About This Pattern
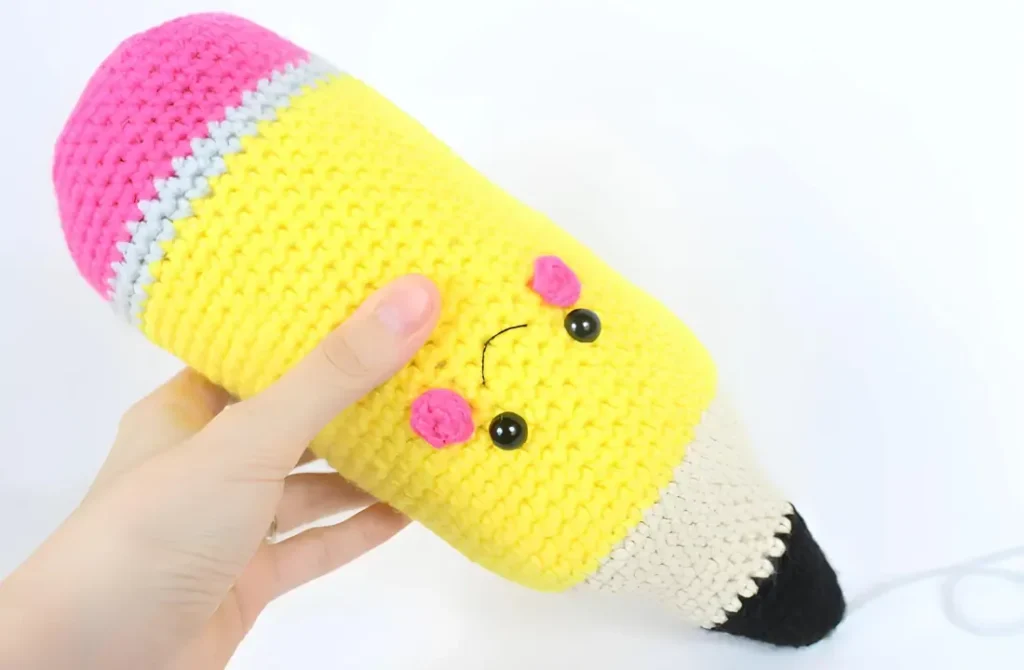
This pencil works up in one piece, tip to eraser. I like that it has no seams to sew later. It moves through black, then cream, then yellow, grey, and pink. Each color marks a part of the shape. It fits into a quiet evening, maybe two. You need a steady hand for the increases near the start, and some stuffing as you go.
In the basket
Additional Information
Pencil
Abbreviations
- st
- stitch
- sc
- single crochet
- inc
- increase
Amigurumi pencil crochet pattern with black tip
Pencil
In Black
- Round 16 Sc in Magic Ring (6)
- Round 2*Inc, Sc in the next 2 st* all around (8)
- Round 3*Inc, Sc 3* all around (10)
- Round 4*Inc, Sc 4* all around (12)
- Round 5*Inc, Sc 5* all around (14)
- Round 6*Inc, Sc 6* all around (16)
- Round 7*Inc, Sc 7* all around (18)
- Round 8*Inc, Sc 8* all around (20)
- Round 9Sc in the next 10 st, Inc in the next st, Sc in the next 9 st (21)
- Rounds 10–11Change to Cream. *Sc* all around (21)
- Round 12*Inc, Sc 6* all around (24)
- Rounds 13–14*Sc* all around (24)
- Round 15*Inc, Sc 3* all around (30)
- Round 16*Sc* all around (30)
- Round 17*Inc, Sc 4* all around (36)
- Round 18*Sc* all around (36)
- Round 19*Inc, Sc 5* all around (42)
- Rounds 20–27Change to yellow. *Sc* all around (42)
In the next round we will add eye stitch markers to mark where to place the eyes.
- Round 28Sc in the next 18. Sc in the next st and add a different colored st marker to the Sc just made. This marks where to place the eye later. Sc in the next 4 st. Sc in the next st and add a different colored St marker to the Sc made. Sc in the next 18 st (42)
Round 28 Will Look Like This Ready to Learn More? Open the next page for Further Guidance!
Pages:
Stitches Used
Supplies: • Yarn 4/Medium Weight Yarn in… Black, Cream, Yellow, Grey, and Pink • 4mm Crochet Hook •8mm safety eyes •Tapestry needle
•Scissors •Stuffing •Black Embroidery Thread
Additional Information
Difficulty: Easy • Size The pencil is about 10.5″ long. This may vary if you’re using a different hook and yarn size.
• Getting started
This pattern is to make a cute pencil! The pencil is all one piece, and we start by making it at the black tip. We work all the way down to the pink eraser. This pencil is all made in one continuous piece.
Before the first stitch
- Check you have all five colors on hand before starting.
- Read through round one and round two first.
- Have your stuffing nearby from round four onward.
Minutes per piece
- Black tip and early shaping about 30 minutes, because the increases need care
- Remaining 19 rounds and finishing about 4 hours, because color changes slow the pace
Other yarns that work
- Acrylic, worsted weight Keeps the size close to 10.5 inches, with a firmer stitch.
- Cotton blend, worsted weight Gives a smoother surface, but needs a touch more stuffing for the same shape.
Where it ends up
- A desk companion for a study corner, paired with a small notebook.
- A soft toy for a child's shelf, next to other amigurumi animals.
- A gift for a teacher or student, paired with a handwritten card.
Small notes
- Use a 4mm hook to keep stitches tight enough to hold stuffing.
- Place a stitch marker at the start of each round, since this pattern has no clear seam to guide you.
- Add stuffing a little at a time as you go, not all at the end.
Little questions
Can I make the pencil shorter?
Yes, you can stop a few rounds early near the eraser end. Just watch your stitch counts so the shape still narrows properly.
Do I need safety eyes for this pattern?
The materials list calls for 8mm safety eyes, so yes. You could hand-stitch eyes instead, if you prefer no hardware.
Is this a good first amigurumi project?
I'd call it easy, yes. The single continuous piece keeps it simple, with no separate parts to assemble.
Original pattern: https://onrecip.com/pencil-free-crochet-pattern/

About the Author
Tamsin Okoro Who writes the patterns at Yarn Gallery, how a pattern gets from the hook to the page, and what this site will never do.


