About This Pattern
This amigurumi pumpkin pattern turns a handful of chenille yarn into the coziest little autumn softie you'll ever squeeze. With its plump ribbed-looking body, curly green tendrils, and a jaunty stem, it captures that classic pumpkin-patch charm in miniature crochet form. It's an ideal project for anyone who loves seasonal decor, wants a quick handmade gift, or just can't resist a good excuse to work with velvety chenille yarn that feels like a stuffed animal come to life.
You'll be working the pumpkin body and stem in continuous spiral rounds, tracking your place with a stitch marker since there's no joining or turning involved—a technique that keeps the surface smooth and seamless. The leaf, by contrast, is worked flat in turned rows, giving you a nice contrast in skills within one small project. With 22 rounds for the body plus quick stem and leaf pieces, this is a satisfying afternoon-to-weekend make for confident beginners or intermediate crocheters.
The finished pumpkin comes out to about 3.5 inches (9 cm) tall, not counting the stem, making it the perfect palm-sized softie for a windowsill, desk, or harvest-themed garland. Its plush chenille texture gives it an irresistibly soft, huggable feel that's totally different from standard acrylic amigurumi. Stitch on a simple embroidered smile and eyebrows, and you've got a one-of-a-kind fall gift that's ready to charm kids, coworkers, or your own coffee table.
- Start the pumpkin body with a magic ring and work continuous spiral rounds, increasing steadily to build its rounded shape.
- Continue through the body rounds without joining or turning, moving your stitch marker up after every round to stay on track.
- Begin adding fiberfill stuffing gradually as the rounds progress so the pumpkin fills out evenly before it closes up.
- Decrease through the final rounds of the body to close the top, finishing off and weaving in the tail.
- Crochet the stem in green using the same continuous spiral method, keeping it small and slightly tapered.
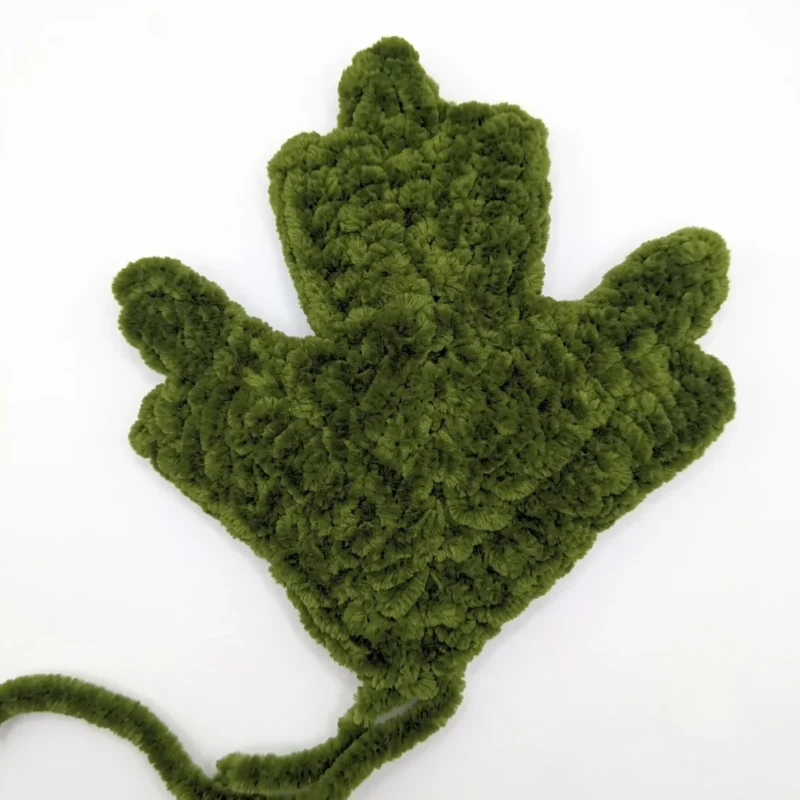
- Work the leaf flat in turned rows rather than in a spiral, giving it a slightly ruffled, natural shape.
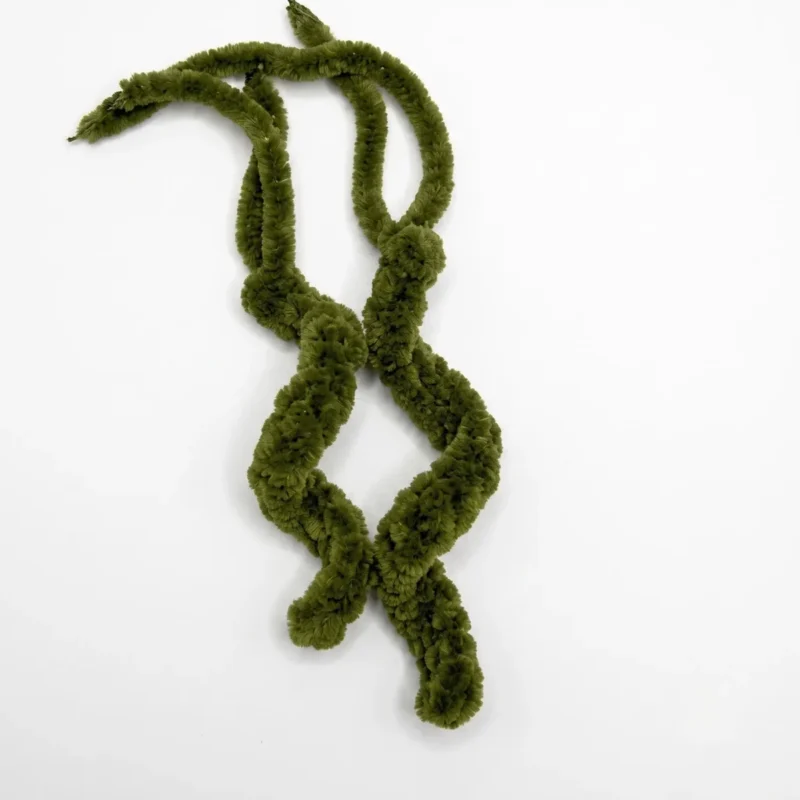
- Make two curly tendrils separately, letting the extra stitches in each foundation chain create their signature curl.
- Assemble everything by sewing the stem, leaf, and tendrils onto the pumpkin body, then embroider the eyebrows and mouth for the finishing touch.
Materials
Yarn
Hook
Safety eyes
Crochet Abbreviations
- BLO
- Back Loop Only
- ch
- Chain
- dec
- Decrease (invisible decrease)
- inc
- Increase (2 sc in same stitch)
- MR
- Magic Ring
- picot
- ch 3, sl st into same stitch as last sc
- Rnd(s)
- Round(s)
- Row(s)
- Row(s)
- sc
- Single Crochet
- sl st
- Slip Stitch
Amigurumi Pumpkin Pattern: Easy Crochet Softie Guide
Pumpkin Body
- Round 16 sc in MR. (7)
Note: work 7 sc into the magic ring for this pattern.
- Round 2inc in each st around. (14)
- Round 3sc, inc repeat around 7 times. (21)
- Round 42 sc, inc repeat around 7 times. (28)
- Round 53 sc, inc repeat around 7 times. (35)
- Round 62 sc, inc, 4 sc, inc repeat 6 times, 2 sc. (42)
- Round 75 sc, inc repeat around 7 times. (49)
- Round 83 sc, inc, 6 sc, inc repeat 6 times, 3 sc. (56)
- Round 97 sc, inc repeat around 7 times. (63)
- Round 104 sc, inc, 8 sc, inc repeat 6 times, 4 sc. (70)
- Round 119 sc, inc repeat around 7 times. (77)
- Round 12-20sc in each st around. (77)Insert safety eyes now, positioned between Rounds 13 and 14, spaced about 7–8 stitches apart.
Note: In Round 16, work every 11th stitch in Back Loop Only (BLO) and place a stitch marker in each of those stitches — at stitches 11, 22, 33, 44, 55, 66, and 77. This keeps your cinching yarn from shifting later.
- Round 219 sc, dec repeat around 7 times. (70)
- Round 224 sc, dec, 8 sc, dec repeat 6 times, 4 sc. (63)
- Round 237 sc, dec repeat around 7 times. (56)Begin stuffing the pumpkin firmly at this point, adding more as you continue decreasing.
- Round 243 sc, dec, 6 sc, dec repeat 6 times, 3 sc. (49)
- Round 255 sc, dec repeat around 7 times. (42)
- Round 262 sc, dec, 4 sc, dec repeat 6 times, 2 sc. (35)
- Round 273 sc, dec repeat around 7 times. (28)
- Round 282 sc, dec repeat around 7 times. (21)
- Round 291 sc, dec repeat around 7 times. (14)
- Round 30dec around 7 times. (7)Leave a long yarn tail for cinching, then cut yarn.
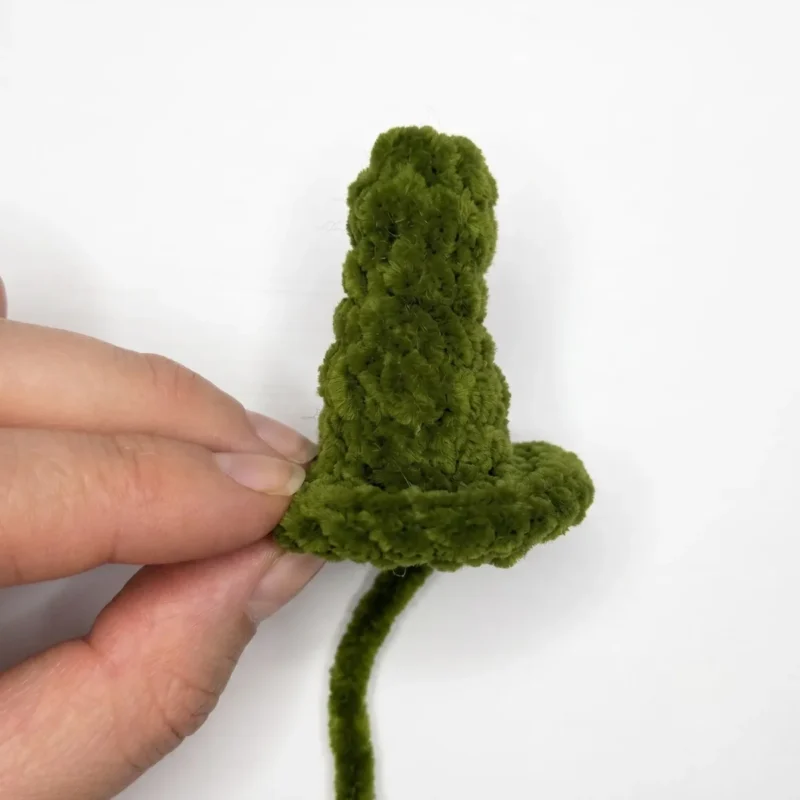
Stem (make 1, green)
- Round 16 sc in MR. (6)
- Round 2-4sc in each st around. (6)
- Round 5sc, inc repeat around 3 times. (9)
- Round 6sc in each st around. (9)
- Round 7sc, inc repeat 4 times, 1 sc. (13)
- Round 8inc, 2 sc, inc repeat 4 times. (18)Sl st to close, cut yarn and weave in end to fasten off.
Leaf (make 1, green)
- Round 1Ch 7, sc in 2nd ch from hook and in each ch across, picot. (6 sc)
- Round 24 sc, ch 1, turn, 5 sc, sc in picot, picot.
- Round 3sc in picot, 4 sc, ch 1, turn, 6 sc, sc in picot, picot.
- Round 4sc in picot, 2 sc, ch 5, sc in 2nd ch from hook and next 6 ch, sc in picot, picot. (8 sc along chain)(8)
- Round 5sc in picot, 2 sc, ch 5, sc in 2nd ch from hook and next 6 ch, sc in picot, picot. (8 sc along chain)(8)
- Round 6sc in picot, 7 sc, ch 1, turn, 9 sc, sc in picot, picot.
- Round 7sc in picot, 7 sc, ch 1, turn, 9 sc, sl st in picot. Cut yarn and fasten off.
Curly Tendrils (make 2, green)
Tendril 1: Ch 15, sl st in 2nd ch from hook and in each ch across. (14 sl sts)
Cut yarn and fasten off.
Tendril 2: Ch 21, sl st in 2nd ch from hook and in each ch across. (20 sl sts)
Cut yarn and fasten off.
More photos
Putting It Together
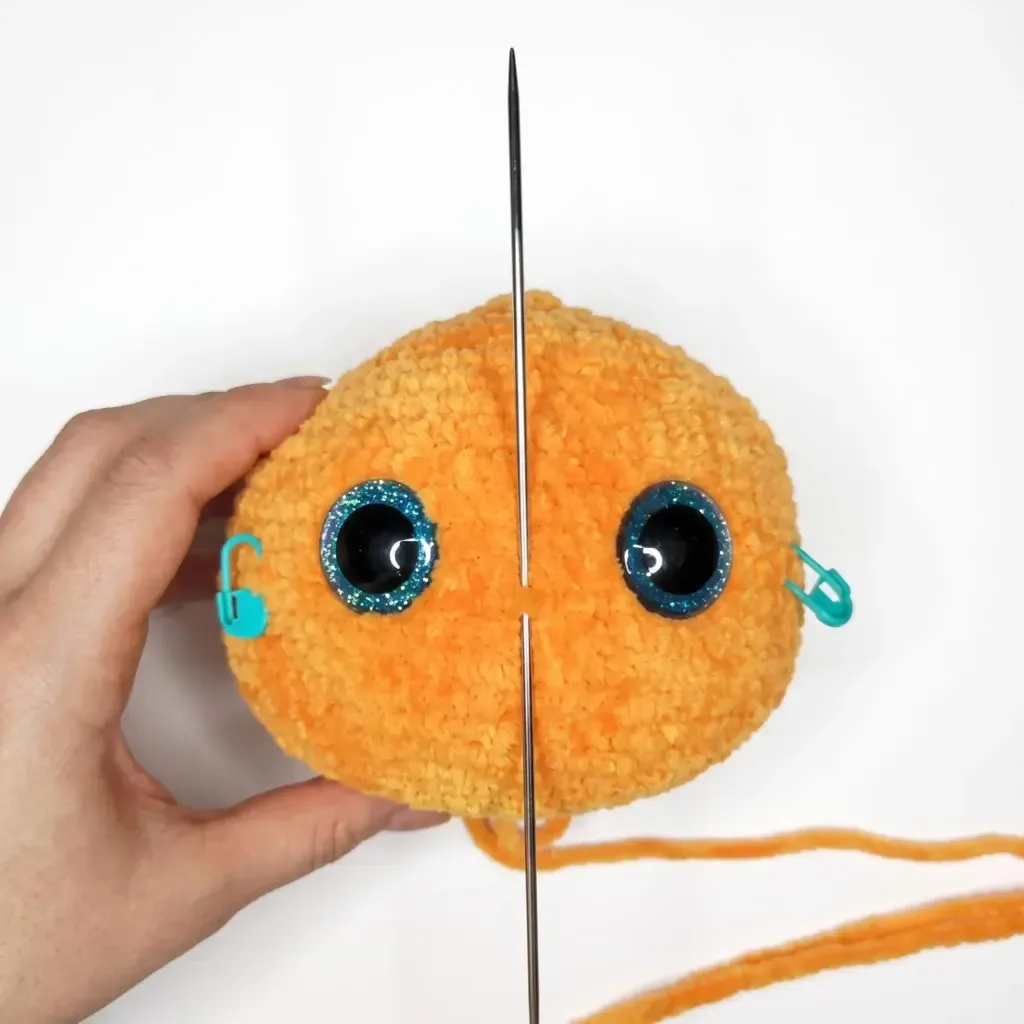
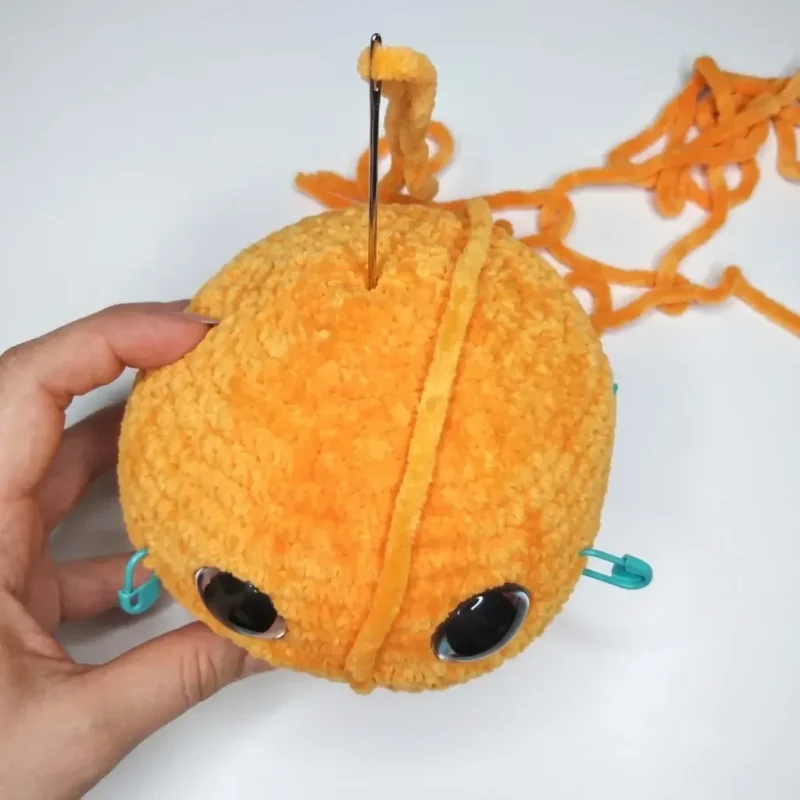
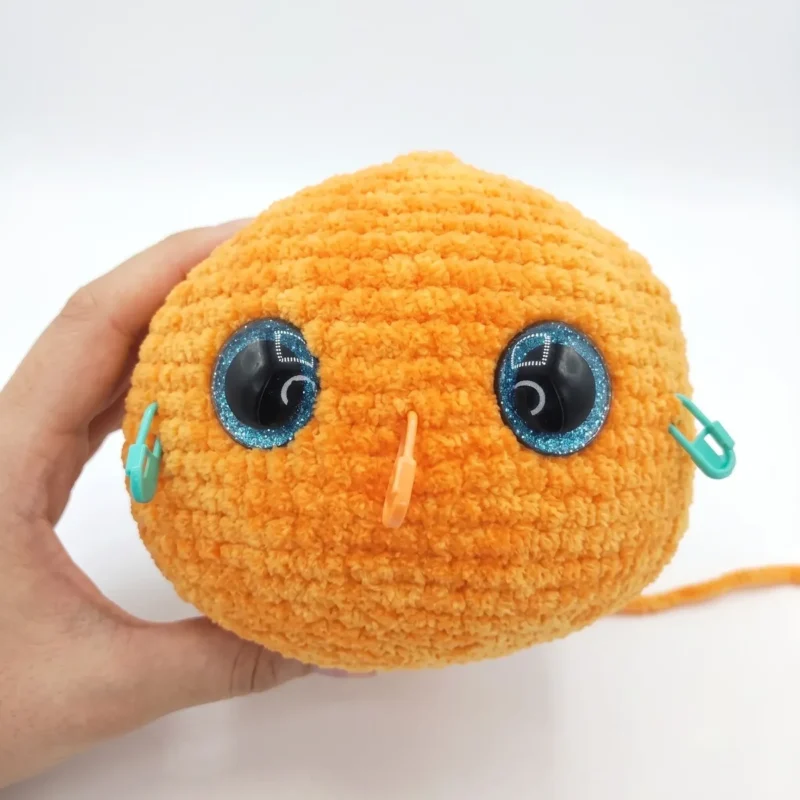
- Step 1 With the long tail left at the end of Round 30, thread your yarn needle and pull tightly through the marked Back Loop Only stitches from Round 16 (stitches 11, 22, 33, 44, 55, 66, and 77). This cinching step draws the body inward, creating the signature pumpkin ridges.
- Step 2 Pull the tail through to secure and knot off, then weave the end into the body.
- Step 3 Position the two curly Tendrils near the center top of the pumpkin, alongside where the Stem will sit, and whipstitch them in place using their yarn tails.
- Step 4 Position the Leaf beside the Stem at the top of the pumpkin and whipstitch it in place, tucking the base of the leaf under the stem for a natural, layered look.
- Step 5 Whipstitch the Stem securely to the top center of the pumpkin, covering the cinched center point.
- Step 6 Using black embroidery thread, stitch the eyebrows and mouth details onto the pumpkin’s face beneath the safety eyes.
- Step 7 Weave in all remaining yarn ends throughout the piece.
Important Notes
💡 Use a US size E-4 (3.5mm) hook consistently throughout the pumpkin body and stem to keep your stitches tight enough that stuffing won't peek through the chenille fabric.
💡 Place your stitch marker in the very first stitch of round 1 and move it up after every single round—this is essential since the body and stem are worked in a continuous spiral with no joining.
💡 Stuff the pumpkin body firmly but in stages, adding small amounts as you go rather than trying to cram it all in at the final round, which helps maintain that classic plump pumpkin silhouette.
💡 Save your chenille yarn tails from the stem, leaf, and tendrils—you'll need them for sewing these pieces onto the body during assembly, so leaving a long tail (about 8-10 inches) saves you from weaving in extra ends.
💡 When embroidering the eyebrows and mouth with black embroidery thread, sketch the placement first with a fabric pen or scrap yarn pinned in place, since chenille doesn't allow for easy unpicking of embroidery.
💡 Block or steam the leaf gently after finishing if it curls more than you'd like from the turned rows—a light press with a warm iron on a low setting (chenille-safe) will help it lie flatter for assembly.
💡 This pattern is written in US crochet terminology.
💡 Gauge is not critical for this project, but working with the specified yarn and hook produces a finished pumpkin approximately 3.5 inches (9 cm) tall (excluding the stem) and 5 inches (13 cm) in diameter.
💡 When working your decreases in Rounds 21 through 30, use an invisible decrease technique rather than a standard one—it keeps the surface smooth and prevents small gaps from appearing as the piece narrows toward the base.
💡 Getting the cinching step right is what makes this pumpkin look truly authentic—pull the tail through each marked Back Loop Only stitch evenly, checking as you go that the tension is consistent all the way around, since an uneven pull will make some ridges deeper than others.
💡 When attaching the tendrils and leaf, arrange them loosely before sewing so you can adjust the angles until they look balanced and natural rather than symmetrical—a little asymmetry actually makes the finished piece feel more charming.
Common Mistakes and Fixes
Losing track of the round in the continuous spiral body
Since the pumpkin body is worked without joining or turning, it's easy to lose your place. Always keep a stitch marker in the first stitch of each round and move it up every time you complete a round—never skip this step, even on 'easy' single crochet rounds.
Stuffing too loosely or too late in the pumpkin body
Chenille yarn hides gaps well, which can trick you into under-stuffing. Add fiberfill gradually as you work the later rounds of the body, using the end of hook to push stuffing into the lower curves before the opening gets too small to reach.
Mixing up flat turned rows on the leaf
The leaf is worked differently from the body and stem—it uses turned rows, not a spiral. Remember to chain and turn at the end of each row on the leaf so it lies flat instead of curling into a tube shape.
Overworking or splitting the chenille yarn plies
Chenille yarn is delicate and can split or fray if you crochet too fast or reuse the same stitch repeatedly while frogging. Work at a slightly slower, gentler pace, and if you need to rip back, unravel just a stitch or two at a time.
Skipping the tendril shaping, leaving
The curly tendrils get their spring from working extra stitches into a small foundation chain, which naturally makes the strip ruffle and curl. If yours come out flat, try using a smaller hook for just the tendrils to intensify the curl.
What Makes It Good
- I adore this pumpkin because chenille yarn does so much of the work for you—those rounds of single crochet just melt together into that classic ribbed pumpkin look without any extra effort. Working the body in a continuous spiral means no visible seams, so your stitch marker becomes your best friend, quietly tracking round after round while the shape blooms in your hands. I love the contrast of techniques packed into one small project: the smooth spiral body and stem versus the structured turned rows of the leaf. And those curly tendrils? Such a fun, fiddly little detail that makes the whole piece feel finished and alive. Embroidering the eyebrows and mouth at the end is my favorite part—two quick stitches and suddenly your pumpkin has personality. It's a project that rewards patience during the increase and decrease rounds but never feels tedious, especially once you see that plump, velvety shape take form. This is the kind of pattern I keep coming back to every September, tweaking the colors and making a whole little patch for my mantel.
Frequently Asked Questions
Why does Round 16 require working stitches in the back loop only?
Round 16 marks specific stitches in Back Loop Only so you can later pull a cinching thread through them evenly. This technique creates the pumpkin's signature ridged, segmented shape. Skipping this step or marking the wrong stitches will make the final cinching look uneven.
When should I insert the safety eyes?
Insert the safety eyes between Rounds 13 and 14 of the pumpkin body, spacing them about 7 to 8 stitches apart. Leave a gap between the eyes clear, since the cinching line will run through that space later. Placing the eyes at this stage makes it much easier to secure the backs before the piece is stuffed.
Original pattern: https://amigurumicorner.com/amigurumi-pumpkin-pattern/

About the Author
Tamsin Okoro Who writes the patterns at Yarn Gallery, how a pattern gets from the hook to the page, and what this site will never do.


