About This Pattern
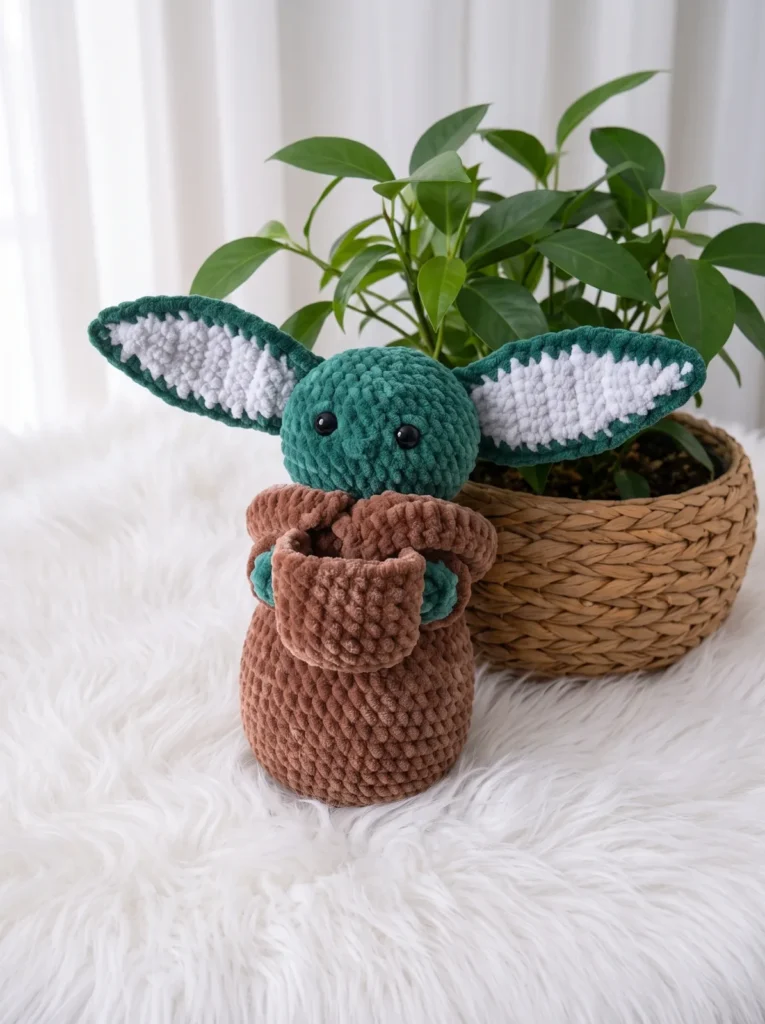
This Baby Yoda amigurumi turns fuzzy bulky yarn into the softest little green friend you've ever seen, complete with oversized ears, a cozy robe-like body, and tiny arms cradling his own little cup. It's the kind of project that makes strangers stop and smile the moment it's finished, and it's perfect for fans of the galaxy far, far away who also happen to love a good hook and skein. Whether you're crocheting for a nursery shelf or a gift for the ultimate fan, this pattern delivers charm in every stitch.
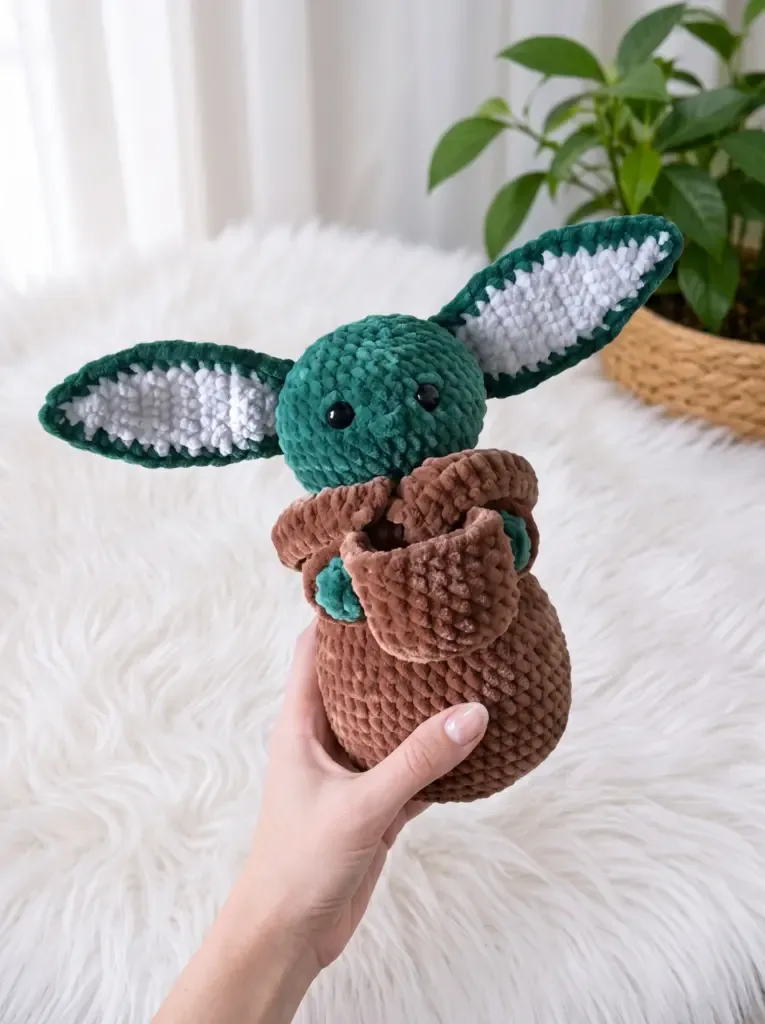
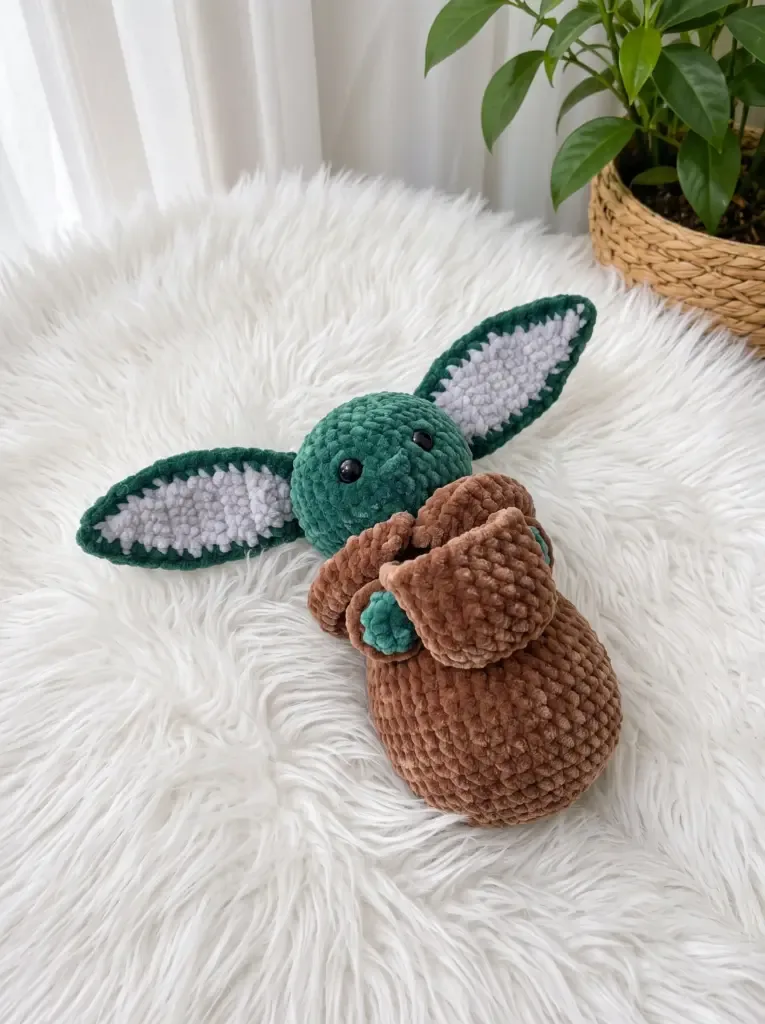
The finished amigurumi is a plush, sittable little figure with a soft fuzzy texture from the eyelash yarn body and head, contrasted by smoother details like the brown yarn-thread arm joins and embroidered eyelids. He's substantial enough to feel like a real keepsake, not a quick toy, with floppy arms that hang naturally and a cup nestled sweetly in one hand. This one makes an unforgettable gift — for a baby shower, a birthday, or just because someone in your life needs a tiny green companion on their desk.
- Crochet the body in a continuous spiral, using a stitch marker to keep every round tracked accurately.
- Work the head separately in its own spiral rounds, then set both pieces aside for stuffing later.
- Stitch the collar flat in double crochet rows, remembering the turning chain counts as your first stitch.
- Make two ears in flat rows, joining green and beige sections before shaping them into their curve.
- Stuff the body and head firmly, keeping tension tight so no fiberfill peeks through the fuzzy fabric.
- Whipstitch the finished ears onto the head with tips pointing up and bases level with the eyes.
- Embroider curved eyelid lines and a small V-shaped nose using brown yarn and a yarn needle.
- Join the arms to the body with a smooth yarn thread, then tuck the cup into one hand.
Materials
Yarn
Hook
Safety eyes
Stuffing
Stitch markers
Crochet Abbreviations
- BLO
- Back Loop Only
- ch
- Chain
- dc
- Double Crochet
- dec
- Invisible Decrease (insert hook through front loops of next 2 sts, yo, pull up a loop, yo, pull through all 3 loops)
- FLO
- Front Loop Only
- inc
- Increase (2 sc in same stitch)
- MR
- Magic Ring
- sc
- Single Crochet
- sl st
- Slip Stitch
Baby Yoda Amigurumi – Free Crochet Pattern
Body
Work in brown yarn throughout.
- Round 18 sc in MR. (8)
- Round 2inc in each st around. (16)
- Round 3sc, inc repeat 8 times around. (24)
- Round 42 sc, inc repeat 8 times around. (32)
- Round 53 sc, inc repeat 8 times around. (40)
- Round 64 sc, inc repeat 8 times around. (48)
- Round 7sc in BLO in each st around. (48) This creates the folded ridge at the base of the body.
- Round 8-17sc in each st around. (48) — 10 rounds
- Round 186 sc, dec repeat 6 times around. (42)
- Round 19-20sc in each st around. (42) — 2 rounds
- Round 215 sc, dec repeat 6 times around. (36)
- Round 22sc in each st around. (36)
- Round 234 sc, dec repeat 6 times around. (30)
- Round 24sc in each st around. (30)
- Round 253 sc, dec repeat 6 times around. (24)
- Round 26sc in each st around. (24)Stuff the body firmly now. Do not cut the yarn — continue directly to the Collar.
Arms (make 2)
Begin with green yarn.
- Round 14 sc in MR. (4)
- Round 2inc in each st around. (8)
- Round 3sc in each st around. (8) At the end of this round, switch to brown yarn: draw the green yarn onto the hook and pull the brown yarn through the loops to complete the color change. The green yarn is carried and the brown yarn is now the working yarn.
- Round 4-13sc in each st around. (8) — 10 rounds, in brown
- Round 14dec 4 times around. (4)Cut yarn, pull tail through remaining 4 stitches to close. Weave in ends. The arms are attached to the body using a yarn-thread join (see Assembly).
Ears (make 2)
Each ear is made from two matching pieces — one in beige and one in green — worked flat, then joined together. Make one beige piece and one green piece per ear.
Foundation chain for each piece: ch 6.
- Round 1Foundation chain of 6 ch.
- Round 2sc in 2nd ch from hook and across. (5 sc) — ch 1, turn.
- Round 3sc in each st across. (5) — ch 1, turn.
- Round 4inc, 3 sc, inc. (7) — ch 1, turn.
- Round 5-10sc in each st across. (7) — 6 rows — ch 1, turn after each row.
- Round 11dec, 3 sc, dec. (5) — ch 1, turn.
- Round 12sc in each st across. (5) — ch 1, turn.
- Round 13dec, sc, dec. (3) — ch 1, turn.
- Round 14dec, sc. (2) — ch 1, turn.
- Round 15dec. (1)For the beige piece: cut yarn and weave in ends. For the green piece: do not cut yarn. Hold the green piece and beige piece together with wrong sides facing, and join them by crocheting sc around all edges. This neatly finishes and joins both layers at once.
Cup
Work in brown yarn.
- Round 18 sc in MR. (8) As you work Round 2, crochet over the starting yarn tail to hide it as you go.
- Round 2inc in each st around. (16)
- Round 3sc, inc repeat 8 times around. (24)
- Round 4sc in BLO in each st around. (24) This creates the sharp bottom edge of the cup.
- Round 5-9sc in each st around. (24) — 5 rounds Do not stuff the cup. After Round 9: sl st to join. Work a chain of 10 ch and attach it to the bottom of the cup to form the handle — skip 8 stitches along the top edge, then work another chain of 10 ch and attach it to the bottom of the cup again.
Collar
The collar is worked in flat rows using double crochet. Round 27 is worked into the front loops only of Round 26. A turning chain of 3 ch counts as 1 dc throughout.
- Round 27(FLO): dc, inc repeat 12 times around. (36) — This is worked as a joined round into the front loops only. After completing, ch 3 and turn.
- Round 282 dc, inc repeat 12 times. (48) — Ch 3, turn.
- Round 29dc in each st across. (48) — Ch 1. Cut yarn and weave in ends.
Head
Return to Round 26 of the body. Join green yarn and work in BLO.
- Round 27(BLO): sc in each st around. (24) Work into the back loops left unworked from Round 26.
- Round 283 sc, inc repeat 6 times around. (30)
- Round 294 sc, inc repeat 6 times around. (36)
- Round 305 sc, inc repeat 6 times around. (42)
- Round 31-35sc in each st around. (42) — 5 rounds Insert 12–14 mm safety eyes between Rounds 33 and 34, with 6 stitches between them.
- Round 365 sc, dec repeat 6 times around. (36) Begin stuffing the head firmly.
- Round 374 sc, dec repeat 6 times around. (30)
- Round 383 sc, dec repeat 6 times around. (24)
- Round 392 sc, dec repeat 6 times around. (18)
- Round 40sc, dec repeat 6 times around. (12)
- Round 41dec 6 times around. (6)Cut yarn, leaving a tail. Pull the tail through the remaining 6 stitches to close the opening. Weave in the end.
Assembly
Attach the ears Sew each finished ear (the joined green-and-beige piece) to the sides of the head. Position them so the pointed tip faces upward and the wider base sits level with the safety eyes. Use the yarn tail from the green layer and a yarn needle to whipstitch the ear firmly in place, stitching through both the ear base and the head stitches. Weave in the end on the inside.
Embroider the eyelids and nose Using a length of brown yarn threaded onto a yarn needle, embroider simple curved lines above each safety eye to suggest eyelids. For the nose, make 2–3 small straight stitches in a subtle V-shape centered between the eyes and slightly below them.
Attach the arms using a yarn-thread join Thread a length of smooth worsted-weight brown yarn (such as YarnArt Jeans) onto a yarn needle. Pass the needle through the body at the shoulder position on one side, then through the top of one arm, back through the body, through the second arm on the opposite side, and back through again. Pull gently to bring both arms close to the body, then tie off securely inside. This gives the arms a natural, slightly floppy hang.
Attach the cup Sew the cup into one of Baby Yoda's hands, stitching through the hand and the side of the cup so it sits as if being cradled. Weave in all remaining ends.
More photos
Important Notes
💡 This pattern is written in US crochet terminology.
💡 Use a US K-10½ / 6.5mm hook as a starting point with Himalaya Dolphin Baby, but always swatch since fuzzy yarns can vary in loft between skeins.
💡 Keep a stitch marker on hand at all times for the spiral rounds in the body and head — losing your place is the single most common holdup with amigurumi.
💡 Stuff firmly but evenly, adding small amounts of polyfill as you close each section rather than cramming it all in at the end, so the shape stays smooth and round.
💡 When working the collar's flat double crochet rows, count your stitches at the end of every row to make sure the ch-3 turning chain hasn't thrown off your total.
💡 Save a long tail on the green layer of each ear specifically for whipstitching them to the head — this avoids extra weaving in and keeps the join extra secure.
💡 Thread the smooth worsted-weight brown yarn (like YarnArt Jeans) generously when doing the arm join, since you'll pass it through the body and both arms multiple times before tying off.
💡 Work the BLO rounds carefully — Round 7 of the body and Round 27 of the head are both worked in back loops only, and they serve structural purposes (the body ridge and the head-to-body join). Use a stitch marker to confirm you're picking up only the back loop before each stitch.
💡 Insert safety eyes before it's too late — the window for placing them is between Rounds 33 and 34 of the head. Once you've decreased past Round 36, the opening becomes too small to work.
Common Mistakes and Fixes
Losing track of the round in
Place a stitch marker in the first stitch of every round and move it up as you go — without a visible seam to guide you, this is the only way to keep your stitch count accurate.
Forgetting the turning chain counts
Remember the ch-3 turning chain stands in for your first dc — skip the first stitch at the base of the chain and work your next dc into the second stitch to avoid gaining or losing stitches.
Using loose tension with the fuzzy
Crochet noticeably tighter than you would with smooth yarn, and check your work against the light periodically to spot any gaps before you stuff the piece.
Attaching the ears without matching
Pin both ears in place first with the pointed tip facing upward and the wider base level with the safety eyes before whipstitching, checking symmetry from the front.
Skipping the yarn-thread join technique
Use the smooth worsted-weight brown yarn to thread through the body and both arms as directed — this is what gives the arms their signature natural, floppy hang instead of a stiff, fixed position.
Placing the embroidered eyelids
Insert the safety eyes and let them set before embroidering, then work the curved eyelid lines just above each eye and the small V-shaped nose centered and slightly below, so the face stays proportional.
What Makes It Good
- This pattern is endlessly customizable once you've got the basic body and head down. For a colorway twist, try a soft sage green with cream instead of beige for a more pastel, muted look, or go bold with a saturated forest green and warm tan combo for higher contrast. Swap Himalaya Dolphin Baby for another bulky eyelash yarn like Fur or Fuzzy Tales if you want a different fiber feel — just keep your hook sized to match gauge so the body and head rounds hold their shape. For a mini version, work with a lighter worsted-weight yarn and a smaller hook (try a 4.5mm), which will naturally shrink the finished size since the same stitch counts create tighter, smaller rounds. If you want him larger and extra squishy, go up to a super bulky yarn with a 7.5-8mm hook for a jumbo desk buddy. Seasonal fans can have fun with accessories: swap the cup for a tiny mug shape using the same 5-round pattern, or omit it altogether and add a small blanket bundle in his arms instead. You could also experiment with the ears — try working them in a single solid color instead of the green-and-beige join for a different creature altogether, or elongate them a few extra rounds for a more dramatic silhouette. Advanced stitchers might enjoy adding a small robe collar in a contrasting brown to mimic a cloak, using the same flat double crochet technique already established for the collar. However you customize it, the core techniques — spiral rounds, flat-row shaping, and the yarn-thread arm join — stay exactly the same, so feel free to play.
- I adore how this pattern uses fuzzy Himalaya Dolphin Baby yarn to give Baby Yoda that soft, almost-fur texture right out of the skein — no extra brushing required! Working the body and head in a continuous spiral keeps things meditative, while the flat-row collar and ears give you a satisfying change of pace and texture. My favorite part is the yarn-thread join for the arms; pulling that brown worsted-weight thread through the shoulders and watching the arms settle into a natural, floppy hang feels like real magic. Embroidering the curved eyelids and tiny V-shaped nose is where his personality truly comes alive — a few careful stitches and suddenly he's staring back at you with all that recognizable charm. And don't skip the cup! Sewing it into his hand so he looks like he's cradling it is such a small detail, but it's the one that makes everyone gasp when they see the finished piece. This project rewards patience with a genuinely huggable, gift-worthy result.
Frequently Asked Questions
Can I use a different yarn instead of Himalaya Dolphin Baby?
Yes, any bulky-weight eyelash or fuzzy yarn will work well for the body, head, and ears. Just be sure to size your hook to match the new yarn's gauge, and consider swatching first since fuzzy yarns vary in thickness.
Why does the pattern use a separate smooth yarn for the arms?
The smooth worsted-weight brown yarn creates a cleaner, stronger yarn-thread join that lets the arms hang naturally and floppy rather than sitting stiff. Fuzzy yarn alone wouldn't give the same clean pull-through and secure knot.
How do I keep my rounds from getting confusing in the spiral sections?
Place a stitch marker at the start of your first stitch each round and move it every time you complete a round. This is essential since the body and head are worked without joining slip stitches.
What's the easiest way to get the eyelids and nose looking right?
Insert your safety eyes first and let the head settle before embroidering, then use brown yarn to stitch simple curved lines just above each eye. For the nose, keep your V-shape small — just 2-3 straight stitches centered and slightly below the eyes.
Can I skip the cup accessory if I want a simpler finish?
Absolutely — the cup is a fun added detail but not essential to the overall figure. You can leave both hands empty, or substitute a small object of your own design using a similar small round shape.
Original pattern: https://amistitch.com/baby-yoda-amigurumi-free-crochet-pattern/

About the Author
Tamsin Okoro Who writes the patterns at Yarn Gallery, how a pattern gets from the hook to the page, and what this site will never do.


