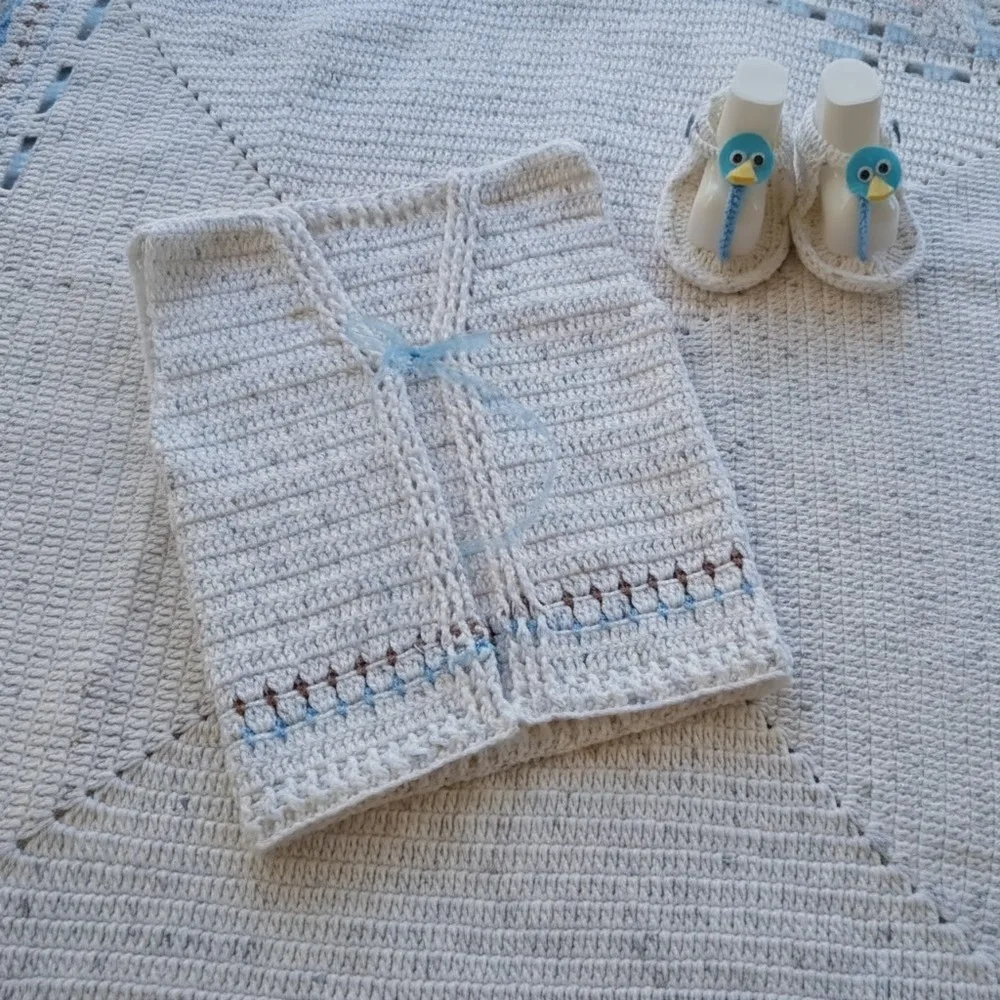
About This Pattern
This ribbed crochet vest is the kind of pattern you'll reach for again and again — a simple, flattering layer that works for babies, kids, and adults alike. Built from a foundation chain sized to fit the wearer's chest, it features a stretchy ribbed hem, a clean stockinette-style body, and tidy shoulder seams. It's especially perfect for crocheters who want a quick, useful project that doesn't require fitted shaping or complicated construction, and it's an ideal way to use up leftover skeins.
The techniques here are wonderfully approachable: a foundation slip stitch row to create the ribbed texture, straightforward single or double crochet rounds for the body, and a simple armhole and front/back separation worked into three panels — Left Front, Right Front, and Back. Shoulder seams are joined at the end, and a quick decoration round finishes the edges. Most crocheters, even those newer to garment-style projects, can complete this vest in a single weekend afternoon or two shorter sessions.
The finished vest has a soft, structured drape thanks to the ribbed hem, with a neutral or striped body that looks polished without fuss. Sized here for a 12-month-old (27 cm body width), it scales easily to any age using a simple chest-based foundation chain. Made in soft DK-weight cotton, it's breathable, huggable, and makes an especially sweet handmade gift for a baby shower, birthday, or just-because surprise.
- Measure the wearer's chest and chain a foundation length that covers the front and back width combined.
- Work the Foundation Row as a slip stitch row to build the stretchy ribbed hem texture.
- Continue the Lower Ribbing for its full two rounds before moving into the main body.
- Work the Body in simple rounds until it reaches the depth needed before the armholes.
- Separate the work into Left Front, Right Front, and Back panels at the armhole point.
- Shape each panel individually, keeping stitch and row counts matching between the two fronts.
- Join the Left Front and Right Front to the Back Panel at the Shoulder Seams.
- Finish with the Decoration round and weave in all ends for a clean, wearable result.
Materials
Yarn
Hook
Notions
Crochet Abbreviations
- ch
- chain
- sc
- single crochet
- dc
- double crochet
- sl st
- slip stitch
- st(s)
- stitch(es)
- fpdc
- front post double crochet
- bpdc
- back post double crochet
Best Free Crochet Vest Pattern for Everyday Wear
2. Lower Ribbing (Hem)
- Round 1Ch 3 (counts as dc), [Alternate fpdc in next st, bpdc in next st] across for a ribbed look. (First row after slip stitch may be regular dc if working into slip stitches is difficult.)
- Round 2Ch 3, continue fpdc in fpdc, bpdc in bpdc across. For babies/children, 2 rows of ribbing is sufficient; adults may prefer 4–5 rows .Turn at end of each row.
3. Body
- Round 3(and subsequent even rows): Ch 3, continue ribbing for first 5 sts ( fpdc, bpdc ), then dc in each st across to final 5 sts, finish with ribbing ( fpdc, bpdc ).Continue as above for each row, maintaining 5-stitch ribbing at each end and plain dc in the center.(Optional) For color striping, change yarns at side of work as desired, securing new yarn and working over tails.
Maintain the rib at the sides throughout the body.
1. Measuring & Foundation Chain
For a 12-month size , measure and mark a chain that equals 53 cm (approx. 21 in) or as needed for recipient.
For sample gauge, ch 110 = 53 cm (adjust number of chains if your gauge differs).
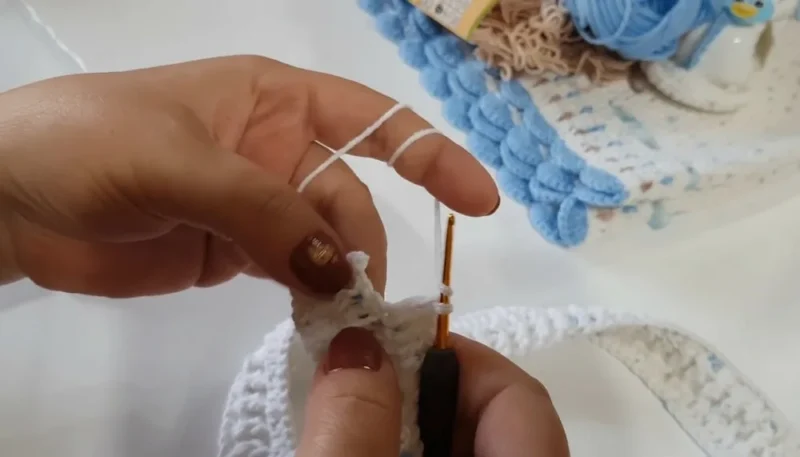
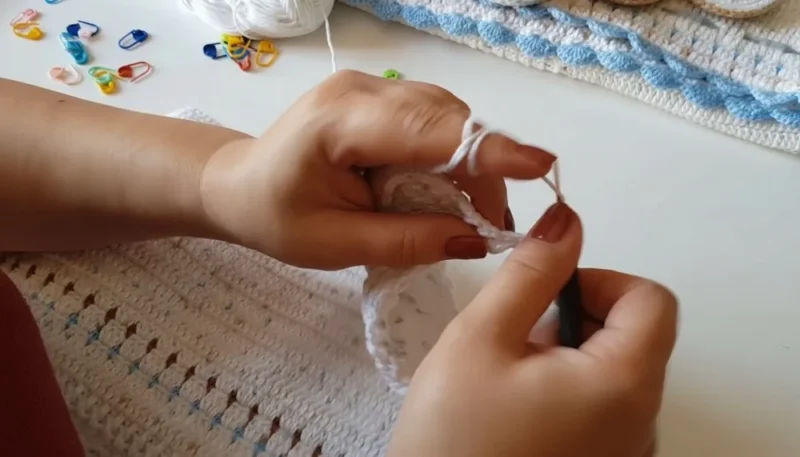
Foundation Row (Slip Stitch Row)
Ch 110. (Or size for your desired age; see notes above.)
4. Armhole & Front/Back Separation
When body reaches underarm length, lay flat and divide as follows for 110 sts: Front Panels: 27 sts each (including 5 rib sts); mark both panels with markers.
Back Panel: 56 sts.
Note: The two front panels + back = total foundation width.
Left Front Panel
Attach yarn (if needed) at armhole edge.
Ch 3, continue across 27 sts, maintaining ribbing for 5 edge sts.
At neck edge , decrease 1 st every row for shaping as follows: Work until 2 sts from neck edge remain, dc2tog over last 2 sts.
Turn, ch 3, work back.
Continue decreases every row at neck edge until only 13 sts remain (5 rib + 8 body sts).
Work even until armhole edge equals back height, then fasten off.
Right Front Panel
As for left, mirroring decreases.
Always keep 5 sts in rib at side; all other decreases at neck edge.
Back Panel
Rejoin yarn at armhole.
Work across 56 sts , straight, no decreases.
When equal in height to front panels’ shoulder seams, work final row with 5 rib sts at each end, and dc in center sts.
Fasten off.
5. Shoulder Seams
Join Shoulders: With WS together or by sewing/crocheting across the shoulder stitches (13 sts on each front, to 13 sts on each side of back).
For a neat finish, join with sl st or whip stitch through outer loops only.
7. Decoration
Sew or glue on felt shapes, buttons, or appliques as desired.
Coordinate with matching flip-flop booties or hat for a set.
More photos
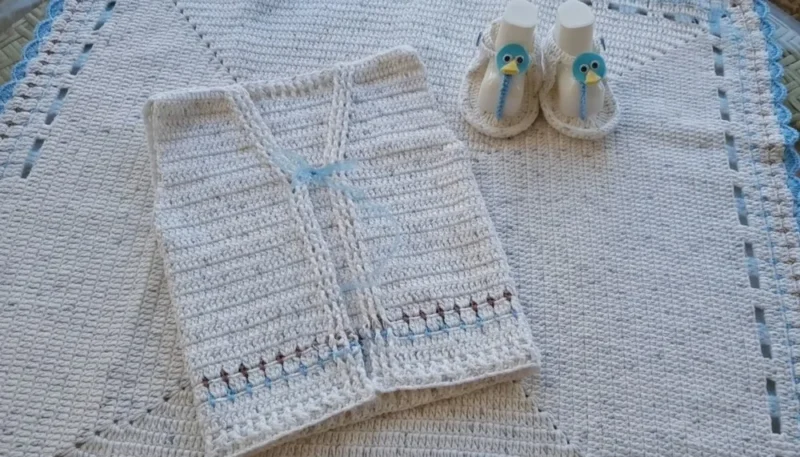
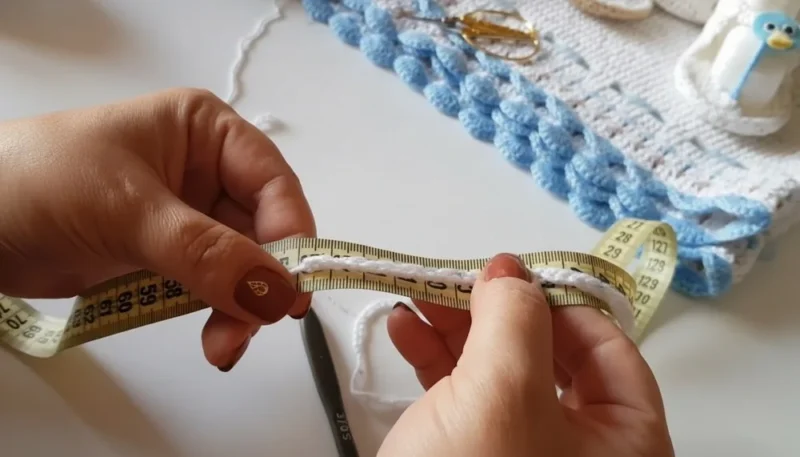
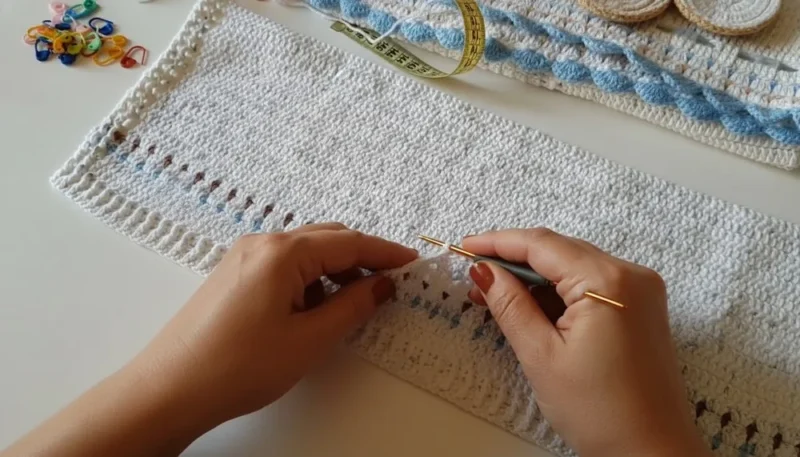
Putting It Together
- Step 1 Armholes: (Optional) Work 1 row of sc or slip stitch around each armhole for a neat edge.
- Step 2 Neckline: (Optional) Work 1 row of sc or slip stitch around neck.
- Step 3 Ties (Optional): Weave ribbon/cord through holes at front to close, or leave open.
- Step 4 Weave in ends.
- Step 5 Save
Important Notes
💡 Use a US G/6 (4mm) hook as your starting point, but always swatch first — hook size should be adjusted to get the correct width for your specific age/size chart.
💡 When working the Foundation Row for ribbing, consistency matters more than speed — keep your tension even so the hem stretches evenly around the body.
💡 Place stitch markers at each panel division point (Left Front, Right Front, Back) before separating for armholes, so you don't lose track mid-round.
💡 If stash-busting with multiple leftover yarns, do a quick gauge and weight check so all your colors are the same DK/light worsted weight for even fabric.
💡 Weave in color-change ends securely along the wrong side seams, especially near the armhole and shoulder areas, since these spots get the most stretch and wear.
💡 Block your finished panels lightly before sewing the shoulder seams — this evens out stitch definition and makes seaming the Left Front, Right Front, and Back much easier.
Common Mistakes and Fixes
Making the foundation chain too short or too long for the intended chest size.
Always measure the recipient's chest (or check a size chart) before chaining, and remember the chain needs to cover front + back width combined, not just half.
Skipping or rushing the Foundation Row (slip stitch row) that creates the ribbing.
Work this row carefully through the correct loop only (usually the back loop) — this is what creates the stretchy ribbed texture, and skipping it results in a flat, unribbed hem.
Losing track of where the armhole and front/back separation begins.
Place a stitch marker at the exact stitch where the Body round ends and the separation begins, so your Left Front, Right Front, and Back panels line up evenly on both sides.
Working the Left Front and Right Front panels to different stitch or row counts.
Count your rows on both front panels as you go, or use a removable marker every few rows, so both fronts match in height before you reach the shoulder seams.
Joining shoulder seams unevenly, causing the neckline to twist or dip.
Lay both panels flat and pin the shoulder edges together before sewing or slip-stitching, matching stitch-for-stitch so the seam sits straight across the top.
Carrying color changes sloppily when stripe is used for stash-busting.
Always change colors on the last yarn-over of the final stitch in the old color, and weave in ends as you go rather than saving them all for the end — this keeps the ribbing and body edges tidy.
What Makes It Good
- This vest is a stash-buster's dream, so have fun with color. Try a neutral oatmeal or cream base (like 24/7 Cotton or Paintbox Cotton DK) with two or three thin stripes in a contrasting color worked into the body rounds — think sage green and mustard for an autumn look, or navy and white for a nautical vibe. For a rainbow stash-buster version, change colors every round for the whole body and let the ribbed hem stay solid for contrast. Sizing up is simple: just lengthen the foundation chain to match a larger chest measurement, and add extra body rounds before starting the armhole separation to lengthen the torso — always check your chest and length numbers against a size chart or the wearer's own measurements. For a lighter, more breathable version (great for warmer climates), size up your hook slightly or swap to a lighter DK cotton blend; for a heavier, snugglier vest, drop to a worsted or aran weight and adjust your hook down for gauge. Want a closure instead of a pullover style? Work simple button loops along one front edge during the decoration round, then sew on flat buttons to match your yarn or add a pop of contrast. For a special-occasion twist, add a scalloped or picot edge in the decoration step instead of a plain finish, or weave a thin ribbon through the ribbing for a delicate detail. This pattern is endlessly adaptable — once you've made it once, you'll find yourself designing your own color-blocked, striped, or trimmed versions every time.
- I adore this vest because it proves that 'simple' doesn't mean boring. The ribbed hem — worked in that satisfying slip-stitch foundation row — gives you a real knit-like stretch and a professional finish that makes people ask, 'wait, you crocheted that?' From there, the body works up fast in easy rounds, and splitting into Left Front, Right Front, and Back panels for the armholes feels like a genuine 'aha' moment even for newer crocheters. I love using stitch markers to keep my panel separations crisp and my armhole depths matching on both sides. And because it's designed with leftover yarn in mind, every stripe combo becomes a little happy accident — no two vests ever look quite the same. Joining the shoulder seams at the end always feels like the moment the project 'clicks' into an actual wearable garment. It's quick enough to finish before you lose steam, but textured and detailed enough to feel special. Honestly, this is the pattern I hand to friends who say they've never made clothing before — it builds real confidence fast.
Frequently Asked Questions
What size does this pattern make, and can I resize it?
As written, this pattern fits a 12-month-old with a 27 cm body width, but it's very adaptable. Simply measure the wearer's chest circumference and adjust your foundation chain length (front + back width) to fit any size from baby to adult.
What yarn weight and hook size do I need?
The sample uses a soft DK or light worsted weight cotton (100g = 260m) with a US G/6 (4mm) hook. You can size the hook up or down slightly depending on your yarn and the width needed for your size chart.
Can I use leftover or scrap yarn for this vest?
Absolutely — this pattern is designed with stash-busting in mind. Just make sure your leftover yarns are a similar DK/worsted weight so your stripes and panels have consistent fabric density.
How does the ribbed hem stay stretchy without knitting?
The ribbing is created with a Foundation Row worked as a slip stitch row, typically through the back loop only, which mimics the stretch of knit ribbing. It's a simple technique but makes a big visual and functional difference at the hem.
Can I add a buttoned closure instead of a pullover style?
Yes, the pattern notes suggest adding simple button loops during the decoration step if you prefer a buttoned front instead of a closed pullover vest. Just space your loops evenly along one front edge and sew matching buttons on the opposite side.
Original pattern: https://redagapeblog.com/best-free-crochet-vest-pattern/

About the Author
Tamsin Okoro Who writes the patterns at Yarn Gallery, how a pattern gets from the hook to the page, and what this site will never do.


