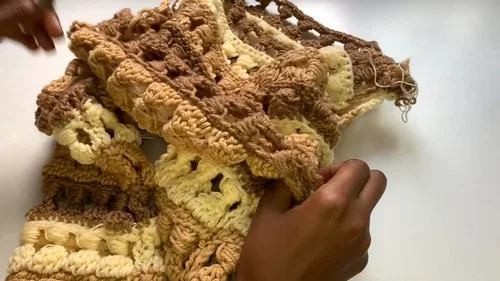
About This Pattern
A cold shoulder top with bead stitch stripes. One hook, two panels, two sleeves. About 10-16 hours depending on size and pace.
In the basket
Abbreviations
- puff
- puff stitch
Colorblock bead stitch cold shoulder top pattern
Front and Back Panels
Make 2Each panel measures approximately 14 inches wide by 14 inches long.
To size for your body, measure from your left shoulder to your right shoulder — that measurement determines your chain width.
The body panels produce a relaxed, slightly cropped fit. Add extra rows of the bead stitch and single crochet repeat to extend the length, or stop a couple of rows earlier for a shorter, cropped version.
Alternate between Row 1 and Row 2 throughout.
Change to a new color at the start of each odd-numbered Row 1 (the bead stitch rows).
Work a total of 7 bead stitch rows (14 rows including the single crochet rows) for each body panel.
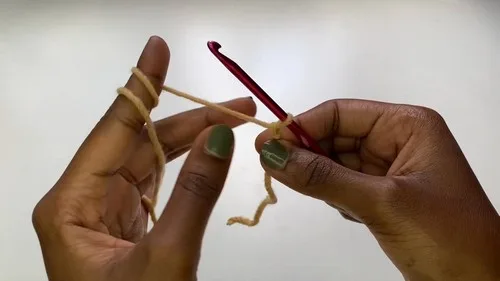
- Round 1(Foundation chain): Chain in multiples of 4 plus 2; your chain should measure approximately 15 inches, which will ease in slightly to your target width once you begin working.
- Round 2Foundation row Skip the first chain from the hook; single crochet in the back loop only of every chain across the row.
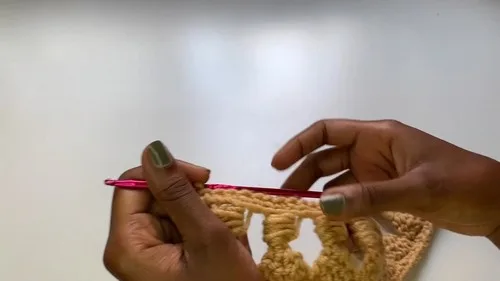
- Row 1(Bead stitch row, attach new color at the start): Chain 6 and turn; yarn over twice, insert hook into the very first stitch below, pull up a loop (4 loops on hook); yarn over and pull through 2 loops; yarn over, insert hook into the next stitch in the back loop only, pull up a loop, yarn over, pull through 2 loops; repeat for the 3rd and 4th stitches; when you have 6 loops on your hook, yarn over and pull through 4 loops, then yarn over and pull through 2 loops, then pull through the remaining 2 loops; make a puff stitch around the post you just created: yarn over, insert hook around the post and pull up a loop; repeat this 4 times total, then yarn over and pull through all loops on the hook; chain 2; repeat this full bead stitch sequence across the row, skipping 4 stitches per bead group, until 1 stitch remains; for the final stitch, do not chain 2, instead chain 1, yarn over twice, and work a treble crochet into the last stitch.
- Row 2(Single crochet row): Chain 1 and turn; single crochet into the first stitch, then single crochet in the back loop only across every remaining stitch to the end of the row.
Sleeves
Make 2Each sleeve measures approximately 11 inches wide by 19 inches long.
Work the exact same bead stitch and single crochet alternating row pattern as the body panels (see Front and Back Panels for Row 1 and Row 2 instructions).
Work a total of 10 bead stitch rows for each sleeve.
Chain wider than the given width if you prefer a more relaxed sleeve. To customize sleeve length, reduce the number of bead stitch rows for a shorter sleeve, or eliminate the sleeve entirely and finish the armhole edges with a border row of single crochets for a sleeveless version.
- Round 1(Foundation chain): Chain in multiples of 4 plus 2 — chain wider than the body panels to achieve the wider sleeve width.
More pictures
Before the first stitch
- Measure shoulder to shoulder first. That number sets your foundation chain width.
- Swatch one full bead stitch repeat before chaining the real panel.
- Read through Row 1 twice. The loop count changes fast, stitch to stitch.
Minutes per piece
- Front and back panels about 4-6 hours because each panel alternates bead stitch and single crochet rows across 14 rows to reach 14 inches, for both panels
- Sleeves and assembly about 6-10 hours because each sleeve needs 10 bead stitch rows (for both sleeves), then seaming wrong-side out and attaching sleeves; total project time runs about 10-16 hours depending on size and pace
Other yarns that work
- Wool blend, chunky weight Adds warmth and structure. Bead stitch clusters hold their shape better.
- Cotton blend, bulky weight Gives more drape and less warmth. Good for a lighter, warm-weather top.
Where it ends up
- Wear it over a fitted tank for an evening out.
- Layer it with a slip dress for a casual look.
- Pair it with wide-leg pants and simple sandals.
Joining up
- Step 1 Keep all pieces wrong-side out while seaming; when you turn everything right-side out at the end, the seams will be hidden on the inside.
- Step 2 Lay the front and back panels together with wrong sides facing outward.
- Step 3 Seam approximately 2.5 inches in from the left edge and 2.5 inches in from the right edge; leave the center section open — this is the neck opening.
- Step 4 With the panels still wrong-side out, seam the left and right sides of the body from the bottom upward.
- Step 5 Seam approximately 7 inches up from the bottom on each side, then stop; the unstitched section at the top of each side becomes the armhole opening.
- Step 6 As you seam, match your color change rows on both panels so the stripes align across the seam.
- Step 7 Fold each sleeve panel in half lengthwise with the wrong side facing outward and seam it closed along the long edge to form a tube.
- Step 8 Turn the main body right-side out and then flip each sleeve so it is also right-side out.
- Step 9 Insert each sleeve into the armhole opening, aligning the underarm seam of the sleeve with the side seam of the body.
- Step 10 Sew around the armhole opening — approximately 3 inches up the front and back edges and the corresponding sleeve sides — to attach the sleeve securely.
- Step 11 Repeat for the second sleeve.
- Step 12 Turn the entire top inside out to access all seam allowances and loose ends.
- Step 13 Weave in every end securely, then trim the excess.
- Step 14 Turn the top right-side out to finish.
Small notes
- Use a 4.5 mm hook throughout. Chunky yarn moves fast, so keep tension even.
- Mark your armhole boundaries with stitch markers. It saves guesswork during assembly.
- Match bead stitch rows at the side seams. Line up your colors before you sew.
- Swatch the bead stitch before starting: it is a multi-step combination of a cluster and a puff stitch. One full repeat on a practice swatch is worth doing before committing to the full panel — it also helps confirm your stitch count and sizing before chaining your foundation.
- Match your color rows at the side seams: align the bead stitch rows on both panels before sewing so the stripes look intentional and clean rather than off.
- Use the wrong-side-out seaming method throughout and resist flipping the piece right-side out until the final step.
- Chunky weight is recommended for this stitch pattern; a smooth chunky cotton or cotton-acrylic blend is ideal. If using worsted weight, panels will be smaller than the given measurements, so add extra rows and possibly extra chains to compensate. Avoid going up in weight beyond chunky, as super-bulky yarn makes the bead stitch too thick and dense.
- If the armhole opening feels too tight after sleeves are attached, carefully undo a few stitches at the top of the side seam to open it slightly.
- You can work this top in a single color by skipping the color change at the start of each bead stitch row and continuing in one yarn without cutting.
- If front and back panels turn out slightly different sizes, block both panels flat to approximately 14 by 14 inches and let them dry before seaming.
- If the neckline feels loose after seaming, work a single row of single crochets around the neck opening to stabilize the edge and pull it in slightly.
- Quick facts: Skill level is intermediate — comfortable with multi-loop stitches and puff stitches. Construction uses 4 flat panels seamed together (2 body squares, 2 sleeves). Key technique is the bead stitch, a combined cluster and puff stitch worked on alternating rows. Stitch multiple is multiples of 4 plus 2. Estimated time is 10-16 hours depending on size and pace.
Little questions
Can I make the panels wider than 14 inches?
Yes, adjust your foundation chain in multiples of 4 plus 2. Just measure shoulder to shoulder first to find your target width.
Why does the bead stitch feel confusing at first?
It combines a cluster and a puff stitch in one motion. Swatch one repeat before starting the real panel, and it clicks faster.
How do I keep my color stripes lining up?
Match the bead stitch rows on both panels before seaming. Lay them side by side and check the pattern before you sew.
Do I need stitch markers for this pattern?
They are optional but helpful. I use them to mark armhole boundaries so assembly goes faster.
How do I know when my armhole opening is the right size?
Measure the unstitched section at the top of each side seam after you have finished the body. It should be wide enough to accommodate your sleeve tube comfortably. If you find it is too tight once the sleeves are attached, you can carefully undo a few stitches at the top of the side seam to open the armhole slightly.
Can I work this top in a single color?
Absolutely. You can work this top in a single color by skipping the color change at the start of each bead stitch row and continuing in one yarn without cutting.
Original pattern: https://crocheteverything.com/free-crochet-cold-shoulder-top-pattern-with-colorblock-bead-stitch/

About the Author
Tamsin Okoro Who writes the patterns at Yarn Gallery, how a pattern gets from the hook to the page, and what this site will never do.


