About This Pattern
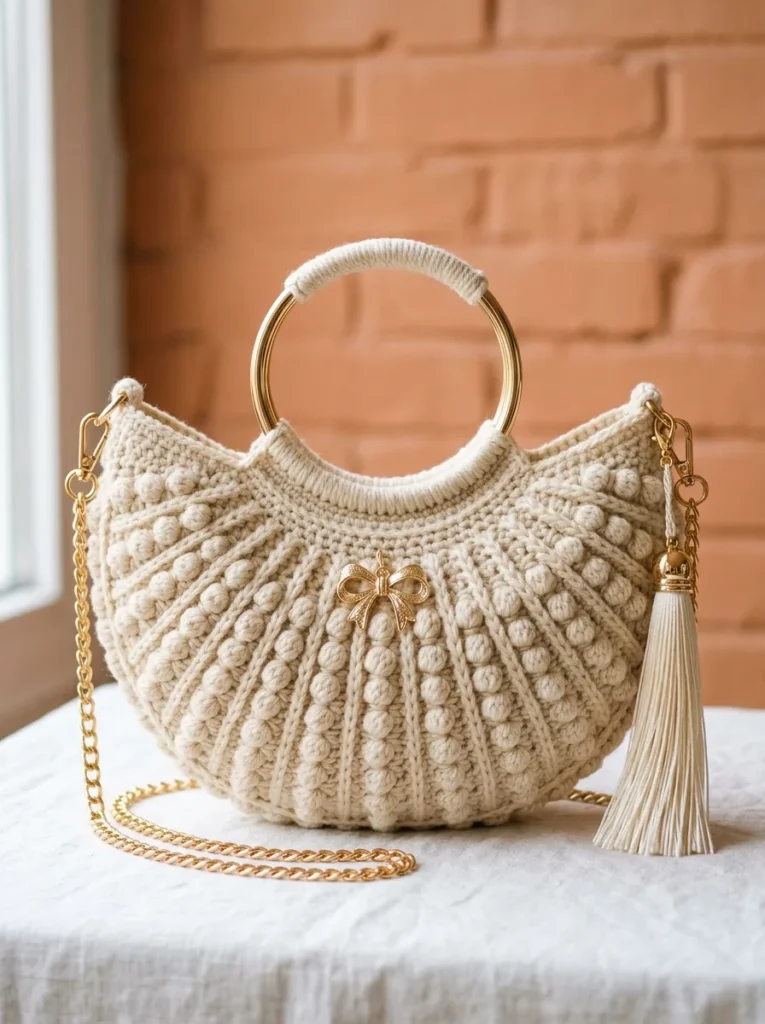
This cream and gold half moon bag combines the softness of handmade crochet with the polish of a designer accessory. The bobble stitch texture radiates from the center of each panel like little raised suns, giving the surface a dimensional quality that photographs beautifully. It's perfect for the maker who wants a project that feels special from start to finish, and for the giftee who deserves something more elevated than a typical granny square tote.
You'll work two flat panels using bobble stitches alternated with single crochet ridge rows, then shape the crescent silhouette through strategic increases at the outer curves. The technique list is short but rewarding: bobble stitches, sc ridges, and simple corner shaping, all worked flat before joining. Confident beginners who've finished a few projects will feel right at home, and the whole build — two panels plus assembly — typically takes a relaxed weekend, roughly 6 to 9 hours.
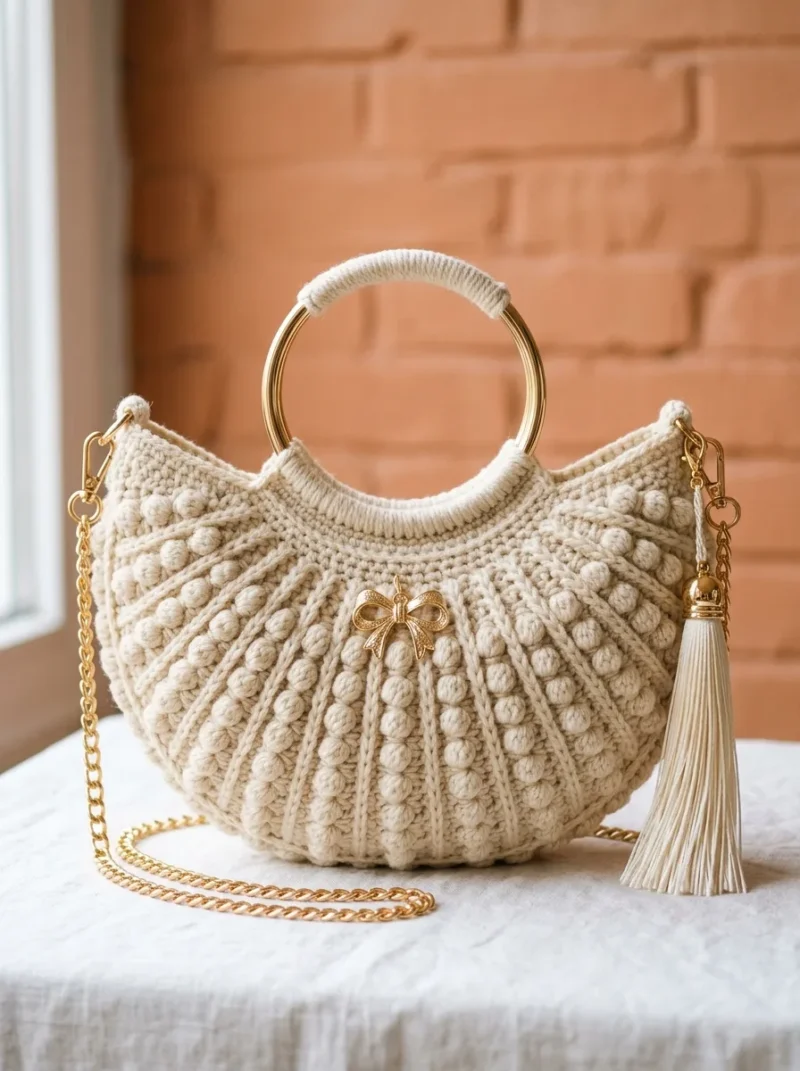
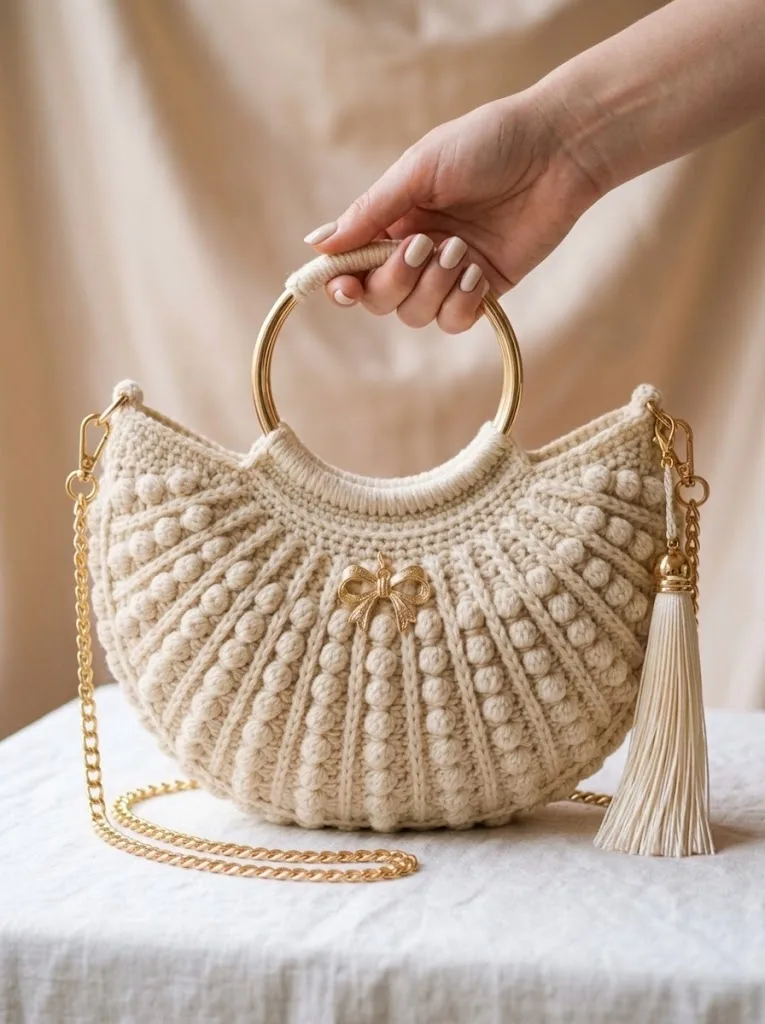
The finished bag measures about 12 inches wide and 8 inches tall, striking that sweet spot between roomy and refined. With its gold ring handle, chain strap clipped to D-rings, and optional tassel swinging at the bottom, it reads as effortlessly chic rather than homemade. Line it for structure and it becomes a genuine everyday carry — or wrap it up as a thoughtful gift for the fashion-forward crocheter in your life.
- Work Panel One flat, alternating bobble stitch rounds with simple single crochet ridge rounds to build the texture.
- Repeat the exact same panel a second time so you have two matching pieces.
- Move into the crescent shaping section, adding increases at the outer curve points while the center stays steady.
- Push each bobble to the right side of the work as you finish it so the raised texture stays crisp.
- Join the two panels together along their edges to form the finished half moon shape.
- Attach D-rings to each upper corner, either sewing them directly on or using small crocheted loops.
- Clip the gold chain strap onto the D-rings with the lobster clasps and thread on the gold ring handle.
- Add the optional tassel and bow charm for movement and a final decorative touch.
Materials
Yarn
Hook
Notions
Crochet Abbreviations
- ch
- chain: Yarn over, pull through loop on hook. The foundation of most crochet.
- sl st
- slip stitch: Insert hook, yarn over, pull through stitch AND loop on hook in one motion. Used for joining and moving across stitches invisibly.
- sc
- single crochet: Insert hook into stitch, yarn over and pull up a loop (2 loops on hook), yarn over and pull through both loops. Your basic building block stitch.
- sc2tog
- single crochet two together: A decrease. Insert hook into first stitch, pull up loop. Insert hook into next stitch, pull up loop. Yarn over, pull through all 3 loops. You just turned 2 stitches into 1.
- bob
- bobble stitch: This creates those beautiful raised bumps. Yarn over, insert hook, pull up loop, yarn over, pull through 2 loops. Repeat this 4 more times in the SAME stitch (6 loops on hook). Yarn over, pull through all 6 loops. Push the bobble to the front of your work. Do not panic if it looks messy at first. It pops into shape.
- inc
- increase: Work 2 stitches into the same stitch.
- BLO
- back loop only: Instead of inserting your hook under both loops at the top of the stitch, go under only the back loop. This creates ridged texture.
Cream and Gold Elegant Half Moon Bag Crochet Pattern
Panel One (Make 2)
Foundation Row: Ch 45.
- Round 1(RS): Sc in 2nd ch from hook and in each ch across. Turn. (44 sts)
- Round 2Ch 1, sc in BLO across. Turn. (44 sts)Working Bobbles on Right Side Rows: Here is the key to perfect bobbles. Always push them to the front (right side) of your work as you complete them. Give a gentle nudge with your finger. They naturally want to pop forward, so this is easier than it sounds.
- Round 3(Bobble Row): Ch 1, sc in first 2 sts, *bob in next st, sc in next 3 sts* repeat from * to last 2 sts, sc in last 2 sts. Turn. (44 sts, 10 bobbles)
- Round 4Ch 1, sc in BLO across. Turn. (44 sts)
- Round 5Ch 1, sc across. Turn. (44 sts)
- Round 6Ch 1, sc in BLO across. Turn. (44 sts)
- Round 7(Bobble Row): Ch 1, sc in first 4 sts, *bob in next st, sc in next 3 sts* repeat from * to last 4 sts, bob in next st, sc in last 3 sts. Turn. (44 sts, 10 bobbles offset from Row 3)
- Round 8Ch 1, sc in BLO across. Turn. (44 sts)Rows 9-10: Repeat Rows 5-6. (44 sts)Rows 11-18: Repeat Rows 3-10. (44 sts) Now we begin shaping the curve.
Shaping the Crescent
Creating the Half Moon Shape: The crescent shape comes from working increases at specific points while keeping the center sections consistent. Think of it like shaping a smile. More stitches at the outer curves, fewer in the middle.
- Round 19Ch 1, sc2tog, sc to last 2 sts, sc2tog. Turn. (42 sts)
- Round 20Ch 1, sc in BLO across. Turn. (42 sts)
- Round 21(Bobble Row): Ch 1, sc2tog, sc in next st, *bob in next st, sc in next 3 sts* repeat to last 5 sts, bob in next st, sc in next 2 sts, sc2tog. Turn. (40 sts)
- Round 22Ch 1, sc in BLO across. Turn. (40 sts)
- Round 23Ch 1, sc2tog, sc to last 2 sts, sc2tog. Turn. (38 sts)
- Round 24Ch 1, sc in BLO across. Turn. (38 sts)
- Round 25(Bobble Row): Ch 1, sc2tog, *bob in next st, sc in next 3 sts* repeat to last 4 sts, bob in next st, sc in next st, sc2tog. Turn. (36 sts)
- Round 26Ch 1, sc in BLO across. Turn. (36 sts)
- Round 27Ch 1, sc2tog twice, sc to last 4 sts, sc2tog twice. Turn. (32 sts)
- Round 28Ch 1, sc in BLO across. Turn. (32 sts)
- Round 29Ch 1, sc2tog twice, sc to last 4 sts, sc2tog twice. Turn. (28 sts)
- Round 30Ch 1, sc in BLO across. Turn. (28 sts)
- Round 31Ch 1, sc2tog three times, sc to last 6 sts, sc2tog three times. Turn. (22 sts)
- Round 32Ch 1, sc in BLO across. Fasten off, leaving a long tail. (22 sts) This creates that beautiful curved top edge.
More photos
Putting It Together
- Step 1 Joining the Panels: Place both panels with wrong sides together. The bobbles should face outward on both sides. Starting at one top corner, work sc evenly around the bottom curved edge only, going through both layers to join. Work approximately 3 sc per 2 rows along the sides and 1 sc per stitch along the bottom. When you reach the other top corner, fasten off. The top opening should remain unjoined.
- Step 2 Top Border: Join yarn at one top corner. Round 1: Ch 1, sc evenly around the entire top opening, working through single layer. Place a stitch marker at the center back. Join with sl st. (approximately 88-92 sts) Round 2: Ch 1, sc in each st to center back marker, ch 10 for handle loop, skip 8 sts, sc to end. Join. Round 3: Ch 1, sc around, working 10 sc into the ch-10 space. Join. Fasten off. Repeat this handle loop creation on the front panel if you want both attachment points.
- Step 3 Attaching the Gold Ring Handle: Thread the top edge through your gold ring handle. The yarn-wrapped section visible in the photo comes from wrapping the ring with yarn before attaching. To wrap the handle: Cut approximately 3 yards of yarn. Starting at one end of the wrap section, hold the tail against the ring and begin wrapping yarn tightly around both the ring and the tail. Continue for about 2.5 inches. Thread the end through a tapestry needle and weave under several wraps to secure. Trim excess. Fold the top border over the ring and whip stitch the edge to the inside of the bag.
- Step 4 Adding the Chain Strap: Attach D-rings to each upper corner of the bag. You can sew them directly to the corner stitches or create small crochet loops to hold them. Small Loop (optional): Ch 8, sl st to form ring, sc 12 into ring, sl st to join. Thread through D-ring and sew to bag corner. Clip your gold chain to the D-rings using the lobster clasps.
- Step 5 Creating the Tassel: The tassel adds movement and personality. Step 1: Cut a piece of cardboard about 5 inches tall. Wrap yarn around it approximately 60 times. Step 2: Thread a 12-inch piece of yarn under all wraps at the top. Tie tightly. Step 3: Cut the bottom loops. Step 4: About 1 inch from the top, wrap another piece of yarn around all strands several times. Tie securely and hide the ends inside the tassel. Step 5: Trim the bottom evenly. Attach to your bag at one corner using the top tie.
- Step 6 Optional Embellishments: The decorative bow charm adds a touch of glamour. Simply sew or clip it to the center front, just below the handle. This is completely optional. The bag looks beautiful without it too. For added structure, consider adding a fabric lining. Cut your lining fabric slightly smaller than your bag dimensions, sew side and bottom seams, and hand stitch inside along the top edge.
Important Notes
💡 Swatch your gauge in the actual bobble-and-ridge pattern, not plain single crochet, since bobbles pull fabric in differently and can throw off your final 12 by 8 inch measurement.
💡 Choose a mercerized cotton or cotton blend with good stitch definition — the bobbles are the visual signature of this bag, and a fuzzy or splitty yarn will blur that texture.
💡 Use stitch markers to flag your increase points at the very start of the Shaping the Crescent section so the crescent curve stays symmetrical across all 14 rounds.
💡 Push every bobble forward the moment you finish it rather than after the whole row — it's much easier to nudge one bobble at a time than to fix a whole flattened round later.
💡 Cut your lining fabric slightly smaller than your finished panel and hand-sew it in after blocking, so the fabric doesn't add bulk to the bag's clean crescent edges.
💡 When attaching the D-rings, sew through several corner stitches rather than just one or two, since this is the point that bears the full weight of the bag when it's worn on the chain.
💡 Gauge is 14 stitches and 16 rows = 4 inches in single crochet. If your tension runs loose, go down a hook size — this bag needs to be sturdy.
Common Mistakes and Fixes
Bobble stitches sinking to the back
After completing each bobble, use your finger to gently push it toward the right side of the fabric as instructed. Do this consistently on every bobble, right after you finish it, rather than waiting until the round is done.
Losing the crescent shape
Place a stitch marker at each designated increase point before you start Shaping the Crescent, and move the markers up as you complete each round so your increases always land in exactly the same spot.
Panels coming out different sizes
Since you're making the panel twice, count your stitches at the end of every round for both panels and check against gauge (14 sts and 16 rows = 4 inches) before moving on, adjusting hook size slightly if one panel runs bigger.
Tension changing between the bobble
Bobbles naturally pull fabric tighter, so consciously relax your tension on the ridge rows that follow to keep the overall panel lying flat rather than cupping.
D-rings or loops attached crookedly
Before sewing, clip or pin both D-rings (or crochet loops) in place on the finished bag and hang it from your gold ring handle to check that both sides sit level before stitching them permanently.
Finished bag measuring smaller
Swatch first: work up a small gauge square in the bobble-and-ridge pattern before starting Panel One, and size up your hook slightly if you're getting more than 14 stitches per 4 inches.
Finished bag feeling floppy and lacking structure.
Go down a hook size — tighter tension creates a sturdier fabric that holds the bag's shape better. You can also add the optional fabric lining for extra structure.
What Makes It Good
- This bag is endlessly adaptable once you understand the bobble-and-ridge rhythm. For color, try working the bobbles in metallic gold cotton against a cream ridge background for a two-tone effect that echoes the hardware, or go moody with charcoal grey bobbles on black rows for an evening-out version. 24/7 Cotton or Paintbox Simply Cotton both give the crisp stitch definition mercerized cotton provides, at a friendlier price point if you're making multiples as gifts. For a warmer, cozier version, swap in a worsted weight cotton-acrylic blend like Bernat Handicrafter Cotton for softer bobbles that still hold their shape. Sizing is easy to adjust: add one extra bobble-and-ridge repeat to each panel before starting the crescent shaping rounds to gain roughly 2 extra inches of width, or drop a repeat for a smaller clutch-style bag. Swap the 5-inch gold ring handle for a wooden or bamboo ring for a boho, natural-fiber look, or use a plain leather strap instead of the chain for a more casual everyday bag. Seasonal spins are fun too — rust and cream bobbles for autumn, or icy blue and silver hardware for a winter evening clutch. If you want a fully lined structured bag, fuse a lightweight interfacing to your lining fabric before sewing it in, which helps the panels hold their crescent shape even when the bag isn't full. Finally, skip the tassel and add a small embroidered initial or a decorative bow charm instead for a monogrammed, personalized gift version.
- I designed this bag because I wanted something that looked like it came from a boutique shelf, not a craft fair table. The bobble stitches are the real star here — watching those raised dots pop forward with a gentle nudge as you work each row is oddly satisfying, almost meditative. Working the crescent shape by increasing at the outer curves while keeping the center calm feels like sculpting fabric, and it's a great confidence builder if you've never shaped anything beyond a circle. I love that the construction stays honest: two flat panels, no fussy seaming, just clean joins. The gold ring handle and chain strap take it from 'cute crochet' to 'where did you buy that bag,' and clipping the lobster clasps to the D-rings feels like the moment it truly becomes a finished accessory. Add the tassel and it has movement every time you walk. This is the pattern I hand to crocheters who are ready to graduate from amigurumi into wearable, giftable pieces they'll actually reach for.
Frequently Asked Questions
Can I make this bag without the optional lining?
Yes, the bag holds its shape well thanks to the bobble and ridge construction even without lining. Adding fabric lining is recommended mainly if you plan to carry loose items like keys or makeup that could snag on the wrong side of the stitches.
What yarn weight and hook size does this pattern use?
This pattern uses worsted weight cotton or cotton blend yarn with a 4.0mm (G/6) hook. A mercerized cotton is recommended specifically because it shows off the bobble texture crisply.
How do I attach the gold chain strap to the bag?
You attach D-rings or jump rings to each upper corner of the bag, either by sewing them directly to the corner stitches or by making the small optional crochet loops included in the pattern. The gold chain then clips onto the D-rings using the lobster clasp attachments.
Why are there two identical panels instead of one piece?
Working two flat panels and joining them gives cleaner edges and easier construction than trying to build the whole bag in one continuous piece. It also makes it much easier to keep both sides of the crescent symmetrical.
What finished size should I expect from this bag?
When gauge is matched correctly, the finished bag measures approximately 12 inches wide and 8 inches tall. Since gauge really matters here, swatching first will help you land on that exact size.
Original pattern: https://crochetwithmia.com/cream-and-gold-elegant-half-moon-bag-free-crochet-pattern/

About the Author
Tamsin Okoro Who writes the patterns at Yarn Gallery, how a pattern gets from the hook to the page, and what this site will never do.


