About This Pattern
This bubble stitch scarf is one of those patterns that looks impressively textured and complicated but is secretly one of the easiest scarves you'll ever make. Using nothing more than single and double crochet stitches worked in a clever repeating sequence, you create rows of puffy little clusters that look like rows of tiny bubbles marching across the fabric. It's perfect for anyone who wants a statement accessory without a steep learning curve, and it makes a wonderful first 'real' project for someone who has just learned the basics.
The magic here is all in the stitch placement rather than any tricky technique. You'll skip stitches, work multiple stitches into a single spot, and build a rhythm that becomes almost meditative once you get a few rows in. Because it only uses chains, single crochet, and double crochet, this is genuinely a beginner-level pattern, though the visual payoff feels much more advanced. Most crocheters can finish a full-length scarf in a single weekend, working a few rows each evening.
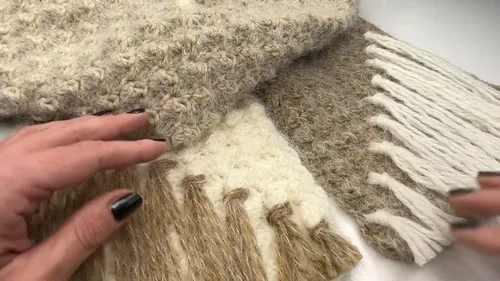
The finished scarf has a wonderfully squishy, dimensional texture thanks to the halo-style yarn, giving it a soft, cloud-like drape that feels amazing wrapped around your neck. It grows to whatever length you like, so you control whether it's a cozy everyday wrap or a long, dramatic accessory. With or without the optional tassels, it makes a thoughtful handmade gift that looks far more polished than the effort it actually took to create.
- Start with a simple foundation chain that sets the width for your entire scarf.
- Work your first row using single and double crochet stitches to establish the bubble pattern.
- Skip pairs of stitches and cluster stitches together into single points to form the puffy bubble texture.
- Turn your work with a small turning chain before beginning each new row.
- Repeat the bubble stitch sequence row after row, letting the texture stack neatly on top of itself.
- Keep repeating the pattern until the scarf reaches the length you want to wear.
- Finish off your last stitch and weave in any loose yarn ends with a darning needle.
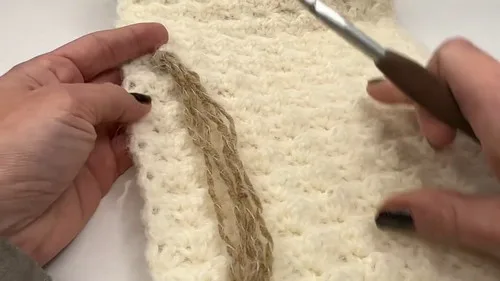
- If desired, cut and attach yarn tassels diagonally across the scarf, then trim them to your preferred length.
Materials
Crochet Abbreviations
- ch
- chain
- sc
- single crochet
- dc
- double crochet
- yo
- yarn over
Crochet Bubble Stitch Scarf: Easy Beginner Pattern
Main Pattern
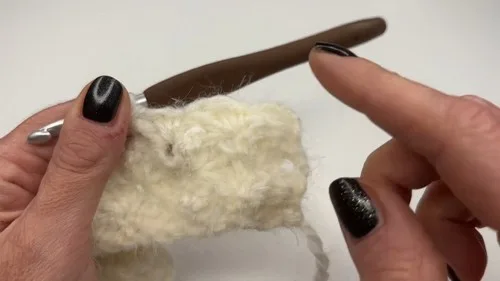
- Round 1Make a slip knot, then chain 33 (or a multiple of 2, plus 3).
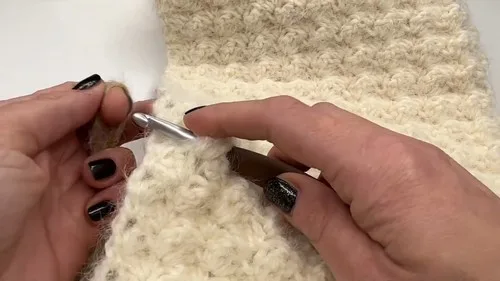
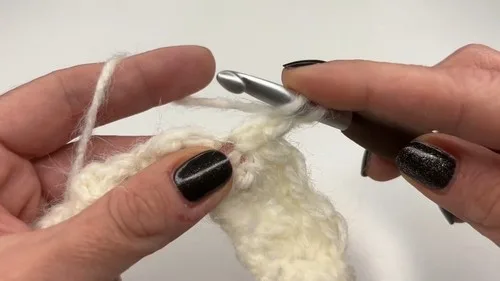
- Round 2Yarn over, insert hook into the third stitch from the hook, and work a double crochet. Skip the next two stitches, and work one single crochet and two double crochets into the third stitch. Repeat until the end of the row. Insert into the last stitch and finish the row with one single crochet.
- Round 3Chain 3 and turn your work. Yarn over, insert your hook into the very first stitch, and work a double crochet. Skip the next two double crochets, and work one single crochet and two double crochets into the single crochet from the previous row. Repeat until the end of the row. Insert between the chain three and double crochet from the previous row, and finish with a single crochet.
- Round 4Repeat Round 3 until your scarf reaches the desired length.
More photos
Putting It Together
- Step 1 Finishing: Work a single crochet in the last stitch, then pull the yarn through.
- Step 2 Sew in the yarn ends using a darning needle.
- Step 3 Adding Tassels (Optional): Cut 27 strings, approximately 18 inches long.
- Step 4 Attach tassels to every other "bubble", working down diagonally.
- Step 5 Trim the tassels to the desired length.
Important Notes
This pattern only requires four basic abbreviations, chain, single crochet, double crochet, and yarn over, so it's a great confidence-builder if you're newer to crochet.
Because the scarf works up in simple repeats, it's easy to set down and pick back up without losing your place, making it an excellent take-along or TV-watching project.
The 6mm hook paired with the halo-style yarn gives this scarf its soft, fuzzy look, so if you swap yarns, expect the bubble texture to look a bit different depending on the fiber's loft.
There is no set length in the pattern, since round four simply has you repeat the sequence until the scarf reaches the length you want, so measure against yourself as you go.
One skein of the 481-yard yarn gives you plenty of room to work with, but if you're making an extra-long or extra-wide version, keep an eye on your remaining yarn as you approach the final rows.
If you plan to add tassels, cut all 27 strings ahead of time and lay them out before attaching, so you can visualize the diagonal spacing before committing to placement.
Common Mistakes and Fixes
Losing track of the skipped stitches between bubbles
Count out loud as you skip the two stitches so you consistently land in the correct spot for each cluster.
Starting the foundation chain with the wrong count
Double-check your chain is a multiple of two plus three before starting round two, since this keeps the bubble repeat aligned all the way across.
Forgetting the turning chain at the start of each new row
Always chain three and turn before beginning round three or four, as this chain acts as your first stitch of the row.
Working the double crochets
Make sure to work into the single crochet from the previous row where indicated, not into the double crochets, to keep the bubble pattern stacking correctly.
Pulling the working yarn too tight while forming each bubble
Keep your tension relaxed on the double crochets that form each cluster so the bubbles stay puffy and dimensional rather than flat.
Adding tassels unevenly
Space tassels out by attaching them to every other bubble in a diagonal line, checking the spacing looks balanced before trimming any strings.
What Makes It Good
- One of the best things about this bubble stitch scarf is how easy it is to make it your own. Try working it in a solid neutral like oatmeal or charcoal for a minimalist, everyday piece, or reach for a variegated or self-striping yarn to let the bubbles show off subtle color shifts as you go. A chunky halo-style yarn gives you that soft, fuzzy halo effect shown here, but swapping in a smooth worsted-weight cotton will give the bubbles crisper, more defined edges — perfect if you want a lighter, warm-weather version. You can also play with scale: a smaller hook and thinner yarn creates a delicate, lacy bubble scarf, while sticking with the 6mm hook and a bulky yarn keeps things soft and substantial. For length and width, remember round one starts with a foundation chain in a multiple of two plus three, so you can easily chain more at the start for an extra-wide wrap or a shorter chain for a skinny scarf-let. Want a matching set? Work a shorter version of the same repeat into a cowl by seaming the ends together once it reaches your desired circumference. If you love the tassel look but want something different, try adding pom-poms instead, or braid three tassel strands together for a chunkier fringe. You could also alternate two coordinating yarn colors every few rows for a bold striped bubble effect, or add a single contrasting stripe near each end to frame the piece. However you customize it, the bubble stitch pattern stays just as beginner-friendly, so don't be afraid to experiment with your favorite color palette.
- I adore this scarf because it proves that simple stitches can create seriously eye-catching texture. Working the double crochet clusters into that skipped stitch and watching each 'bubble' pop up is honestly so satisfying — it's the kind of repetitive motion that makes crochet feel relaxing instead of stressful. Since the whole pattern only uses chain, single crochet, and double crochet, I never have to stop and look anything up, which means I can crochet while watching TV or chatting with friends. I also love how forgiving the pattern is: because you're just repeating rounds 3 and 4 until you hit your desired length, there's no pressure to get an exact row count right. And those optional tassels? They completely transform the look, turning a simple scarf into something that feels boutique-worthy. Whether I leave it fringe-free for a clean, modern vibe or add tassels for a bohemian touch, this pattern always turns out gorgeous. It's become my go-to recommendation for anyone asking me what to crochet next.
Frequently Asked Questions
Is this bubble stitch scarf really beginner-friendly?
Yes, it only uses chain, single crochet, and double crochet stitches, which makes it a great project if you already know the basics. The repeating pattern in rounds three and four becomes easy to memorize after just a few rows.
How long will my finished scarf be?
That's entirely up to you, since round four simply has you repeat the bubble row until the scarf reaches your desired length. Most crocheters try the scarf on periodically while working to gauge when it feels long enough.
Can I make this scarf without the tassels?
Absolutely, the tassels are listed as optional in the assembly steps, so you can leave the ends plain for a cleaner, more minimal look. Simply sew in your ends after finishing the last row and skip the tassel-making steps entirely.
What yarn weight works best for this pattern?
The pattern calls for a halo-style yarn with a 6mm hook, which produces a soft, fuzzy, dimensional bubble texture. A bulky or chunky weight yarn will give you a similarly cozy result if you're substituting yarns.
Why do my bubbles look flat instead of puffy?
This usually happens when the double crochets forming each cluster are pulled too tight, so try loosening your tension slightly on those stitches. Working with a soft, fluffy yarn like the one suggested also naturally helps the bubbles stand out more.
Original pattern: https://crocheteverything.com/trendy-crochet-bubble-stitch-scarf-tutorial-best-for-beginners/

About the Author
Tamsin Okoro Who writes the patterns at Yarn Gallery, how a pattern gets from the hook to the page, and what this site will never do.


