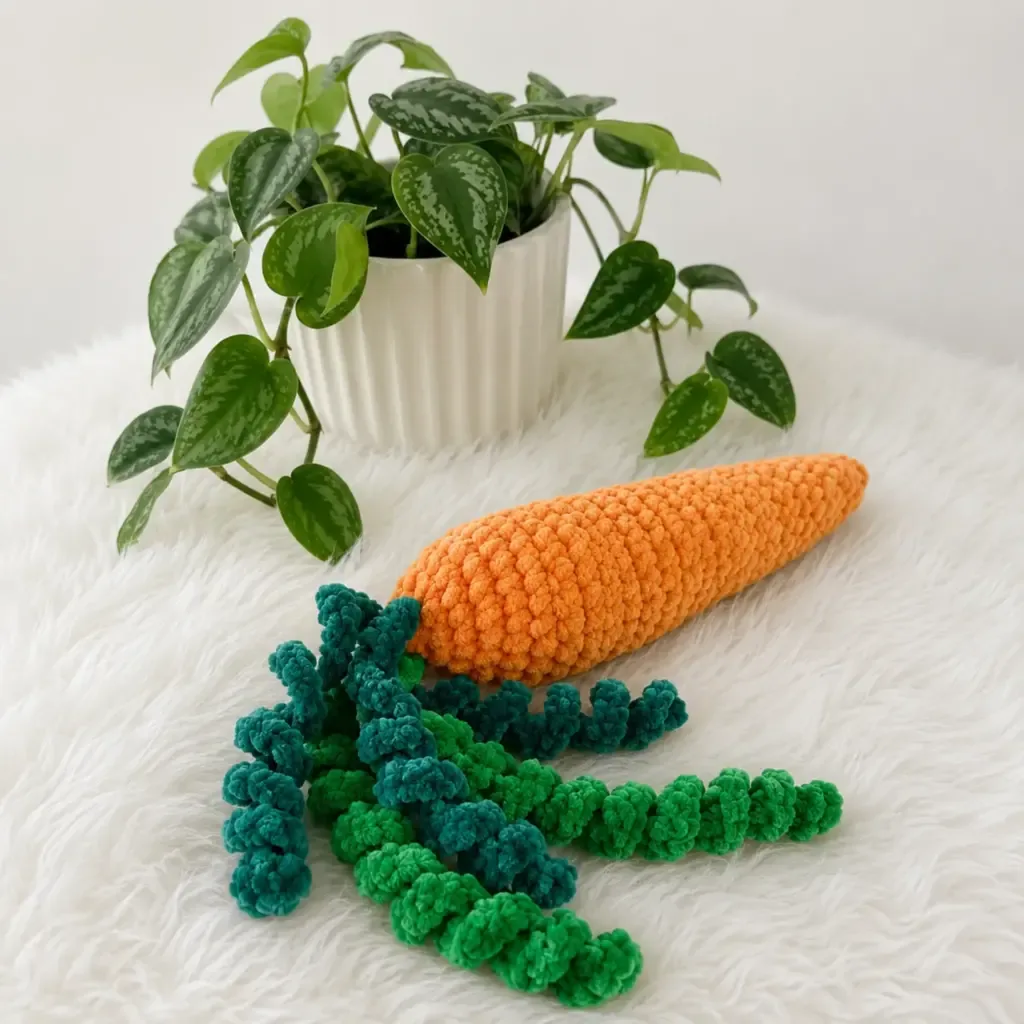
About This Pattern
This crochet carrot pencil case takes the humble zippered pouch and turns it into something genuinely fun to pull out of your bag. Worked in plush, velvet-style orange yarn with a cluster of dark and light green stems on top, it looks just like a fresh-pulled carrot but functions as a fully lined, zippered storage pouch. It's perfect for crocheters who love amigurumi-style projects but want to make something practical — teachers, garden lovers, kids heading back to school, or anyone who wants their pencil case to double as a conversation starter.
The body combines two distinct construction methods: a continuously joined round tip section that tapers to a point, and a flat, turned-row opening section that houses the zipper — so you'll get practice with both amigurumi shaping and structured seaming in one project. The five stems (three dark green, two light green) are quick, low-commitment makes that let you experiment with color before tackling the main body. Expect a solid intermediate project, roughly 4-6 hours including assembly, zipper insertion, and a little hand-sewing.
Finished, the carrot measures a cute handheld size built around a 15 cm (6") zipper, with a soft velvety texture that feels almost huggable rather than stiff or bulky. The rounded tip and bushy stem topper give it real charm sitting on a desk or peeking out of a backpack. Because it's unstuffed and pouch-like rather than a fitted amigurumi, it holds pencils, crochet hooks, or small notions comfortably — and makes a wonderfully unexpected handmade gift for kids, teachers, or fellow yarn lovers.
- Crochet three dark green stems and two light green stems first as quick warm-up pieces before the main body.
- Start the carrot body by working the Tip Section in continuous joined rounds, shaping the pointed end.
- Transition carefully from joined rounds into the Opening Section, which is worked flat in turned rows instead.
- Continue the Opening Section rows until the edge is ready to receive the zipper opening.
- Hand-sew the 15 cm zipper into the Opening Section edge using matching thread and a sharp sewing needle.
- Attach the small cotton fabric scrap detail with fabric glue and let it cure fully before handling.
- Assemble the finished stems onto the top of the carrot body, arranging dark and light green stems together.
- Give the whole piece a final shape-check and trim any yarn tails for a clean, finished carrot pouch.
Materials
Yarn
Yarn
Hook
Tools
Crochet Abbreviations
- ch
- Chain
- dec
- Decrease (invisible decrease)
- sc
- Single Crochet
- st(s)
- Stitch(es)
Crochet Carrot Pencil Case Pattern (Free & Playful)
Carrot Body — Tip Section
- Row 1Chain 25. Starting in the 2nd ch from hook, 24 sc. (24)
- Rows 2-1024 sc. (24)
- Round 11Join to work in continuous rounds from here forward. 24 sc. (24)
- Round 122 sc, dec repeat around. (18)
- Round 1318 sc. (18)
- Round 141 sc, dec repeat around. (12)
- Round 156 dec. Fasten off and weave in the end.
Carrot Body — Opening Section
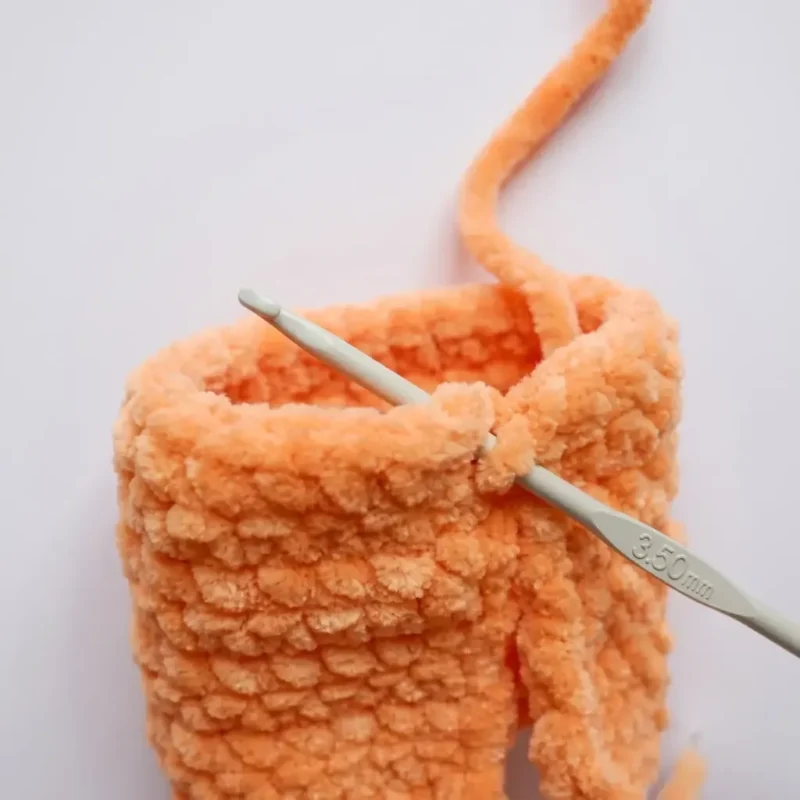
Attach yarn to the opposite (foundation chain) edge of the tip section piece to begin this half.
- Row 124 sc. (24)
- Row 210 sc, dec repeat twice. (22)
- Row 322 sc. (22)
- Row 49 sc, dec repeat twice. (20)
- Row 520 sc. (20)
- Row 68 sc, dec repeat twice. (18)
- Row 718 sc. (18)
- Round 8Join to work in continuous rounds from here forward. 18 sc. (18)
- Round 918 sc. (18)
- Round 107 sc, dec repeat twice. (16)
- Round 116 sc, dec repeat twice. (14)
- Round 125 sc, dec repeat twice. (12)
- Round 134 sc, dec repeat twice. (10)
- Round 143 sc, dec repeat twice. (8)
- Round 154 dec. Fasten off, leaving a long tail for sewing.
Dark Green Stems (make 3)
Chain 30.
Work 2 sc in each ch across. Fasten off, leaving a long tail for sewing. (60)
Light Green Stems (make 2)
Chain 45.
Work 2 sc in each ch across. Fasten off, leaving a long tail for sewing. (90)
More photos
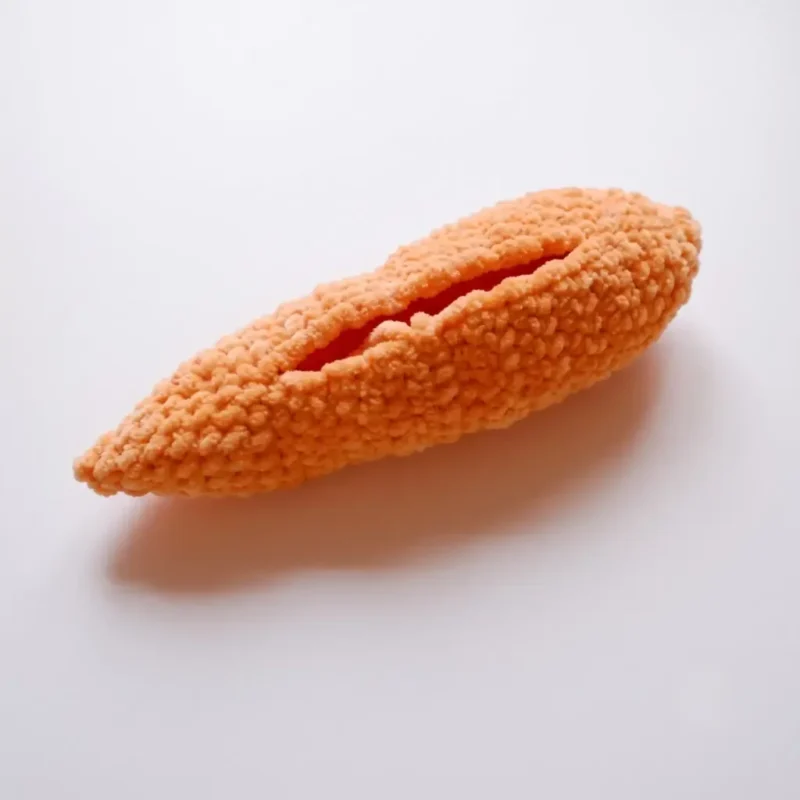
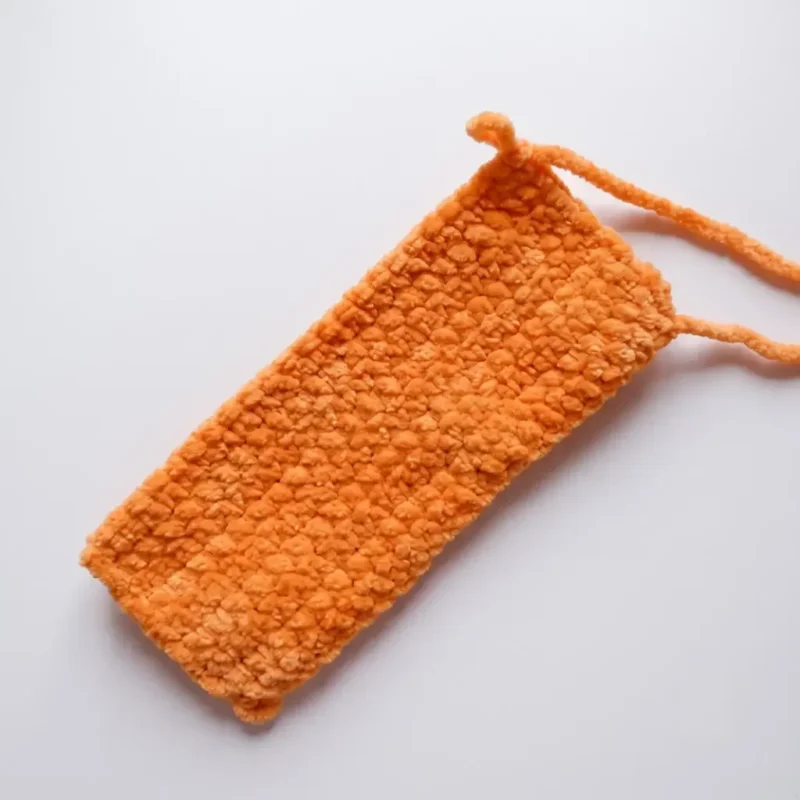
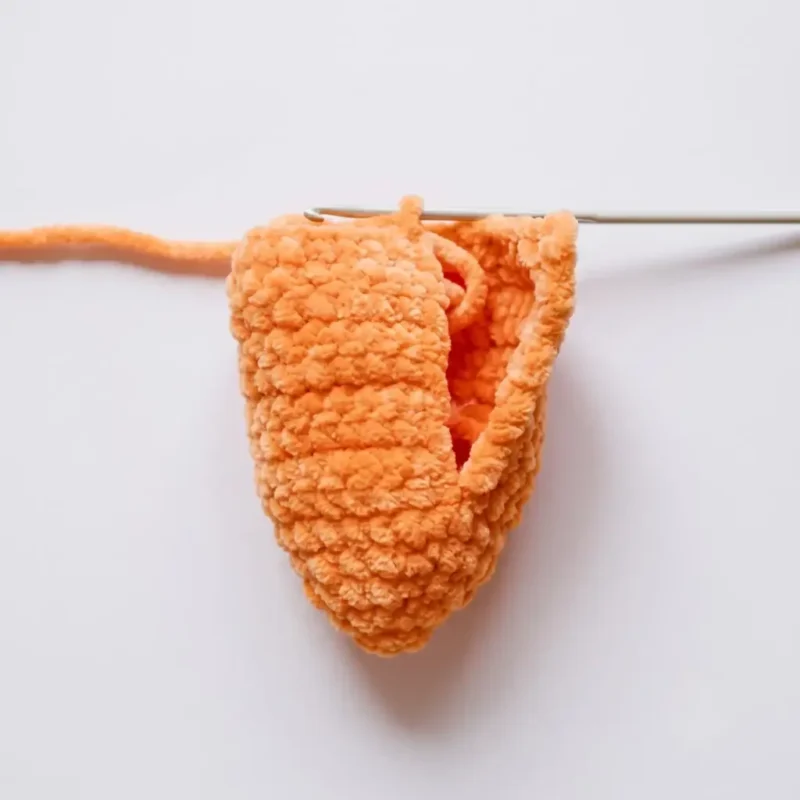
Putting It Together
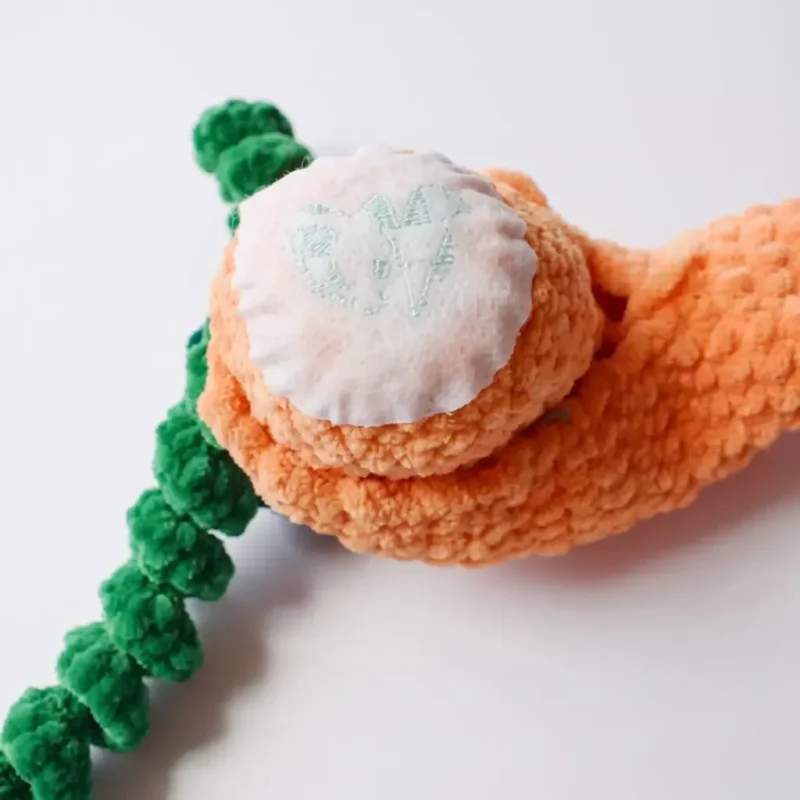
- Step 1 Sew or tie the three Dark Green Stems and two Light Green Stems to the wide end of the Carrot Body, arranging them so they fan out naturally like real carrot greens.
- Step 2 Cut two circles from your cotton fabric scrap, one larger and one smaller. Glue the larger circle over the stem attachment point at the wide end, covering the inside seam where the stems connect. Glue the smaller circle over the point at the narrow tip. This step not only tidies up the interior — it also reinforces both ends against wear from repeated pencil use.
- Step 3 Using a sewing needle and thread that matches your carrot color, hand-sew the 15 cm (6″) zipper into the opening using a backstitch for a secure, even seam.
- Step 4 Weave in any remaining yarn tails from the stems and body sections.
Important Notes
💡 Use an E-4 (3.5 mm) hook consistently throughout — since this is an unstuffed pouch, gauge isn't critical for fit, but staying consistent keeps your stitches even for that smooth velvet look.
💡 Work 2 sc into every single chain stitch without skipping any when making the stems — that doubling is what forces the strip to ruffle and coil into its signature curly texture, so resist the temptation to speed through this part.
💡 When working the decrease rounds on the carrot body, work your invisible decreases through the front loops only of the next two stitches — it keeps the surface smooth and hides the shaping almost completely, which matters since this piece has no stuffing to disguise bumpy transitions.
💡 Substituting a different yarn weight is fine for the stems since they're purely decorative, but keep the carrot body itself in a true worsted weight, or your row and round counts won't produce the right proportions.
💡 When sewing the zipper, pin it in place first and baste a few anchor stitches before committing to the full backstitch seam — plush yarn hides pin holes easily, and this small step prevents a crooked zipper line.
💡 A zipper is hand-sewn into the opening at the finishing stage, so leave that seam open until you reach the Assembly section.
💡 This pattern is written in US crochet terminology.
Common Mistakes and Fixes
Working the Opening Section's turned
Keep your tension slightly relaxed on the turned rows near the opening edge, and test-fit the zipper against the unfinished edge every few rows so you catch a too-tight gauge before you've finished the whole section.
Mixing up which stems are dark green
Use a scrap of contrasting yarn or a small tag to mark the light green stems as you finish them, or simply crochet all light green stems first so you always know which pile is which before assembly.
Not accounting for the plush/velvet
Work under good lighting and use a stitch marker at the start of every round in the Tip Section, checking your stitch count against the parenthetical number at the end of each round before moving on.
Gluing the cotton fabric scrap in place
Dry-fit all assembly steps — stems, zipper, and fabric scrap — before applying any fabric glue permanently, and let each glued section cure fully before moving to the next assembly step so nothing shifts out of place.
Sewing the zipper in with thread
Use a sturdy matching-colored sewing thread (not just yarn) with a sharp sewing needle for the zipper, and go over each side of the zipper tape twice for durability since this pouch will see daily zipping and unzipping.
What Makes It Good
- Once you've made one carrot, the fun really starts with customizing it! Try an all-orange or all-red palette using Bernat Baby Velvet or Comfy Cotton Blend for a tomato-inspired pouch instead of a carrot — just keep the same stitch counts, only swap the yarn color for the body while keeping the stems green. Want a beet or radish version? Work the body in deep magenta or purple velvet yarn and use only the dark green stems (skip the light green set, or make all five in dark green as the pattern notes suggest) for a moodier root-vegetable look. For a mini keychain-sized version, work the same shaping but drop to a smaller zipper (10-12 cm) and reduce your stitch counts proportionally in each round — great for a quick gift-topper project. If you want a fall/harvest theme without going seasonal-specific, add a few French knots or embroidered freckles in brown thread across the carrot body for a rustic, hand-drawn look. You can also swap the fabric glue-and-cotton-scrap detail for a tiny embroidered leaf motif if you'd rather skip fabric entirely and keep the whole project 100% yarn. For gifting, personalize by adding a single crocheted initial charm to one of the light green stems using a contrasting scrap of yarn. Finally, if you're making several as gifts, batch the stems first (they're quick and portable — great TV-watching crochet) and then set aside dedicated evenings for the Tip and Opening sections so the zipper insertion always happens with fresh focus.
Frequently Asked Questions
What size zipper do I need for this carrot pencil case?
You'll need a 15 cm (6-inch) zipper, which is sized to match the Opening Section of the carrot body. Any standard sewing zipper in that length will work as long as it matches your fabric scrap and thread color.
Can I use a different yarn weight for this pattern?
The carrot body works best in worsted weight yarn to match the given stitch and row counts. The stems are more forgiving since they are purely decorative, so you can substitute a different green yarn weight there without affecting the finished size.
Do I need to stuff the carrot body?
No — this pattern is designed as an unstuffed pouch rather than a stuffed amigurumi piece, which is also why gauge isn't critical here. The zipper and fabric lining give it its shape instead of stuffing.
Is this pattern beginner-friendly?
It's best suited for confident beginners or intermediate crocheters, since it combines continuous joined rounds, flat turned rows, and hand-sewing a zipper in one project. If you've made a basic amigurumi shape before, you'll be comfortable here.
Can I make all five stems the same color instead of two different greens?
Absolutely — the pattern notes mention this substitution is easy, so feel free to make all five stems in a single green yarn if you don't have two shades on hand or prefer a simpler look.
What is the fabric circle step for?
The two fabric circles are glued inside the carrot at the tip and stem-attachment points. They cover the less tidy interior seams and add reinforcement, which helps the pencil case hold up longer against pencil tips poking through.
Original pattern: https://amigurumicorner.com/crochet-carrot-pencil-case-pattern/

About the Author
Tamsin Okoro Who writes the patterns at Yarn Gallery, how a pattern gets from the hook to the page, and what this site will never do.


