About This Pattern
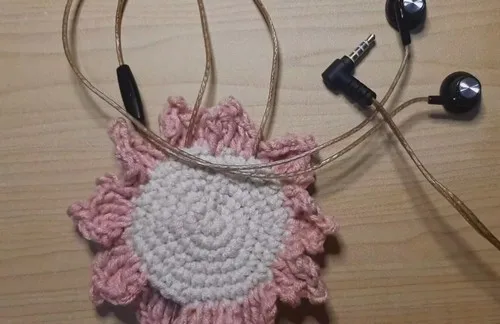
This little crochet earphone case is the kind of project that solves a real problem while looking absolutely adorable doing it. Built with a circular front and an oval-shaped back, it's designed to snugly cradle your earbuds and keep those cords from twisting into a knotted mess at the bottom of your bag. It's perfect for anyone who loves tiny, functional makes — students, commuters, or crocheters looking for a fast, giftable project that doesn't require a huge yarn stash.
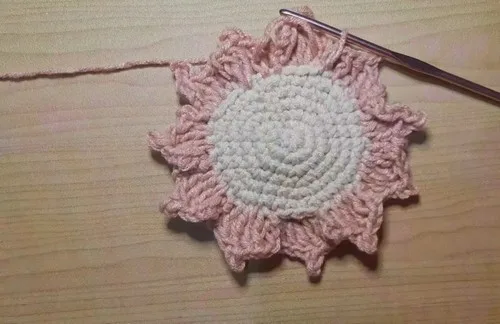
The star technique here is the decorative shell-style border, worked by combining a double crochet and triple crochet into the same stitch, then mirroring that shape with chains and slip stitches to create a scalloped edge. You'll repeat this border across both the front and back panels, alternating between them, which builds a lovely rhythm once you get the hang of it. This is a great pattern for confident beginners ready to level up, or intermediate crocheters wanting a fun, fast finish — expect around 2-3 hours from start to closed case.
The finished case is compact, pocket-sized, and endlessly charming, with that scalloped border giving it a handmade, boutique-shop feel. Made in soft milk cotton yarn, it feels gentle against your device while still holding its shape well. Whether you keep it for yourself, tuck it into a friend's stocking, or stack a few up for a craft fair table, it's the kind of small, quick win that makes a big impression.
- Gather your milk cotton yarn and 3.5mm hook before starting the front part of the case.
- Work the front part across 9 rounds, building up the circular shape one round at a time.
- Once the body is complete, begin the decorative border along the back part's edge.
- Work a double crochet and triple crochet into the same stitch to start each scallop.
- Chain 2, slip stitch, then mirror the stitches with a triple crochet and double crochet to close the scallop.
- Repeat that same border sequence along the front part to match the back.
- Alternate the border pattern between back and front two more times until all edges are finished.
- Weave in ends and seam the front and back together, leaving the top open for earbuds.
Materials
Crochet Abbreviations
- sc
- single crochet
- inc
- increase
- dc
- double crochet
- tc
- triple crochet
- ch
- chain
Crochet Earphone Case Pattern for Tangle-Free Wires
Front Part
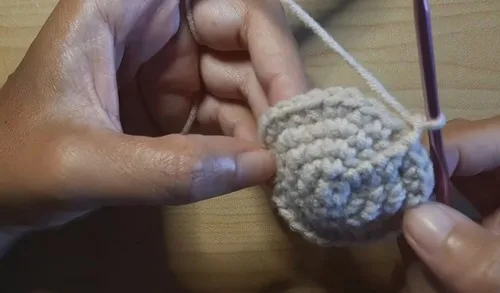
- Round 1Magic Ring with 6 single crochets (SC)(6)
- Round 2Increase (INC) to 12 SC(12)
- Round 3SC, INC (18 SC)
- Round 4SC, SC, INC (24 SC)
- Round 5SC, SC, SC, INC (30 SC)
- Round 6SC, SC, SC, SC, INC (36 SC)
- Round 736 SC
- Round 836 SC
- Round 936 SC
- Round 1036 SC
Back Part
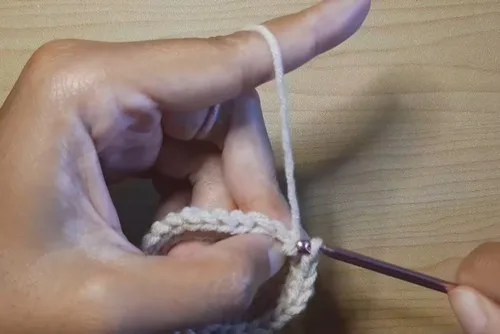
Step by step: Chain 18. Slip stitch to form a base.
- Round 1SC, SC, INC (24 SC)
- Round 2SC, SC, SC, INC (30 SC)
- Round 3SC, SC, SC, SC, INC (36 SC)
- Round 436 SC
- Round 536 SC
- Round 636 SC
- Round 736 SC
Decorative Border
Work around the back part:
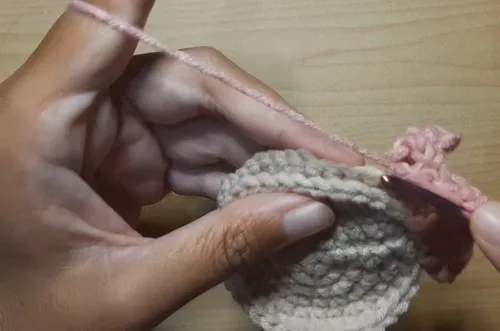
- Border Repeat3 Ch, double crochet (DC), triple crochet (TC) in the same stitch, 2 Ch, slip stitch, TC, DC, 3 Ch, slip stitchRepeat the same border for the front part.Repeat the border pattern again for the back part.Finally, repeat the border pattern again for the front part until complete.
More photos
Important Notes
💡 Stick with a 3.5mm hook and milk cotton yarn as specified — this combination keeps stitches tight enough to protect delicate earbuds while staying soft to the touch.
💡 Place a stitch marker at the start of every border repeat so you can easily track your place when alternating between the front and back parts.
💡 Block your finished front and back pieces lightly before joining them — this helps the scalloped border lie flat and look crisp rather than curled.
💡 When repeating the border pattern across both parts, keep an even tension throughout so all four repeats match in size and shape for a professional finish.
💡 Leave generous yarn tails at the end of each part specifically for seaming — this saves you from having to rejoin new yarn later just to close the case.
💡 If gifting or selling at craft fairs, weave in all ends securely and give the case a final light steam block so it looks polished and ready to use.
Common Mistakes and Fixes
Working the double crochet and triple
Count carefully and use a stitch marker to mark the starting stitch of each border repeat before you begin, so you always know exactly where to place your first double crochet and triple crochet.
Skipping or misplacing the chain-2
Pause after your slip stitch and double-check you've made exactly 2 chains before continuing to the next triple crochet — this little gap is what gives the border its rounded, shell-like pop.
Pulling the triple crochet stitches
Keep your tension relaxed on the taller stitches, and give the border a gentle stretch and steam-block once finished to help it sit smooth and even.
Using a hook size larger than 3.5mm out
Stick with the recommended 3.5mm hook for this milk cotton yarn to keep stitches snug and the fabric dense enough to protect your earphones.
Forgetting to leave a long enough tail
Leave at least a 12-inch tail at the end of your last round on both the front and back parts so you have plenty of yarn to whip stitch the pieces together cleanly.
What Makes It Good
- This pattern is a dream for customization since it uses so little yarn per case. Try working the front and back panels in two contrasting shades — a soft blush pink body with a cream border, or a deep forest green with a mustard yellow scallop edge — for a two-tone look that really makes the border pop. For a bold statement, go with a solid bright color like coral or turquoise and work the border in metallic or variegated yarn so those scallops catch the light. If you want a themed set, a burgundy and forest green combo feels cozy for autumn, while a soft lavender and white pairing looks sweet for spring gifting. Yarn-wise, if milk cotton isn't available to you, look for a similar DK-weight cotton blend like 24/7 Cotton, Paintbox Yarns Cotton DK, or Hobbii Amigo — anything with a bit of drape and softness will work beautifully with a 3.5mm hook. If you want a slightly roomier case for larger earbud styles, simply add one extra round to the front part before starting the border, keeping your stitch count consistent with the round before it. You can also personalize the case further by adding a small crocheted flower, a button embellishment, or a tiny loop and clasp so it can clip onto a bag strap or keychain. For gifting, consider making a matching set — one case plus a small coordinating coaster or keychain — using leftover yarn from the same skein so nothing goes to waste.
- There's something so satisfying about a pattern that's both practical and pretty, and this earphone case checks both boxes. I love how the border comes together — working that double crochet and triple crochet into the same stitch gives you an instant textured bump, and when you follow it with the chain-2, slip stitch, triple crochet, double crochet sequence, it forms this neat little scallop that looks so much fancier than the effort it actually takes. Repeating that border across the front and back panels means you get into a groove fast, and watching the case take shape round by round is genuinely relaxing. I also love that it's worked in milk cotton yarn, which feels silky and soft in your hands and won't scratch up your earbuds or phone screen. Plus, at just 9 rounds for the front part, it's a project you can realistically start and finish in one cozy evening. It's a fantastic stash-buster too, since it only takes a small amount of yarn, so you can whip up a whole rainbow of these for gifts, swaps, or your own collection without committing to a big project.
Frequently Asked Questions
What size earbuds does this case fit?
Thanks to its circular front and oval back, this case is designed to snugly fit standard wireless or wired earbuds along with their coiled cord. If your earbuds come in an especially bulky charging case, you may want to add an extra round to the front part for more room.
How long does this project take to complete?
Most crocheters can finish both the front and back parts, including the decorative border, in about 2-3 hours. It's a great one-evening project or a relaxing weekend make.
Is this pattern good for beginners?
It's best suited for confident beginners or intermediate crocheters, since the border involves working multiple stitches into a single stitch. If you're newer to crochet, practice the double crochet and triple crochet combo on a scrap swatch first.
How do I attach the front and back parts together?
Use the yarn tails left at the end of each piece to whip stitch the front and back together around the edges, leaving the top open for inserting your earbuds. A blunt yarn needle makes this step quick and neat.
Original pattern: https://crocheteverything.com/useful-crochet-earphone-case-pattern-perfect-for-tangle-free-wires/

About the Author
Tamsin Okoro Who writes the patterns at Yarn Gallery, how a pattern gets from the hook to the page, and what this site will never do.


