About This Pattern
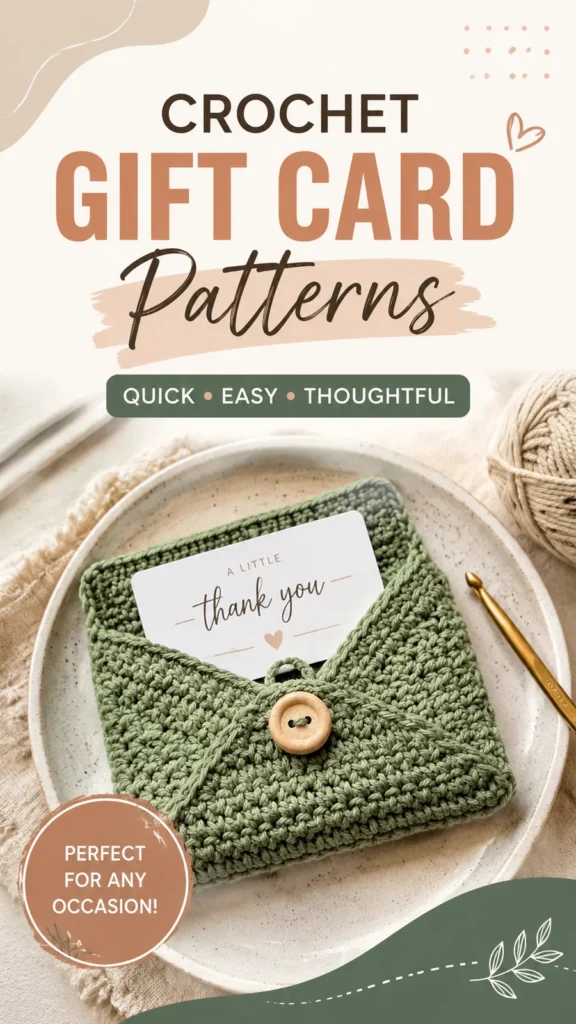
This little envelope holds a gift card or a short note. I make it in one sitting, maybe two. It starts as one flat rectangle, worked in rows. Then I fold it, and it becomes a pocket with a flap. A wooden button and a crochet loop close it shut. It needs a cotton yarn with clean stitches, not a fuzzy one. The shape depends on firm, even rows. It fits well into a gift set or a small market table.
In the basket
Abbreviations
- ch
- chain
- sc
- single crochet
- hdc
- half double crochet
- sl st
- slip stitch
- st
- stitch
- sts
- stitches
- yo
- yarn over
Crochet Envelope Gift Card Holder with Button Loop Closure
Main Rectangle
The holder is created as one rectangle. The bottom portion folds upward to create the pocket, while the top portion becomes the flap. Turning chains do not count as stitches throughout the pattern.
- Row 1Ch 31. Hdc in the second ch from hook and across. Turn. (30 sts)
- Row 2Ch 1, hdc in each st across. Turn. (30 sts)
- Rows 3–28Rows 3-28: Repeat Row 2 twenty-six more times. Turn after each row. (30 sts)
- Row 29Ch 1, sc in each st across. Turn. (30 sts)
- Row 30Ch 1, sc in each st across. Fasten off. (30 sts)
Special Stitch Explanation
Half Double Crochet (hdc): Yarn over, insert hook into indicated stitch, yarn over and pull up a loop, yarn over and pull through all three loops on the hook.
Button Loop Closure
Attach yarn to the center top edge of the flap.
Ch 12.
Sl st into the same stitch where the yarn was attached to form a loop.
Fasten off and weave in the ends securely.
Before the first stitch
- Check I have the full 60 yards of cotton yarn before starting.
- Swatch a few rows of hdc to confirm my tension matches 30 stitches across.
- Read the Button Loop Closure step once, so I know where to attach yarn later.
Minutes per piece
- Main Rectangle about 2-3 hours because it is 30 rows of hdc and sc, worked flat
- Button Loop Closure and finishing about 20-30 minutes because the loop is one short chain, plus a few ends to weave
Other yarns that work
- Fingering weight cotton Makes a smaller, thinner envelope. Needs a smaller hook, closer to 3mm. Drape softens, so the fold loses some structure.
- Worsted weight wool blend Makes a slightly bulkier pouch. Needs a hook closer to 5mm. Stitch definition softens, so the texture reads less crisp.
Where it ends up
- A gift card holder, paired with a short handwritten note.
- A small cash pouch, tucked inside a larger wrapped gift.
- A keepsake pocket for a care package, paired with a few stitched flowers.
Joining up
- Step 1 Place the rectangle flat with the shorter single crochet edge at the top.
- Step 2 Fold the bottom edge upward approximately 2.5 inches (6.5 cm) to create the pocket.
- Step 3 Using matching yarn, sew both side edges together with neat whip stitches. Leave the upper section open to form the flap.
- Step 4 Fold the flap downward and mark the button placement on the front pocket. Sew the button securely to the center front of the pocket.
- Step 5 Weave all yarn tails into the back of the fabric. Lightly block the rectangle before assembly if the edges curl. Shape the flap and pocket corners while damp and allow the piece to dry completely.
- Step 6 A small crochet accessory benefits greatly from careful finishing. Blocking helps straighten the edges, improve the shape, and create a cleaner envelope silhouette.
- Step 7 Important: Always secure the button tightly and inspect closures regularly if the holder will be used around young children. For baby or toddler gifts, avoid buttons and choose embroidered details instead.
- Step 8 For care, hand washing with mild soap is recommended for cotton crochet accessories. Reshape while damp and allow the holder to dry flat to maintain its structure.
Small notes
- I use a 4mm hook to keep the hdc fabric firm, not loose.
- A stitch marker partway through the 26 repeated rows helps me track my place without recounting.
- Even tension matters more here than stitch choice, since the folded edges show every gap.
- Finished size is approximately 4.25 inches x 6 inches (11 cm x 15 cm). Gauge is approximately 18 stitches x 12 rows in 4 inches (10 cm) using half double crochet. This pattern uses US crochet terminology.
- The pictured version uses a neutral cream color palette for a soft, rustic look, but any medium weight cotton color works well for this holder.
- If your fabric feels too loose, reduce your hook size by 0.25 mm to 0.5 mm. If the fabric feels stiff and difficult to fold, increase the hook size slightly.
- Count stitches at the end of every row and place the first stitch in the correct turning chain space.
- Try a smaller hook size or a firmer cotton yarn.
- Block the rectangle before folding and measure the pocket depth carefully.
- Reduce chain length so the loop fits snugly around the button.
- This is a confident beginner project, ideal for crocheters comfortable with basic hdc and sc stitches and simple seaming.
Little questions
Can I make the holder bigger?
Yes, add chains to the starting row to widen it. Keep the same hdc and sc pattern throughout. Add rows if I also want more height.
Do I need a stitch marker for this project?
Not strictly, but I like placing one partway through the 26 repeated rows. It keeps my row count honest over a long stretch. One marker saves me from recounting rows.
Is this a good project for a beginner?
It only uses hdc and sc, so the stitches themselves are simple. The harder part is tension and keeping the edges straight. I'd call it intermediate mostly because of the folding and finishing.
Original pattern: https://duniarecipe.com/crochet-packaging-ideas-for-handmade-gifts-and-small-business-orders/

About the Author
Tamsin Okoro Who writes the patterns at Yarn Gallery, how a pattern gets from the hook to the page, and what this site will never do.