About This Pattern
You'll work through continuous spiral rounds for the legs, body, and head, flat turning rows for the ears, muzzle patch, lip, and cardigan, and joined rounds with a turning chain for the overalls — so by the finish you'll have practiced nearly every core amigurumi construction method. The bobble stitch is used repeatedly for hooves, horns, and the cardigan's textured front, so getting comfortable with it early pays off. Plan on roughly 4 to 6 hours total, split naturally by part: legs and tail one sitting, body and head another, then the wardrobe pieces last.
The finished cow stands sturdy on her four stuffed legs, with a broad two-tone face, embroidered eyebrows for expression, and a tasseled tail poking out from beneath her overalls. She has real presence on a shelf — soft, huggable, and detailed enough to hold up to close inspection. Because every piece is worked in yarn ends and fastened off cleanly, she also makes a lovely handmade gift for a farmhouse-nursery theme, a baby shower, or any crochet lover who appreciates a project with a full outfit change built in.
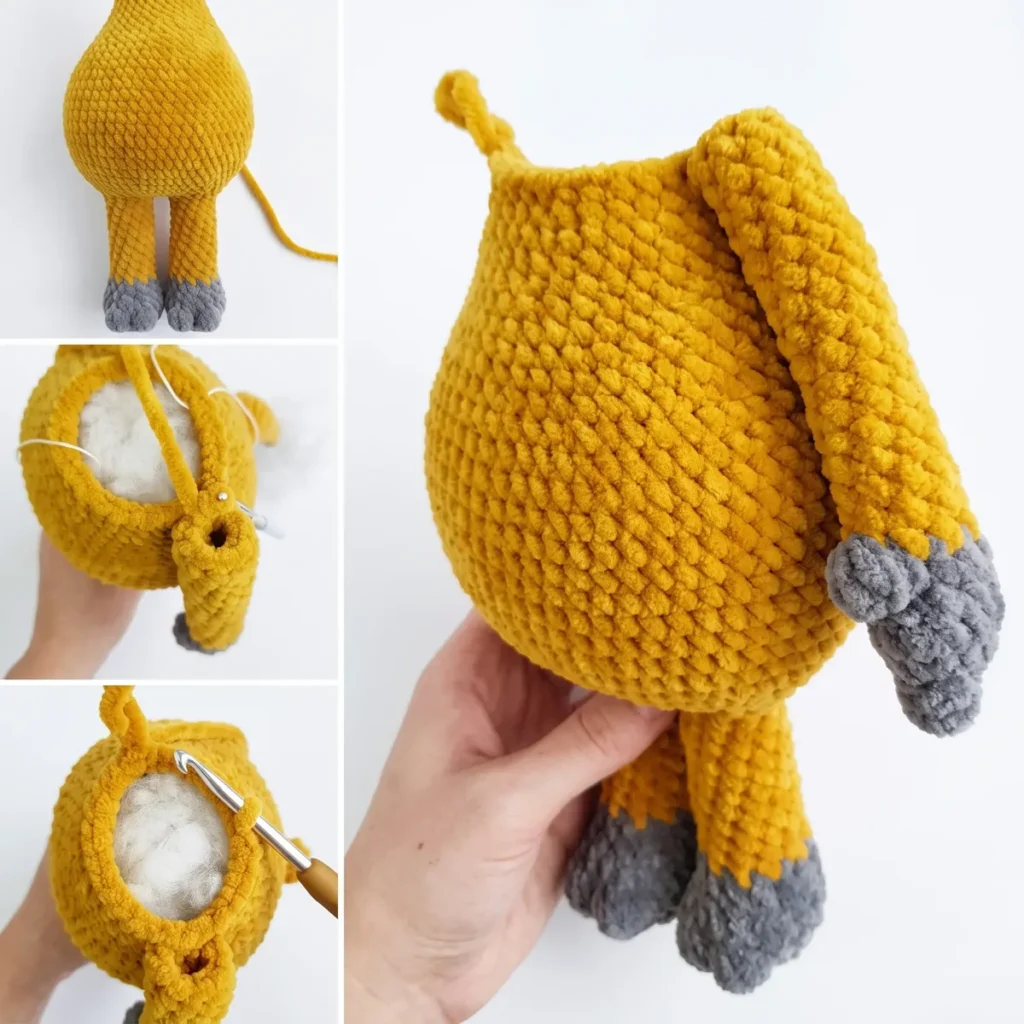
- Make the back legs and body as one continuous piece, starting each leg separately and joining them to continue upward.
- Work the head as its own spiral piece, shaping the muzzle area and adding bobble accents before closing and stuffing it.
- Crochet the smaller flat pieces — the muzzle patch, lip, and both ears — in turning rows and set them aside for assembly.
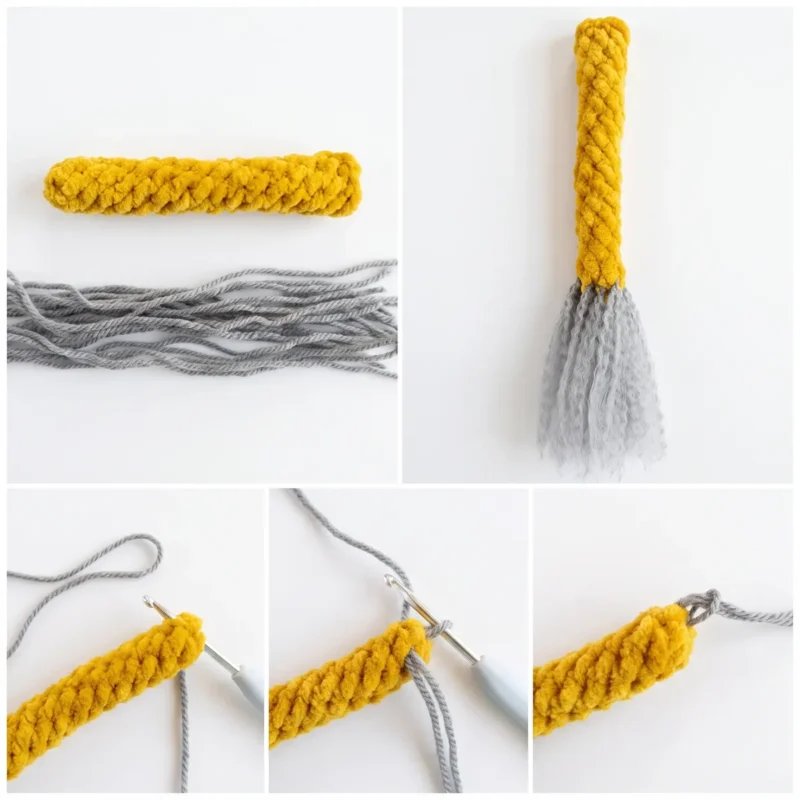
- Stitch the tail in a tight spiral tube, flatten and close its open end, then knot on a fringed tassel at the tip.
- Attach the safety eyes and embroider the eyebrows and nostrils onto the head before joining the head to the finished body.
- Crochet the cardigan in turning rows using the smallest hook, then sew on its single button for closure.
- Finish with the overalls worked in joined rounds and the booties on the larger hook, adding buttons and laces to complete the outfit.
Materials
Yarn
Yarn
Yarn
Yarn
Yarn
Yarn
Yarn
Yarn
Yarn
Hook
Hook
Buttons
Tools
Crochet Abbreviations
- BLO
- Back Loop Only
- ch
- Chain
- dc
- Double Crochet
- dec
- Decrease (2 sc worked together through the front loops)
- FLO
- Front Loop Only
- hdc
- Half Double Crochet
- inc
- Increase (2 sc in the same stitch)
- MR
- Magic Ring
- sc
- Single Crochet
- sc3tog
- Single Crochet 3 Stitches Together (used to join a piece in place)
- sl st
- Slip Stitch
- st(s)
- Stitch(es)
Crochet Overalls Cow Amigurumi Pattern: Farmhouse Cutie
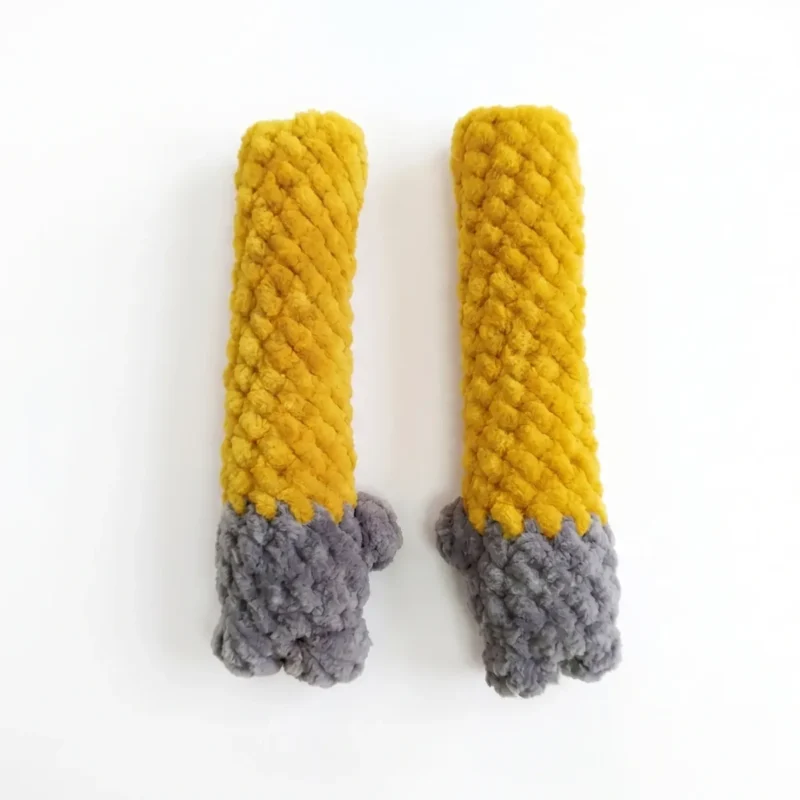
Front Legs (make 2)
Make 2Change yarn to color 80330 for the rest of the leg after Rnd 4.
Stuff the lower portion of the leg firmly. Fasten off and weave in the end.
- Round 1Ch 5. Starting in the 2nd ch from hook: 5-dc Bobble, 1 sc, 5-dc Bobble, 3 sc in last ch; working into the other side of the foundation chain: 3 sc, then 3 sc in the same st, 3 sc, inc. (13) Place a marker here — this becomes the start of the round from here on.
- Round 2Sc in each st around. (13)
- Round 3Dec, 4 sc, dec, 5 sc. (11)
- Round 4(Leg 1): 4 sc, 5-dc Bobble, 6 sc. (11)
- Round 4(Leg 2): 6 sc, 5-dc Bobble, 4 sc. (11)
- Round 5Dec, 9 sc. (10)
- Round 6-20Sc in each st around. (10) (15 rounds total)
Tail
Flatten the open end so the two sides meet, then work 1 sc through both layers at each stitch across to close it flat. Fasten off and weave in the end.
For the tassel: cut 15–20 strands of color 490 yarn, each 15 cm (6 in) long. Fold a strand in half, pull the folded midpoint through the last stitch at the tail tip with your hook, then thread the loose ends through that loop and pull snug. Repeat with the remaining strands until the tassel looks full.
- Round 16 sc in MR. (6)
- Round 2-16Sc in each st around. (6) (15 rounds total)
Back Legs (make 2) and Body
Start each back leg separately using color 80320.
Change yarn to color 80330 after Rnd 7. Begin stuffing as you go.
One leg is complete — fasten off and weave in the end. Repeat Rnds 1–18 for the second leg, but do not fasten off the second leg; continue directly into the body.
Place a marker at Rnd 19 — this becomes the start of the round.
Rnd 44 shifts the marker forward 16 sts, moving the start of the round to the back of the body so the shaping in the next rounds lands correctly on the front.
Fasten off and weave in the end. Shape the body by hand as you finish stuffing — kneading it gently helps the fiberfill settle evenly and gives the piece a smooth, rounded silhouette.
- Round 16 sc in MR. (6)
- Round 2Inc in each st around. (12)
- Round 3(1 sc, inc) around. (18)
- Round 4BLO: 7 sc, (5-dc Bobble, 1 sc) twice, 7 sc. (18)
- Round 5Sc in each st around. (18)
- Round 63 sc, (1 sc, dec) 4 times, 3 sc. (14)
- Round 7Sc in each st around. (14)
- Round 84 sc, (dec, 1 sc) twice, 4 sc. (12)
- Round 9-18Sc in each st around. (12) (10 rounds total)
- Round 19Ch 2 to join the two legs (on the second leg, join into the 7th stitch, making sure the legs face forward evenly), 6 sc, inc, 5 sc, 2 sc across the joining chain, 5 sc, inc, 6 sc, 2 sc across the joining chain. (30)
- Round 20(4 sc, inc) around. (36)
- Round 21(5 sc, inc) around. (42)
- Round 223 sc, (inc, 6 sc) 5 times, inc, 3 sc. (48)
- Round 23(7 sc, inc) around. (54)
- Round 244 sc, (inc, 8 sc) 5 times, inc, 4 sc. (60)
- Round 25-32Sc in each st around. (60) (8 rounds total)
- Round 3327 sc, sc3tog while attaching the tail, 30 sc. (60)
- Round 34Sc in each st around. (60)
- Round 354 sc, (dec, 8 sc) 5 times, dec, 4 sc. (54)
- Round 36(7 sc, dec) around. (48)
- Round 37Sc in each st around. (48)
- Round 383 sc, (dec, 6 sc) 5 times, dec, 3 sc. (42)
- Round 39Sc in each st around. (42)
- Round 40(5 sc, dec) around. (36)
- Round 41-43Sc in each st around. (36) (3 rounds total)
- Round 44(4 sc, dec) around, then shift your marker forward 16 sts. (30)
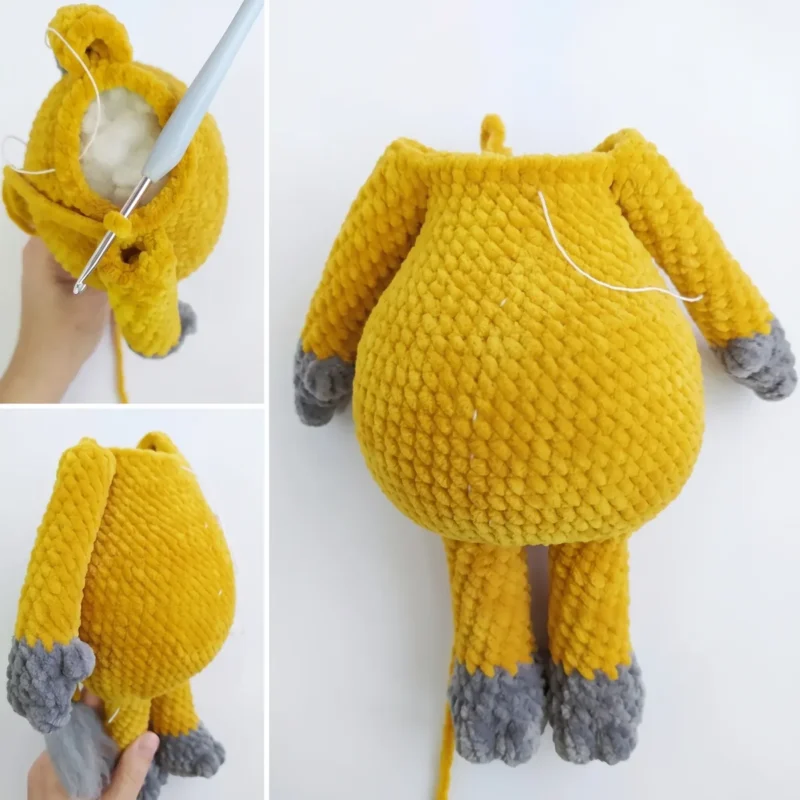
- Round 456 sc, sc3tog while attaching a front leg, 13 sc, sc3tog while attaching the second front leg, 5 sc. (30)
- Round 466 sc, 7 sc across the attached front leg, 13 sc, 7 sc across the attached front leg, 5 sc. (38)
- Round 474 sc, dec, 1 sc, dec, 9 sc, dec, 7 sc, dec, 3 sc. (34)
- Round 483 sc, (dec, 7 sc) 3 times, dec, 2 sc. (30)
- Round 49(3 sc, dec) around. (24)
- Round 50(2 sc, dec) around. (18)
- Round 51Sc in each st around. (18)
Head
Rnd 9 is where the safety eyes will be placed later — see Assembly.
Finish stuffing the head firmly, then cinch the opening closed. Fasten off and weave in the end.
- Round 1Ch 6. Starting in the 2nd ch from hook: 4 sc, 3 sc in last ch; working into the other side of the chain: 3 sc, inc. (12)
- Round 2Inc, 3 sc, (inc) 3 times, 3 sc, (inc) twice. (18)
- Round 31 sc, inc, 3 sc, (1 sc, inc) 3 times, 3 sc, (1 sc, inc) twice. (24)
- Round 42 sc, inc, 3 sc, (2 sc, inc) 3 times, 3 sc, (2 sc, inc) twice. (30)
- Round 53 sc, inc, 3 sc, (3 sc, inc) 3 times, 3 sc, (3 sc, inc) twice. (36)
- Round 64 sc, inc, 3 sc, (4 sc, inc) 3 times, 3 sc, (4 sc, inc) twice. (42)
- Round 7-8Sc in each st around. (42) (2 rounds total)
- Round 928 sc, then change yarn to color 80330 and sc to the end of the round. (42)
- Round 102 sc, FLO: (hdc inc) 12 times, 28 sc. (54)
- Round 114 sc, (inc, 8 sc) 5 times, inc, 4 sc. (60)
- Round 12-17Sc in each st around. (60) (6 rounds total)
- Round 18BLO: sc in each st around. (60)
- Round 19Sc in each st around. (60)
- Round 20(8 sc, dec) around. (54)
- Round 21(7 sc, dec) around. (48)
- Round 22(6 sc, dec) around. (42)
- Round 23(5 sc, dec) around. (36)
- Round 24(4 sc, dec) around. (30)
- Round 25(3 sc, dec) around. (24)
- Round 26(2 sc, dec) around. (18)
- Round 27(1 sc, dec) around. (12)
- Round 28Dec around. (6)
Muzzle Patch
On Rnd 18 of the head, count 11 stitches from the start of the round and join yarn through the front loops only. Work in flat turning rows.
Fasten off, leaving a tail for sewing.
- Round 1Sc in each of 12 sts, turn. (12)
- Round 2Ch 1, sc in each of 12 sts, turn. (12)
- Round 3Ch 1, dec, 8 sc, dec, turn. (10)
- Round 4Ch 1, sc in each of 10 sts, turn. (10)
- Round 5Ch 1, dec, 6 sc, dec, turn. (8)
- Round 6Ch 1, sc in each of 8 sts, turn. (8)
- Round 7Ch 1, dec, 4 sc, dec, turn. (6)
- Round 8Ch 1, sc in each of 6 sts, turn. (6)
- Round 9Ch 1, dec, 2 sc, dec, turn. (4)
- Round 10Ch 1, sc in each of 4 sts. (4)
Lip
Fasten off, leaving a tail for sewing.
- Round 15 sc in MR, turn. (5)
- Round 2Ch 1, inc in each st around. (10)
Ears (make 2)
Make 2- Round 1Ch 8. Starting in the 2nd ch from hook: 6 sc, 3 sc in last ch; working into the other side of the chain: 6 sc, turn. (15)
- Round 2Ch 1, 6 sc, (inc) 3 time
More photos
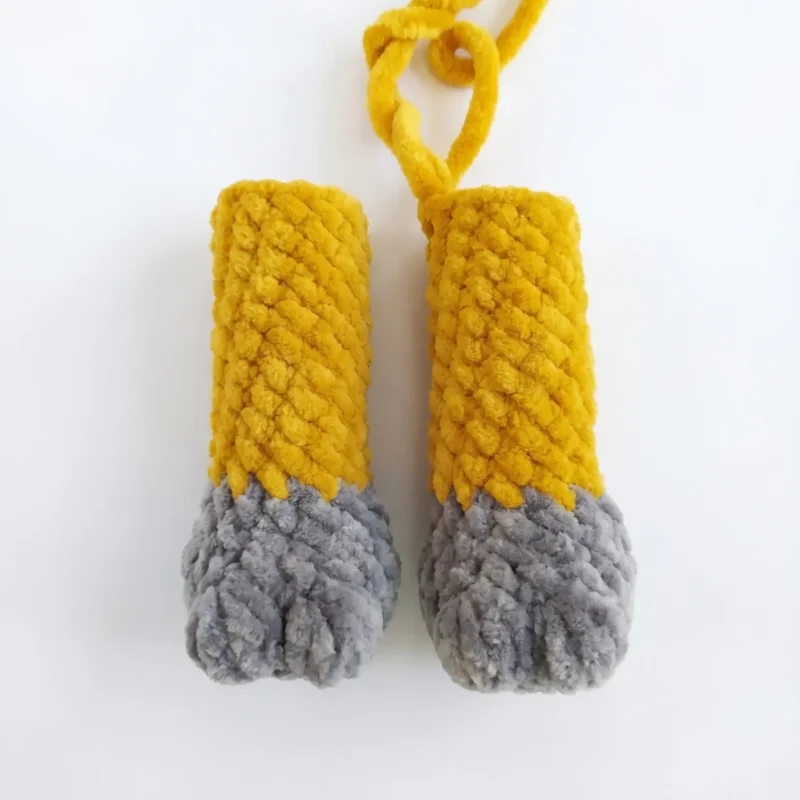
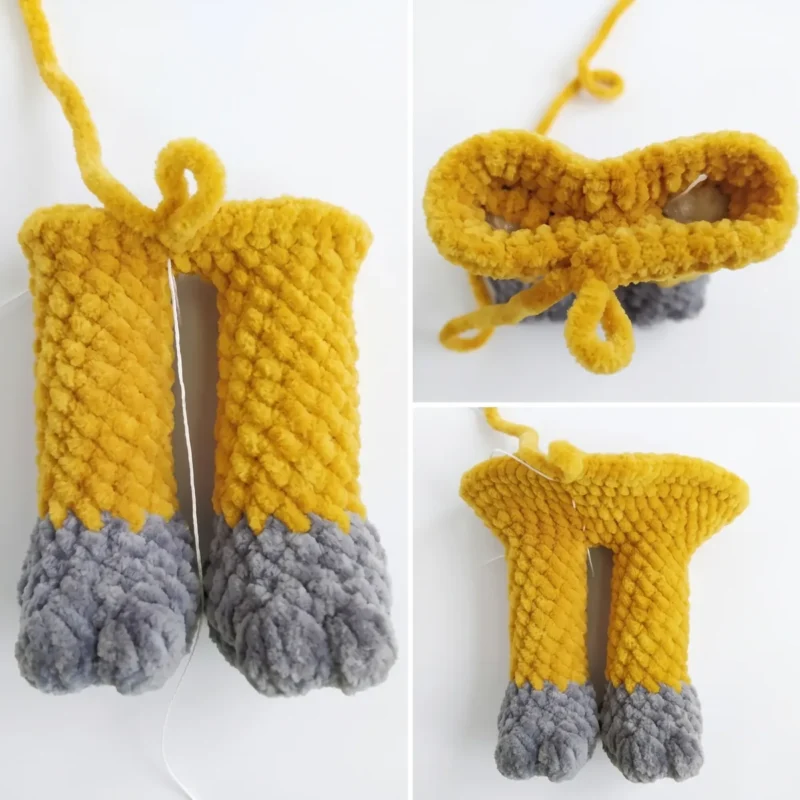
Putting It Together
- Step 1 Sew the muzzle patch onto the head so its narrow end sits on Rnd 10, between the 4th and 9th hdc increases from Rnd 10.
- Step 2 Sew the safety eyes onto Rnd 9 of the head: the first eye directly below the 3rd hdc increase, the second eye directly below the 10th hdc increase. Symmetry matters, but don’t chase perfection — small imperfections give the toy handmade charm.
- Step 3 Shape the muzzle indent: insert the needle between Rnds 10–11 of the head, bring it out at the 4th hdc increase on Rnd 10, insert it again at the 9th hdc increase on Rnd 10, then bring it back out between Rnds 10–11. Pull gently to cinch, and tie off once you like the shape.
- Step 4 Shape the eye and mouth indent: insert the needle between Rnds 4–5 of the head, bring it out at Rnd 9 where the first eye sits, insert it back in at Rnd 9, and bring it out again between Rnds 4–5. Repeat the same sequence for the second eye. Pull both sets of stitches to cinch a soft mouth indent, then run the thread back to the first cinch point, pull snug, tie off, and hide the tail.
- Step 5 Sew the horns onto Rnd 18 of the head.
- Step 6 Sew the ears on between Rnds 15–20 of the head.
- Step 7 Sew the nostrils onto Rnd 5 of the muzzle patch, spacing them roughly 6–7 sc apart.
- Step 8 Embroider the eyebrows with black yarn.
- Step 9 Glue on the eyelashes.
- Step 10 Sew the lip onto Rnds 5–6 of the muzzle patch, adjusting placement until it looks right.
- Step 11 Sew the head onto the body using a whipstitch, working through both loops of matching stitches for a clean, invisible seam.
- Step 12 Shape the bottom: insert the needle at the back of the body, under the tail, between Rnds 32–33, bring it out between the legs, and return through the same path. Repeat a couple of times, pull to cinch, tie off, and weave in the end.
- Step 13 Dress Burenka in her cardigan, overalls, and booties, and lace up the booties with the white laces.
- Step 14 Weave in any remaining loose ends throughout the project.
Important Notes
This pattern uses only US crochet terminology, so if you're used to UK terms, convert before you begin — a US sc is a UK dc, and so on.
The legs, body, and head are worked in continuous spiral rounds with a stitch marker, while the ears, muzzle patch, lip, and cardigan use flat turning rows — read each section's setup line closely so you know which method to use.
The overalls are the one piece worked in joined rounds closed with a slip stitch and turning chain, which creates a small seam line; plan your buttonhole and button placement with that seam in mind for a neat finish.
Have both safety eyes/beads and your embroidery yarn for the eyebrows ready before you close up the head, since facial features are much easier to place accurately while there's still an opening to work through.
This pattern is written entirely in US crochet terminology.
The legs, body, and head are worked in continuous spiral rounds — place a stitch marker in the first stitch of each round and move it up as you go. The ears, muzzle patch, lip, and cardigan are worked in flat turning rows. The overalls are worked in joined rounds, closed with a slip stitch and a turning chain at the start of each round.
This pattern uses a special stitch called a Bobble: work 3 unfinished double crochets into the same stitch (yarn over, insert hook, pull up a loop, yarn over and draw through 2 loops — repeat twice more into the same stitch), then yarn over and draw through all 4 remaining loops on the hook to close. A 5-dc Bobble follows the same method with 5 unfinished dc's before closing.
Gauge isn't critical for this toy, but a tighter gauge keeps stuffing from peeking through. With the materials listed, the finished cow measures approximately 36 cm (14 in) tall.
Stitch counts are given in parentheses at the end of every round or row.
Stuff firmly but gradually as you go — overstuffing can stretch and distort the stitches, so add fiberfill in small amounts and check the shape often.
Safety eyes are placed on Rnd 9 of the head, and full facial shaping (cinching) instructions are included in the Assembly section below.
Common Mistakes and Fixes
Losing track of the stitch marker in the continuous spiral rounds on the legs, body, and head.
Move your marker into the first stitch of every new round the moment you complete it, before you crochet even one more stitch, so you never have to guess where the round started.
Working the bobble stitch too loosely, so the hooves and horns look flat instead of raised.
Keep consistent tension on each of the three unfinished double crochets and pull the final yarn-over through firmly so the bobble pops forward from the surrounding single crochets.
Mixing up BLO and FLO rounds on the body and head, which throws off the color-break ridge detail.
Double-check which loop the pattern calls for before starting that round, and mark the front loop with a stitch marker on your first stitch if you tend to lose track mid-round.
Under-stuffing the legs and body before closing them up.
Stuff firmly as you go, especially in the lower leg and hoof areas, pressing stuffing into the bobble hooves specifically so they hold their shape once the piece is closed.
Rushing the tail tassel and ending up with a thin, uneven fringe.
Cut all 15-20 strands to the same 15 cm length ahead of time and add them in small even batches around the closed tip so the tassel fills out uniformly on all sides.
Frequently Asked Questions
What yarn weight does this cow amigurumi pattern use?
It primarily uses a DK/light worsted weight yarn for the body along with several worsted and fingering-weight yarns for accent details like the tail tassel, nostrils, and eyebrows. Using the same weight family throughout keeps the proportions between the cow and her outfit consistent.
Do I need to know the bobble stitch before starting?
It helps to practice a 5-dc bobble on a scrap swatch first since it's used repeatedly for the hooves, horns, and cardigan detailing. Once you've made one bobble cleanly, the rest of the pattern goes much faster.
Can I make the overalls and cardigan separately from the cow?
Yes, both the cardigan and overalls are worked as their own distinct pieces using smaller hooks, so you could crochet the outfit on its own timeline once the cow's body is finished and stuffed. Just be sure to check the fit against your finished body before sewing on buttons.
What size safety eyes work best for this pattern?
The pattern calls for safety eyes or 12mm beads, which suit the head's proportions well. If you're making this for a very young child, embroidered eyes are a safer substitute for safety eyes or beads.
Original pattern: https://amigurumicorner.com/overalls-amigurumi-cow-pattern/

About the Author
Tamsin Okoro Who writes the patterns at Yarn Gallery, how a pattern gets from the hook to the page, and what this site will never do.


