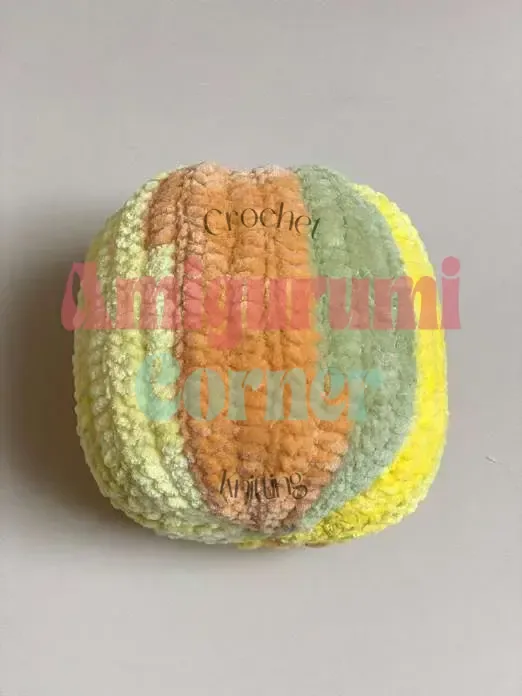
About This Pattern
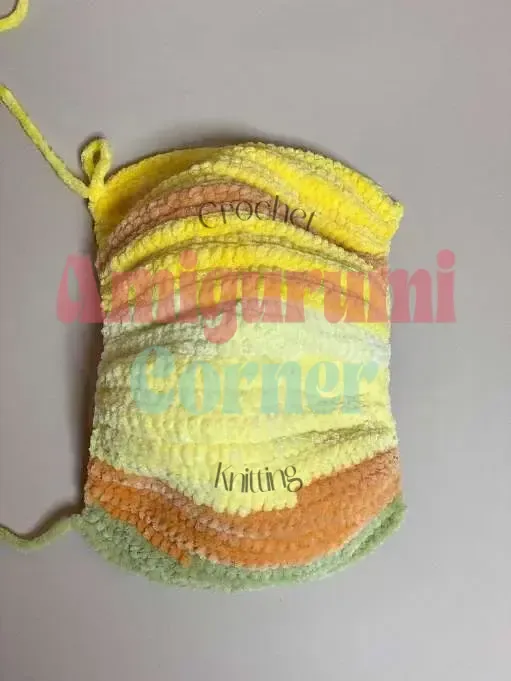
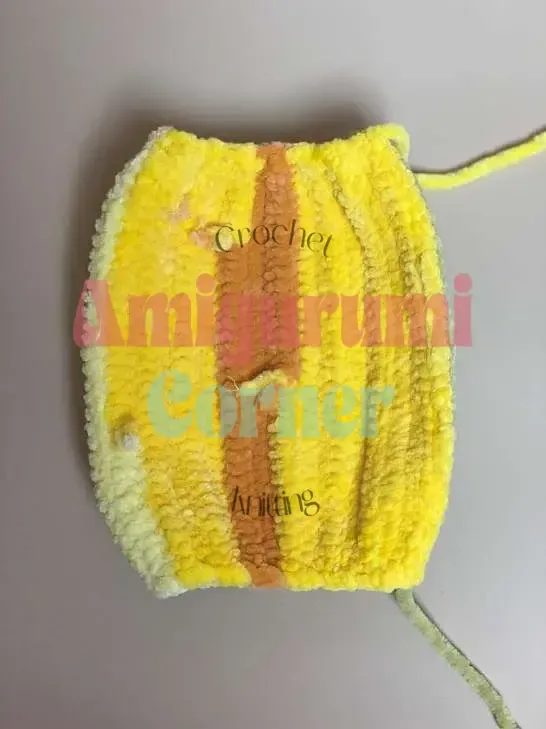
This pumpkin starts as a flat strip, then becomes a ridged gourd. I work twenty-nine rows of single and half-double crochet, turning each time. The ridges only appear once I cinch the fabric with thread and a doll needle. It's a quiet, close-up task — good for a slow evening, not a quick one. I keep my stuffing nearby and a second color ready for the stem. The piece needs patience more than speed, and steady hands for the cinching.
In the basket
Yarn
Yarn
Yarn
Abbreviations
- BLO
- Back Loop Only
- ch
- Chain
- dc
- Double Crochet
- hdc
- Half Double Crochet
- inc
- Increase (2 stitches in the same stitch)
- mr
- Magic Ring
- sc
- Single Crochet
- sl st
- Slip Stitch
Crochet pumpkin pattern with cinched ridge texture
Pumpkin Body (make 1)
Leave a 40cm (16in) tail at the very start of your foundation chain — you’ll use this later to cinch the piece closed.
- Row 1Ch 35. Starting in 2nd ch from hook, working in BLO throughout: 3 sc, 28 hdc, 3 sc, ch 1, turn. (34)
- Rows 2–29Repeat Row 1 across, working in BLO throughout (28 more rows; 29 rows total). Change yarn colors randomly as you go for a natural, variegated look. (34)Fasten off, leaving another 40cm (16in) tail for seaming.
Bottom Stem (make 1)
- Round 19 sc in mr, sl st to join. (9)Leave a tail for sewing — this stem attaches to the base of the finished pumpkin.
Top Stem & Tendril (make 1)
- Round 15 sc in mr. (5)
- Rounds 2–5Sc in each st around, worked even (4 rounds total). (5)
- Round 6Inc in each st around. (10)
- Round 7Inc in each st around. (20)
- Round 8(ch 2, work [2 dc inc] in next st, sl st in next st) — repeat 10 times around. Do not fasten off. Continue directly into the tendril using the working yarn.Tendril Row: Ch 12. Starting in 2nd ch from hook: (1 sc, inc) — repeat 5 times, then sl st in last ch. (15)Leave a long tail for sewing the stem in place.
More pictures
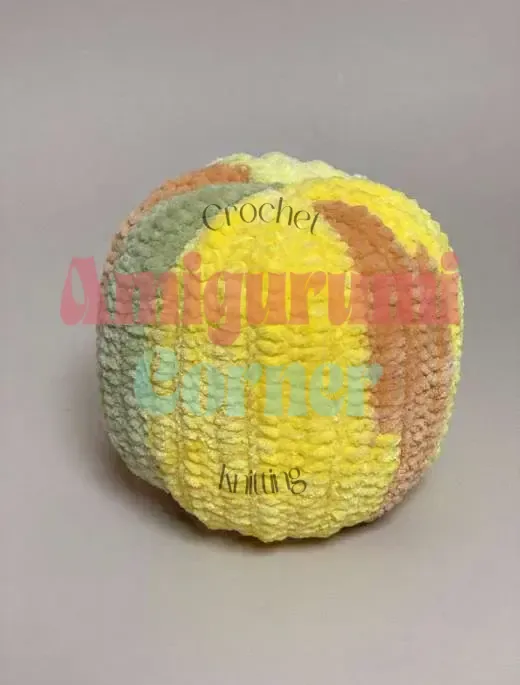
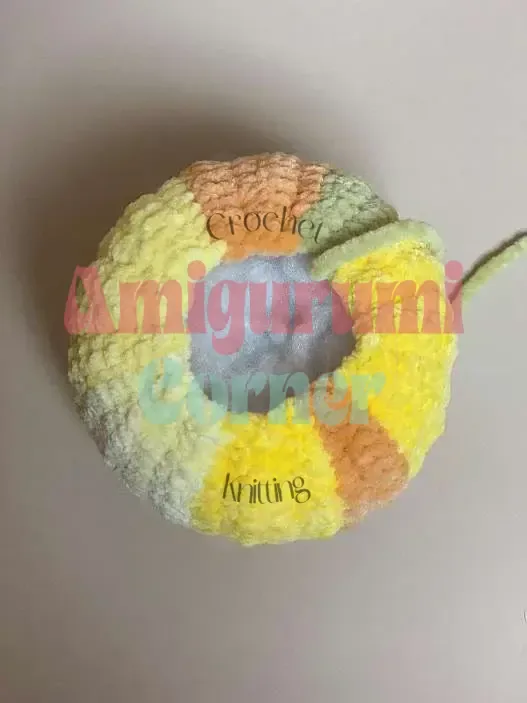
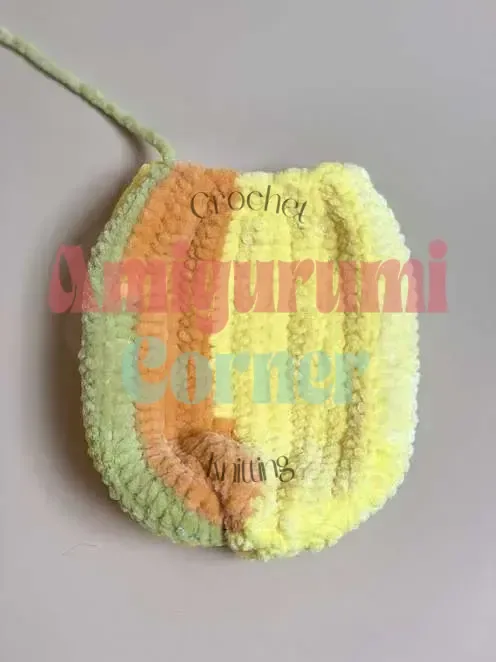
Before the first stitch
- Count your rows before you start cinching — all twenty-nine matter.
- Keep about two meters of cotton thread ready for the ridges.
- Swatch a few rows first, to check your hook gives a tight fabric.
Minutes per piece
- Pumpkin Body about 2 hours, because twenty-nine rows add up row by row.
- Stems, cinching, and stuffing about 1.5 hours, because the ridges need careful, slow tension.
Other yarns that work
- Worsted-weight cotton-acrylic blend A smaller pumpkin, with crisper stitches and clearer ridges.
- Chunky wool-acrylic blend A larger, fluffier pumpkin, needing a bigger hook and softer drape.
Where it ends up
- A centerpiece for a kitchen table, paired with a small gourd bowl.
- A paperweight for a desk, next to stacked notebooks.
- A soft toy for a child's shelf, beside other amigurumi.
Joining up
- Step 1 Fold the Pumpkin Body piece in half widthwise so the two short side edges meet. Join the edges together with sl st down the seam, then fasten off, leaving a 40cm (16in) tail.
- Step 2 Using the original starting tail, cinch the bottom of the tube closed and sew the opening shut.
- Step 3 Turn the piece right side out.
- Step 4 Begin stuffing the pumpkin firmly with fiberfill, adding stuffing evenly as you gather and cinch the top opening closed.
- Step 5 Close the top opening completely and sew it shut. Weave the tail down inside the pumpkin body to hide it.
- Step 6 Thread your long doll needle with the 2m (79in) length of cotton thread. Secure the thread at the top center of the pumpkin, then pass the needle down through the body and back up to the top to pull a vertical ridge into the surface. Repeat evenly around the pumpkin for a total of 8 cinches, creating 8 well-defined pumpkin ridges. Fasten off and trim the thread.
- Step 7 Using the tail from the Bottom Stem, sew it centered onto the base of the pumpkin.
- Step 8 Using the tail from the Top Stem & Tendril, sew the stem onto the top of the pumpkin, positioning it where the ridges converge.
- Step 9 Weave in all remaining yarn ends.
Small notes
- I use a 3mm or 3.25mm hook here, for a snug, tight fabric.
- The long doll needle makes the ridge cinching much easier to control.
- I stuff firmly before closing the top opening, so the shape holds.
- This pattern is written in US crochet terminology.
- The pumpkin body is worked in flat, turning rows. The stem and tendril are worked in joined rounds, using a slip stitch to close each round.
- Gauge is not critical for this project — a smaller hook simply produces a denser, more structured fabric, which is recommended here. This particular design finishes at approximately 12 x 9 cm (excluding the stem).
- Because the shaping is controlled by chain length and row count, you can freely resize this pumpkin — just adjust your starting chain and total number of rows to make it taller, shorter, wider, or narrower.
- Working the entire body in back loops only isn't just a texture choice — it leaves the front loops free and creates a ribbed foundation that helps your 8 cinched ridges sit cleanly and evenly once you gather the sides.
- Before you begin the ridge-cinching step, use a scrap of yarn or a stitch marker to note the very top center of the pumpkin. Space your remaining 7 cinches evenly around from that point so the ridges land symmetrically.
- If your plush yarn is too slippery to cinch into a magic ring, chain 2 instead and work your first round of stitches into the second chain from the hook.
Little questions
What size is the finished pumpkin?
The finished pumpkin measures approximately 12 x 9 cm, not including the stem. This can vary slightly depending on your yarn weight, hook size, and how firmly you stuff the piece.
Can I make this pumpkin bigger or smaller?
Yes. Because the shaping comes from your starting chain length and total row count rather than complex increases, you can adjust both to change the size and proportions. A longer chain creates a wider pumpkin, while more rows create a taller one.
My plush yarn won't cinch into a magic ring. What should I do?
This is common with slippery or fuzzy plush yarns. Simply chain 2 instead of forming a magic ring, then work your first round of stitches into the second chain from the hook. Join as usual with a slip stitch.
Why does the pattern specify working in back loops only?
Working in back loops only throughout the pumpkin body leaves the front loops exposed, creating a subtle ribbed texture. This texture helps the eight cinched ridges sit more cleanly and evenly once you gather the sides at the end.
Original pattern: https://amigurumicorner.com/crochet-amigurumi-pumpkin-pattern/

About the Author
Tamsin Okoro Who writes the patterns at Yarn Gallery, how a pattern gets from the hook to the page, and what this site will never do.


