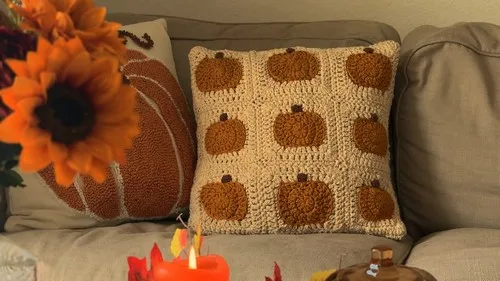
About This Pattern
This pumpkin pillow cover takes the classic granny square and turns it into a playful piece of fall home decor. Instead of stopping at a flat square, you'll round it out into a rounded pumpkin shape, then add a sweet little brown stem worked in double crochet for that finishing touch. It's perfect for crocheters who already love granny squares but want to try something more dimensional and seasonal, whether you're decorating your own reading nook or making a thoughtful housewarming gift.
The techniques here build on traditional granny square construction across four rounds, with the fourth round worked in a contrasting corner color to really make the pumpkin pop against its background. You'll also practice a classic envelope-style pillow back, working two half double crochet rectangles that overlap to create an easy-access opening, then joining everything with a single crochet seam through all three layers. Expect this project to take a comfortable weekend, especially if you're already familiar with basic granny square rhythm and color changes.
When you're done, you'll have a plush, textured pillow cover with a raised granny square pumpkin front and a clean, tailored back that hides your pillow form seamlessly. The dimensional stitching gives it a handmade, cottagecore charm that photographs beautifully on a porch swing or living room chair. It makes a wonderful gift for anyone who loves fall styling, and honestly, it's satisfying enough to want to make a whole patch of them.
- Start by building the pumpkin front through three rounds of classic granny square shaping in your main color.
- Create a small stem separately using a short foundation chain and a couple of double crochet stitches.
- Attach the finished stem to the top of the granny square with a yarn needle for a secure, tidy join.
- Chain and work two flat rectangles in half double crochet for the pillow back, matching the front panel's width.
- Continue each back rectangle in rows until it reaches just past half the front panel's height.
- Layer the two back rectangles over the front panel so their edges overlap in the middle.
- Single crochet around the entire pillow through all three overlapping layers to join everything into one finished cover.
Materials
Crochet Abbreviations
- ch
- chain
- st
- stitch
- sl st
- slip stitch
- sc
- single crochet
- hdc
- half double crochet
- dc
- double crochet
- inc
- increase
- dec
- decrease
- mr
- magic ring
- fo
- finish off
Crochet Pumpkin Pillow Cover with Granny Squares
Creating the Pumpkin Granny Square
- Round 1Start with a magic ring, then chain three or use a chainless double crochet for the first stitch.Make nine more double crochets for a total of 10 stitches.Slip stitch to close.
- Round 2Chain three or use a chainless double crochet. Make two double crochets in each stitch for a total of 20 stitches.Slip stitch to close.
- Round 3Chain one and make a single crochet into the first stitch. Follow the pattern to create the pumpkin shape using a mix of single crochets and double crochets.Use three slip stitches for an indented look.Cut and fasten off the yarn at the end of the round.
For Round 4 (Using the corner color yarn)
Attach new yarn to the back loop of the last slip stitch from the previous round.
Create corners by placing three double crochets together, and use a mix of half double crochets and single crochets for the sides.
Slip stitch to join at the end of the round.
- Round 5Start with a chain three or a chainless double crochet. Make one double crochet in each of the next four stitches.In the middle of the corner, work six double crochets.Continue this pattern for the remaining sides and corners, with eight double crochets along the sides.Slip stitch to join.
Adding the Stem
- StemAttach brown yarn and chain five. Make a double crochet into the second and third chains from the hook.Cut the yarn and fasten off.Use a yarn needle or crochet hook to attach the stem to the granny square.
More photos
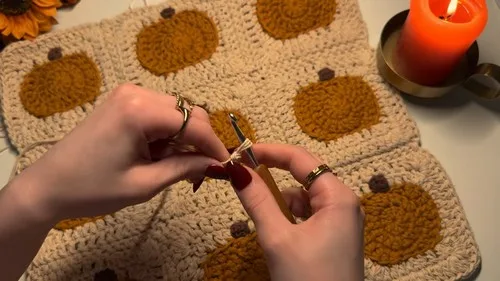
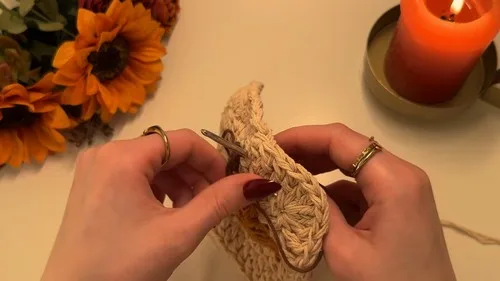
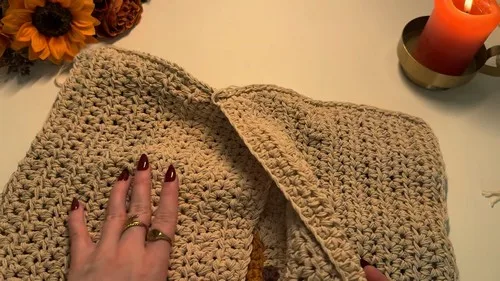
Putting It Together
- Step 1 Make a total of nine granny squares for a one-sided pillow or 18 for a two-sided pillow.
- Step 2 Arrange the squares in a 3x3 layout.
- Step 3 Join the squares together using single crochets, working on the back side to keep the front neat.
- Step 4 Crochet two separate rectangles for the back of the pillow.
- Step 5 Chain 42 (or the length of your front panel) plus two for turning.
- Step 6 Make half double crochets all the way across.
- Step 7 Continue in rows until the rectangles are a little longer than half the height of the front panel.
- Step 8 Place the two back rectangles on the front panel so they overlap.
- Step 9 Single crochet all the way around the pillow to join all the pieces together, inserting your hook through all three layers where they overlap.
- Step 10 Turn the pillow cover right side out and insert the pillow form.
Important Notes
💡 Use a hook one size smaller than you normally would for granny squares if you want extra-defined, crisp ridges in Round 4 — tighter stitches show off the contrast color beautifully.
💡 Weave in your Round 4 color-change tails as you go rather than waiting until the end, since this round has a very visible right side and stray ends can peek through.
💡 When cutting yarn for the stem, leave a generous tail (at least 6 inches) on both ends so you have plenty to work with when sewing it onto the granny square.
💡 Dry-fit your pillow form inside the cover before doing your final single crochet join, adjusting the overlap of the back panels if the fit feels too tight or too loose.
💡 Use stitch markers to mark the corners of your front granny square before you start joining, so you can easily keep your single crochet stitch count even on all four sides.
Common Mistakes and Fixes
Making the stem too long or too thick
Stick closely to the chain five foundation and only two double crochet stitches as directed; if you want a slightly longer stem, add just one or two extra chains rather than doubling the length.
Attaching the stem with visible knots
Use a yarn needle to weave the stem's fastened-off tail through the top center of the granny square several times in different directions before trimming, so it's anchored invisibly and won't wiggle loose.
Chaining the back rectangles
Always measure your finished front panel's width first, then chain that number plus two for turning; if your granny square finishes at a different size than 42 stitches, adjust your foundation chain to match exactly.
Not overlapping the two back rectangles
Overlap the two back pieces by at least two to three inches, and pin or clip them in place against the front panel before you start the joining round so the overlap stays consistent all the way around.
Missing layers while single crocheting
Slow down at the overlap section and consciously check that your hook is going through all three layers together — front panel plus both back panels — every single stitch in that zone, not just two.
What Makes It Good
- There's something so satisfying about watching a plain granny square transform into a pumpkin right before your eyes, and that's exactly what happens here. I love how Round 4 uses a contrasting corner color yarn to define those classic pumpkin ridges — it's a simple trick, but it makes the whole piece read instantly as 'pumpkin' instead of just 'square.' Then there's the stem: a tiny chain-five foundation with a couple of double crochets, cut and fastened off, then stitched on with a yarn needle. It's such a small detail, but it's the one that makes people smile when they spot your pillow on the couch. I also appreciate that the back panel construction is genuinely practical — those two overlapping half double crochet rectangles create a no-fuss envelope closure, so you can slip your pillow form in and out without wrestling with buttons or zippers. Joining everything with a single crochet seam through all three layers at once feels like a satisfying final step, like you're literally stitching the whole project together in one confident pass. It's the kind of project where every part serves a purpose.
Frequently Asked Questions
What size pillow form does this cover fit?
The size is flexible since the back rectangles are chained to match your front panel's width, so you can size the whole project up or down. Just measure your pillow form and adjust your granny square rounds and back panel chain length to fit.
Can I make this pillow cover without doing a color change for Round 4?
Yes, you can work Round 4 in the same main color if you prefer a more subtle, monochrome look. The contrast color simply helps the pumpkin ridges stand out more, but it's entirely optional.
Do I need to sew a zipper or buttons onto the back?
No, this pattern uses an envelope-style back with two overlapping panels, so there's no zipper or button closure needed. You simply slide the pillow form in through the overlap after the cover is joined.
What yarn weight works best for this pattern?
A worsted weight yarn works wonderfully here since it gives the granny square good structure and a nice plump look once stuffed. Cotton-acrylic blends hold their shape well for pillow covers and are easy to spot-clean.
How do I attach the stem so it doesn't come loose over time?
Use a yarn needle to weave the stem's tail securely through the center top of the granny square in multiple directions before trimming. Weaving it in several passes, rather than a single knot, keeps it firmly anchored through regular pillow handling.
Original pattern: https://crocheteverything.com/crochet-pumpkin-pillow-cover-made-of-granny-squares-tutorial/

About the Author
Tamsin Okoro Who writes the patterns at Yarn Gallery, how a pattern gets from the hook to the page, and what this site will never do.


