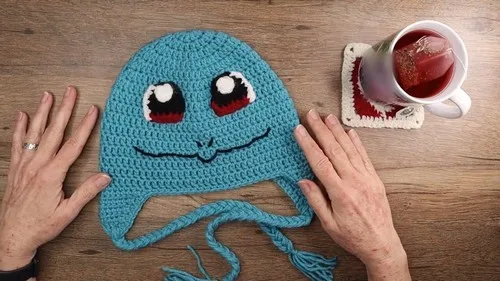
About This Pattern
This crochet Squirtle hat pattern turns a simple double crochet crown into a wearable tribute to one of Pokémon's most beloved starters. Worked in aqua or turquoise yarn with claret and black-and-white eye details, it's the kind of project that gets recognized instantly, whether you're crafting for a birthday, a convention outfit, or just because someone in your life loves the little turtle. It's playful, nostalgic, and endlessly huggable as a finished accessory.
The hat is built from the crown down using standard double crochet increases, starting with a magic ring and expanding through a series of calculated increase rounds until you reach a comfortable head circumference. You'll also assemble layered eye details using claret, black, and white yarn, attached with hot glue or sewing thread. This is a great pattern for confident beginners ready to level up, or intermediate crocheters who enjoy following a structured stitch count without needing to track complex stitch patterns.
Once finished, you'll have a snug, rounded hat with a distinctive Squirtle-inspired color block and expressive eyes stitched right onto the front. It has that soft, squishy amigurumi-adjacent texture that makes it fun to wear and even more fun to photograph. Sized for customization, it makes a wonderful handmade gift for Pokémon fans of any age, from a toddler's first fandom hat to an adult's convention-ready accessory.
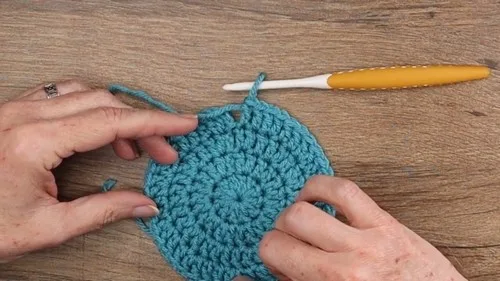
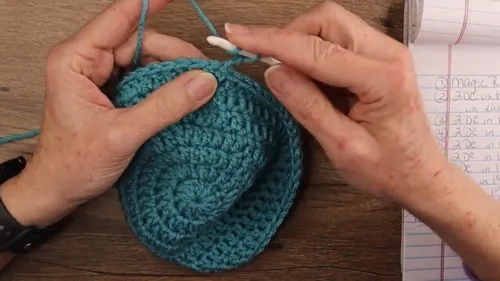
- Begin at the crown with a magic ring, working your first set of double crochets into the center to establish the top.
- Increase steadily round after round, doubling stitches evenly to expand the crown into a smooth, rounded shape.
- Space increases further apart as the rounds progress, keeping the growing circle flat and evenly proportioned.
- Continue through the increase sequence until the crown reaches its full width at the final stitch count.
- Prepare the eye pieces separately, layering claret, black, and white yarn to build the classic Squirtle eye look.
- Attach the finished eyes securely to the front of the hat using hot glue or sewing thread.
- Weave in all yarn tails and give the finished hat a final shape check before wearing or gifting.
Materials
Worsted weight yarn
Crochet Abbreviations
- ch
- chain
- st
- stitch
- sts
- stitches
- sc
- single crochet
- hdc
- half double crochet
- dc
- double crochet
- dec
- decrease
Adorable Crochet Squirtle Hat Pattern for Pokémon Fans
Main Pattern
- Round 1Ch 2, make 11 double crochets (dc) into the ring. (12 sts total including ch-2)
- Round 2Ch 2, 2 dc in each stitch around. (22 sts) For Round 3 Ch 2, 1 dc in next st, 2 dc in next—repeat around. (33 sts)
- Round 4Ch 2, 2 dc in next st, 1 dc in next 2 sts—repeat. (44 sts)
- Round 5Ch 2, 2 dc in next st, 1 dc in next 10 sts—repeat. (48 sts) For Round 6 Ch 2, 2 dc in next st, 1 dc in next 11 sts—repeat. (52 sts)
- Round 7Ch 2, 2 dc in next st, 1 dc in next 12 sts—repeat. (56 sts)
- Round 8Ch 2, 2 dc in next st, 1 dc in next 13 sts—repeat. (60 sts) For Round 9 Ch 2, 2 dc in next st, 1 dc in next 14 sts—repeat. (64 sts)
- Round 10Ch 2, 2 dc in next st, 1 dc in next 15 sts—repeat. (68 sts)
- Round 11-16Dc in each stitch around. (68 sts per round) Ear Flaps (Make 2) Start Ear Flap Sc in the next 12 stitches.
Shaping
- Round 2Dec 1, sc in 8, dec 1.
- Round 3Sc across. Repeat: Alternate a decrease row with a single crochet row until 2 stitches remain.Finish Off Fasten off and repeat for the second flap on the opposite side.
Border
Single Crochet Border Sc around the edge of the hat and ear flaps.
Fasten off and weave in ends.
Braided Ties Prepare Yarn Cut 12 long strands of yarn (approx. 20–24 inches each).
Attach Ties Attach 6 strands to each ear flap (centered).
Braiding Separate into 3 sections and braid. Tie off at the end.
Squirtle Eyes (Make 2)
Red Base (Iris)
Ch 7, sc in next 6 sts.
Join Black Yarn Attach black yarn to the top of the red base.
Pupil (Black Section)
2 rows of 6 hdc.
Shape Eye Hdc decrease across to create tapering.
Join White Yarn Attach white yarn to one side and sc down the edge.
White Eye Center (Pupil)
Create a magic ring, sc 7 into it. Tighten and fasten off.
Assembly Sew or glue the parts of the eye together.
Sew eyes onto the hat.
More photos
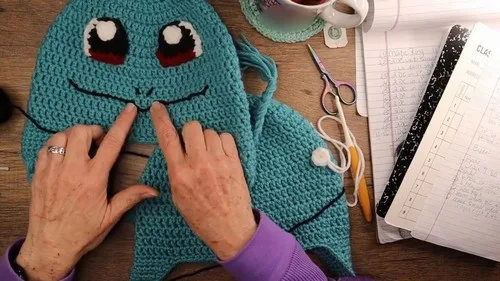
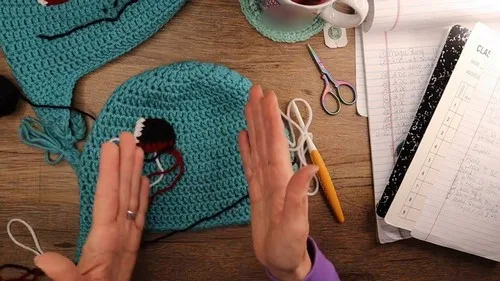
Putting It Together
- Step 1 Sew or glue the parts of the eye together.
- Step 2 Sew eyes onto the hat.
- Step 3 Add smile and nose with black yarn or thread.
Important Notes
💡 Use a 5mm (Size H) hook consistently throughout to keep your gauge even, especially since the increase rounds rely on accurate stitch counts to shape the crown correctly.
💡 Place a stitch marker at the start of every round so you always know where each new round begins, which is especially helpful once you're increasing 'every 10th or 13th stitch.'
💡 Weave in yarn tails from color changes (aqua to claret, claret to black/white) as you go rather than saving them all for the end, so the eye area stays neat and manageable.
💡 When assembling the eyes, use small dabs of hot glue rather than large amounts to avoid stiffening the yarn or bleeding through to the front of the fabric.
💡 Try the hat on periodically (or use a head form) once you reach the later increase rounds to check the fit before moving into straight rounds for the body.
💡 Keep your ch-2 at the start of each round loose and consistent, as tight turning chains can pull the crown out of shape over multiple rounds.
Common Mistakes and Fixes
Starting the magic ring too loosely, leaving a visible hole at the crown center.
Pull the tail firmly after your first round of stitches and check that the ring closes completely before continuing to the next increase round.
Losing track of stitch counts during the increase rounds, especially once you're increasing 'every 10th, 11th, 12th, or 13th stitch.'
Place a stitch marker at the beginning of each round and count stitches after every round before moving on, adjusting immediately if the total doesn't match the pattern.
Working the ch-2 at the start of each round too tightly, creating a visible seam or lump along the crown.
Keep your ch-2 turning chain at a consistent, relaxed tension, matching the height of your other double crochets so the transition between rounds stays smooth.
Misjudging where the increases should fall, causing the hat to become cone-shaped instead of rounded.
Space increases evenly around each round rather than clustering them, using stitch markers every few stitches as a guide if you're new to increase patterns.
Gluing or sewing the eye details on before checking placement against the actual head size.
Try the hat on (or on a similarly sized surface) and pin the eye pieces in place first to confirm symmetry before permanently attaching them with hot glue or thread.
Using yarn that's too thin or too thick for a 5mm hook, resulting in a floppy or overly stiff fabric.
Stick to a worsted weight yarn to match the 5mm hook size specified, ensuring the fabric holds its shape without becoming too dense or too loose.
What Makes It Good
- I love this pattern because it takes something as classic as a double crochet beanie and gives it instant personality. Watching the crown grow from a tidy magic ring through those increase rounds—2 dc in each stitch, then spacing increases further and further apart—is so satisfying because you can literally see the hat taking shape round by round. The eye assembly is my favorite part: layering claret for the iris and black-and-white details onto the aqua base gives Squirtle that unmistakable, wide-eyed expression. There's something really rewarding about attaching those final details and suddenly the whole thing clicks into a recognizable character. It's also a fantastic stash-buster if you already have turquoise and claret yarn sitting around, and the color palette is simple enough that you're not juggling a dozen skeins mid-round. Plus, because the base pattern is just consistent dc increases, it's an easy one to customize in size without reworking the whole structure. Whether you're a longtime Pokémon fan or just crocheting it as a gift, there's a real joy in seeing a beloved character emerge from yarn and hook.
Frequently Asked Questions
What yarn weight works best for this Squirtle hat pattern?
A worsted weight yarn paired with a 5mm (H) hook gives the best結果, creating a fabric that's sturdy but still soft enough to wear comfortably. Acrylic or acrylic-blend yarns in aqua, claret, black, and white all hold their color vividly for the character details.
Can I embroider the eyes instead of using hot glue?
Yes, embroidering the claret, black, and white eye details with a yarn needle is a great alternative, especially for hats intended for children. It creates a more secure, washable finish than glued pieces.
Why is my hat crown turning out cone-shaped instead of round?
This usually happens when increases aren't spaced evenly around each round, causing the fabric to pull unevenly to one side. Double-check your stitch counts after every round and use stitch markers to keep increases evenly distributed.
Original pattern: https://crocheteverything.com/adorable-crochet-squirtle-hat-pattern-every-pokemon-fan-needs/

About the Author
Tamsin Okoro Who writes the patterns at Yarn Gallery, how a pattern gets from the hook to the page, and what this site will never do.


