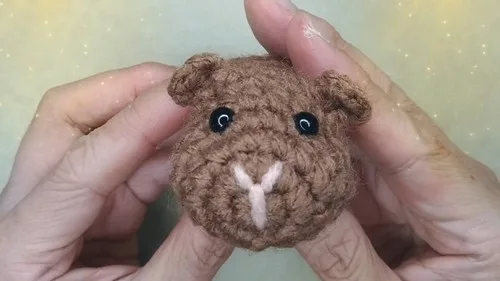
About This Pattern
This little guinea pig pattern turns a handful of basic stitches into one of the most endearing amigurumi shapes you can make. There's something about that rounded, no-neck body silhouette that instantly reads 'guinea pig' the moment you finish stuffing it. It's perfect for beginners who've mastered the magic ring and basic increases but want their first project to actually look like something recognizable and lovable, rather than just a practice sphere.
The techniques here are refreshingly approachable: a magic ring start, straightforward single crochet increases worked in joined rounds, and a clever little transition where the pattern shifts into half double crochet stitches before returning to single crochet again. That HDC section is what shapes the guinea pig's distinctive cheek and nose area, giving the whole face its characteristic pushed-in, whiskery look. Expect to spend about 2-3 hours total, working head and body in one continuous piece with zero sewing required.
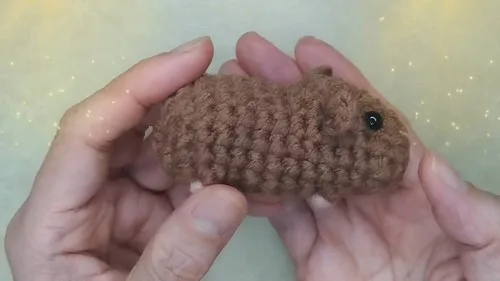
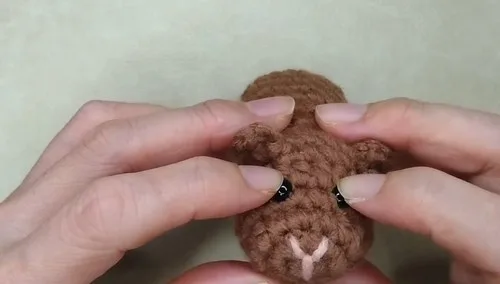
The finished guinea pig comes out compact and huggable, with a plump, rounded body and a snug little face perfect for embroidered nose and mouth details in pink. Its safety eyes give it that alert, curious guinea pig expression, and the continuous construction means no visible seams between head and body. It makes a wonderful shelf companion, a thoughtful handmade gift for a guinea pig owner, or a sweet addition to a growing amigurumi menagerie.
- Start the head with a magic ring and work an initial round of six single crochet stitches.
- Join the round with a slip stitch and chain one before beginning the next round of increases.
- Double the stitch count evenly by working two single crochets into every stitch around the head.
- Shape the nose area with a mixed round combining single crochet and half double crochet increases.
- Continue directly from the head into the body without cutting yarn or sewing any seams.
- Work the nine body rounds in joined rounds, stuffing firmly with fiberfill as the shape closes in.
- Insert the 6mm safety eyes into the head and lock the washers securely from inside.
- Finish by embroidering a simple pink nose and mouth onto the face with a yarn needle.
Materials
Crochet Abbreviations
- st
- stitch
- sc
- single crochet
- hdc
- half double crochet
- dc
- double crochet
- sc2tog
- single crochet 2 stitches together (decrease)
Easy Crochet Guinea Pig Pattern for Beginners
Head
- Round 1(6 stitches) Make a magic ring. Work 6 single crochets (SC) into the ring. Slip stitch (SL) to the first SC.
- Round 2(12 stitches) Chain 1. Work 2 SC in each stitch around. SL to the first SC. For Round 3 (16 stitches)Chain 1.(2 SC in next st, 1 SC in next) once (2 HDC in next, 1 HDC in next) once (2 SC in next, 1 SC in next) once (2 HDC in next, 1 HDC in next) onceSC in next stitch.SL to the first SC.(16)
- Round 4(16 stitches) Chain 1. Work: 3 SC, 4 HDC, 4 SC, 4 HDC, 1 SC. SL to the first SC.
- Round 5(18 stitches) Chain 1. Work: 7 SC, (2 HDC in next, 2 HDC, 2 HDC in next) , 5 SC.SL to the first SC.
Body (Continues from head)
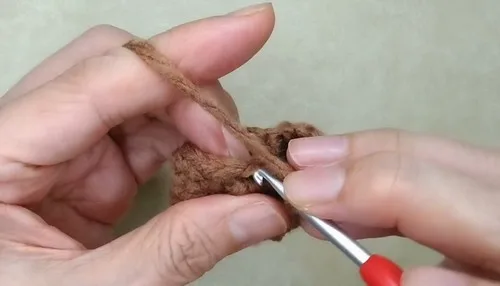
- Round 6(18 stitches) Chain 1. 2 SC. Front Leg 1: Pick front loop, SL 1. Chain 2 tightly.SL 1 into same front loop.Chain 3 tightly.DC 1.Chain 3 tightly.SL 1 into same loop.Ear 2: (repeat Ear 1 instructions)Front Leg 2: (repeat Front Leg 1 instructions)SL to the first SC.Weave in and secure yarn from inside the body.(4)
Ear 1: Pick front loop, SL 1.
Nose Embroidery Use pink yarn and yarn needle.
Embroider a "Y" shape at the front of the head.
Body Continued
- Round 7(18 stitches) Chain 1. 2 SC. SC into back loop of front leg. 15 SC (into back loops from ears and legs).SL to the first SC.
- Round 8(16 stitches) Chain 1. 8 SC. SC2TOG twice. 6 SC. SL to the first SC. Front Foot EmbroideryWrap around chain leg 4 times.Secure inside body and repeat on other foot.
Use pink yarn.
- Round 9(16 stitches) Chain 1. 16 SC. SL to the first SC. For Round 10 (18 stitches) Chain 1.(2 SC in next) twice.SL to first SC.(8)
- Round 11-12(18 stitches) Chain 1. 18 SC each round. SL to the first SC. Back Legs
- Round 13(18 stitches) Chain 1. 2 SC. Back Leg 1: Pick front loop, SL 1. Chain 2 tightly.SL 1 into same front loop.Back Leg 2: (repeat above)SL to the first SC.(14)
- Round 14(18 stitches) Chain 1. 18 SC (picking up remaining back loops). SL to the first SC.Back Foot Embroidery Wrap pink yarn around chain 3 times per foot.Secure and repeat for the second back foot.
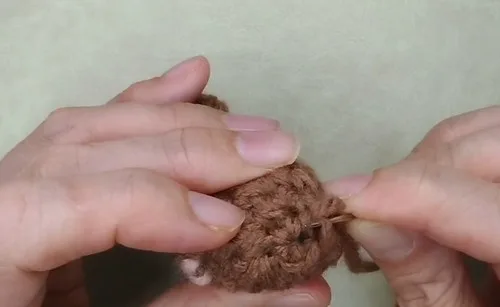
Stuffing Begin partially stuffing the body.
Final Rounds & Closing
- Round 15(12 stitches) Chain 1. (SC2TOG, 1 SC) x6. SL to first SC.
- Round 16(6 stitches) Chain 1. (SC2TOG) x6. SL to first SC. Cut yarn, leaving 20 cm tail.
Final Stuffing & Closure:
More photos
Important Notes
💡 Use a 7/0 hook and worsted weight yarn together; going up in hook size will leave visible gaps between stitches that show through the stuffing.
💡 Since every round is joined with a slip stitch, always work your chain 1 immediately after joining before starting the next round's stitches.
💡 Add your 6mm safety eyes before you finish stuffing the head completely; it's much easier to position and lock the washers while you can still reach inside.
💡 Keep a yarn needle threaded with pink yarn or floss ready before you finish stuffing, so you can embroider the nose and mouth while the head is still slightly accessible.
💡 Stuff in small pinches rather than large clumps to avoid lumpy bulges; work fiberfill evenly into the rounded body shape as you go.
💡 Use an awl to gently pre-poke the holes for the safety eye posts through tightly worked stitches, which prevents splitting your yarn plies and keeps stitches looking neat.
Common Mistakes and Fixes
Magic ring left too loose after the first round of single crochets.
Pull the tail firmly and check that all six stitches cinch into a closed circle before moving on; a loose ring leaves a visible hole at the top of the head.
Losing track of the join point between rounds since the pattern uses slip stitch joins throughout.
Place a stitch marker in the first stitch of each new round so you always know exactly where to slip stitch to close the round cleanly.
Forgetting that head and body are worked as one continuous piece, and accidentally fastening off after the head.
Since there's no sewing step between head and body in this pattern, keep working directly into the last round of the head rather than cutting yarn, unless your pattern explicitly says to fasten off.
Placing the 6mm safety eyes too close together or too high on the face.
Insert the eye posts without locking the backs first, hold the piece at arm's length to check placement looks balanced and guinea pig-like, then secure the washers permanently.
Under-stuffing the body, leaving it floppy instead of firm and round.
Stuff firmly in small handfuls as you work rather than all at once at the end, pushing fiberfill into the cheeks and nose area first so the face holds its shape.
What Makes It Good
- I adore this pattern because it proves you don't need complicated stitches to make something genuinely charming. Starting with a magic ring keeps that crown of the head perfectly closed and tidy, no gap to fuss over later. What really won me over is the way the pattern sneaks in half double crochet stitches partway through the head shaping. That subtle stitch height change is the secret behind the guinea pig's signature blunt, rounded nose. Working the head and body in one continuous piece, joining rounds as you go, means there's no sewing pieces together afterward. You just crochet straight through from the crown of the head to the base of the body and you're basically done with the shell. Then it's all about the fun finishing touches: safety eyes for that alert little expression, pink embroidery floss for the nose and mouth, and a good stuffing session to get that plump, huggable body shape. It's satisfying to watch a flat ring of six stitches grow into a recognizable creature in under three hours.
Frequently Asked Questions
Do I need to sew the head and body together?
No, this pattern is worked in one continuous piece, so you crochet directly from the head into the body without any seaming. This keeps the finished guinea pig smooth and seamless.
What size hook and yarn work best for this pattern?
A 7/0 crochet hook paired with worsted weight yarn gives the tight, even stitches needed to hold in the polyester fiberfill stuffing. Going up in hook size can leave gaps that let stuffing peek through.
How do I attach the safety eyes securely?
Insert the eye posts through the stitches at your desired spot before finishing all the stuffing, then push the backing washer on firmly from inside until it clicks or locks in place. Craft glue on the washer adds extra hold for pieces that will see lots of handling.
Can I make the nose and mouth without embroidery floss?
Yes, the pink worsted weight main color yarn used for embroidery works fine, or you can substitute embroidery floss for finer, more detailed line work. Either way, use a yarn needle and work small straight stitches for a simple, sweet expression.
Original pattern: https://crocheteverything.com/easy-crochet-guinea-pig-tutorial-perfect-for-beginners/

About the Author
Tamsin Okoro Who writes the patterns at Yarn Gallery, how a pattern gets from the hook to the page, and what this site will never do.


