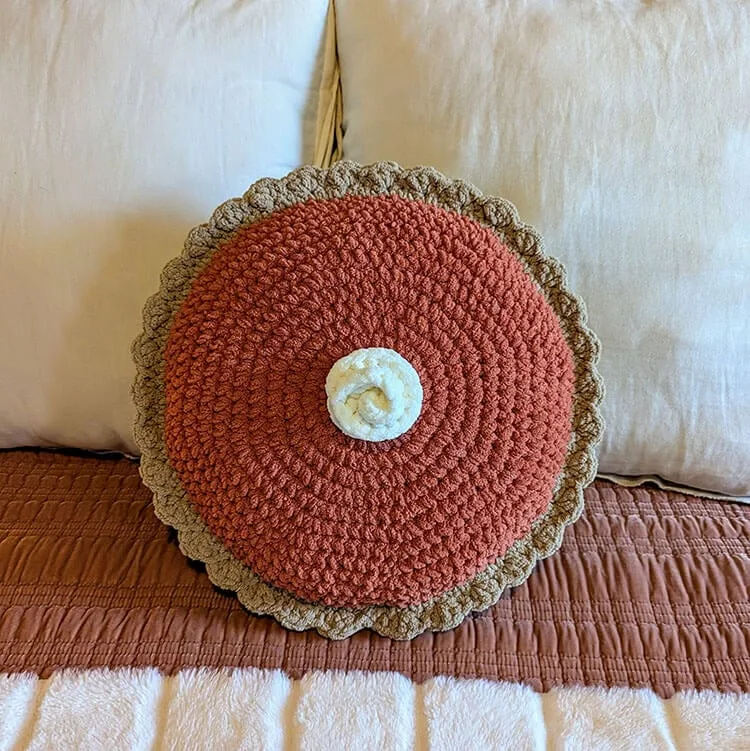
About This Pattern
This is a stuffed pie, built to sit on a couch. It has three parts: filling, crust, and whipped topping. Each piece works up fast in super bulky yarn, so one evening can cover a lot of ground. It needs a size L hook, three colors, and a little patience for stuffing evenly. By the end, you have something soft, round, and a little bit funny to lean against.
In the basket
Abbreviations
- ch
- chain
- st(s)
- stitch(es)
- sl st
- slip stitch
- sc
- single crochet
- sc blo
- single crochet in the back loop only
- inc
- increase; you will work two stitches into the same stitch
- hdc
- half double crochet
- dc
- double crochet
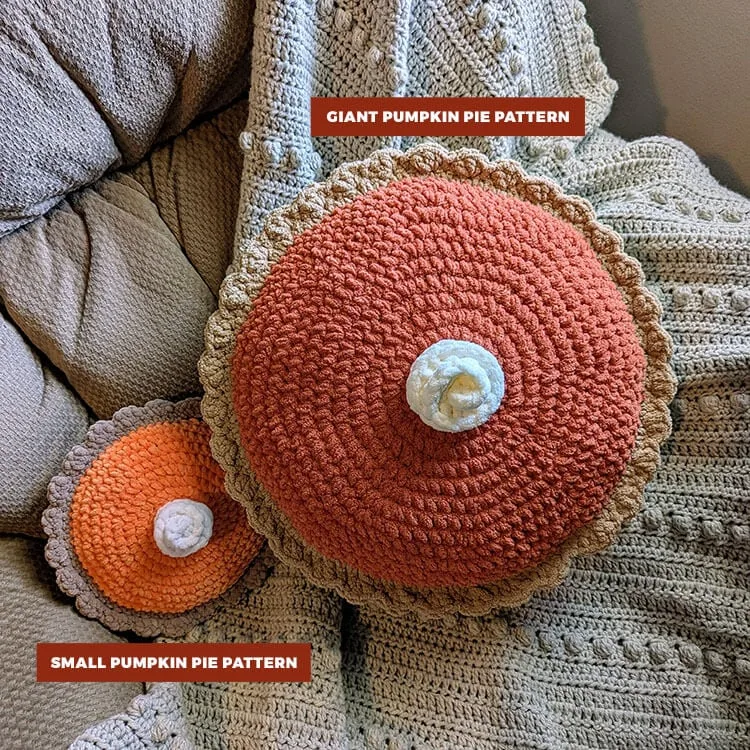
Giant pumpkin pie pillow crochet pattern for your couch
Creating the Pie Filling (using Orange Leaf yarn)
To begin, chain 2.
- Round 1Work 8 single crochets into the 2nd chain from your hook. This round equals 8 stitches.As you work through each round, remember to place your stitch marker in the first stitch. This will be essential in helping you keep track of when you are starting each new round.
- Round 2Increase in every stitch around. You will end up with 16 stitches.
- Round 3*Increase, then single crochet in the next stitch*. Repeat this pattern around until you have 24 stitches.
- Round 4*Increase, then single crochet in the next 2 stitches.* Continue this around for a total of 32 stitches.
- Round 5*Increase, then single crochet in the next 3 stitches*. Repeat until you have 40 stitches.
- Round 6*Increase, then single crochet in the next 4 stitches*. Your total should now be 48 stitches.
- Round 7*Increase, then single crochet in the next 5 stitches*. This will bring your total to 56 stitches.
- Round 8*Increase, then single crochet in the next 6 stitches*. You should have 64 stitches now.
- Round 9*Increase, then single crochet in the next 7 stitches*. Repeat this around for a total of 72 stitches.
- Round 10*Increase, then single crochet in the next 8 stitches*. Now you should have 80 stitches.
- Round 11*Increase, then single crochet in the next 9 stitches*. Your total will be 88 stitches at this point.
- Round 12*Increase, then single crochet in the next 10 stitches*. You will have 96 stitches now.
- Round 13*Increase, then single crochet in the next 11 stitches*. This brings your total to 104 stitches.
- Round 14Place one single crochet in each stitch around. You will still maintain 104 stitches.Join with a slip stitch to the first stitch, fasten off, and weave in the ends to finish this part.
Creating the Crust (using Sand yarn)
To begin, chain 2.
- Round 1Work 8 single crochets into the 2nd chain from the hook, resulting in 8 stitches.Don’t forget to place your stitch marker to help track your rounds.
- Round 2Increase in every stitch, obtaining a total of 16 stitches.
- Round 3*Increase, then single crochet in the next stitch*. You will now have 24 stitches.
- Round 4*Increase, then single crochet in the next 2 stitches*. Continue this until you reach 32 stitches.
- Round 5*Increase, then single crochet in the next 3 stitches*, reaching a total of 40 stitches.
- Round 6*Increase, then single crochet in the next 4 stitches*, for a total of 48 stitches.
- Round 7*Increase, then single crochet in the next 5 stitches*, getting to 56 stitches.
- Round 8*Increase, then single crochet in the next 6 stitches*, totaling 64 stitches.
- Round 9*Increase, then single crochet in the next 7 stitches*, leading you to 72 stitches.
- Round 10*Increase, then single crochet in the next 8 stitches*, resulting in 80 stitches.
- Round 11*Increase, then single crochet in the next 9 stitches*, now reaching 88 stitches.
- Round 12*Increase, then single crochet in the next 10 stitches*, resulting in 96 stitches.
- Round 13*Increase, then single crochet in the next 11 stitches*, totaling 104 stitches.
- Round 14Single crochet in the back loop only for each stitch, maintaining 104 stitches.
- Rounds 15–20Continue placing one single crochet in each stitch around, keeping the total at 104 stitches.Join with a slip stitch to the first stitch, then fasten off and weave in your ends.
Creating the Whipped Topping (using Vintage yarn)
To begin, chain 14.
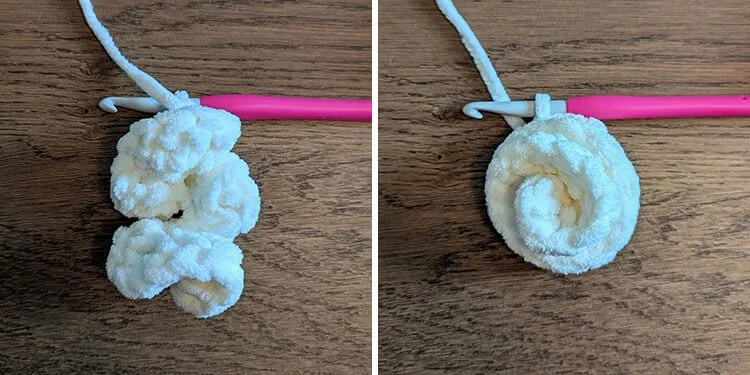
Place 3 double crochets in the 2nd chain from the hook and continue with double crocheting in each chain across. Once complete, fasten off while leaving a long tail for sewing purposes.
To create a whimsical whipped cream effect, wrap the yarn in a spiral shape. You may need to adjust it until you achieve the desired look. Once satisfied, securely attach the whipped topping to the pie filling.
More pictures
Before the first stitch
- Check you have one full skein each of Sand and Orange Leaf, plus a small amount of Vintage.
- Read through Round 3 of the Pie Filling first. It sets the increase pattern you will repeat.
- Have your stitch marker ready before Round 1. You will place it right away, in the first stitch.
Minutes per piece
- Pie Filling and Crust about 2-3 hours, because each piece runs close to 15 rounds of steady increases
- Whipped Topping and assembly about 1-2 hours, because the spiral shaping and stuffing need a careful hand
Other yarns that work
- Cotton blend, super bulky weight (size 6) Stitches hold their shape better but drape less. Stuffing may need to be packed a bit firmer.
Where it ends up
- A floor cushion for a reading corner, paired with a knit throw.
- A statement pillow for a window seat, next to plain linen cushions.
- A soft prop for a kid's play kitchen, alongside other stuffed food pieces.
Joining up
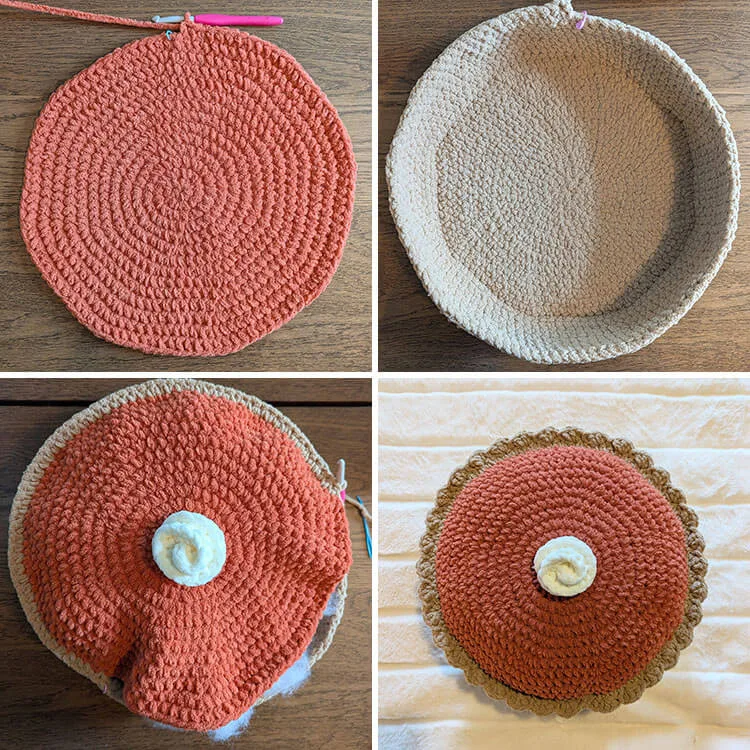
- Step 1 Begin by positioning the orange filling atop the crust. You will use single crochet stitches in the Sand yarn to join these two pieces together.
- Step 2 Round 1: Attach the yarn to any stitch in the crust. Chain 1 and work a single crochet into the same stitch. Then, continue to single crochet in every stitch around to connect the filling and crust. Before fully closing the pie, add your desired amount of stuffing. After you are satisfied with the stuffing, continue to close the piece with single crochet stitches around, maintaining a total of 104 stitches.
- Step 3 Join with a slip stitch to the first stitch. Do not fasten off, as we now move on to creating the crust edge.
- Step 4 Round 2: Chain 1 and single crochet in the same stitch, followed by working 3 half double crochets in the next stitch, skipping the next stitch and finishing with a slip stitch in the following stitch. Repeat this sequence around. When you reach the final stitch, skip it and join with a slip stitch to the initial chain. Fasten off your work and weave in all ends to create a neat finish.
Small notes
- Use the size L 8.0 mm hook throughout. A smaller hook will make the super bulky yarn hard to work.
- Move your stitch marker up every round, from the start of Round 1 onward. It is easy to lose count otherwise.
- Stuff the pillow gradually as you close the final round. Adding it all at once makes the last stitches hard to see.
- The project will be crafted in continuous rounds. Unless specified, do not join at the end of each round, allowing for a smooth finish.
- The chain stitch (ch 1) does not count as a stitch in this pattern.
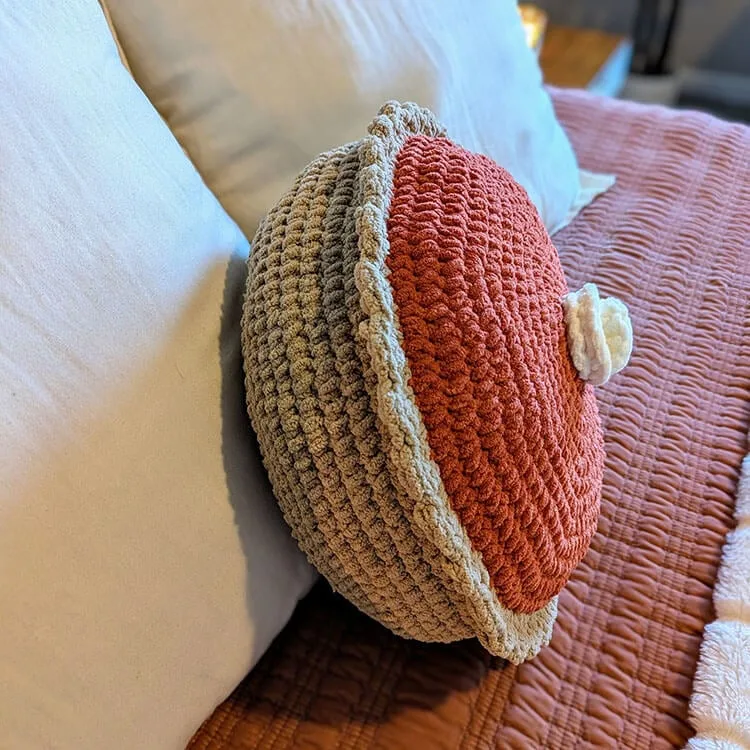
- Approximate Size: This pillow measures about 17 inches wide and 7 inches tall, excluding the whipped topping.
Little questions
Why does the pattern use three different colors?
Each color marks a part of the pie. Orange Leaf is the filling, Sand is the crust, and Vintage makes the whipped topping. Keeping them separate makes assembly easier to follow.
Can I make the pillow smaller?
Yes, you can stop the increase rounds earlier on both the filling and crust. Just make sure both pieces still match in stitch count where they join. The whipped topping chain can shorten too.
How much stuffing will I need?
The pattern does not give an exact amount, since pillows vary by hand tension. Add it gradually while closing the final joining round. Stop when it feels full but still a little soft.
What if I don't have a stitch marker?
A small safety pin or scrap of yarn works just as well. The point is to mark your first stitch in every round. Without it, counting rounds gets confusing fast.
Original pattern: https://sallycrochet.com/giant-pumpkin-pie-pillow-free-crochet-pattern/

About the Author
Tamsin Okoro Who writes the patterns at Yarn Gallery, how a pattern gets from the hook to the page, and what this site will never do.


