About This Pattern
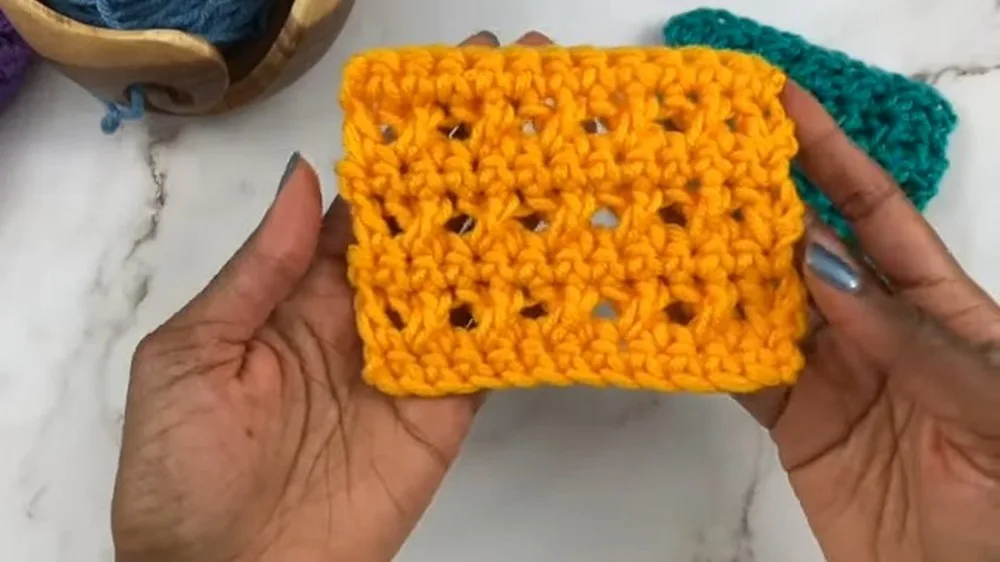
This tutorial teaches the back crossed double crochet stitch, a beautifully textured stitch that creates a woven, basket-like surface unlike anything you get from plain double crochet rows. It's especially wonderful because the crossing technique adds visual interest and dimension without requiring any complicated stitch combinations or specialty tools. This pattern is perfect for beginners who've mastered basic double crochet and chains and are ready to level up their stitch vocabulary with something that looks far more advanced than it actually is.
The key technique here is working double crochet stitches that cross over one another from behind, creating that signature woven look. Because the tutorial uses bulky weight scrap yarn, every stitch formation is easy to see clearly, making this an ideal way to learn without squinting at tiny stitches. Expect to spend roughly one to two hours working through the four rows, with most of that time simply getting comfortable with the crossing motion — once it clicks, it becomes quick and rhythmic.
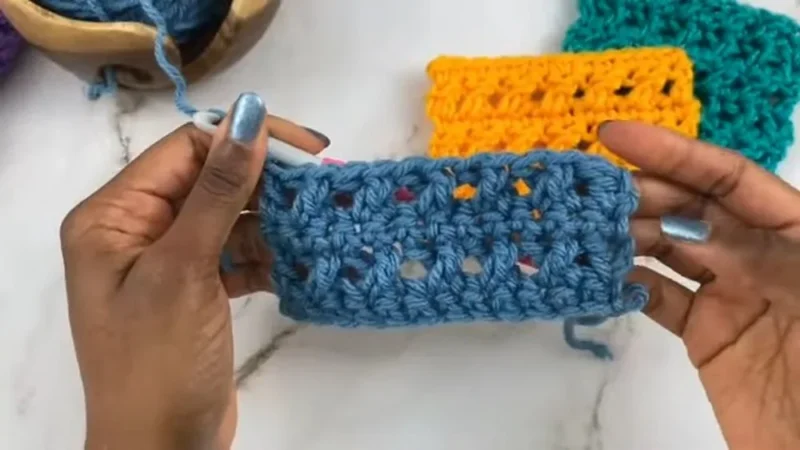
The finished swatch is a small but mighty practice piece, roughly the width of your thirteen-chain foundation, showcasing dense, textured rows perfect for swatching before a bigger project. It has a substantial, tactile feel thanks to the bulky yarn, almost like a woven basket or cable-knit fabric. While this particular piece is a learning swatch, the stitch itself is gift-worthy once applied to scarves, cowls, or blanket panels — a lovely technique to tuck into toolkit.
- Start by chaining thirteen stitches to create a foundation that's a multiple of two plus one.
- Work your first row of single crochet stitches across the chain to establish a base row.
- Begin the crossing technique by skipping ahead one stitch and working a double crochet into the next stitch.
- Reach back and work a double crochet into the stitch you skipped, letting it cross over the first one.
- Repeat this skip-and-cross motion in pairs across the entire row to build the woven texture.
- Continue working the crossed stitch pattern consistently through all four rows of the tutorial.
- Check that your tension stays relaxed throughout so the crossed stitches sit naturally without flattening.
- Finish your final row and admire the basket-weave texture built entirely from crossed double crochet stitches.
Materials
Crochet Abbreviations
- ch
- chain
- st
- stitch
- sl st
- slip stitch
- sc
- single crochet
- hdc
- half double crochet
- dc
- double crochet
- inc
- increase
- dec
- decrease
- mr
- magic ring
- fo
- finish off
How to Crochet the Back Crossed Double Stitch: A Beginner-Friendly Guide
Crossed Double Crochet Stitch Tutorial
This tutorial provides comprehensive guidance on how to crochet the back cross double crochet stitch. The creator offers insights into the stitch's characteristics and provides detailed, step-by-step instructions for its execution.
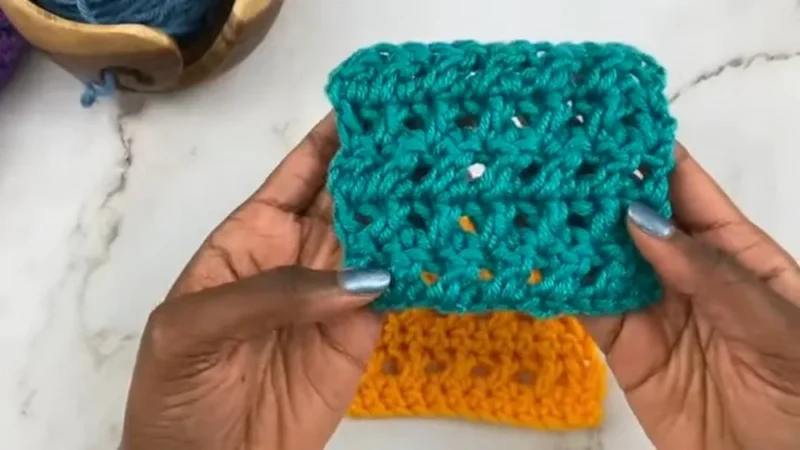
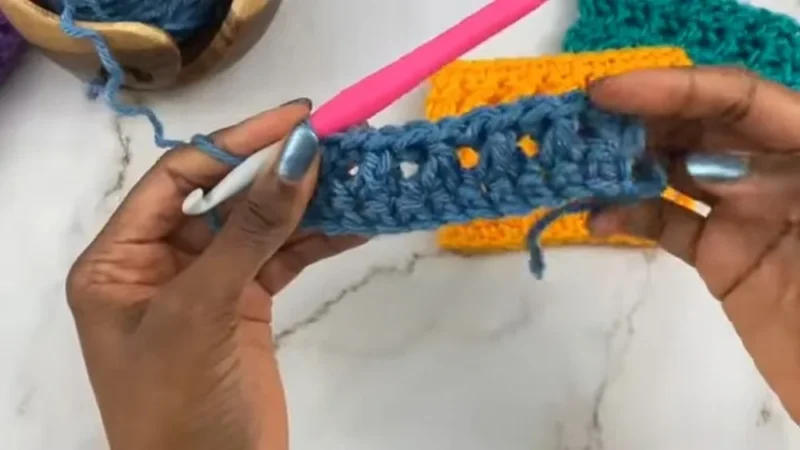
Stitch Characteristics The creator begins by showcasing two different swatches of the back cross double crochet stitch. One swatch includes a row of single crochet stitches worked in between each row of back cross double crochet, while the other does not. The creator expresses a clear preference for incorporating the single crochet row, explaining that it significantly enhances stitch definition, causing the distinctive "crosses" of the back cross double crochet to stand out more prominently. This preference highlights a design choice that impacts the overall aesthetic of the finished fabric. The tutorial also clarifies that the back cross double crochet stitch can be worked over a multiple of two stitches, providing a flexible foundation for various projects. Furthermore, the creator notes that the stitch exhibits a similar appearance on both sides of the fabric, although one side may appear slightly flatter than the other. This characteristic makes it a versatile stitch for projects where both sides of the fabric might be visible.
Materials and Foundation For the purpose of this tutorial, the creator utilizes bulky weight scrap yarn, which is an excellent choice for demonstrating stitches as its thickness makes the stitch formation easily visible. To begin the project, a foundation chain is created using a multiple of two stitches, plus an additional stitch. The tutorial specifically starts with a foundation chain of thirteen stitches, providing a concrete example for viewers to follow.
- Row 1(Single Crochet): The first row is established with single crochet stitches. The creator instructs viewers to work a single crochet into the second chain from the hook and then into each subsequent stitch across the row. A key tip provided is to work into the bottom bump of the chains, which creates a neater and more stable edge.This initial row results in a specific number of single crochet stitches, which forms the base for the subsequent pattern.
- Row 2(Back Cross Double Crochet): This row introduces the core stitch of the tutorial.
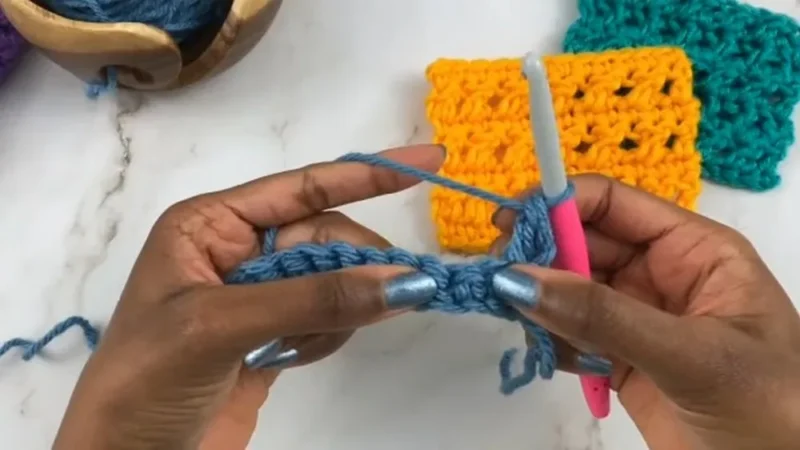
Step by step The row begins by chaining one and turning the work, preparing for the next row. A double crochet stitch is then worked into the very first stitch of the row. The next step involves skipping one stitch and then working a double crochet into the stitch immediately following the skipped one. To form the distinctive "cross," the creator instructs viewers to yarn over and then work a double crochet behind the stitch that was just made, inserting the hook into the previously skipped stitch. A crucial piece of advice here is to keep this stitch relatively loose to prevent it from pulling down the surrounding stitches, which could distort the fabric. This pattern of skipping a stitch, working a double crochet in the next, and then working a double crochet behind into the skipped stitch is repeated across the entire row. The row concludes with a double crochet stitch worked into the very last stitch.
- Row 3(Single Crochet): This row serves as the intermediate row that the creator prefers for stitch definition. It begins with a chain one and turning the work, followed by working a single crochet stitch all the way across the row.
- Row 4and Beyond: To continue the pattern, the tutorial advises repeating Row 2 and Row 3 for the entire duration of the project. This alternating sequence creates the continuous back cross double crochet pattern with enhanced definition.
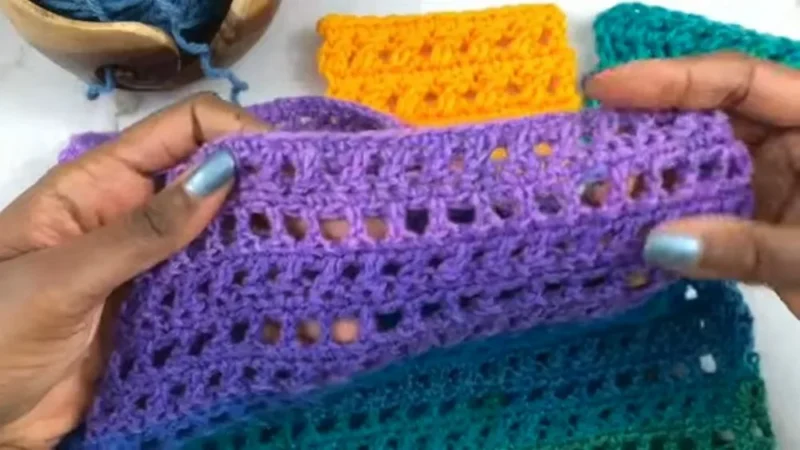
Project Application The creator shares that she has utilized this stitch in a cowl design and plans to release a separate tutorial specifically for that project. This provides viewers with an example of how the back cross double crochet stitch can be incorporated into a finished item, potentially inspiring them to create their own projects using this versatile stitch.
More photos
Important Notes
💡 Use a hook one size larger than typically recommended for your bulky yarn's label — this gives you a little extra room to maneuver when reaching behind stitches to complete the cross.
💡 Place a stitch marker at the start of each row so you always know where your first stitch is, especially important since the crossed stitches can make row starts trickier to spot.
💡 Since this tutorial uses scrap yarn, grab a few different colors from your stash to practice the stitch more than once — repetition really is the fastest way to build muscle memory for the crossing motion.
💡 Work slowly through your very first crossed pair and really look at how the two double crochets interlock before speeding up — rushing early on tends to create uneven texture that's harder to fix later.
💡 Keep your foundation chain slightly loose rather than tight, since a tight starting chain can make it harder to find your stitches once you begin working the crossed pattern into it.
💡 If you lose your place mid-row, count your completed crossed pairs rather than individual stitches — it's much easier to spot a missing or extra cross than an extra double crochet.
Common Mistakes and Fixes
Working the double crochet stitches in
Always skip ahead to the second stitch first, then come back and work into the skipped stitch behind it — this order is what creates the crossing motion, so double-check it every single repeat until it's automatic.
Pulling the yarn too tight
Keep your tension relaxed, especially as you reach behind the first stitch to work the skipped one — a slightly looser hand lets the crossed stitches sit naturally on top of each other for that dimensional look.
Losing track of the foundation chain
Count your starting chain of thirteen carefully before you begin, and remember the formula is a multiple of two plus one — placing a stitch marker every ten chains makes recounting quick and painless.
Confusing which double crochet
Slow down on your first row and consciously identify which stitch will be worked over the other before every crossing pair — once you've done a few consistently, your hands will remember the pattern.
Not maintaining consistent stitch
Make sure each double crochet is pulled up to the same height before crossing, and check your row edges periodically against each other to catch any drift early.
Using yarn that's too thin to see
Stick with bulky weight scrap yarn as the tutorial suggests for your first attempt — the thickness makes every cross visible, and you can always downsize to worsted or DK weight once you've mastered the motion.
What Makes It Good
- Once you've got the back crossed double crochet down using bulky scrap yarn, there are so many fun ways to take this stitch further. Try swatching it in a smooth worsted weight yarn like Wool-Ease or Super Saver to see how the texture changes with a lighter-weight fiber — the crossing pattern becomes more delicate and refined. For a totally different look, work it in a chunky cotton like Bernat Blanket for a soft, squishy texture perfect for dishcloths or coasters. Color-wise, this stitch shines with variegated or self-striping yarns because the crossing pattern catches the color changes in unexpected, beautiful ways — try a sunset-toned skein or a tonal gray-to-white gradient to really show off the woven effect. If you prefer solid colors, a deep jewel tone like emerald or burgundy makes the texture pop with shadow and light. For sizing, simply adjust your foundation chain in multiples of two plus one — try a chain of 21 for a wider swatch that could become a mug rug, or scale up to 41 chains to start a scarf. Since the pattern is worked in a multiple-of-two-plus-one repeat, you can expand it to any width you like without breaking the stitch pattern. Once you're confident, experiment with combining this crossed stitch with plain double crochet rows to create striped texture blocks, alternating a crossed row with two plain rows for a fabric that has both smooth and textured sections. You could even use this stitch as an accent panel in the center of a blanket, framed by simple single crochet borders, to give a handmade throw a designer-quality focal point without much extra effort.
- I love this stitch because it completely transforms a plain double crochet fabric into something that looks intentional and advanced, even though the technique itself is totally approachable. Working the back crossed double crochet across those four rows gives you that satisfying moment where a simple foundation chain of thirteen turns into a woven, textured swatch right before your eyes. There's something deeply satisfying about watching two stitches cross over each other and lock into that basket-weave pattern — it's the kind of stitch that makes people stop and ask how you did it. Using bulky scrap yarn for this tutorial was such a smart choice because you can actually see every crossing motion clearly instead of guessing with thin yarn. I also appreciate that this is a genuinely practical practice piece; once you've worked all four rows, you'll have the muscle memory to apply this stitch to scarves, cowls, or blanket squares. It's one of those techniques that instantly makes your finished pieces look more polished and professional, and once you learn it, you'll want to use it everywhere.
Frequently Asked Questions
What yarn weight is best for learning this stitch?
Bulky weight yarn is ideal for learning, exactly as this tutorial recommends, because it makes the crossing motion easy to see and follow. Once you're comfortable, you can move down to worsted or DK weight for finer, more refined texture.
Why does the foundation chain need to be a multiple of two plus one?
This stitch pattern works in pairs of double crochet stitches that cross over each other, so the chain needs an even multiple to complete full pairs plus one extra stitch to turn and anchor the pattern edge. Starting with thirteen chains, as the tutorial does, gives you six complete crossed pairs.
Can I use this stitch for a full-size project like a scarf or blanket?
Absolutely! Once you've practiced the technique on this swatch, you can simply chain a longer multiple of two plus one to start a scarf, cowl, or blanket panel. The dense, woven texture makes it especially great for cozy winter accessories.
How is the back crossed double crochet different from a regular crossed double crochet?
The 'back' version specifically routes one stitch behind the other in a particular order, giving a slightly different lean and texture compared to a standard cross. It's a small technical difference but it changes how the finished fabric catches light and shadow.
Do I need any special tools for this stitch?
No special tools are needed beyond your regular crochet hook and yarn — this stitch is purely a technique variation on the standard double crochet. Just make sure your hook size matches your yarn weight comfortably for smooth stitch formation.
Original pattern: https://redagapeblog.com/crochet-back-crossed-double-stitch/

About the Author
Tamsin Okoro Who writes the patterns at Yarn Gallery, how a pattern gets from the hook to the page, and what this site will never do.


