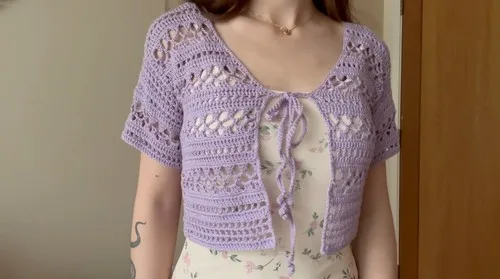
About This Pattern
This cardigan is a small, steady project that grows one row at a time. It fits over a dress for an evening out or layers over a plain top at home. I think of it as two rectangles and two fronts, worked separately, then joined at the shoulders. It needs a quiet stretch of evenings, not one long sitting. The lace rows ask for attention; the straight DC rows let my mind wander. By the end, I have something light enough for spring evenings, warm enough for a cool porch after dark.
The design combines two lace patterns, named Squares and Semicircles, which keep the fabric airy and light enough for layering in cooler months. The pattern suits crocheters of all levels, and the fit, length, and color are all mine to customize as I go.
In the basket
Abbreviations
- ch
- chain
- st
- stitch
- sc
- single crochet
- dc
- double crochet
- inc
- increase
- 3DCT
- 3 double crochets together
- 2DCT
- 2 double crochets together
A lightweight crochet lace cardigan for layering
Front Panel Pattern
Foundation Chain Foundation Chain: Make a slip knot, then chain a number that is a multiple of four. (The example uses 24 chains, plus 3 extra for turning)
- Row 1(DC): DC (Double Crochet) in the 4th chain from the hook and in each chain across.
- Row 2Squares Chain 4 (Ch 3 counts as DC, Ch 1 for spacing). Turn. Skip 1 st, DC in next. Repeat from * across.End with a DC in the 3rd chain of the turning chain.
- Rows 3–4Row 3 & 4 (Squares): Repeat the instructions for Row 2.
- Row 5(DC): Chain 3 . Turn. Work 1 DC into each chain space and 1 DC into each DC stitch across.End with 1 DC in the 3rd chain of the turning chain.
- Row 6Squares Repeat the instructions for Row 2.
- Row 7(DC): Repeat the instructions for Row 5.
- Row 8(SC + Inc): Chain 1 . Turn. Work SC (Single Crochet) across, making one additional stitch (increase) somewhere in the row.
Main Lace Pattern (Semicircles)
- Row 9Chain 3 . Turn. Skip 1 st, DC in next. Chain 5. Skip 1 st, make a 3DCT (3 Double Crochets Together) into the next three stitches.Repeat from * across. End: Skip 1 st, make a 2DCT (2 Double Crochets Together) into the last two stitches.
- Row 10Chain 5 . Turn. Make a SC into the first Chain-5 space. Chain 5, SC into the next Chain-5 space.Repeat from * across. End: Chain 2, DC into the last stitch.
- Row 11Chain 3 . Turn. DC into the first stitch. Chain 1, make 3 DC into the Chain-5 space.Repeat from * across.End: Make 2 DC into the last Chain-5 space to match the beginning.
- Row 12Finishing Row (Row 12): Chain 1 .Turn. Work 1 SC into each stitch and into each Chain-1 space across.
Pattern Repeat The main pattern sequence that is repeated (with increases on some DC/Square rows) is: Double Crochets (DC); Squares (Ch 1, DC); Double Crochets (DC); Single Crochets (SC with 1 increase); Main Lace Pattern (3 rows: Row 9, 10, 11); Single Crochets (SC). Repeat this sequence until your front panel has a total of 43 rows.
More pictures
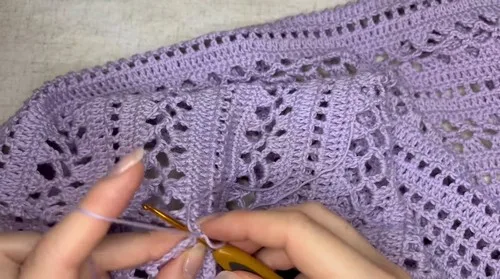
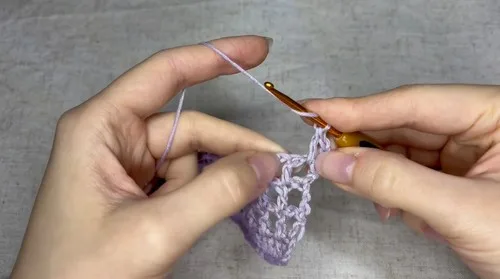
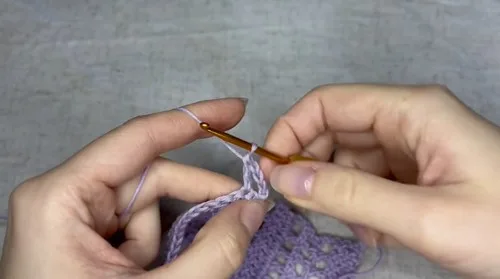
Before the first stitch
- I count my starting chain twice before Row 1 begins.
- I swatch the Squares round first, to check my spacing.
- I lay out yarn for two front panels and one back panel.
Minutes per piece
- Main Pattern, first stage (5 rounds) about 1.5 hours, because the DC and Squares rows set the pattern rhythm
- Main Pattern, second stage (3 rounds) about 1 hour, because the Chain-5 spacing and 3DCT shaping need close counting
Other yarns that work
- Cotton, DK weight gives crisper lace and less drape, so I size down my hook slightly
- Mohair blend, lace weight gives a softer halo and more drape, so I size up my hook slightly
Where it ends up
- I wear this cardigan over a slip dress for a dinner out.
- I throw it over a plain tank for an afternoon at my desk.
- I pack it for travel, since it layers flat in a bag.
Joining up
- Step 1 Back Panel: Chain 95 total (92 for the base, 3 for turning).
- Step 2 This length should measure approximately 40 cm (16 in) for the example size.
- Step 3 Work the same 43-row pattern sequence as the front panel, but without any increases , creating a simple rectangle.
- Step 4 Joining Shoulders: Line up the back panel and front panels.
- Step 5 Use slip stitches to join the panels at the shoulders.
- Step 6 Front Border and Ties: Work a row of Single Crochet all the way around the front opening.
- Step 7 Add ties by chaining 100 chains + 1 for turning at the specified points on the panel.
- Step 8 Joining Sides: Try on the cardigan to place a stitch marker where you want the armpit opening to end.
- Step 9 Starting from the bottom, join the side seams using Single Crochet up to the stitch marker.
- Step 10 Sleeves: Join the yarn under the armpit and work in the round, turning at the end of each row.
- Step 11 Start the first row with 72 DC , then continue the pattern sequence until you reach your desired sleeve length.
Small notes
- I keep my tension even across the Squares rows, since loose chains show in the finished lace.
- I mark the start of each panel, so I don't lose my row count partway through.
- I block each panel flat before joining, so the lace rows lie smooth at the shoulder seam.
Little questions
Can I make this cardigan shorter or longer?
Yes, I just add or remove rows before the shoulder join. I keep the same row sequence throughout, so the lace stays consistent.
Do I need to count stitches carefully on the Squares rows?
Yes, the spacing depends on even skips between stitches. I count twice before turning, since one missed stitch shifts the whole row.
How do the front panels differ from the back panel?
The back panel skips the increases and stays a simple rectangle. The front panels follow the same row sequence but shape gradually with increases.
What's the best way to join the shoulders neatly?
I line up both panels carefully before I start. Then I use slip stitches along the shoulder edge, checking row alignment as I go.
Original pattern: https://crocheteverything.com/lightweight-crochet-lace-cardigan-pattern-perfect-for-layering/

About the Author
Tamsin Okoro Who writes the patterns at Yarn Gallery, how a pattern gets from the hook to the page, and what this site will never do.


