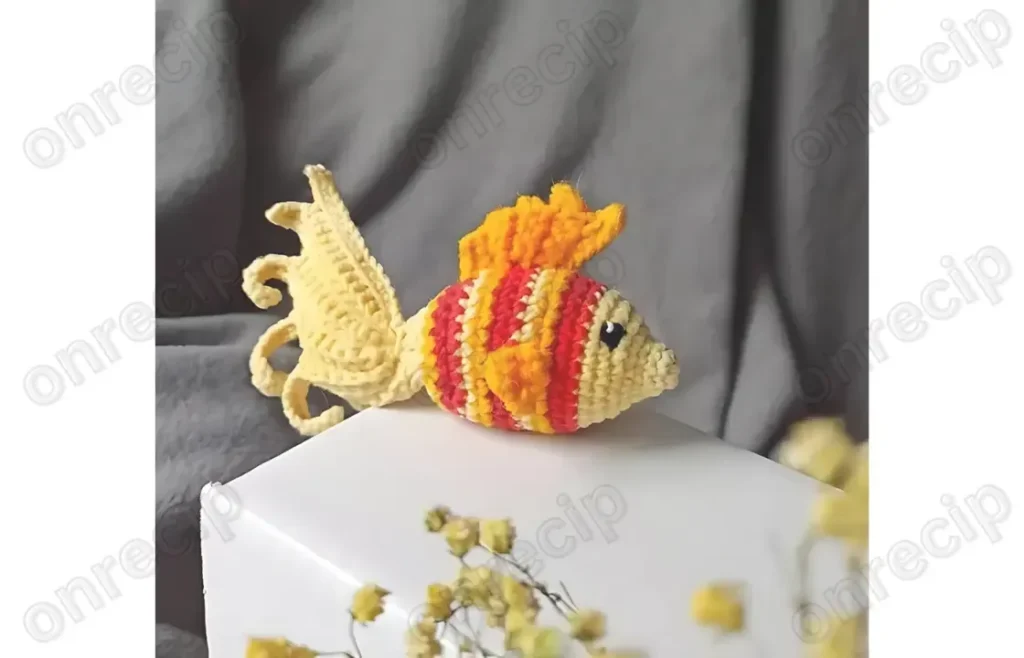
About This Pattern
This little fish sits somewhere between a quick toy and a real project, rated an easy skill level. The body alone runs eighteen rounds, so it fills an evening nicely. Yellow starts the head, then red, then orange carry the rest of the body along. A tail of chains and turns, two small fins, and a comb finish the shape. It needs stuffing, thread for the eyes, and patience for the color changes. Any acrylic, cotton, or cotton-blend yarn and an appropriate hook will work for this amigurumi. Nothing fancy. Just small steady rounds, building something round and bright by the end.
In the basket
Abbreviations
- MR
- magic ring
- ch
- chain
- sc
- single crochet
- inc
- increase
- dec
- decrease
- (…) x n
- repeat n times
Little amigurumi fish crochet pattern with fins and tail
Body
Start crocheting from the fish's head in yellow.
- Row 16 sc in MR
- Row 2(1 sc, inc) x 3 (9)
- Row 39 sc
- Row 4(2 sc, inc) x 3 (12)
- Row 5(1 sc, inc) x 6 (18)
- Row 6(2 sc, inc) x 6 (24)
- Rows 7–824 scChange to red before Rows 9-10.
- Rows 9–1024 scChange to orange before Row 11.
- Row 1124 scChange to yellow before Row 12.
- Row 1224 scChange to red before Rows 13-14.
- Rows 13–1424 scChange to yellow before Row 16.
- Row 1624 scChange to red before Row 17.
- Row 17(6 sc, dec) x 3 (21)
- Row 18(5 sc, dec) x 3 (18)Change to orange before Row 19.
- Row 19(4 sc, dec) x 3 (15)Change to yellow before Row 20.
- Row 20(4 sc, dec) x 3 (15)
- Row 21(3 sc, dec) x 3 (12)
- Row 22(1 sc, dec) x 6 (6)Pull the opening closed! This is where the tail will be attached.
Tail
When I crocheted the tail and fins, I didn't write down the exact number of stitches! It was more of a creative flow.
Counted based on the finished fish.
- Row 1I made 18 ch + one turning chain – the number of chains directly affects the length of the tail. It's up to you to decide if you want it longer or shorter.
- Row 2Turn. Crochet 18 sc + one turning chain
- Row 3Turn. Crochet 15 sc + 3 ch + one turning chain
- Row 4Turn. Crochet 18 sc + one turning chain
- Row 5Turn. Crochet 15 sc + 5 ch + one turning chain
- Row 6Turn. Crochet 20 sc + one turning chain
- Row 7Turn. Crochet 15 sc + 6 ch + one turning chain
- Row 8Turn. Crochet 21 sc + one turning chain
- Rows 9–10Repeat rows 7 and 8
- Row 11Turn. Crochet 14 sc + 4 ch + one turning chain
- Row 12Turn. Crochet 18 sc + one turning chain
The comb is crocheted using the same principle!
Fins
Make 2- Row 13 ch + turning chain
- Row 2Turn, 3 sc + turning chain
- Row 3Turn, 3 sc
- Row 4Turn, 2 sc
Before the first stitch
- Check you have yellow, red, and orange yarn ready, since the body changes color partway through.
- Read through the body rounds once, noting where red starts and where orange takes over.
- Set aside embroidery thread now, so the eyes are easy to place on row 7 later.
Minutes per piece
- Body about 2 hours, because eighteen rounds and two color changes take steady attention
- Tail, fins, and comb about 1 to 2 hours, because the shaping is improvised rather than counted
Other yarns that work
- Cotton, worsted weight Gives a firmer, slightly stiffer fish. Stitches show more definition, so tension should stay even throughout.
Where it ends up
- A soft toy for a child's shelf, paired with other small amigurumi animals.
- A desk companion, sitting beside a pencil cup or a small plant.
- A handmade gift, wrapped simply with no extra trimmings needed.
Joining up
- Step 1 Sew the fins on the sides, the comb on top, and the tail!
- Step 2 Embroider the eyes on both sides on row 7!
Small notes
- The tail and fins are worked more by eye than by exact count. Trust the shape as it forms, not a strict stitch tally.
- Color changes happen before rows 9 through 11 on the body. Plan your yarn ends so joins stay tidy inside the stuffing.
- Stuff the body gradually as you close the rounds. Firm stuffing near row 7 helps the eyes sit evenly on both sides.
- Eyes can be embroidered, or ready-made safety eyes for toys can be used instead, if preferred.
Little questions
Can I make the tail longer?
Yes. The chain length in row 1 sets the tail's length directly. Add or remove chains as you like before starting.
Why don't the tail and fins have exact stitch counts?
They were worked by feel rather than a fixed pattern. Counting from the finished fish gives a rough guide, but some variation is normal.
Where exactly do the eyes go?
Embroider them on row 7, placed on both sides of the body. This keeps them level and close to the head color change.
How much stuffing does the fish need?
Enough to hold a firm round shape through all eighteen body rounds. Add it steadily as you close each round, rather than all at once.
Original pattern: https://onrecip.com/free-amigurumi-fish-crochet-pattern/

About the Author
Tamsin Okoro Who writes the patterns at Yarn Gallery, how a pattern gets from the hook to the page, and what this site will never do.


