About This Pattern
This little airplane sits in the palm of your hand. It works up in yellow and blue milk cotton, round by round. The body builds from a magic ring, the propellers spin separately, and a small cockpit gets sewn on top. It needs an evening, a bit of fiberfill, and patience for the tiny parts. A good project for a quiet night, with the TV on and stitches to count.
In the basket
Abbreviations
- ch
- chain
- st
- stitch
- sl st
- slip stitch
- sc
- single crochet
- inc
- increase
- dec
- decrease
Little crochet airplane amigurumi with wings and propellers
Main Pattern
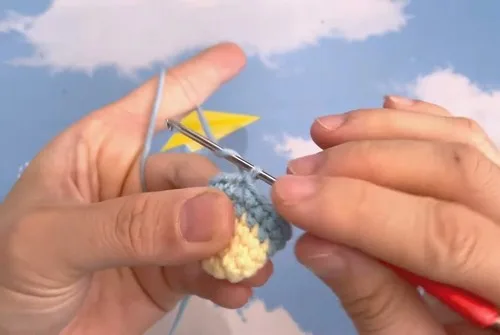
- Round 1Yellow Yarn Make a magic ring Ch 1 SC 6 into the ring Pull tight and SL ST into first SC (6 stitches)Step by step: Ch 1 INC in each stitch SL ST to join (12 stitches) For Row 3: Ch 1 1 SC, 1 INC x6; SL ST to join (18 stitches).(6)
- Round 2Ch 1 INC in each stitch around SL ST to join (12 stitches) For Rows 3–4: Ch 1 SC in each stitchSL ST to join (12 stitches)
- Round 5(Switch to Blue Yarn): Change color and secure yarn Ch 1 SC around SL ST to join (12 stitches)(12)
- Round 6Ch 1 1 SC, 1 INC x6 SL ST to join (18 stitches) For Row 7: Ch 1 1 SC, 1 INC, 1 SC x6SL ST to join (24 stitches)
- Round 8Ch 1 3 SC, 1 INC x6 SL ST to join (30 stitches)(30)
- Rounds 9–12Ch 1 SC around SL ST to join (30 stitches) For Row 13: Ch 1 8 SC, 1 DEC x3 SL ST to join (27 stitches)(27)
- Round 14Ch 1 SC around SL ST to join (27 stitches)(27)
- Round 15Ch 1 7 SC, 1 DEC x3 SL ST to join (24 stitches) For Row 16: Ch 1 SC around SL ST to join (24 stitches)(24)
- Round 17Ch 1 6 SC, 1 DEC x3 SL ST to join (21 stitches)(21)
- Round 18Ch 1 SC around SL ST to join (21 stitches) For Row 19: Ch 1 5 SC, 1 DEC x3 SL ST to join (18 stitches)(18)
- Round 20Ch 1 SC around SL ST to join (18 stitches)(18)
- Round 21Ch 1 4 SC, 1 DEC x3 SL ST to join (15 stitches) For Row 22: Ch 1 SC around SL ST to join (15 stitches)(15)
Finishing
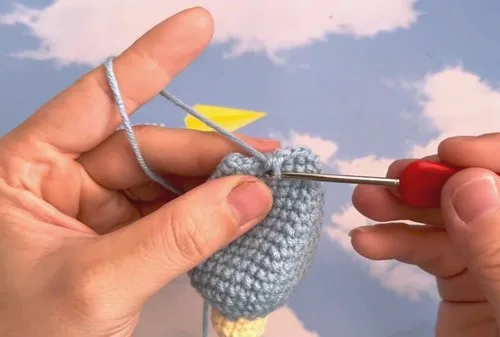
Cut yarn, weave tail through front loops, pull tight, and fasten off.
Propeller (Make 2)
- Round 1Magic ring Ch 1 SC 6 into ring SL ST to join (6 stitches)(6)
- Round 2Ch 1 INC in each stitch SL ST to join (12 stitches) For Rows 3–6: Ch 1 SC aroundSL ST to join (12 stitches)
- Round 7Ch 1 1 SC, 1 DEC x4 SL ST to join (8 stitches)(8)
- Round 8Ch 1 SC around SL ST to join (8 stitches)(8)
Finishing
Fold in half SC across both layers (4 SC)
Leave a long tail for sewing Cockpit/Windshield Create slip knot, Ch 8
- Round 1Skip 1, SC in next 7 (7 stitches)(7)
- Rounds 2–8Ch 1, turn, SC across Fasten off and weave in ends Tail Fin
Part 7
- Round 1Magic ring Ch 1 SC 6 into ring SL ST to join (6 stitches)(6)
- Round 2Ch 1 INC in each stitch SL ST to join (12 stitches)(12)
- Rounds 3–6Ch 1 SC around SL ST to join (12 stitches)(12)
Stuffing
- Round 23Ch 1 3 SC, 1 DEC x3 SL ST to join (12 stitches)(12)
- Round 24Ch 1 SC around SL ST to join (12 stitches) For Row 25: Ch 1 2 SC, 1 DEC x3 SL ST to join (9 stitches)(9)
Stuffing
- Round 26Ch 1 DEC 4 times SC 1 SL ST to join (5 stitches)(5)
More pictures
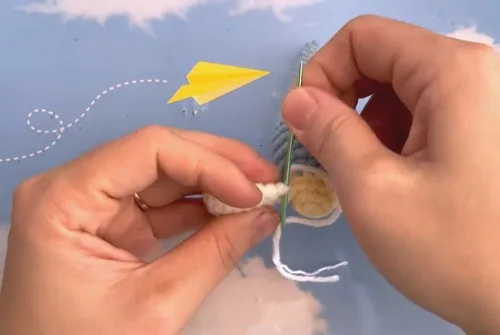
Before the first stitch
- Check you have both yellow and blue milk cotton yarn on hand.
- Read through the Main Pattern's 12 rounds before starting the body.
- Set aside time for the small pieces: propellers, cockpit, and tail fin.
Minutes per piece
- Main Pattern body about 90 minutes, because it runs 12 rounds with a color change partway through
- Propellers, cockpit, and tail fin about 2 hours, because the small pieces are fiddly and need careful sewing
Other yarns that work
- Acrylic worsted weight Slightly stiffer stitches, easier stuffing, same 2.5mm hook works fine.
- Cotton-blend DK weight Softer drape, smaller finished airplane, try a 2mm hook for tighter gauge.
Where it ends up
- A shelf toy for a child's room, paired with other small amigurumi animals.
- A soft travel toy for car rides or waiting rooms.
- A desk companion for a plane-loving coworker or student.
Joining up
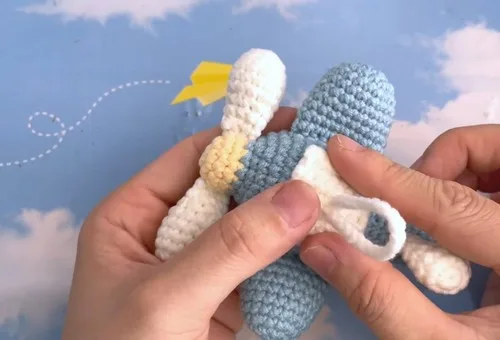
- Step 1 Attach loop to cockpit’s back side
- Step 2 Sew propellers to the front of the airplane
- Step 3 Attach tail fin to the back
- Step 4 Sew cockpit to the top center
- Step 5 Add wings on each side of the body
Small notes
- Use a 2.5mm hook to keep stitches tight enough to hold the fiberfill in.
- Stuff as you go on the smaller pieces, since the propellers close up fast.
Little questions
Can I make the airplane in one color instead of two?
Yes, just skip the color change in Row 5. The shape works the same with one skein throughout.
How much yarn do I actually need?
One 50g skein each of yellow and blue covers the whole toy. You may have a little left over.
Do I need stitch markers?
They help, especially through the 12 rounds of the main body. A scrap of contrasting yarn works just as well.
What if my propellers come out uneven?
Make both propellers back to back, checking round counts match. Small differences won't show once they're sewn on.
Original pattern: https://crocheteverything.com/cute-adorable-crochet-airplane-toy-amigurumi-pattern/

About the Author
Tamsin Okoro Who writes the patterns at Yarn Gallery, how a pattern gets from the hook to the page, and what this site will never do.