About This Pattern
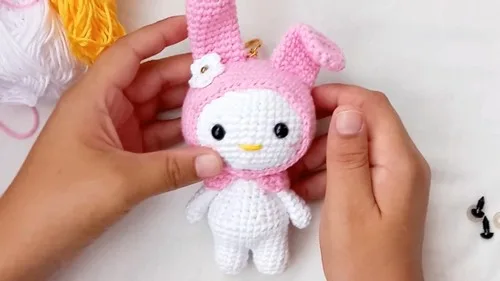
This My Melody amigurumi pattern brings one of the most beloved kawaii characters to life in soft, huggable yarn form. With her signature rounded hood, tiny triangular nose, and rosy pink cheeks, this little friend captures all the charm of the original character while remaining totally achievable at home. She's perfect for fans of cute collectibles, crocheters building a shelf of amigurumi friends, or anyone hunting for a handmade gift that will make someone's whole day.
Working up this pattern involves classic amigurumi techniques: magic ring starts, single crochet increases and decreases for shaping the head and limbs, and simple embroidery-style detailing for the nose and cheeks. The 24-round head is the most involved part, requiring some patience with shaping, but nothing here is beyond an intermediate beginner. Expect to spend a relaxed weekend on this project, working in one or two cozy sittings.
The finished My Melody amigurumi is a compact, plush little companion with a rounded head, stubby arms, and legs worked identically in pairs for perfect symmetry. She has that soft, pinchable amigurumi texture that makes stuffed crochet toys so satisfying to hold. Whether displayed on a shelf, clipped onto a bag as a keychain, or wrapped up as a gift, she's guaranteed to bring a smile.
- Start with the Head, working all 24 rounds continuously to shape the rounded face and hood base.
- Crochet Leg 1 across its 6 rounds, then continue directly into Leg 2 without cutting the yarn.
- Make the Arms twice in white yarn, working the quick continuous rounds for each matching pair.
- Crochet the Tail in white yarn, then stitch the Flower piece separately in pink yarn to prepare My Melody's signature hood accent.
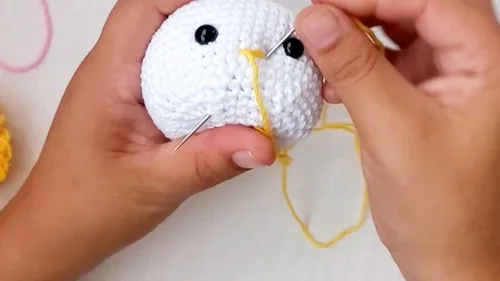
- Embroider the triangular nose in yellow by passing the needle through three stitches, three times over.
- Add the pink cheek details beside each eye at the same height as the new nose.
- Stuff each piece firmly in stages before closing, keeping the head smooth and evenly rounded.
- Follow the nine assembly steps to join the head, arms, legs, and flower into the finished amigurumi.
Materials
Crochet Abbreviations
- ch
- chain
- st
- stitch
- sl st
- slip stitch
- sc
- single crochet
- hdc
- half double crochet
- inc
- increase
- dec
- decrease
- mr
- magic ring
Free My Melody Amigurumi Crochet Pattern
Leg 1
- Round 1Magic ring with 6 single crochet (6)Step by step: 6 single crochet (6); Slip stitch and cut a long tail for sewing to the body.
- Round 26 increases (2 single crochet in each stitch) (12)
- Round 312 single crochet through the back loop only (12)
- Round 4-612 single crochet in both loops (3 rounds) (12)Slip stitch and cut the yarn
Leg 2
Repeat Rounds 1-6 exactly as Leg 1, but do not cut the yarn after the last round
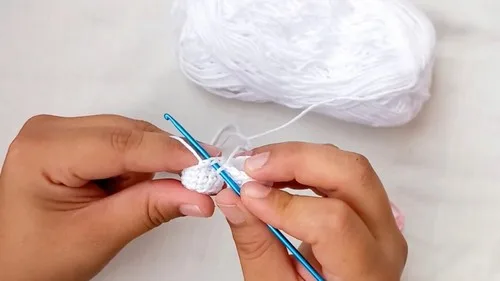
Arms (White Yarn - Make 2)
- Round 1Magic ring with 7 single crochet (7)
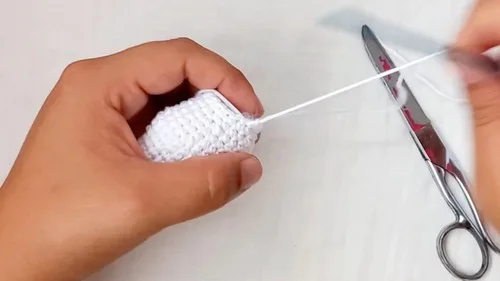
- Round 2-87 single crochet (7 rounds) (7)Flatten the piece and close by making 3 single crochet through both sides of the opening Cut a long tail for sewing to the body
Tail (White Yarn)
- Round 1Magic ring with 6 single crochet (6)
- Round 26 single crochet (6)Slip stitch and cut a long tail for sewing to the body
Flower (Pink Yarn)
In a magic ring, repeat the following sequence 5 times to create petals: Chain 1 2 half double crochet into the magic ring
Chain 1 Slip stitch into the magic ring Pull the magic ring tight to close the flower Cut a long tail for sewing Tie a knot with the starting tail
Head (White Yarn)
- Round 1Magic ring with 6 single crochet (6)
- Round 26 increases (12)
- Round 3(1 single crochet, 1 increase) x 6 (18)
- Round 4(2 single crochet, 1 increase) x 6 (24)
- Round 5(3 single crochet, 1 increase) x 6 (30)
- Round 6(4 single crochet, 1 increase) x 6 (36)
- Round 7(5 single crochet, 1 increase) x 6 (42)
- Round 8(6 single crochet, 1 increase) x 6 (48)
- Round 9-1748 single crochet (9 rounds) (48)
- Round 18(6 single crochet, 1 decrease) x 6 (42)
- Round 19(5 single crochet, 1 decrease) x 6 (36)
- Round 20(4 single crochet, 1 decrease) x 6 (30)Place Safety Eyes: Between rounds 14 and 15, with 7 stitches apart
- Round 21(3 single crochet, 1 decrease) x 6 (24)
- Round 22(2 single crochet, 1 decrease) x 6 (18)
- Round 23(1 single crochet, 1 decrease) x 6 (12)Stuff the head firmly
- Round 246 decreases (6)Slip stitch and cut the yarn Close the remaining hole with a tapestry needle
Facial Details
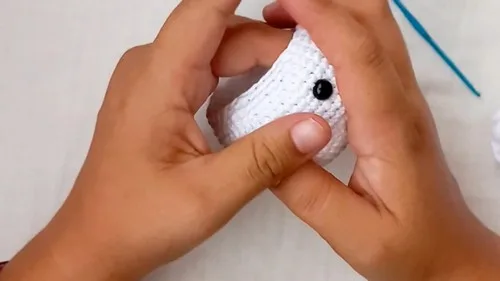
Nose (Yellow Yarn) Insert the needle one round below the eyes. Pass the needle through three stitches horizontally, repeating this process three times to create a triangular nose.
Cheeks (Pink Yarn) At the same height as the nose, but to the side of each eye, take two stitches to create a small line for the cheek.
More photos
Putting It Together
- Step 1 Round 7: From Leg 1, start in the stitch before the slip stitch and make 12 single crochet. Then, make 12 single crochet on Leg 2 (24)
- Step 2 Rounds 8-9: 24 single crochet (2 rounds) (24)
- Step 3 Round 10: (3 single crochet, 1 increase) x 6 (30)
- Step 4 Rounds 11-12: 30 single crochet (2 rounds) (30)
- Step 5 Round 13: (3 single crochet, 1 decrease) x 6 (24)
- Step 6 Rounds 14-15: 24 single crochet (2 rounds) (24)
- Step 7 Round 16: (2 single crochet, 1 decrease) x 6 (18)
- Step 8 Rounds 17-18: 18 single crochet (2 rounds) (18)
- Step 9 Slip stitch and cut a long tail for sewing to the head
Important Notes
💡 Use a hook one size smaller than the yarn label recommends — this keeps your amigurumi stitches tight so stuffing doesn't peek through, especially important on the compact Arms rounds.
💡 Place a stitch marker at the start of every round on the Head, since 24 rounds of continuous single crochet can easily lose track of where a round begins and ends.
💡 When you reach the nose and cheek embroidery, thread your yarn needle with a slightly shorter length than usual — it's easier to control tension over small, precise stitches.
💡 Stuff the Head and limbs firmly but in stages, adding small amounts as you close each section rather than stuffing everything in one go at the very end.
💡 Since Leg 1 and Leg 2 are worked continuously without cutting yarn, keep your working yarn loose on a bobbin or clip to prevent tangling while you finish the assembly steps.
💡 If converting this pattern into a keychain, attach the keyring loop securely inside the top few stitches of the Head before final stuffing so it can bear weight without pulling loose.
Common Mistakes and Fixes
Cutting the yarn after finishing Leg 1
Read ahead before finishing each leg — this pattern intentionally has you repeat Rounds 1-6 for Leg 2 without cutting the yarn, so keep your working loop live and simply start the second leg's first round right after the first.
Losing track of stitch placement
Use a stitch marker to mark exactly one round below the eyes before you begin, and count out your three horizontal stitch passes carefully so the triangle stays even and centered.
Placing the pink cheek stitches too far
Line the cheek stitches up at the same round height as the nose and position them directly beside each eye — pinning both cheeks in place before stitching helps you check symmetry first.
Under-stuffing or over-stuffing
Stuff in small pinches as you go rather than all at once at the end, checking that the head stays round and smooth without stretching the stitches too thin.
Working the Arms (8 rounds)
Since the arms are worked in continuous single crochet rounds, use a hook one size smaller than you'd normally choose for the yarn weight to keep the stitches tight and stuffing invisible.
Forgetting to make two identical Arms
Complete both arms back to back using the same yarn tension throughout, and lay them side by side before attaching to check they truly match in size and shape.
What Makes It Good
- I adore how this pattern turns simple single crochet rounds into something so recognizably My Melody. Working the legs and repeating them exactly for Leg 2 without cutting yarn is such a satisfying shortcut — it keeps your yarn tails to a minimum and speeds up finishing. The nose detail is my favorite part: passing the needle horizontally through three stitches, three times over, to build that perfect little triangle is a technique I use in so many amigurumi faces now. Placing the pink cheek stitches beside each eye at nose height gives her that classic rosy, sweet expression instantly. The 24-round head means you really get to practice smooth shaping, and by the time you reach the top you'll feel so much more confident with increases and decreases. I also love that this pattern is endlessly customizable — swap colors, add a keychain ring, or resize her — so no two My Melodies ever have to look quite the same. It's a project that rewards patience with an incredibly cute payoff.
Frequently Asked Questions
Do I need to cut the yarn between Leg 1 and Leg 2?
No — the pattern specifically has you repeat Rounds 1-6 for Leg 2 without cutting the yarn after Leg 1. This keeps the transition seamless and reduces the number of ends you'll need to weave in later.
What yarn weight works best for this My Melody amigurumi?
A worsted weight cotton or acrylic yarn paired with an appropriately sized amigurumi hook gives the cleanest stitch definition. Cotton yarns like a standard worsted acrylic hold their shape well and keep the stuffing from showing through.
How do I make the triangular nose look neat and even?
Work one round below the eyes and pass your needle horizontally through three stitches, repeating the pass three times to build up the triangle shape. Keep even tension on each pass so the nose sits flat and symmetrical rather than puckering the fabric.
Can I turn this pattern into a keychain?
Yes, the source notes that this design can easily be adapted into a keychain accessory. Simply attach a keyring loop securely within the top rounds of the head before closing and stuffing it fully.
Is this pattern suitable for a beginner amigurumi crocheter?
It's best suited to someone with some amigurumi experience, as the 24-round head involves consistent shaping through increases and decreases. If you've completed a simpler amigurumi before, you should find this an enjoyable step up.
Original pattern: https://crocheteverything.com/free-my-melody-amigurumi-crochet-pattern/

About the Author
Tamsin Okoro Who writes the patterns at Yarn Gallery, how a pattern gets from the hook to the page, and what this site will never do.


