About This Pattern
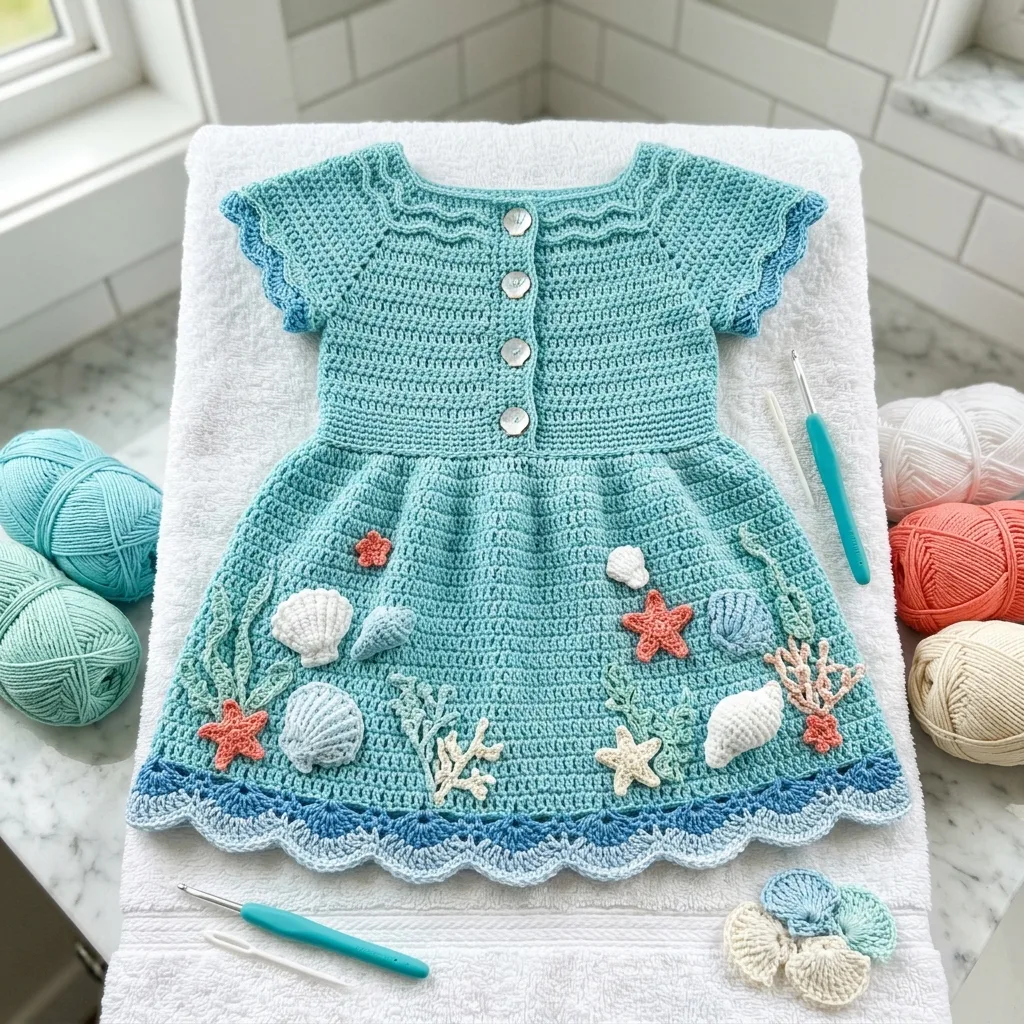
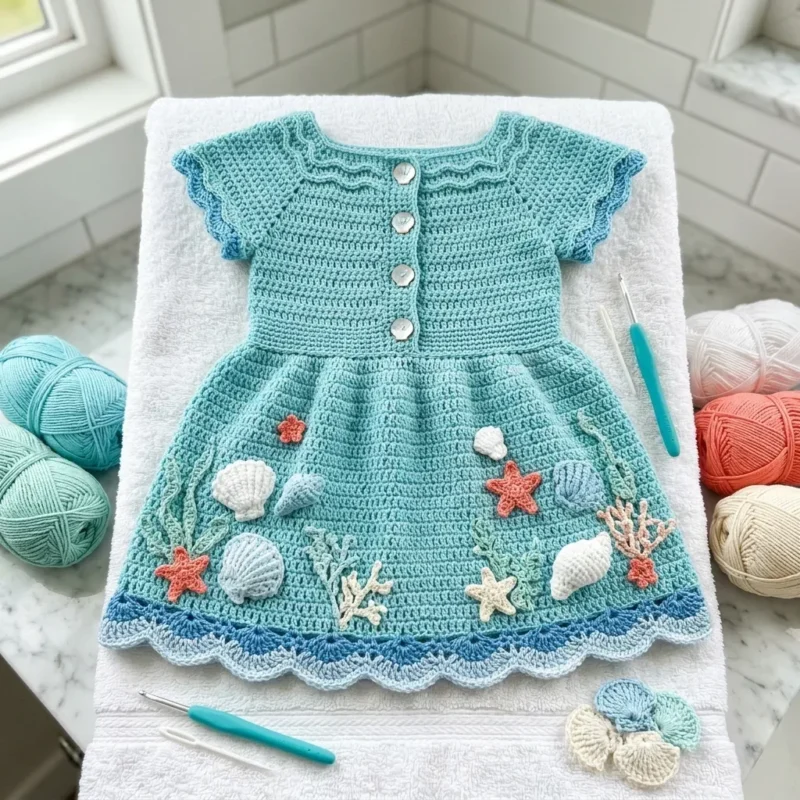
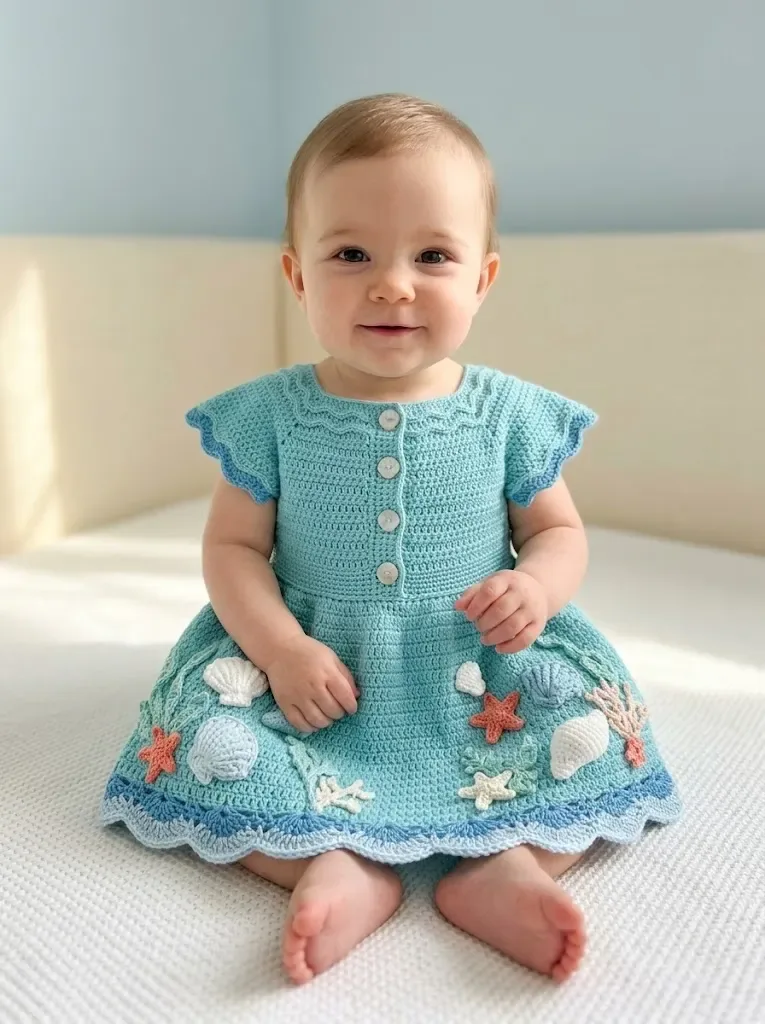
This Ocean Wave Baby Dress brings a little seaside magic to basket, combining a simple three-panel bodice with a scalloped Wave Border skirt and a scattering of tiny appliqués. Worked in soft aqua and seafoam tones with pops of coral and sage, it captures that breezy, beachy feeling in a garment sized for the smallest wearers. It's perfect for crocheters who want a special-occasion baby piece that still feels approachable, and for anyone dreaming up a summer birth gift, baby shower present, or seasonal photo-shoot outfit.
The construction is refreshingly straightforward: flat rows of single crochet build the Back, Front Left, and Front Right bodice panels with shoulder shaping, followed by a gently increasing Skirt and a decorative Wave Border worked in rounds. Along the way you'll practice increases, decreases, seaming, and simple color-change appliqué work for the Seashells and Starfish. It sits comfortably at an intermediate beginner to intermediate level, and most crocheters can complete the full dress, sleeves, and embellishments in a handful of relaxed sessions.
When it's finished, you'll have a sweet button-back dress fitting a 6 to 12 month chest of about 18 inches, with a shoulder-to-hem length near 14 inches and dainty short sleeves. The wave-edged hem and ocean-inspired appliqués give it a boutique, heirloom-quality look, while the soft worsted cotton blend keeps it gentle against baby skin. It makes an unforgettable handmade gift — the kind that gets tucked away and treasured long after baby has outgrown it.
- Crochet the Bodice Back Panel flat in single crochet, then shape each shoulder separately while skipping stitches for the neck opening.
- Work the Bodice Front Left Panel with matching shoulder shaping, then mirror those same shaping rows for the Bodice Front Right Panel.
- Seam all three bodice panels together at the shoulders using slip stitch or your preferred seaming method.
- Join the side seams from the bottom edge of the bodice up to where the armhole openings begin.
- Attach yarn at the bodice hem and work the Skirt rounds outward to build the dress body.
- Finish the hem with the scalloped Wave Border rounds for that signature rippling ocean edge.
- Crochet two Sleeves in the round and set them into the armhole openings.
- Add the Neckline Edging, Button Band, and Buttonhole Band, then sew on the five buttons and stitch your chosen Seashell and Starfish appliqués in place.
Materials
Color A
Color B
Color C
Color D
Color E
Color F
Crochet Abbreviations
- Ch
- Chain
- Sl st
- Slip stitch
- Sc
- Single crochet
- Dc
- Double crochet
- Hdc
- Half double crochet
- Inc
- Increase - Work 2 stitches into the same stitch
- Dec
- Decrease - Work 2 stitches together as one
- Sk
- Skip - Miss the indicated stitch and work into the next one
- RS
- Right side - the side that will face outward when worn
- WS
- Wrong side - the side that faces the body
Crochet Ocean Wave Baby Dress: Seaside Style Pattern
Bodice Back Panel
You should now have a rectangular panel measuring approximately 9 inches wide and 4 inches tall after Row 20.
Fasten off and weave in ends after completing Right Shoulder.
For Left Shoulder: Skip center 15 stitches for neck opening, then join MC to next stitch with sl st before beginning Row 31.
Fasten off after completing Left Shoulder.
Foundation: With MC and 4.0mm hook, ch 42.
- Round 1(RS): Sc in 2nd ch from hook and in each ch across. (41 sts)
- Round 2Ch 1, turn. Sc in each st across. (41 sts)
- Round 3through 20: Repeat Row 2. (41 sts)
- Round 21Ch 1, turn. Sl st in first 4 sts, ch 1, sc in next 33 sts, leave remaining 4 sts unworked. (33 sts)
- Round 22Ch 1, turn. Sc2tog over first 2 sts, sc across to last 2 sts, sc2tog. (31 sts)
- Round 23Ch 1, turn. Sc in each st across. (31 sts)
- Round 24through 30: Repeat Row 23. (31 sts)
- Round 31(Right Shoulder): Ch 1, turn. Sc in first 8 sts, leave remaining sts unworked. (8 sts)
- Round 32(Right Shoulder): Ch 1, turn. Sc2tog, sc across. (7 sts)
- Round 31(Left Shoulder): Ch 1, sc in same st and in next 7 sts. (8 sts)
- Round 32(Left Shoulder): Ch 1, turn. Sc across to last 2 sts, sc2tog. (7 sts)
Bodice Front Left Panel
Fasten off after Row 32.
Foundation: With MC, ch 23.
- Round 1(RS): Sc in 2nd ch from hook and in each ch across. (22 sts)
- Round 2through 20: Ch 1, turn. Sc in each st across. (22 sts)
- Round 21Ch 1, turn. Sl st in first 4 sts, ch 1, sc in remaining 18 sts. (18 sts)
- Round 22Ch 1, turn. Sc across to last 2 sts, sc2tog. (17 sts)
- Round 23through 28: Ch 1, turn. Sc in each st across. (17 sts)
- Round 29Ch 1, turn. Sc in first 10 sts, leave remaining 7 sts unworked. (10 sts)
- Round 30Ch 1, turn. Sc2tog, sc across. (9 sts)
- Round 31Ch 1, turn. Sc across to last 2 sts, sc2tog. (8 sts)
- Round 32Ch 1, turn. Sc2tog, sc across. (7 sts)
Skirt
The skirt attaches directly to the bottom edge of the joined bodice and is worked in the round with increases for gentle flare.
Fasten off MC after Round 20.
- Round 1With RS facing, join MC at center back. Ch 1, work 82 sc evenly around entire bottom edge of bodice, sl st to first sc to join. (82 sts)
- Round 2Ch 3 (counts as dc throughout skirt), dc in each st around, sl st to top of ch-3. (82 dc)
- Round 3Ch 3, dc in same st, dc in next 3 sts, *2 dc in next st, dc in next 3 sts*, repeat from * around, sl st to join. (102 sts)
- Round 4through 6: Ch 3, dc in each st around, sl st to join. (102 sts)
- Round 7Ch 3, dc in same st, dc in next 4 sts, *2 dc in next st, dc in next 4 sts*, repeat from * around, sl st to join. (122 sts)
- Round 8through 12: Ch 3, dc in each st around, sl st to join. (122 sts)
- Round 13Ch 3, dc in same st, dc in next 5 sts, *2 dc in next st, dc in next 5 sts*, repeat from * around, sl st to join. (142 sts)
- Round 14through 20: Ch 3, dc in each st around, sl st to join. (142 sts)
Wave Border
This is worked as three rounds of wave edging in graduating blues to create the ocean-floor effect.
- Round 1(Color A, Medium Blue): Join Color A with sl st to any st. *Sc in next st, hdc in next st, dc in next 2 sts, hdc in next st, sc in next st*, repeat from * around, sl st to join. Fasten off.
- Round 2(Color B, Light Blue): Join Color B in any sc from previous round. *Sc in sc, hdc in hdc, dc in next 2 dc, hdc in hdc, sc in sc*, repeat from * around, sl st to join. Fasten off.
- Round 3(Color C, White): Join Color C in any sc. Work scallop edging: *Sk 1 st, 5 dc in next st (shell made), sk 1 st, sl st in next st*, repeat from * around. Fasten off.
Sleeves
Make 2With RS facing, join MC at center of underarm before beginning Round 1.
- Round 1Ch 1, work 28 sc evenly around armhole opening, sl st to join. (28 sts)
- Round 2through 5: Ch 1, sc in each st around, sl st to join. (28 sts)Ruffle Round: Ch 3, dc in same st, 2 dc in each st around, sl st to join. (56 sts)Edging Round: Ch 1, sc in each st around, sl st to join. Fasten off.
Neckline Edging
- Round 1With RS facing, join MC at center back neck. Work sc evenly around entire neckline, sl st to join.
- Round 2Ch 3, dc in same st, 2 dc in each st around for ruffle effect, sl st to join.
- Round 3Ch 1, sc in each st around, sl st to join. Fasten off.
Button Band (Right Front)
- Round 1With RS facing, join MC at bottom of right front opening. Work sc evenly up front edge to neckline. Turn.
- Round 2Ch 1, sc in each st across. Fasten off.
Buttonhole Band (Left Front)
- Round 1With RS facing, join MC at top of left front opening (at neckline). Work sc evenly down front edge. Turn.
- Round 2Ch 1, sc in first 2 sts, *ch 2, sk 2 sts, sc in next 6 sts*, repeat from * 4 more times for 5 buttonholes total, sc to end. Fasten off.
Seashell
Work with the 3.5mm hook for tighter stitches and better definition.
Fasten off, leaving long tail for sewing.
- Round 1With Color C or Color E, ch 10. Sc in 2nd ch from hook, hdc in next ch, dc in next 2 ch, hdc in next ch, sc in next ch, sl st in next ch, sc in next ch, hdc in last ch. Do not turn.
- Round 2Working along opposite side of foundation chain, hdc in first ch, sc in next ch, sl st in next ch, sc in next ch, hdc in next ch, dc in next 2 ch, hdc in next ch, sc in last ch.
Bodice Front Right Panel
Work same as Front Left Panel through Row 20, reversing shaping. This panel will mirror the left side.
Continue reversing all shaping through Row 32 to create matching shoulder.
Fasten off after completing the panel.
- Round 21Ch 1, turn. Sc in first 18 sts, leave last 4 sts unworked. (18 sts)
Starfish
Work with the 3.5mm hook for tighter stitches and better definition.
Source text was cut off after 'With' — remaining Starfish pattern instructions were not provided in the scraped content.
More photos
Putting It Together
- Step 1 Join all three bodice panels at shoulders using sl st or your preferred seaming method.
- Step 2 Join side seams from bottom of bodice up to armhole openings.
- Step 3 Each seashell, starfish, and coral piece is worked separately and sewn on at the end; placement can be customized as desired.
Important Notes
Check your gauge carefully with the 4.0mm hook — 18 stitches and 20 rows should measure 4 inches in single crochet, since this directly affects the finished 18-inch chest fit.
Use a soft, machine-washable cotton or cotton-blend light worsted (category 3) yarn for baby comfort and easy care after little messes.
Keep your 3.5mm hook separate and ready for the Seashell and Starfish appliqués — the smaller hook keeps these accent pieces tidy and proportional.
When working the Bodice Back Panel, remember the center 15 stitches are skipped for the neck opening before starting the Left Shoulder section.
Take your time joining the three bodice panels at the shoulders first, then complete side seams from the bottom up to the armholes for a clean fit.
Since Seashell, Starfish, and appliqué placement is fully customizable, pin pieces in place and try the dress on a doll or folded towel to preview the look before sewing permanently.
Skill Level: Intermediate beginner to intermediate. Comfortable with basic stitches and increasing.
Finished Measurements: Chest approximately 18 inches (fits 6 to 12 months); Length from shoulder to hem approximately 14 inches; Sleeve circumference approximately 6 inches.
Gauge: 18 stitches and 20 rows = 4 inches in single crochet using 4.0mm hook. Check gauge before starting.
A soft cotton or cotton blend works beautifully for baby garments; look for machine-washable options.
Common Mistakes and Fixes
Losing track of stitch counts when shaping the shoulder sections on the Back, Front Left, and Front Right panels.
Use a stitch marker at the start of each row and count stitches after every shaping row (like Row 21's sl st and unworked stitch instructions) before moving on.
Skipping the gauge swatch since the panels look simple.
Always check gauge (18 sts and 20 rows = 4 inches in single crochet) before starting — a few stitches off will change the finished 18-inch chest measurement significantly on a baby garment.
Mixing up which panel is the Front Left versus Front Right, especially since Right mirrors Left with reversed shaping.
Label your panels with a scrap of yarn or stitch marker as you finish each one, and lay them out RS-up in dress orientation before seaming.
Sewing on buttons before finalizing appliqué and border placement.
Lay the finished dress flat and pin all Seashells, Starfish, and buttons in place first, step back to check the overall look, then sew everything down permanently.
Seaming side seams too high or too low, causing armhole openings to sit unevenly.
Join side seams only from the bottom of the bodice up to the armhole openings as directed, checking that both sides match in length before securing.
What Makes It Good
- This pattern is wonderfully easy to customize once you understand the panel construction. For a sunset nursery theme, swap the aqua Main Color for a soft peach or blush, keep the coral (Color D) as your accent, and use cream and sage for the shells and starfish so they read as little sand dollars instead. Want a boy-friendly ocean look? Try a deeper teal Main Color with navy and white stripes worked into the skirt rounds, saving the coral for just one or two starfish appliqués. If you're making this for a slightly older baby, consider adding a few extra rows to the Skirt section before starting the Wave Border rounds to lengthen the hem — just keep your stitch count consistent with the pattern's shaping. You can also lengthen the sleeves by repeating the sleeve rounds once or twice more for a bit more coverage in cooler weather. For yarn substitutions, any light worsted weight (category 3) cotton or cotton-blend works beautifully in place of the specified yarns — just aim to match gauge with your 4.0mm hook so the finished chest measurement stays true to 18 inches. If you love texture, work the Wave Border in a contrasting variegated ocean-toned yarn to make those scallops pop even more. For gifting, consider making a matching Starfish or Seashell as a stand-alone hair clip or headband embellishment using the same appliqué rounds and the 3.5mm hook. However you play with it, the panel-and-appliqué structure of this dress makes it endlessly adaptable to different palettes, seasons, and personalities.
- I adore how this dress takes such simple building blocks — rows of single crochet, a few increases and decreases — and turns them into something that feels genuinely special. The Bodice Back, Front Left, and Front Right panels come together like a little puzzle, and there's real satisfaction in watching the shoulder shaping click into place at Row 21 and beyond. The Wave Border is the star for me; those scalloped rounds transform a plain skirt hem into something that looks like it's rippling right off the ocean. And then there are the appliqués — working up tiny Seashells and Starfish with the smaller 3.5mm hook feels like little bursts of creative play after the more meditative bodice rows. I love that placement is totally up to you, so no two dresses ever look quite the same. Add in the button band and buttonhole band for an easy on-and-off design that's practical for real baby dressing, and you've got a project that's as functional as it is charming. This one had me smiling the whole way through.
Frequently Asked Questions
What size baby does this Ocean Wave Dress fit?
This pattern is designed for babies 6 to 12 months, with a finished chest measurement of approximately 18 inches and a shoulder-to-hem length of about 14 inches. Always check your gauge first since fit depends heavily on matching the specified stitch counts.
Do I need to make all the appliqués — Seashells, Starfish, and coral pieces?
No, the number and placement of Seashells and Starfish (3 to 4 of each) is fully up to you, so feel free to add more, fewer, or arrange them however you like. They're worked separately and sewn on at the very end, giving you complete creative freedom.
How do the Front Left and Front Right bodice panels differ?
The Front Right Panel mirrors the Front Left Panel, working the same stitch counts through Row 20 but reversing the shaping for the shoulder and neckline. This creates a symmetrical, matching front opening once both panels are joined.
What's the best way to attach the buttons and buttonhole band?
The Button Band is worked on the Right Front and the Buttonhole Band on the Left Front, each just 2 rounds, then the five small buttons (about 10mm) are hand-sewn to align with the buttonholes. Try the bands together before sewing buttons to double-check spacing matches your buttonholes.
Original pattern: https://crochetwithmia.com/ocean-wave-baby-dress-free-crochet-pattern/

About the Author
Tamsin Okoro Who writes the patterns at Yarn Gallery, how a pattern gets from the hook to the page, and what this site will never do.


