About This Pattern
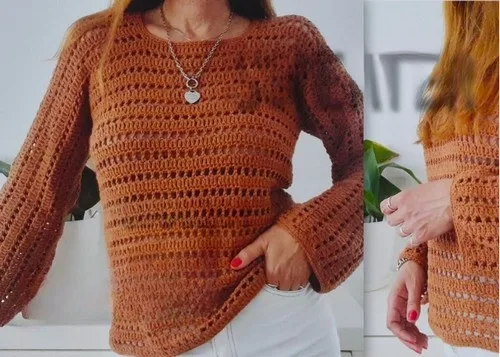
This sweater starts flat, as one back panel. It grows sideways into sleeves. Then it splits for the neckline and rejoins. One seam closes the sides. It suits a quiet evening with a big cotton ball nearby. It needs a steady chain count and patience through the Punto Red rows. No piecing, no counting motifs. Just four parts, worked in order.
In the basket
Abbreviations
- PA
- Double Crochet
- PB
- Single Crochet
- C
- Chain
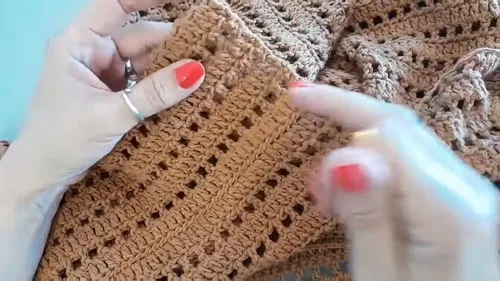
- Punto Red
- PA, C1, skip 1 st
- FPA
- False DC as turning substitute
One piece crochet sweater worked flat from the back
Back Panel
Chain an odd number based on desired width plus 1 for turning
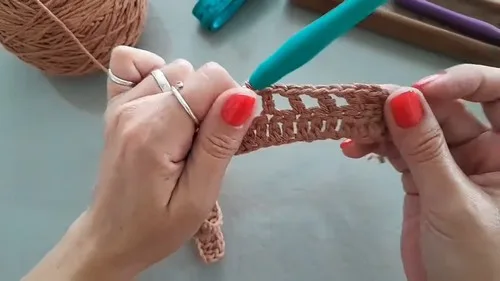
- Row 1PA Row Work FPA in 2nd chain and PA across
- Row 2Punto Red Work FPA then C1 skip 1 PA in next continue end with PARepeat Row 1 and Row 2 until reaching armhole height ending on Punto Red row
Sleeves And Full Panel
At last row chain odd number for one sleeve plus 1 for turning
- Row 1Work PA back down chain and across the panelJoin new yarn and chain same amount for second sleeve
- Row 2Punto Red Turn and work Punto Red across entire pieceContinue alternating PA and Punto Red rows until sleeve height before neckline
Neckline Separation And Rejoining
Mark center stitches for neckline opening
- Row 1Work first shoulder section only in pattern for required rows cut yarn
- Row 2Join yarn at second marker work same stitch count one row less cut yarn
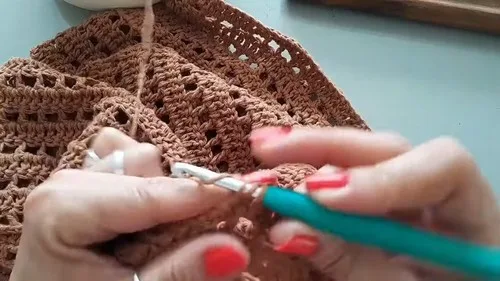
- Row 3Punto Red Rejoin at first shoulder work Punto Red chain required stitches to bridge neckline continue to end
- Row 4PA row Work next PA row placing PA evenly into chainsContinue alternating rows adding length until sleeves complete ending with PA row
Front Panel
Mark center stitches equal to back panel width
- Row 1Work pattern rows on marked stitches onlyContinue until front panel row count matches back panel
More pictures
Before the first stitch
- Check you have the full 400g of cotton yarn before starting the back panel.
- Read through the Neckline Separation and Rejoining section first. It has four rounds and two cut points.
- Place a marker at the center stitches early. You will need it for the neckline split.
Minutes per piece
- Back Panel and Sleeves And Full Panel about 2 to 3 hours, because the piece grows wide across two parts before any shaping starts
- Neckline Separation And Rejoining about 1 to 2 hours, because of the yarn cuts and rejoins across four rounds
Other yarns that work
- Cotton-linen blend, worsted weight Drapes looser and cooler. Keep the same 4.5mm hook, but expect a slightly larger finished width.
- Acrylic, worsted weight Lighter in the hand, less structured. Size down to a 4mm hook to keep stitches from going loose.
Where it ends up
- A weekend layer over a plain tank top, worn loose.
- A throw-on piece for cool mornings, paired with simple trousers.
- A travel sweater, packs flat and needs no ironing.
Joining up
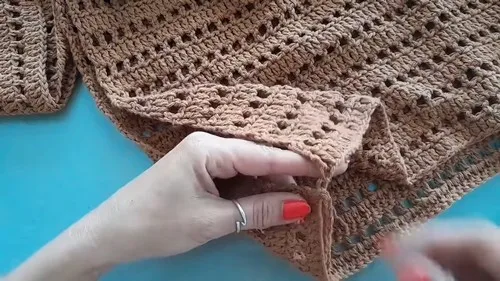
- Step 1 Fold sweater in half and seam sides and sleeves
- Step 2 Work PB around neckline using smaller hook placing 1 PB per stitch and 2 PB along row edges slip stitch to close round
- Step 3 Work PB around hem and cuffs for cleaner finish
- Step 4 Reduce cuff width by alternating 2 PB per row 1 PB per row if desired
Small notes
- Keep your Punto Red tension even. Loose chains here will show as gaps across the chest.
- Mark both shoulder sections before cutting yarn in the neckline rounds. It is easy to lose your place.
Little questions
Can I make this sweater without a pattern repeat count?
Yes. The chain length for the back panel is based on your desired width plus one for turning. You set the width yourself before Round 1.
Why does the pattern use two different stitch rows?
Round 1 builds plain rows in PA. Round 2, the Punto Red row, opens up the fabric with chain spaces. Alternating the two gives the sweater its drape.
How do I know where to split for the neckline?
Mark the center stitches before you start the Neckline Separation section. Each shoulder is then worked separately, with yarn cut between sections.
Do I need to seam much at the end?
Just the sides and sleeves, folded in half first. The rest of the sweater is already joined from working it as one piece.
Original pattern: https://crocheteverything.com/easy-one-piece-crochet-women-sweater-pattern-free/

About the Author
Tamsin Okoro Who writes the patterns at Yarn Gallery, how a pattern gets from the hook to the page, and what this site will never do.


