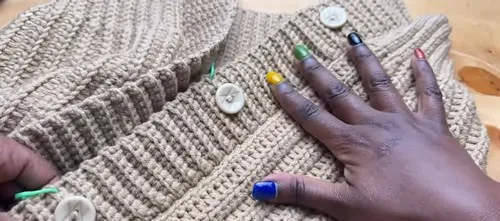
About This Pattern
This cardigan starts small, with just 17 stitches of ribbing. That strip grows into a back panel, worked flat in SC and HDC. It needs an evening where you can sit through repeats, row after row, without rushing the turn. The ribbing holds its shape through back-loop-only stitches, which take patience more than skill. By the end you have a panel close to 19 inches, ready for the next part. The finished cardigan is designed for a medium fit, with a buttoned front band added at the end. It fits a lap, a cup of tea, and a quiet hour of counting.
In the basket
Yarn
Other
Abbreviations
- sc
- single crochet
- hdc
- half double crochet
- blo
- back loops only
Ribbed cardigan pattern with button detailing
Main Pattern
- Row 1Foundation Starting in the second chain from the hook, make 17 Single Crochets (SC) , working on the back side of the stitches.Place a stitch marker on the 17th SC.Make Half Double Crochet (HDC) in the remaining stitches until the end of the row.
- Row 2Chain 2 (does not count as a stitch), turn your work.Work BLO HDC until you reach the stitch marker.Remove the stitch marker and work BLO SC in the 17 stitches of the ribbing section. Place the marker back on the first BLO SC.
- Row 3Chain 1, turn your work. Work BLO SC until you reach the stitch marker. Remove the stitch marker and work BLO HDC for the remainder of the row.Repeat: Repeat Rows 2 and 3 until you have a total of 54 rows for the back panel. Your panel should measure up to 19 to 19.5 inches .
Front Panels & Shoulder Shaping
Mark Shoulders: On the last row of the back panel, count 21 stitches from one corner and place a stitch marker. Repeat this on the other corner.
The middle un-marked section is the neckline area (12 stitches/rows, approx. 5 inches).
Make Panels: Create two identical front panels, each worked for 21 rows , following the same stitch pattern as the back panel.
Assembly: Align the front and back panels at the shoulders.
Starting at the corner stitch, use the long tail of yarn to join the two pieces by making two Single Crochets (SC) through both layers in each stitch/row end, repeating until you reach the shoulder stitch marker.
Chain 2 and cut the yarn. Repeat on the opposite shoulder.
Side Seams
Count 56 stitches up from the bottom edge of the back panel and place a stitch marker (this leaves 33 stitches for the armhole opening).
Join the sides from the bottom up to the stitch marker using SC: insert your hook through both loops on one side and the back loop only on the opposite side to create a hidden seam effect.
Continue this seam until you reach the stitch marker.
Sleeves
Part 2
- Row 1Armhole Starting at the stitch marker, make HDC into both loops all the way around the armhole opening. Place a stitch marker on the first HDC.When you reach the shoulder seam, insert the hook through both sides of the seam and make one HDC to join across.Continue with HDC until the end of the row (do not join).
- Rows 2–36Chain 2, turn your work. Work Back Loop Half Double Crochet (BLO HDC) in every stitch.Repeat this until you have a total of 36 rows of BLO HDC (approx. 15 inches).
Cuff
Foundation: Chain 16 stitches . Chain 1, then make 16 SC in the back of the chains. Place a marker on the last SC.
Joining: Skip 1 stitch on the sleeve edge, then make 4 slip stitches on the sleeve edge. Turn your work.
Cuff Row 1 (Return): Remove marker, BLO SC in every stitch of the cuff (16 stitches). Replace the marker.
Cuff Row 2 (Out): Chain 1, turn, BLO SC in every stitch of the cuff.
Joining: Skip 1 stitch on the sleeve edge, then make 4 slip stitches on the sleeve edge. Turn your work.
Repeat: Continue repeating the process until you have 5 stitches remaining on the sleeve. Finish off the cuff with 4 slip stitches.
Front Ribbing (Button Band)
Edge Prep: Attach yarn at the bottom corner. Work a row of SC up the entire front opening (both front panels and the back neckline).
Along the HDC rows, make two SC in every HDC row .
At the corners (like the neckline corner), make two SC in the corner stitch to help turn the work.
Count your total SC stitches around the opening.
Chain 2 and cut the yarn.
Ribbing Strip
Chain 9 stitches . Chain 1, make SC in 8 stitches.
Subsequent Rows: Chain 1, turn, make BLO SC in every stitch.
Button Holes Create Hole: On a chosen row, chain 1, turn.
Make BLO SC in the first 3 stitches .
Chain 3 .
Skip the next 3 SC on the previous row.
Make BLO SC in the remaining stitches.
Spacing: The suggested spacing is to make a button hole, then work 19 more rows , then make another button hole.
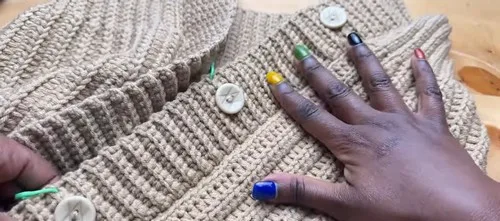
Finishing Attaching Buttons: Attach the buttons to the opposite side of the button holes.
Spacing: The suggested spacing is to attach a button after every 20 rows (specifically between the 19th and 20th rows/stitches).
Placement: Center the button in the middle three stitches of the ribbing section where the button hole would be on the opposite side.
More pictures
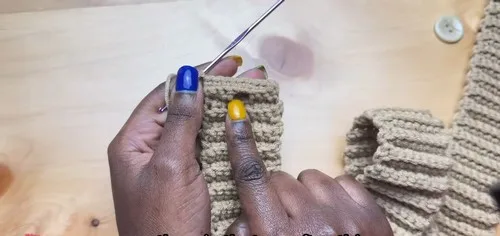
Before the first stitch
- Chain 90 stitches and check it measures about 20 inches before starting Row 1.
- Buy three balls of your yarn now, so dye lots match across the whole back panel.
- Read Rows 2 and 3 once, start to finish, before you pick up the hook.
Minutes per piece
- Back panel ribbing and body about 2 to 3 hours, because 54 rows repeat the same two-row pattern
- Armhole and sleeve shaping about 1 to 2 hours, because 36 rows of BLO HDC need even tension
Other yarns that work
- Cotton blend, worsted weight Gives a cooler drape, but ribbing may need a slightly smaller hook to keep its bounce.
- Acrylic, worsted weight, single color Keeps the same gauge and hook size, with a lighter, less structured drape than the milk cotton blend.
Where it ends up
- Wear it over a plain tee for a morning at the market.
- Layer it over a dress for an evening that turns cool.
- Keep it by the door for quick errands, buttoned at the chest only.
Small notes
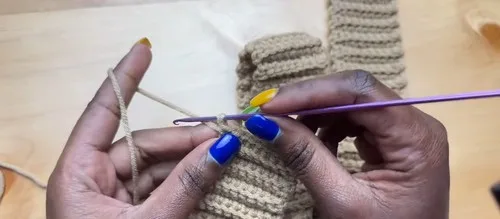
- Use a 3mm hook throughout, since the ribbing depends on a tight, even gauge.
- Keep two stitch markers moving with you, one for the ribbing edge and one for joins.
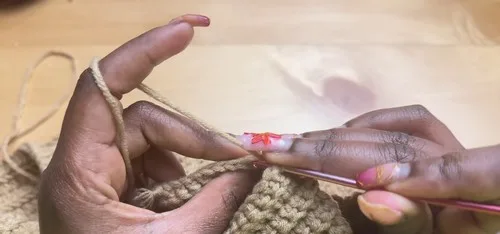
- Work BLO stitches slowly at first, since the back loop is easy to miss early on.
- Gauge/Initial Chain: Chain 90 stitches to begin; it should measure approximately 20 inches before you work Row 1 of the back panel.
Little questions
Why does the ribbing use SC instead of HDC?
The single crochet stitches sit tighter, which lets the ribbing stretch and recover. HDC in the rest of the row keeps the body soft and quick to work.
How do I know if my panel is the right size?
After 54 rows, measure the back panel. It should sit between 19 and 19.5 inches, matching the gauge from your starting chain.
Where exactly do the buttons go?
Space them every 20 rows, between the 19th and 20th row. Center each one in the middle three stitches of the ribbing strip.
Can I skip the stitch marker on the ribbing?
I would not skip it. The marker marks where ribbing ends and the body begins, and losing that point means uneven rows later.
Original pattern: https://crocheteverything.com/how-to-crochet-ribbed-cardigan-pattern-free-with-button-detailing/

About the Author
Tamsin Okoro Who writes the patterns at Yarn Gallery, how a pattern gets from the hook to the page, and what this site will never do.


