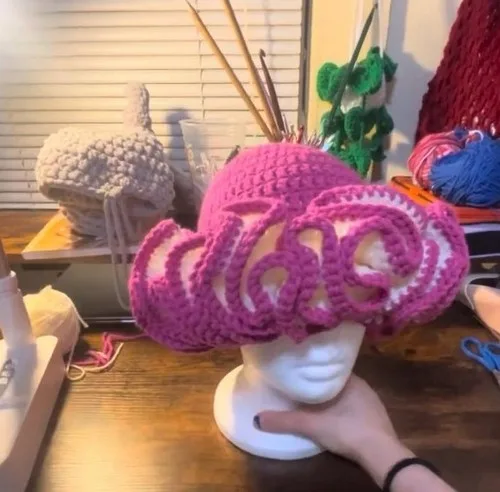
About This Pattern
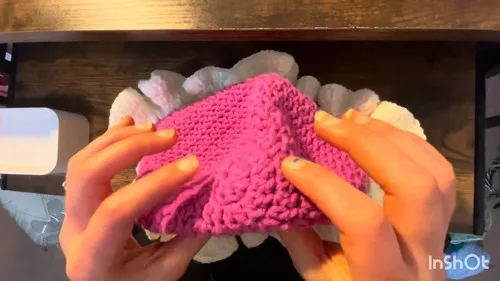
This is a hat for a slow evening by the lamp. It starts small, with a magic circle in hot rose pink. The crown grows in quiet increase rounds, then the off-white ruffle rises along the brim. It needs one evening, a steady hand with double crochet, and a willingness to count stitches twice. By the end you have something that looks store-bought, but was made stitch by stitch at your own table.
In the basket
Abbreviations
- ch
- chain
- st
- stitch
- sl st
- slip stitch
- sc
- single crochet
- dc
- double crochet
- inc
- increase
- fo
- finish off
Ruffled crochet hat with boutique-style trim
Main Pattern
Hat Base (Using Pink Yarn)
- Round 1Magic Circle Magic Circle Create a magic circle. Chain 1 to secure the circle (does not count as a stitch). Chain 2 (not counted as a double crochet). Work 10 double crochets into the ring. Pull tight and slip stitch into the first double crochet to close the round.Step by step: create a magic circle; chain 1 to secure the circle (does not count as a stitch); chain 2 (not counted as a double crochet); work 10 double crochets into the ring; pull tight and slip stitch into the first double crochet to close the round.
- Round 2Increase Round Increase Round Chain 2 (not counted). Work 2 double crochets in each stitch around. Slip stitch to join.Step by step: chain 2 (not counted); work 2 double crochets in each stitch around; slip stitch to join.
- Round 3Increase Round Chain 2. 1 increase, 1 double crochet—repeat around. Slip stitch to join.
- Round 4Increase Round Chain 2. 1 increase, 2 double crochets—repeat around. Slip stitch to join.
- Round 5Increase Round Chain 2. 1 increase, 3 double crochets—repeat around. Slip stitch to join.
- Round 6Final Increase Round Chain 2. 1 increase, 4 double crochets—repeat around. Slip stitch to join.
- Rounds 7–13Body of the Hat Chain 2. Work 1 double crochet in each stitch around (through both loops).Repeat for about 7 rounds or until it reaches the top of your ears.At the end, chain 1, fasten off, and weave in the tail.
Part 2
Ruffle Section (Using White Yarn)
- Round 1Starting the Ruffle Make a slip knot with white yarn and attach it where you ended the hat base. Chain 2. Work 3 double crochets in the front loop only of each stitch around. Slip stitch to join.
- Round 2Ruffle Build-Up Chain 2. Work 3 double crochets in each stitch (through both loops). Slip stitch to join.
- Round 3Final Ruffle Round Chain 2. Work 2 double crochets in each stitch around. Slip stitch to join. Chain 1, fasten off, and leave a tail.
Outlining the Ruffles (Using Pink Yarn)
- BorderSingle Crochet Border Make a slip knot with pink yarn. Insert into the stitch where you last slip stitched. Single crochet in each stitch around the ruffle edge. Slip stitch to the first single crochet. Chain 1 and fasten off.
More pictures
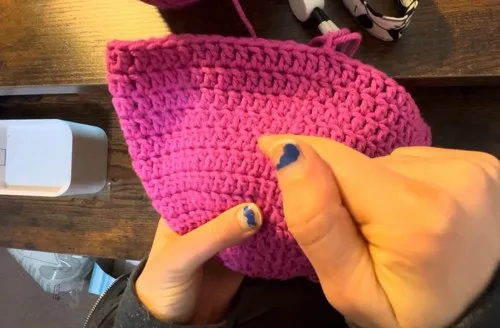
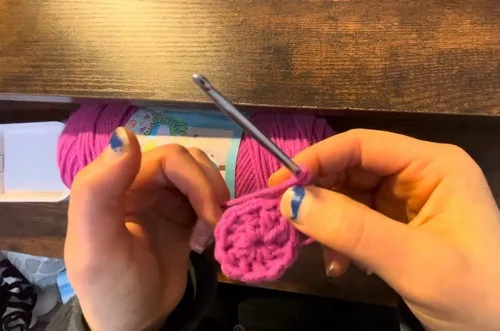
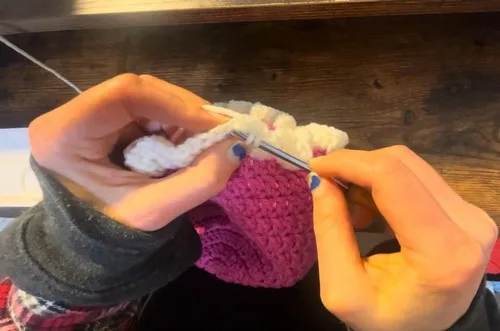
Before the first stitch
- Check you have enough hot rose pink yarn for the main hat and border, plus off-white for the ruffle.
- Read through Round 2 and Round 3 first, since the increase pattern changes between them.
- Make a small swatch with your 4 mm hook to check your double crochet tension before starting the ring.
Minutes per piece
- Main Pattern (5 rounds) about 2-3 hours, because the crown increases shift pattern each round
- Ruffle (Part 2) about 1-2 hours, because working through the front loop only takes a careful, slower rhythm
Other yarns that work
- Acrylic, worsted weight Close to the original drape, with a crisp ruffle and no change to hook size.
- Cotton blend, worsted weight A heavier, structured hat with a flatter ruffle, so you may want a slightly larger hook.
Where it ends up
- A warm walk outside, paired with a plain wool scarf.
- A photo-ready accessory for a baby or toddler, worn with a simple knit sweater.
- A handmade gift for someone who likes small, finished details.
Joining up
- Step 1 Weave in all loose ends using a yarn needle.
- Step 2 Ensure all edges are smooth and tidy.
Small notes
- Keep your 4 mm hook consistent throughout, since a looser hook will make the ruffle sit flat instead of full.
- Mark the first double crochet of each round, so you always know where to slip stitch and close.
- Work the front loop only round slowly, since skipping a loop by mistake changes how the ruffle flares.
Little questions
Can I make the ruffle a different color than the border?
Yes, the pattern already uses two colors, hot rose pink and off-white. You can swap either color, since the construction does not depend on which color goes where.
Why does my ruffle look tight instead of full?
This usually means a stitch in the front loop only round was missed or worked through both loops by mistake. Check Round 1 of the ruffle part, since that round sets the flare for everything after it.
Do I need stitch markers for this hat?
A single marker helps you track the first stitch of each round, since every round ends with a slip stitch join. It is not required, but it saves time and miscounts.
How many rounds make up the whole hat?
The hat base works through 13 rounds total: Rounds 1-6 shape the crown with a magic circle and increases, then Rounds 7-13 build the straight sides. The ruffle section adds 3 more rounds in off-white, finished with a single crochet border worked back in pink yarn.
Original pattern: https://crocheteverything.com/stunning-crochet-ruffle-hat-pattern-that-looks-boutique-made/

About the Author
Tamsin Okoro Who writes the patterns at Yarn Gallery, how a pattern gets from the hook to the page, and what this site will never do.


