About This Pattern
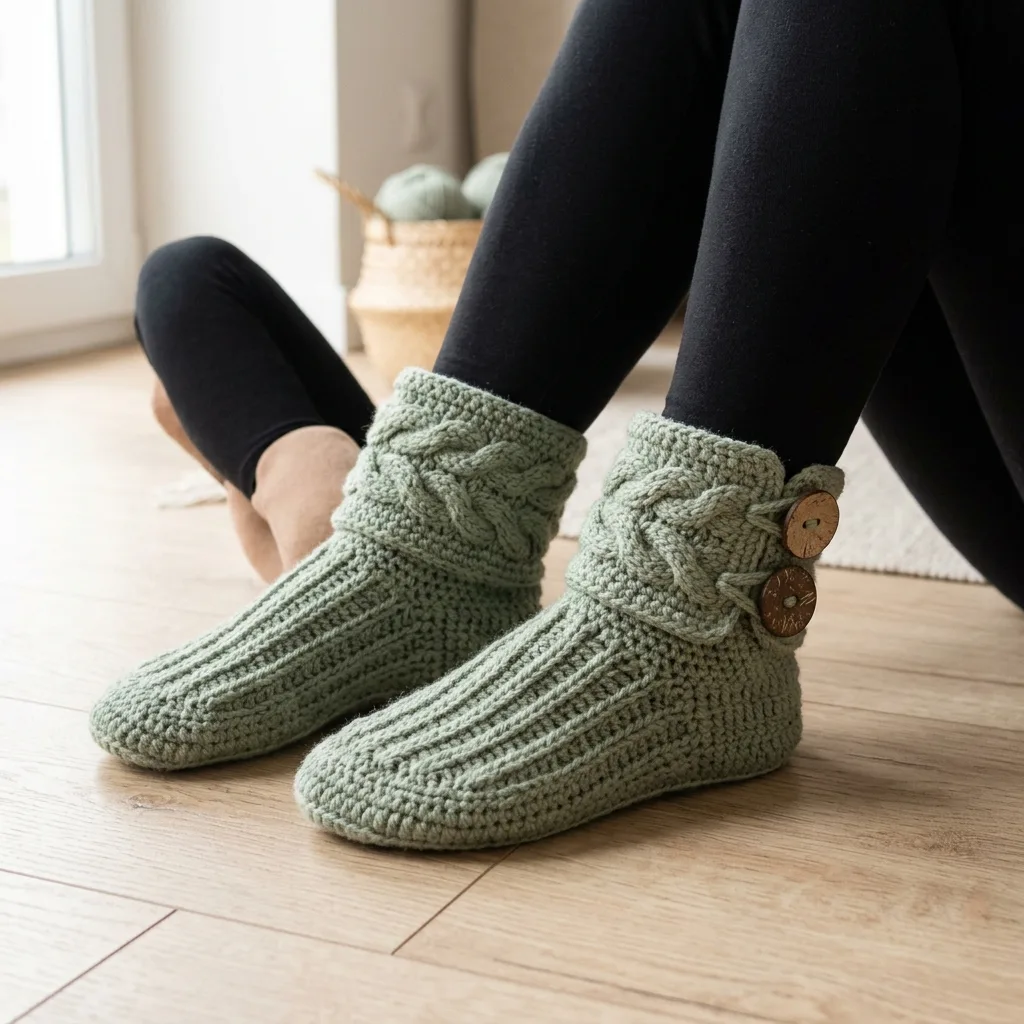
These Sage Green Boho Button Slipper Boots are the kind of project that turns a simple ball of worsted weight yarn into something you'll want to wear every single evening. Built from a sturdy sole up through a textured cabled cuff and finished with two chunky wooden buttons, they strike that perfect balance between rustic charm and cozy function. They're ideal for crocheters who love the earthy, boho aesthetic and want a footwear pattern that feels handmade in the best possible way, not fussy or overly delicate.
This pattern moves through three main parts: the sole worked in eight structured rounds, the body of the boot built up over another eight rounds, and a shorter three-round section that shapes the cuff and sets up the button closure. You'll use single crochet as your foundation stitch, with stitch markers keeping your rounds honest and a yarn needle doing the heavy lifting during assembly. Expect this to take an evening or two, roughly four to six hours total once both slippers are complete, making it a satisfying weekend project rather than a quick one-sitting make.
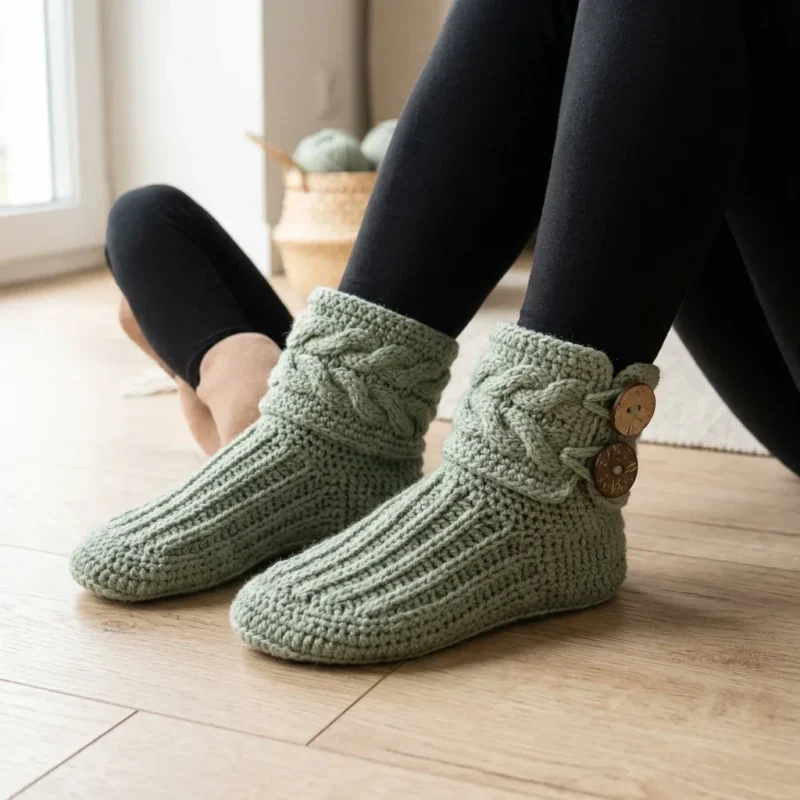
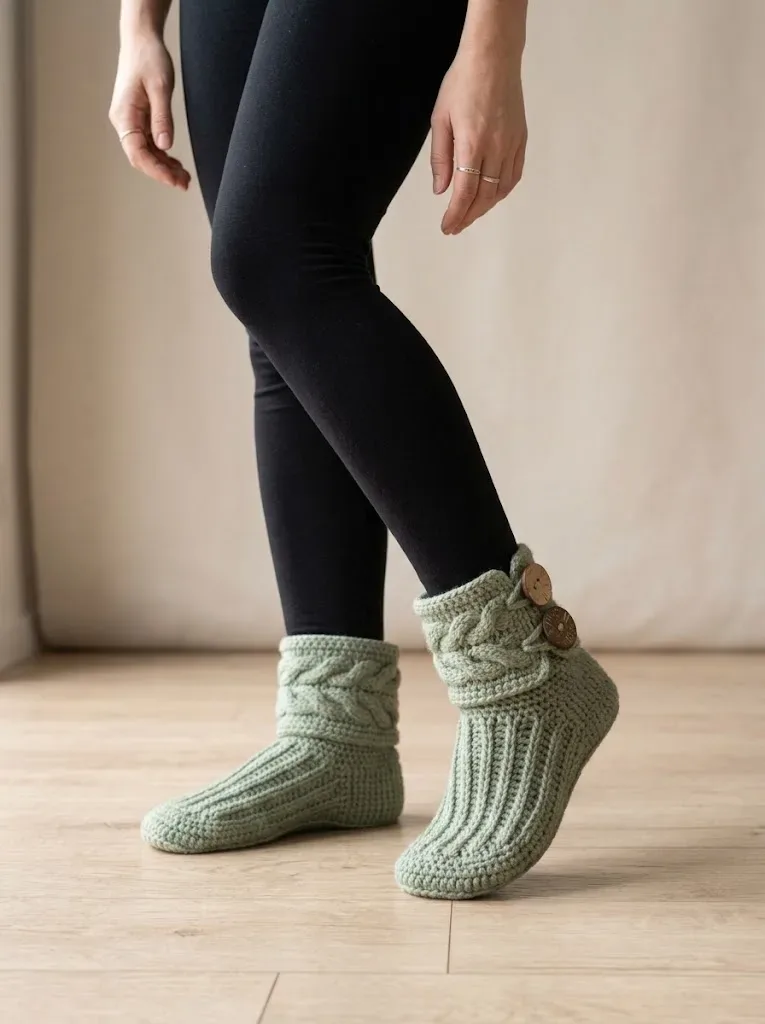
When you're finished, you'll have a pair of slipper boots with real structure — a firm sole that holds its shape underfoot, a snug ankle fit, and a cable-textured cuff punctuated by two large wooden buttons for that boho farmhouse look. They work up in a soft sage green that feels equally at home with loungewear or thick wool socks on a cold morning. Because they're sized to a solid worsted weight gauge, they also make a genuinely thoughtful handmade gift for anyone who loves cozy, earthy home style.
- Crochet the sole in the round, building up its shape over eight structured rounds, and make two to match.
- Place stitch markers at the start of each round throughout so you never lose track of your place.
- Move into the shorter cuff section, working just three rounds to form the textured, boho-style top edge.
- Optionally swap to the larger 6mm hook for the cuff rounds if you want a softer, looser cable look.
- Seam the sole to the body neatly, checking that both slippers match in size before joining.
- Weave in all loose ends with a yarn needle as each part is completed for a tidy finish.
- Sew one large wooden button onto each cuff to finish the boho detail and complete the pair.
Materials
Yarn
Hook
Notions
Crochet Abbreviations
- ch
- chain
- st
- stitch
- sts
- stitches
- sl st
- slip stitch
- sc
- single crochet
- hdc
- half double crochet
- dc
- double crochet
- dec
- decrease
- sc2tog
- single crochet 2 stitches together (decrease)
- blo
- back loops only
- FPdc
- front post double crochet
- BPdc
- back post double crochet
Sage Green Boho Button Slipper Boots Free Crochet Pattern
Sole (Make 2)
The sole is worked flat in rows, creating an oval shape.
- Round 1Ch 21. Sc in 2nd ch from hook and in each ch across. (20 sc)
- Round 2Ch 1, turn. 2 sc in first st, sc in next 18 sts, 2 sc in last st. (22 sc)
- Round 3Ch 1, turn. Sc in each st across. (22 sc)
- Round 4Ch 1, turn. 2 sc in first st, sc in next 20 sts, 2 sc in last st. (24 sc)
- Round 5through 8: Ch 1, turn. Sc in each st across. (24 sc)
- Round 9Ch 1, turn. Sc2tog, sc in next 20 sts, sc2tog. (22 sc)
- Round 10Ch 1, turn. Sc in each st across. (22 sc)
- Round 11Ch 1, turn. Sc2tog, sc in next 18 sts, sc2tog. (20 sc) Do not fasten off. You will now work around the entire sole to begin the sides.
Sides and Foot Section
Part 4
- Round 1Ch 1, do not turn. Work 1 sc in the end of each row down the side (11 sc), 3 sc in corner, 20 sc across the starting chain edge, 3 sc in corner, 11 sc up the other side, sl st to first sc to join. Place marker. (48 sc)
- Round 2through 4: Sc in BLO of each st around. Do not join. Work in continuous spiral. (48 sc)This back loop only technique creates the ribbed texture you see on the finished slippers.
- Round 5Sc in BLO of each st around. (48 sc)
- Round 6through 10: Continue working sc in BLO around. (48 sc) Toe Shaping Now you will decrease across the toe area while keeping the heel unchanged.
- Round 11Sc in BLO of next 16 sts, [sc2tog] 8 times, sc in BLO of remaining 16 sts. (40 sc)
- Round 12Sc in BLO of next 14 sts, [sc2tog] 6 times, sc in BLO of remaining 14 sts. (34 sc)
- Round 13Sc in BLO of next 12 sts, [sc2tog] 5 times, sc in BLO of remaining 12 sts. (29 sc)
- Round 14Sc in BLO of each st around. (29 sc) Sl st to next st. Fasten off, leaving a 6 inch tail for weaving.Switch to your 6mm hook if desired for a slightly looser cable.
Cable Cuff (Make 2)
The cuff is worked separately and then attached to the slipper boot opening. This is where the magic happens.
Part 5
- Round 1(Foundation): Ch 12. Dc in 4th ch from hook and in each ch across. (10 dc, counting turning ch as first dc)
- Round 2Ch 2 (does not count as stitch throughout), turn. Fpdc around first st, bpdc around next st, fpdc around next 2 sts, bpdc around next 2 sts, fpdc around next 2 sts, bpdc around next st, fpdc around last st. (10 sts)
- Round 3(Cable Cross Row): Ch 2, turn. Fpdc around first st, bpdc around next st. Cable cross: Skip next 2 fpdc, fpdc around next 2 bpdc, working in front of stitches just made, fpdc around 2 skipped fpdc. Bpdc around next st, fpdc around last st. (10 sts)Row 4: Repeat Row 2.Row 5: Repeat Row 3.Rows 6 through 25: Continue alternating Row 2 and Row 3 pattern (Row 2 on even rows, Row 3 on odd rows).Your cuff should measure approximately 11 to 12 inches long. Adjust length by adding or removing row repeats as needed to fit around your ankle opening comfortably with slight overlap.Buttonhole Row: Ch 2, turn. Fpdc around first 3 sts, ch 2, skip 2 sts, fpdc around next 2 sts, ch 2, skip 2 sts, fpdc around last st. (6 fpdc, 2 ch-2 spaces)Fasten off, leaving a 12 inch tail for sewing.2. Using your yarn needle and the long tail, whip stitch the starting edge of the cuff to the inside of the boot opening, aligning it with the center back heel.5. Weave in all remaining ends securely.6. Repeat for second boot.
The cable cross is simply working stitches out of order. You skip two, work the next two, then go back and work the skipped ones in front. That crossing action creates the braided look.
Assembly
1. Attach cuff to boot: Position the cuff around the ankle opening of the slipper with the cable texture facing outward. The non-buttonhole end will be sewn directly to the boot.
3. Wrap the cuff around, overlapping so the buttonholes align with where you want your buttons.
4. Sew buttons: Position buttons on the outside of the boot where they will show through the buttonholes. Sew securely with yarn or matching thread.
Customization Ideas
Notions
Yarn needle for weaving ends and seaming Stitch markers (at least 4)
2 large wooden buttons, approximately 1.25 inches in diameter Scissors Gauge
- Round 114 single crochet stitches and 16 rows = 4 inches in single crochet using 5.5mm hook. Check your gauge before starting. If your gauge is off, adjust your hook size up or down.(14)
Abbreviations and Stitch Definitions Let me walk you through every stitch you will use in this pattern.
- Round 2ch = chain. Wrap yarn over hook, pull through loop on hook. This creates the foundation for your work.
- Round 3sl st = slip stitch. Insert hook, yarn over, pull through both loops at once. Used for joining and creating invisible seams.
- Round 4sc = single crochet. Insert hook, yarn over, pull up a loop (2 loops on hook), yarn over, pull through both loops. The most basic crochet stitch.
- Round 5hdc = half double crochet. Yarn over, insert hook, yarn over, pull up a loop (3 loops on hook), yarn over, pull through all 3 loops. Slightly taller than single crochet.
- Round 6dc = double crochet. Yarn over, insert hook, yarn over, pull up a loop (3 loops on hook), yarn over, pull through 2 loops, yarn over, pull through remaining 2 loops. Creates a taller, more open fabric.BLO = back loop only. Work the stitch into only the back loop of the stitch below. This creates the ribbed texture on the foot.
- Round 7fpdc = front post double crochet. Yarn over, insert hook from front to back around the post (vertical part) of the stitch below, yarn over, pull up a loop, complete as a regular double crochet. This creates raised stitches for cables.
- Round 8bpdc = back post double crochet. Same as fpdc but insert hook from back to front around the post. Creates recessed stitches that contrast with fpdc. dec = decrease. Work 2 stitches together as one to reduce stitch count.
- Round 9sc2tog = single crochet 2 together. Insert hook in first stitch, pull up loop, insert hook in next stitch, pull up loop (3 loops on hook), yarn over, pull through all 3 loops. Decreases by one stitch.Work in continuous rounds for the foot section unless otherwise noted. Use a stitch marker to track the beginning of each round.Do not turn at the end of rounds in the foot section.Turn at the end of every row in the cuff section.Slip stitches do not count as stitches unless specified.
Pattern Notes Before You Begin
The cable cuff is worked flat in rows, then wrapped around the ankle and buttoned.
Slipper Boot Pattern Instructions
More photos
Important Notes
💡 Swatch first with your 5.5mm hook — hitting 14 sc and 16 rows per 4 inches is what keeps these slippers from turning out too tight or too loose around your foot.
💡 Keep at least 4 stitch markers on hand and dedicate one to the start of each round; with 8 rounds in the sole and 8 more in the body, it's very easy to drift off pattern without one.
💡 Choose a smooth, well-defined worsted weight yarn like a 100% acrylic or wool blend — fuzzy yarns will muddy the cable texture in the cuff and make the finished slipper look less crisp.
💡 If you want a softer, more relaxed cable cuff, swap to the 6mm hook only for that final 3-round section — you don't need to reknit the sole or body to get this effect.
💡 Save your two wooden buttons until the very end and sew them on with your yarn needle only after both slipper boots are fully assembled, so you can double-check placement is symmetrical on both feet.
💡 Weave in ends as you finish each part (sole, body, cuff) rather than waiting until the very end — it makes the final seaming and button attachment much faster and tidier.
Common Mistakes and Fixes
Skipping the gauge swatch before starting the sole
Since the sole and body rely on 14 sc and 16 rows per 4 inches with the 5.5mm hook, work a quick swatch first — if you're getting more stitches per inch, size up your hook slightly, and if fewer, size down, so the finished slipper actually fits.
Losing track of rounds without stitch markers
eight rounds each for the sole and body plus a separate three-round cuff section, it's easy to lose your place; place a stitch marker at the start of every round and move it up as you go so you always know exactly where you are.
Using a fuzzy or textured yarn that hides the cable detail
The pattern specifically calls for good stitch definition, so avoid boucle, chenille, or heavily brushed yarns — stick with a smooth 100% acrylic or wool blend worsted weight so the cable cuff texture actually shows once it's crocheted.
Attaching the wooden buttons in the wrong spot or too loosely
Try the slipper on (or check against your sole measurements) before sewing on the two wooden buttons, and use your yarn needle to stitch through each button multiple times so they stay secure through regular wear.
Not seaming the sole and body evenly on both slippers
Since you're making the sole twice, lay both completed soles side by side before assembly to confirm they match in size and shape, then use matching stitch counts around the edge when seaming so both slippers end up looking identical.
What Makes It Good
- Once you've made one pair, this pattern becomes a playground for color and texture experiments. For a moodier fall version, try a deep terracotta or rust worsted weight yarn with the same wooden buttons — the warm tones lean beautifully into that boho aesthetic. If sage feels too muted for you, a mustard yellow or dusty lavender in the same weight 4 yarn will give the exact same structure a completely different personality. Yarn brands like Wool-Ease or With Love both offer great stitch definition at this gauge and come in a huge range of earthy, boho-friendly shades. For sizing, remember your gauge check matters most here — 14 single crochet stitches and 16 rows equals 4 inches with the 5.5mm hook. If you need a larger boot, work one or two extra rounds into the sole (Part matching the 8-round sole) before starting the body, adding roughly half an inch of length per extra round, and increase your body rounds proportionally to keep the fit snug around the ankle. For a smaller or child-size version, drop down to a 5mm hook and expect the finished slipper to run about 10-15% smaller overall — just be sure to try it on periodically as you work the body section. Button swaps are an easy way to completely change the mood: try antique brass buttons for a vintage look, or two mismatched natural shell buttons for an eclectic beachy vibe instead of the wooden ones. You could also work the cuff twice as long and fold it over for a slouchy boot-sock look, or add a contrasting color for just the final round of the cuff to frame the buttons with a pop of color. A gradient or self-striping worsted yarn through the body section would also add visual interest without changing a single stitch count.
- I designed these slippers because I wanted something that felt more substantial than your average crochet house shoe — and that's exactly what the eight-round sole delivers. Working the sole first gives you instant gratification; you can literally see the shape of a shoe forming in your hands within the first sitting. Moving into the body, the single crochet base keeps everything simple and portable, so you can work on these while watching TV without losing your place. My favorite part is the cuff section — those three rounds go by fast, but they're where all the boho personality lives, especially once you thread on those big wooden buttons. There's something so satisfying about pairing a rustic sage green with natural wood tone; it just feels earthy and intentional. I also love that this pattern uses a slightly larger hook option for the cuff, so even if your gauge runs tight, you can loosen up that cable texture without redoing the whole project. These are the slippers I reach for on chilly mornings, and I think you'll feel the same once you see them come together.
Frequently Asked Questions
What yarn weight and how much do I need for one pair of Sage Green Boho Button Slipper Boots?
You'll need approximately 200 yards of worsted weight (weight 4) yarn per the materials list, ideally in a color like sage green. A smooth acrylic or wool blend works best so the cable cuff detail stays crisp and visible.
Can I use a different hook size than the recommended 5.5mm?
The main body and sole are designed around a 5.5mm (US I/9) hook to hit the gauge of 14 sc and 16 rows per 4 inches, so it's best to stick close to that size. The 6mm (US J/10) hook is optional and only used for a looser cable texture on the cuff.
Do I really need wooden buttons, or can I substitute something else?
The pattern calls for two large wooden buttons around 1.25 inches in diameter to complete the boho look, but you can substitute any sturdy button of similar size. Just make sure whatever you choose is securely stitched on with a yarn needle so it holds up to regular wear.
How long does it take to make one pair of these slippers?
Between the sole, the main body, and the cuff section, most crocheters can finish a pair in about 4-6 hours of focused work. Since the sole and body are worked flat in structured rounds, it's easy to break the project up over a couple of evenings.
Is this pattern good for a crochet beginner?
This pattern is best suited to an intermediate crocheter who is comfortable working in the round and following multi-part construction, since it involves a separate sole, body, and cuff section. If you're newer to crochet, practicing basic single crochet in the round beforehand will make this project much smoother.
Original pattern: https://crochetwithmia.com/sage-green-boho-button-slipper-boots-free-crochet-pattern/

About the Author
Tamsin Okoro Who writes the patterns at Yarn Gallery, how a pattern gets from the hook to the page, and what this site will never do.


