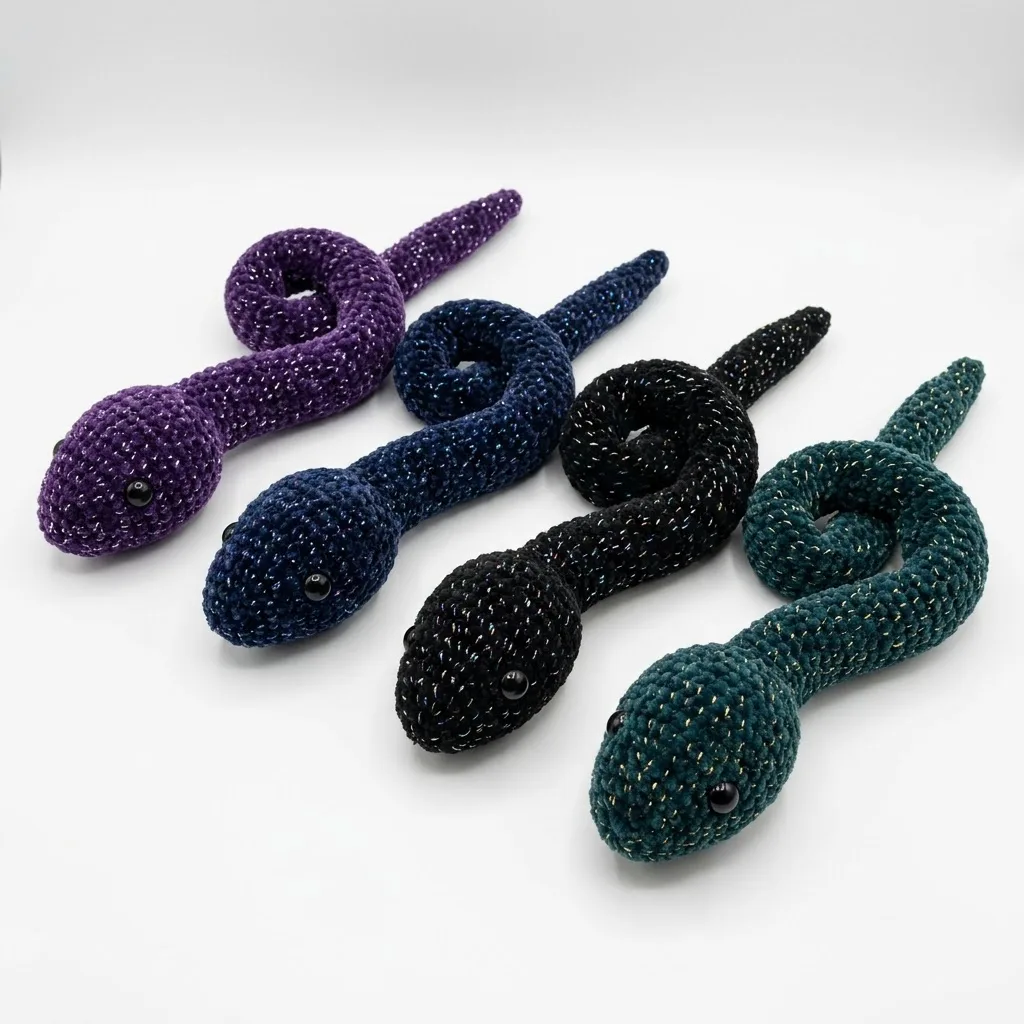
About This Pattern
This sparkle snake is a quiet evening project. It coils into a small spiral once stuffed and finished. The metallic thread catches light without any fuss. It needs worsted yarn with glitter running through it, a smaller hook than usual, and steady stuffing as you go. No seams, no joining rounds. Just round after round, growing longer and skinnier under your hands. Good for a lap, a side table, or a shelf that needs a little shine.
In the basket
Yarn
Yarn suggestions
Hook
Notions
Abbreviations
- Magic Ring (MR)
- An adjustable starting loop that closes completely, leaving no hole in the center of your work. You wrap yarn around your fingers, pull up a loop, and crochet your first stitches into that ring before pulling it tight.
- Chain (ch)
- The foundation stitch. Yarn over and pull through the loop on your hook.
- Single Crochet (sc)
- Insert hook into stitch, yarn over and pull up a loop (2 loops on hook), yarn over and pull through both loops. This is your main stitch for the entire pattern.
- Increase (inc)
- Work 2 single crochet stitches into the same stitch. This adds one stitch to your round total. For example, if you have 6 stitches and work increases in each one, you end with 12 stitches.
- Invisible Decrease (dec)
- Insert hook through the front loops only of the next 2 stitches, yarn over and pull through both front loops (2 loops on hook), yarn over and pull through both loops. This creates a neater decrease than the standard method and prevents gaps in your amigurumi fabric.
- Slip Stitch (sl st)
- Insert hook into stitch, yarn over and pull through both the stitch and the loop on your hook in one motion. Used for joining and finishing.
- FO
- Fasten off. Cut your yarn and pull the tail through the last loop to secure.
Sparkle galaxy snake amigurumi crochet pattern
The Head
- Round 1Create a magic ring. Work 6 sc into the ring. Pull tight to close. (6 sts)
- Round 2Inc in each st around. (12 sts)
- Round 3*Sc in next st, inc in next st* repeat around. (18 sts)
- Round 4*Sc in next 2 sts, inc in next st* repeat around. (24 sts)
- Round 5*Sc in next 3 sts, inc in next st* repeat around. (30 sts)
- Round 6through 10: Sc in each st around. (30 sts) Work these 5 rounds even with no increases or decreases.This completes the top dome of the head. Now add the safety eyes between Rounds 7 and 8, spacing them approximately 8 to 10 stitches apart. Push the posts through from the outside, then secure with the safety backs on the inside. Make sure they are firmly attached before continuing.
- Round 11*Sc in next 3 sts, dec* repeat around. (24 sts)
- Round 12*Sc in next 2 sts, dec* repeat around. (18 sts) Begin stuffing the head firmly. You want it nice and plump. The head should feel solid but not stretched.
- Round 13*Sc in next st, dec* repeat around. (12 sts) Add more stuffing to fully fill the head before the opening gets too small.
The Neck and Upper Body
- Round 14through 18: Sc in each st around. (12 sts) Work these 5 rounds even.
- Round 19*Sc in next 3 sts, inc in next st* repeat around. (15 sts)
- Round 20through 24: Sc in each st around. (15 sts)
- Round 25*Sc in next 4 sts, inc in next st* repeat around. (18 sts)
- Round 26through 35: Sc in each st around. (18 sts) Work these 10 rounds even. Continue stuffing as you work. Add small amounts frequently rather than trying to stuff a long section at once. Use the eraser end of a pencil or a chopstick to push stuffing into the narrow neck area.
The Mid Body
- Round 36through 50: Sc in each st around. (18 sts) Work these 15 rounds even. This creates the longest section of the body at consistent thickness. Keep stuffing as you go. The body should be firm but flexible enough to coil and pose.
The Lower Body and Tail Taper
Now we begin decreasing gradually to create that tapered tail shape.
- Round 51*Sc in next 7 sts, dec* repeat around. (16 sts)
- Round 52through 55: Sc in each st around. (16 sts)
- Round 56*Sc in next 6 sts, dec* repeat around. (14 sts)
- Round 57through 60: Sc in each st around. (14 sts)
- Round 61*Sc in next 5 sts, dec* repeat around. (12 sts)
- Round 62through 65: Sc in each st around. (12 sts)
- Round 66*Sc in next 4 sts, dec* repeat around. (10 sts)
- Round 67through 70: Sc in each st around. (10 sts)
- Round 71*Sc in next 3 sts, dec* repeat around. (8 sts)
- Round 72through 75: Sc in each st around. (8 sts)
- Round 76*Sc in next 2 sts, dec* repeat around. (6 sts)
- Round 77through 80: Sc in each st around. (6 sts)
- Round 81*Sc in next st, dec* repeat around. (4 sts)
- Round 82through 85: Sc in each st around. (4 sts) Stuff the tail as firmly as possible, using a chopstick or pencil to push fiberfill all the way to the tip.
- Round 86Dec twice. (2 sts) FO. Cut yarn leaving a 6 inch tail. Thread through remaining stitches and pull tight to close. Weave end through nearby stitches to secure, then trim.
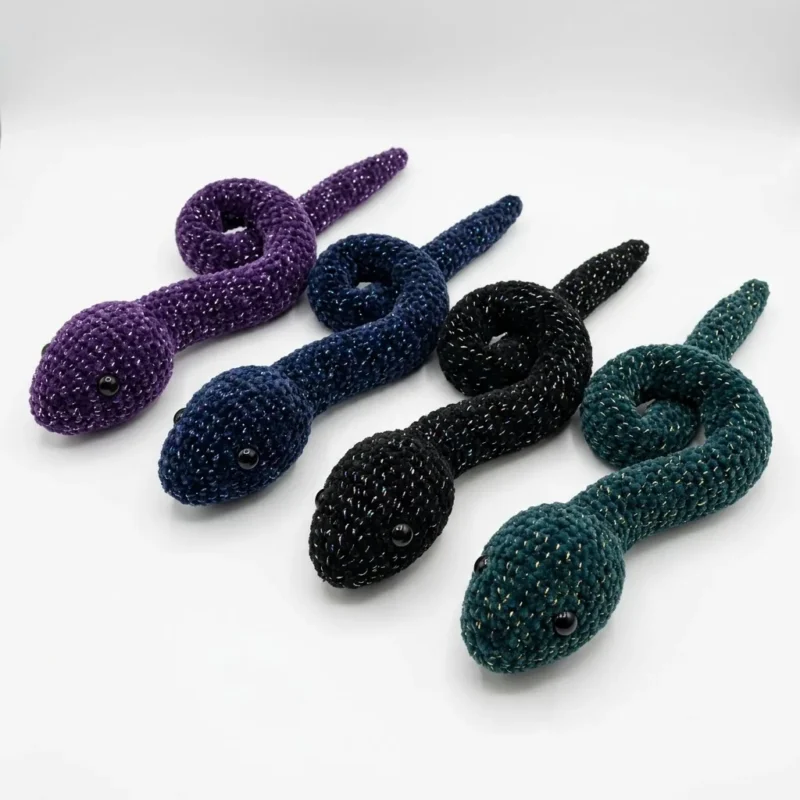
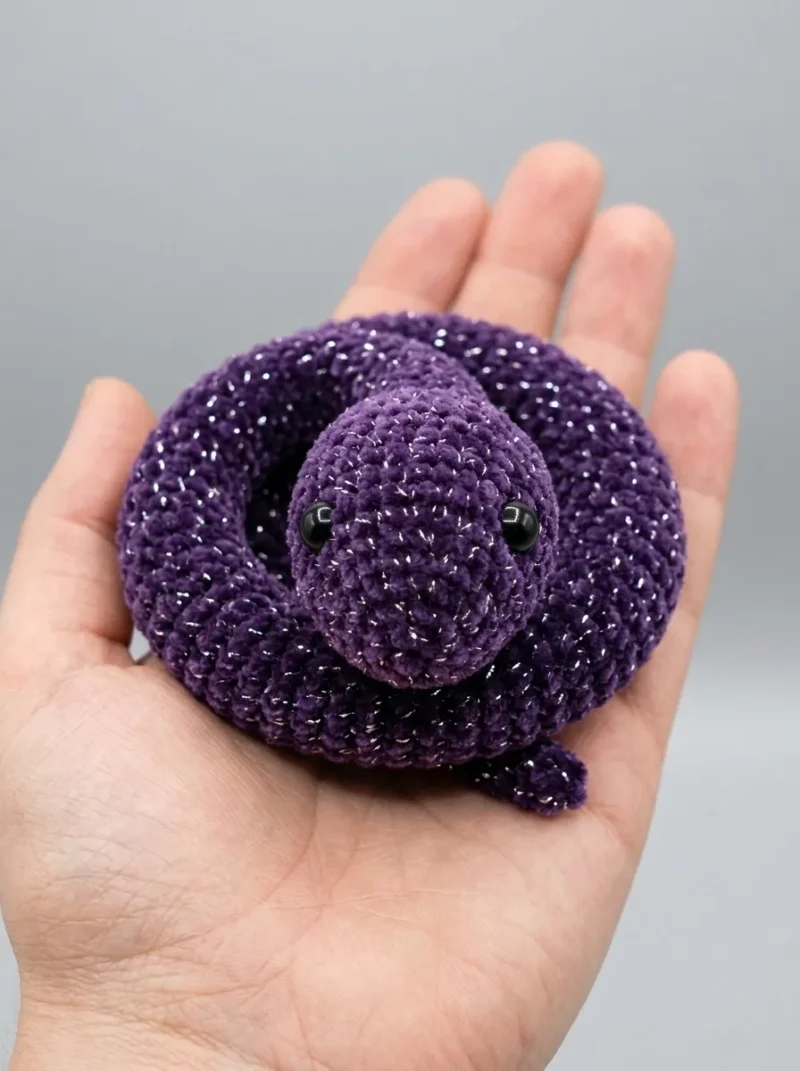
More pictures
Before the first stitch
- Check your yarn amount. Plan for 80 to 100 yards per snake.
- Swap to the 3.5mm hook. Smaller than usual keeps the fabric tight.
- Read through the head rounds first. Count stitches at round five before moving on.
Minutes per piece
- Head and neck shaping about 1.5 hours because of nine head rounds plus five neck rounds with repeated increases
- Mid body and tail taper about 3 hours because fifteen even rounds and fifteen taper rounds take steady stuffing and patience
Other yarns that work
- Acrylic worsted without metallic thread Loses the sparkle but keeps the same size and stuffing needs. Use the same hook.
- DK weight metallic blend Makes a smaller, lighter snake. Drop to a smaller hook and expect less yarn used overall.
Where it ends up
- A desk companion that coils around a pen cup or small plant.
- A soft toy for a child who likes snakes and shiny things.
- A shelf piece that pairs well with other amigurumi animals in a small collection.
Joining up
- Step 1 Once you have fastened off, examine your snake from snout to tail tip. Add any additional stuffing through the fabric if needed by gently pushing fibers apart and tucking in small bits of fiberfill.
- Step 2 To create the coiled pose shown in the photos, simply twist your snake into a spiral shape. The stuffed amigurumi fabric has enough stiffness to hold a gentle coil. Start by making one loop near the midsection, then let the head and tail drape naturally.
- Step 3 Weave in any remaining yarn tails securely. With metallic yarn, I recommend weaving through at least 2 inches of stitches to prevent the slippery thread from working loose.
Small notes
- Use the smaller E/4 hook on purpose. It tightens the fabric so stuffing stays put.
- Mark your round start with scrap yarn. This spiral pattern has no joining stitch to guide you.
- Stuff the neck in small bits. A chopstick or pencil eraser helps push fiberfill into that narrow space.
Little questions
Why use a smaller hook than usual for worsted yarn?
The 3.5mm hook keeps stitches tight. That holds the stuffing in and gives the snake a firm, structured feel.
Do I need to join each round?
No. This pattern works in a continuous spiral. A stitch marker just helps you track where each round starts.
How do I get the snake to hold its coiled pose?
Stuff it firmly but keep it flexible enough to bend. The finished fabric has enough stiffness to hold a gentle spiral on its own.
Can I change the eye size for a different look?
Yes. Larger safety eyes give a cartoonish feel, while smaller ones look more realistic. Either 9mm or 10mm works with this head size.
Original pattern: https://crochr.com/sparkle-galaxy-snake-amigurumi-free-crochet-pattern/

About the Author
Tamsin Okoro Who writes the patterns at Yarn Gallery, how a pattern gets from the hook to the page, and what this site will never do.


