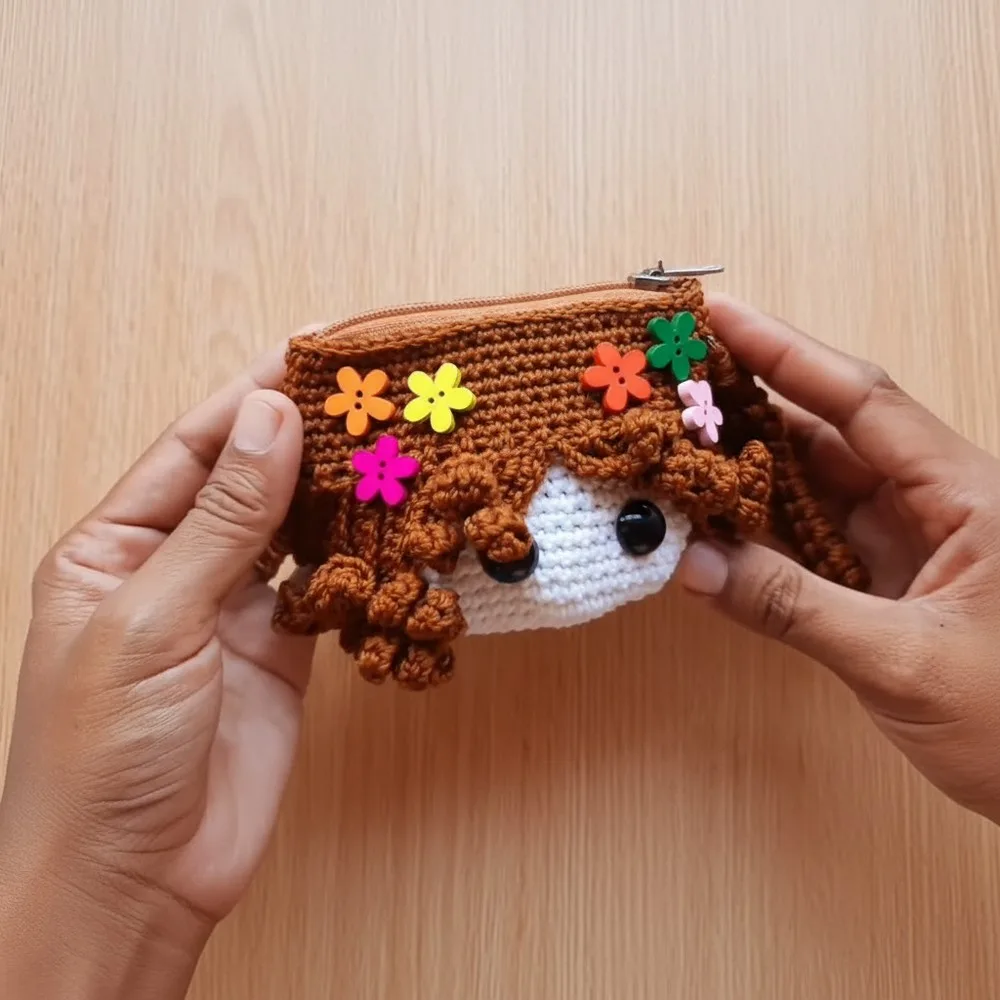
About This Pattern
This pattern turns a few grams of polyester thread into a tiny coin purse with real structure — a flat round base, a snug little body carrying a color-change motif, a neat top edging, and a slim strap you can loop over a wrist or clip onto a bag. It is the kind of make that disappears into a single afternoon and comes back out as something you genuinely want to carry. Perfect for crocheters who love small, finished, useful objects more than long-haul projects.
You will work in rounds, spacing your increases evenly across the base foundation, then stopping those increases so the body foundation round lifts the sides upward. From there the motif rounds bring in color changes across three rows of patterning, followed by the top edging and the handle or strap. Nothing here is exotic, but the thread is fine and the 3 mm Tulip hook is small, so it sits comfortably at an intermediate level. Expect roughly three to five hours, easily split over two evenings.
Finished, the purse measures about 6 cm across the base and settles neatly into a palm, with Poly Gloss polyester thread giving it a firm, faintly shiny surface that holds its shape instead of slumping. The motif band reads as a deliberate stripe of pattern rather than an accidental color break, and the strap keeps the whole thing wearable rather than merely decorative. Coins, stud earrings, a folded note, a hair tie — it swallows small things happily and gifts beautifully.
- Begin at the center and work the base in rounds, increasing evenly until the circle measures about 6 cm across.
- Count your stitches at the end of every base round so the disc stays flat and perfectly circular.
- Stop increasing and work the body foundation round so the sides lift away from the flat base.
- Continue up the body in your main color, keeping tension even and consistent all the way around.
- Join your contrast shades and work the motif rounds, changing color on the last yarn-over each time.
- Crochet over the resting colors or cut them, keeping the inside of the purse tidy and snag-free.
- Finish the opening with the top edging so the rim firms up and holds its shape.
- Make the handle, attach it at two opposite points on the rim, then weave in every remaining tail.
Materials
Yarn
Hook Size
Measuring tape
Scissors
Tapestry needle
Crochet Abbreviations
- CH
- Chain
- DC
- Double Crochet
- SC
- Single Crochet
- SL ST
- Slip Stitch
- MR
- Magic Ring
- SP
- Space
- ST
- Stitch
Tiny Crochet Coin Purses That Pack Big Style
1. Base Foundation
Magic Ring (MR) : Begin with Red Yarn .
Create a Magic Ring.
CH 2 (does not count as a stitch). Work 12 DC into the MR.
Pull the ring tight, SL ST into the first DC to close (12 ST total).
- Round 2CH 2 (does not count as a stitch). Work 2 DC in each stitch around , starting at the SL ST.Total ST for this round: 24 DC .SL ST into the first DC to complete the round.
- Round 3CH 2. Work 1 DC, 2 DC in the next ST ; repeat this pattern (1 DC, 2 DC) around.Total ST: 36 DC .SL ST into the first DC.
- Round 4(Optional, if needed for larger bottles): CH 2. Work 1 DC in the next 2 ST, 2 DC in the following ST ; repeat around.Total ST: 48 DC .SL ST into the first DC.Measure your base: The base should be ~6 cm in diameter . If your bottle is larger, add additional increasing rounds by following a consistent incremental pattern (e.g., 3 single DC, 2 DC in next ST for Round 5).
Body Foundation
- Round 5CH 2. Without increasing, work 1 DC in each ST around (1 DC per ST from the previous round).Total ST: Same as the last round (e.g., 36 DC).SL ST into the first DC.Change Yarn (Optional): Start Pink Yarn . Knot securely, then SL ST into the top of the first DC in the round.CH 2 and proceed to the motif section.
Creating the Motif
- Round 6First Motif: Work DC clusters: Work 1 DC in the first ST, then 1 DC in the next ST.CH 1, skip 1 stitch. Repeat this pattern ( 2 DC, CH 1, skip 1 ST ) all around.End the round with a SL ST into the top of the first DC.
- Round 7Second Motif: CH 2. Work 2 DC in the next CH SP (from previous round), CH 1, and skip 2 ST. Repeat this pattern around.SL ST into the first DC at the end.Continue the motif rounds, repeating Round 7 until the bottle sheath reaches the height of your bottle (approximately 13 cm for the sample).
Skill Level
Intermediate : Familiarity with working in rounds and creating increases or motifs.
3. Top Edging
- Round 1SC Border Rows: Work 1 SC in each stitch around for a neat finishing border.Repeat for 4 rows .(1)
- Round 2End the final round with a SL ST . Fasten off and weave in the ends.
4. Handle/Strap
Strap Foundation : Attach Red Yarn . CH 1.
Work 5 SC stitches into 5 consecutive stitches.
Building the Strap : CH 1, turn.
Work 5 SC stitches across. Repeat until the strap measures ~30 cm , or longer if required.
Attaching the Strap : Fold the strap ends to the opposite side, aligning it symmetrically.
With SC stitches, sew the strap ends onto the sheath, ensuring the strap is secure.
Tension Control : Maintain even tension for uniform stitches. Test a swatch initially if unsure.
Colorwork : Tuck tails from color changes neatly during SC rows for a clean finish.
Strap Adjustment : For heavy bottles, consider using thicker yarn for the strap or doubling it for extra durability.
Conclusion
This bottle bag sheath is a functional yet charming project perfect for holding bottles, small personal items, or even for decorative use. The simple motifs make it easy to customize for various sizes and color palettes. Add your creative touch by experimenting with additional motifs, color changes, or decorative embellishments like tassels.
More photos


Important Notes
💡 The 6 cm base diameter is your real gauge check, not a stitch swatch. Measure the base before you stop increasing — if it is coming in small, add a round; if it is running large, work one fewer. Everything above it, including how much the motif band shows, depends on getting this number right.
💡 Use a stitch marker in the first stitch of every round and move it as you go. At 3 mm with polyester thread, the rounds are nearly seamless to the eye, and losing your place in the base foundation is the single fastest way to end up with a wobbly circle.
💡 Wind small bobbins or butterfly bundles for the motif colors before you start the color-change rounds. Three loose balls tangling around a purse this small is genuinely more annoying than the crochet itself, and untangling mid-round tends to distort your tension.
💡 Poly Gloss thread is slippery, so leave generous tails — at least a good hand's length — at every join and color change. Short tails work themselves loose from a firm fabric, and a tail that pops out on the motif band is very visible against the contrast color.
💡 If your hand cramps at 3 mm, work in shorter sittings rather than loosening a size mid-project. A hook change partway up the body will show as a visible step in the stitch height right where the motif band sits.
💡 The finished purse holds its shape thanks to the polyester, but a light steam over the base — hovering, never pressing the iron down — will flatten any residual cupping and set the circle beautifully before you attach the strap.
Common Mistakes and Fixes
Skipping the stitch count check after each base round, so the finished base is lopsided or egg-shaped instead of a true circle.
Count at the end of every single base round before moving on — with fine thread, one missed increase is invisible until three rounds later, when the disc pulls to one side. Drop a stitch marker into the first stitch of each round and pause to count before you pass it again. If a round is short, tink back rather than adding a fudge stitch, because an extra increase in the wrong place creates a permanent bump in the wall of the purse.
Working the base too tightly, so it cups into a bowl before you have even reached the body foundation round.
Polyester thread has very little give, so a tight grip compounds quickly. Lay the base flat on the table after each round — if the edges are lifting, your increases are too close together or your tension is too firm. Loosen your yarn hand deliberately, and remember the target: the base should read at about 6 cm in diameter and sit flat, not domed. A base that cups will make the whole purse lean once the sides go up.
Changing color at the wrong moment, so the last stitch of the old color has a lump of the new shade poking through it.
Always complete the color change on the final yarn-over of the stitch before the new color begins. Work the stitch until two loops remain on the hook, drop the old thread, then pull the new color through those two loops. Done this way, the transition between the three motif rows is invisible from the front. Changing after the stitch is finished leaves a mismatched half-stitch that will bother you every time you look at it.
Letting floats and carried threads dangle loosely inside during the motif rounds, so coins snag on the interior.
Carry the resting color along the top of the previous round and crochet over it as you go, keeping it snug but never pulled tight — a tugged float will suck the motif band inward and narrow the purse. If a color rests for more than a couple of stitches, cut it and rejoin instead. Weave every tail into the inside of the wall, splitting the thread as you go so the slippery polyester will not wriggle back out.
Attaching the handle or strap to points that are not truly opposite each other, so the purse hangs crooked when carried.
Before you attach anything, fold the purse flat and mark the two fold points with stitch markers — those are your true opposite anchors, and the eye will spot a few stitches of error immediately once it is hanging. Secure each end of the strap through several stitches of the top edging rather than a single one, since one anchor stitch under the weight of coins will stretch and eventually tear.
What Makes It Good
- The color-change motif is your playground here, so start there. A cream body with a deep teal and mustard motif band feels vintage and grown-up; blush with two shades of sage reads fresh and modern; charcoal with a single bright coral stripe is the one I would make for a teenager. Because the motif spans three rows, you can also run three closely related shades — pale, mid, and deep of one color — for an ombré band that looks far more complicated than it is. For size, the base is the only lever you need: add an extra increase round before the body foundation for a wider purse that swallows a house key and lip balm, or drop a round for a truly miniature charm-sized pouch. Whatever you change, work in the round until the base lies genuinely flat before lifting the sides, and keep your final base count consistent all the way around. Thread substitutions are easy — DMC Petra 3, Scheepjes Catona, or Anchor Freccia all behave nicely at a similar gauge, though cotton gives a matte, softer finish and slightly less body than polyester. If you swap to a heavier thread, size up to a 3.5 mm hook and expect a chunkier, slouchier purse. Seasonally, warm rust and oatmeal shades suit autumn gifting, while icy blues and silver-flecked thread make the motif band sparkle in winter. You can also make the strap shorter for a keyring loop or long enough to wear crossbody.
- There is something quietly addictive about watching a flat little disc become an actual purse, and this pattern hands you that moment fast. The base grows to roughly 6 cm across, you stop increasing, the body foundation round lifts the sides, and suddenly the thing is standing up on its own. I love that Poly Gloss thread with a 3 mm Tulip hook gives every stitch a crisp, glossy definition — the motif rounds look almost printed rather than crocheted, which is not something worsted yarn can do at this scale. The three rows of color-change work are my favorite part: they take about twenty minutes and they carry the entire design. And because the whole make is so small, checking your stitch counts after each base round costs you seconds and saves you from a lopsided, cupping little bowl. The top edging tightens the rim so the purse keeps its mouth open, and attaching the strap is the satisfying two-minute finish that turns a pouch into an accessory you will actually clip onto something.
Frequently Asked Questions
Can I use cotton thread instead of the Poly Gloss polyester?
Absolutely — DMC Petra, Scheepjes Catona, or Anchor Freccia all work at a similar gauge with the 3 mm hook. Just know that cotton gives a matte finish and a slightly softer body, so the purse will be a touch more relaxed and less self-supporting than the polyester version. Check that your base still reaches about 6 cm in diameter before you lift the sides.
My base is cupping instead of lying flat. What went wrong?
Nine times out of ten it is tension rather than a counting error — polyester thread with a small hook punishes a tight grip. Loosen your yarn hand and lay the base flat after each round to check. If it is still domed, count back through your increase rounds to confirm none were missed or doubled up.
How do I keep the color changes from showing on the front of the motif?
Complete the change on the last yarn-over of the stitch before the new color starts, so the new shade forms the top of that stitch cleanly. Carry the resting color along the round and crochet over it, keeping it snug but never taut. Done that way, all three motif rows look seamless from the outside.
Can I make the purse bigger without redesigning the whole pattern?
Yes — the base is the only place you need to adjust. Add one more increase round before the body foundation for a wider purse, keeping your increases evenly spaced so the circle stays flat. Everything above it, including the motif rounds and top edging, then simply works across the larger count.
Does the purse need a lining or a closure?
It does not — the polyester thread at this tight gauge makes a firm fabric that holds its shape, and the top edging keeps the rim from flopping. If you plan to carry very small items like stud earrings, a scrap of fabric lining stitched inside will stop anything slipping through the stitches. A simple button and chain loop added to the edging also works nicely.
Original pattern: https://redagapeblog.com/tiny-crochet-coin-purses-pattern/

About the Author
Tamsin Okoro Who writes the patterns at Yarn Gallery, how a pattern gets from the hook to the page, and what this site will never do.


