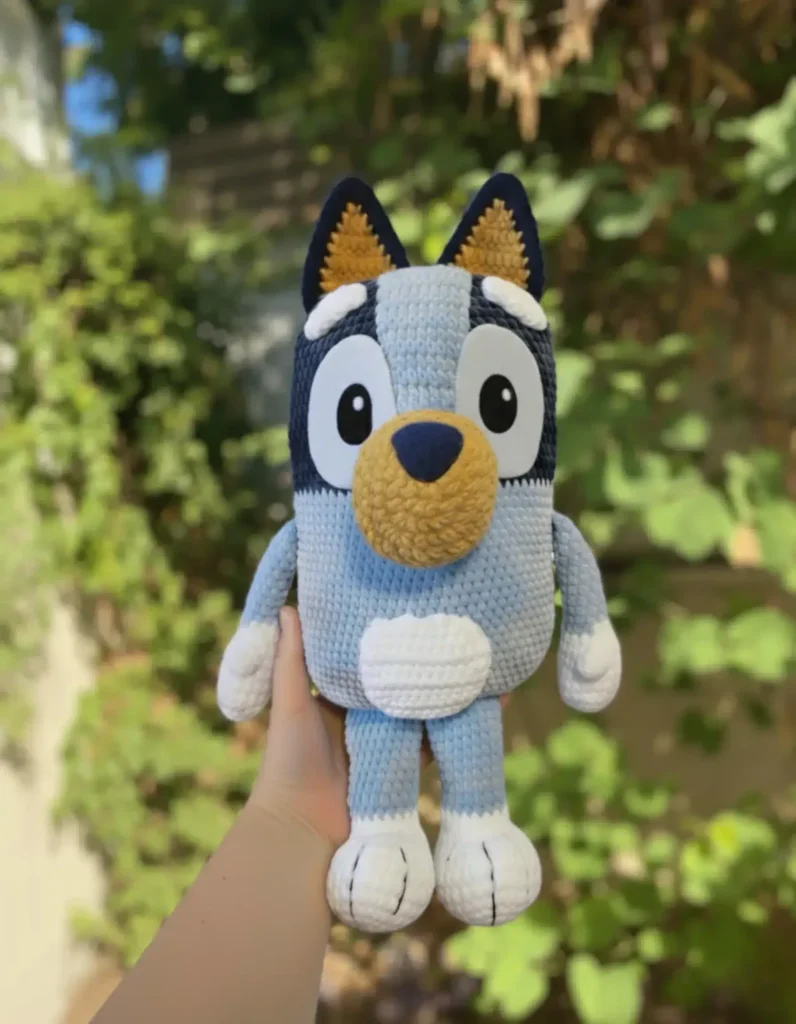
About This Pattern
This puppy sits somewhere between a quick project and a quiet commitment. Standing about 16.14 inches tall when finished, eleven parts come together: head, body, legs, arms, tail, ears, nose, spots. Velvet yarn makes it soft under the hands, almost like a real pup's coat. It needs a 5mm hook, patience for the spots, and an evening where no one needs the table. Good for one long sitting, or several short ones by the window.
In the basket
For the Blue Puppy
For the Orange Puppy
Abbreviations
- ch
- chain
- sc
- single crochet
- dc
- double crochet
- hdc
- half double crochet
- sl st
- slip stitch
- inc
- increase
- dec
- decrease
- MR
- Magic Ring
- Bs
- bubble stitch
- Triple increase
- 3 sc in the same stitch
Velvet blue puppy amigurumi with floppy spotted ears
Ears
Make 4Made by making two pieces in dark blue (or orange) and two in yellow (or peach), then joining them together.
- Round 1Chain 2, turn
- Round 21 increase, chain, turn (2 stitches)(2)
- Round 32 increases, chain, turn (4 stitches)(4)
- Round 4Increase, 2 single crochet, increase, chain, turn (6 stitches)(6)
- Round 56 single crochet, chain, turn (6 stitches)(6)
- Round 6Increase, 4 single crochet, increase, chain, turn (8 stitches)(8)
- Rounds 7–88 single crochet, chain, turn (8 stitches)(8)
- Round 98 single crochet (fasten off only the yellow or peach pieces)
- Round 10Place the dark blue (or orange) and yellow (or peach) pieces together and crochet around: 8 single crochet, 3 single crochet in the same stitch, 8 single crochet. Leave a long tail for sewing to the top of the head.
Nose
Begin with yellow (or beige) yarn.
Leave thread for sewing and stuff lightly with fiberfill.
- Round 17 single crochet in Magic Ring
- Round 27 increases (14 stitches)(14)
- Round 32 single crochet, (2 increases, 2 single crochet) twice, 2 increases, 2 single crochet (20 stitches)(20)
- Round 42 single crochet, (2 increases, 5 single crochet) twice, 2 increases, 2 single crochet (26 stitches)(26)
- Round 5(8 single crochet, increase) twice, 8 single crochet (28 stitches)(28)
- Rounds 6–828 single crochet
Head Spot
Start with blue (or beige) yarn.
Fasten off and leave thread for sewing. For easier attachment, consider working single crochet all around the edge of this piece.
- Round 1Chain 7, turn
- Rounds 2–46 half double crochet, chain, turn
- Round 5Increase, 4 half double crochet, increase, chain, turn
- Rounds 6–138 half double crochet, chain, turn
- Round 148 half double crochet
Eyebrows
Make 2Start with white (or beige) yarn.
Fasten off and leave thread for sewing.
- Round 1Chain 6
- Round 2Increase, 3 single crochet, 3 single crochet in same stitch, 4 single crochet
Body Spots
For Blue Puppy: Create three circles of varying sizes using dark blue yarn for the back of the puppy.
- Round 1(Small spot, make 2): 6 single crochet in Magic Ring
- Round 2(Small spot, make 2): 6 increases (12 stitches)(12)
- Round 1(Medium spot, make 1): 6 single crochet in Magic Ring
- Round 2(Medium spot, make 1): 6 increases (12 stitches)(12)
- Round 3(Medium spot, make 1): (1 single crochet, increase) 6 times (18 stitches)(18)
For Orange Puppy: Create one oval spot to place on the back right above the tail.
- Round 1Orange oval spot Chain 9
- Round 2Orange oval spot Increase, 6 single crochet, 4 single crochet in the same stitch, 6 single crochet, increase (20 stitches)(20)
- Round 3Orange oval spot 2 increases, 6 single crochet, 4 increases, 6 single crochet, 2 increases (28 stitches)(28)
Belly
Start with white (or beige) yarn.
Fasten off and leave thread for sewing. Adding single crochet around the entire piece makes attachment easier.
- Round 1Chain 12, turn
- Round 211 single crochet, chain, turn
- Round 3Increase, 9 single crochet, increase, chain, turn
- Rounds 4–813 single crochet, chain, turn
- Rounds 9–103 single crochet, 3 half double crochet, 1 double crochet, 3 half double crochet, 3 single crochet, chain
Tail
Start with dark blue (or beige) yarn.
Change to blue (or peach) yarn before Round 7.
Fold in half and crochet 5 single crochet to close.
- Round 16 single crochet in Magic Ring
- Round 26 increases (12 stitches)(12)
- Round 3(2 single crochet, increase) 4 times (16 stitches)(16)
- Round 416 single crochet
- Round 5(6 single crochet, decrease) twice (14 stitches)(14)
- Round 6(5 single crochet, decrease) twice (12 stitches)(12)
- Round 712 single crochet
- Round 8Decrease, 4 single crochet, decrease, 4 single crochet (10 stitches)(10)
- Rounds 9–1710 single crochet
Arms
Make 2Start with white (or beige) yarn for the paws.
- Round 16 single crochet in Magic Ring
- Round 26 increases (12 stitches)(12)
- Round 3(1 single crochet, increase) 6 times (18 stitches)(18)
- Rounds 4–718 single crochet
- Round 81 bubble stitch, 17 single crochet (18 stitches)(18)
- Round 9(1 single crochet, decrease) 6 times (12 stitches)(12)
- Rounds 10–1112 single crochetChange to blue (or peach) yarn before Round 12.
- Rounds 12–1812 single crochetFill with fiberfill, fold arms in half, and crochet 6 single crochet to close.
Felt Eyes
Make 2Optional.
Fasten off and leave thread for sewing, or cut eyes from felt using a template.
- Round 1(White eye base, make 2): Chain 8, turn
- Round 2(White eye base, make 2): Increase, 5 single crochet, 4 single crochet in the same stitch, 5 single crochet, increase (18 stitches)(18)
- Round 3(White eye base, make 2): 2 increases, 5 single crochet, 4 increases, 5 single crochet, 2 increases (26 stitches)(26)
- Round 4(White eye base, make 2): 26 single crochet
- Round 1(Black pupil, make 2): Chain 3, turn
- Round 2(Black pupil, make 2): Increase, 4 single crochet in the same stitch, increase
Legs
Make 2Start with white (or beige) yarn, working in an oval shape on both sides of the chain.
Change to blue (or peach) yarn before Round 12.
Fill with fiberfill, fold leg in half, and crochet 7 single crochet to close.
- Round 1Chain 6, turn
- Round 2Increase, 3 single crochet, 4 single crochet in the same stitch, 3 single crochet, increase (14 stitches)(14)
- Round 3Increase, 4 single crochet, 4 increases, 4 single crochet, increase (20 stitches)(20)
- Round 41 single crochet, increase, 4 single crochet, (1 single crochet, increase) 4 times, 4 single crochet, 1 single crochet, increase (26 stitches)(26)
- Rounds 5–726 single crochet
- Round 84 single crochet, (1 single crochet, decrease) 6 times, 4 single crochet (20 stitches)(20)
- Round 98 single crochet, 2 decreases, 8 single crochet (18 stitches)(18)
- Round 10(4 single crochet, decrease) 3 times (15 stitches)(15)
- Round 1115 single crochet
- Rounds 12–2015 single crochet
Body
Start with blue (or peach) yarn, working in an oval shape on both sides of the chain.
Change to dark blue (or orange) yarn and begin stuffing with fiberfill before Round 25.
- Round 1Chain 15, turn
- Round 2Increase, 12 single crochet, 4 single crochet in the same stitch, 12 single crochet, increase (32 stitches)(32)
- Round 3Attaching the legs 2 increases, 7 single crochet with first leg, 7 single crochet with second leg, 4 increases, 10 single crochet, 2 increases (40 stitches)(40)
- Round 4(1 single crochet, increase) twice, 12 single crochet, (1 single crochet, increase) 4 times, 12 single crochet, (1 single crochet, increase) twice (48 stitches)(48)
- Round 5(2 single crochet, increase) twice, 12 single crochet, (2 single crochet, increase) 4 times, 12 single crochet, (2 single crochet, increase) twice (56 stitches)(56)
- Round 6(3 single crochet, increase) twice, 12 single crochet, (3 single crochet, increase) 4 times, 12 single crochet, (3 single crochet, increase) twice (64 stitches)(64)
- Rounds 7–1064 single crochet
- Round 11Attaching the tail 48 single crochet, position tail behind legs in center and crochet 5 single crochet, 12 single crochet
- Rounds 12–2164 single crochet
- Round 22Attaching the arms 2 single crochet, 6 single crochet with first arm, 25 single crochet, 6 single crochet with second arm, 26 single crochet
- Rounds 23–2464 single crochet
- Rounds 25–4064 single crochet
- Round 41Decreasing for neck (3 single crochet, decrease) 4 times, 12 single crochet, (3 single crochet, decrease) 4 times, 12 single crochet (56 stitches)(56)
- Round 42(2 single crochet, decrease) 4 times, 12 single crochet, (2 single crochet, decrease) 4 times, 12 single crochet (48 stitches)(48)
- Round 43(1 single crochet, decrease) 4 times, 12 single crochet, (1 single crochet, decrease) 4 times, 12 single crochet (40 stitches)(40)
- Round 444 decreases, 12 single crochet
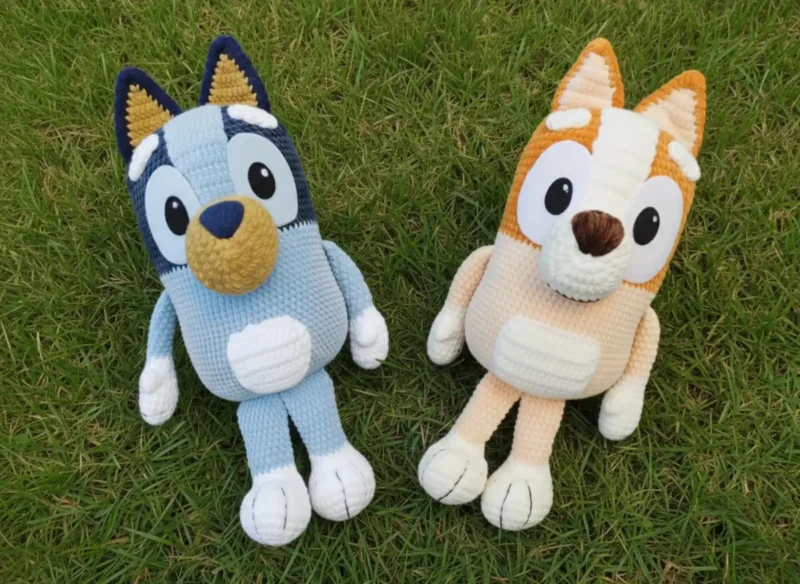
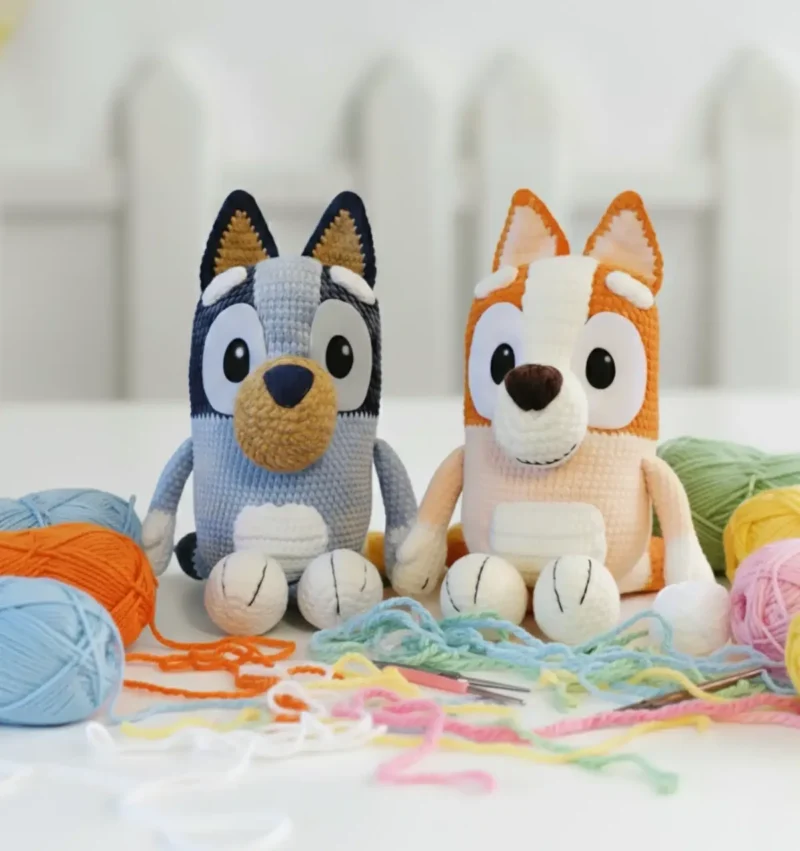
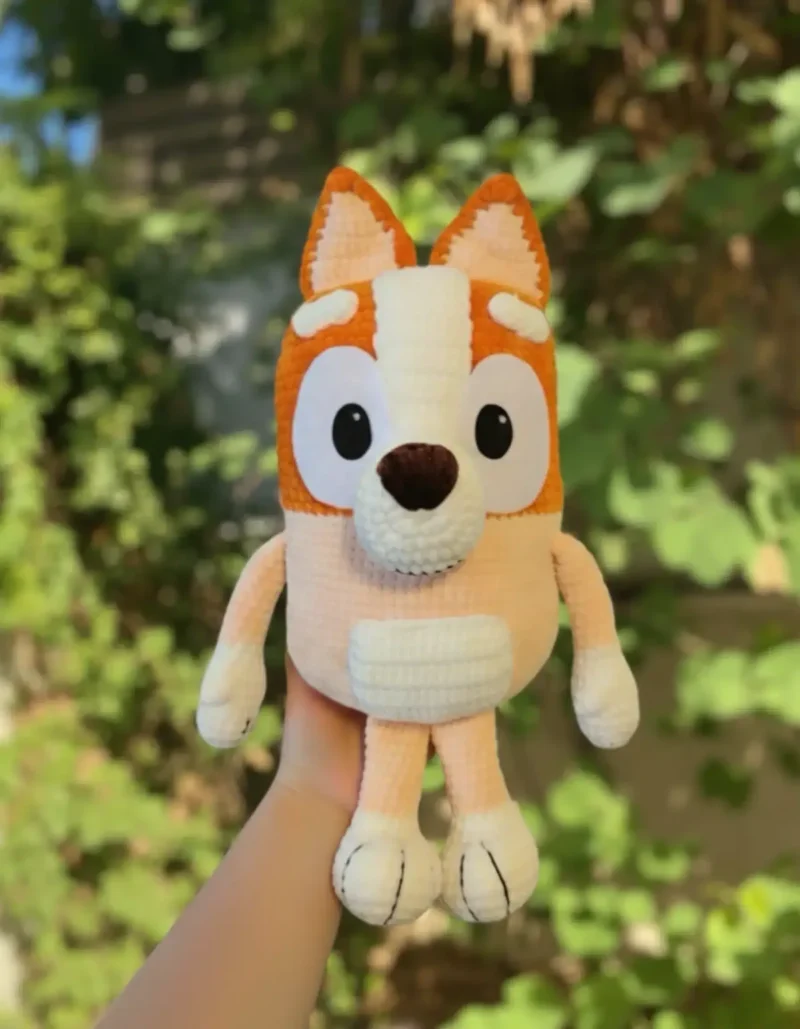
More pictures
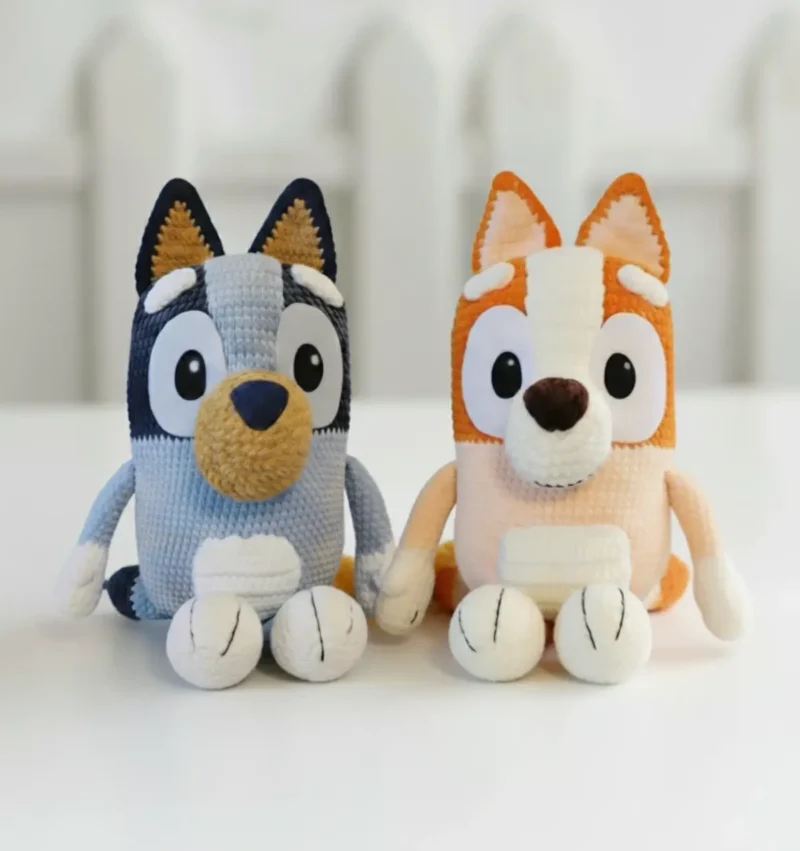
Before the first stitch
- Check you have a full ball of blue yarn before starting the body.
- Read through the Ears rounds once; the increase pattern shifts each row.
- Set aside felt or safety eyes early, so the face goes together without a pause.
Minutes per piece
- Body and Head about 2 hours, because the Body alone runs 16 rounds
- Ears, Spots, and Nose about 1.5 hours, because four ears and three spots add up stitch by stitch
Other yarns that work
- Chenille, chunky weight Similar soft finish, slightly heavier drape, same 5mm hook
- Cotton, worsted weight Crisper stitch definition, less plush feel, may need a smaller hook and more stuffing to fill the same shape
Where it ends up
- A shelf companion beside other amigurumi animals.
- A soft first toy for a toddler's room.
- A quiet handmade gift for a dog lover.
Joining up
- Step 1 Now comes the exciting part—bringing all your carefully crafted pieces together to create your finished puppy!
- Step 2 Attach the head spot: Center this piece from the color change on the body up to the top of the head, ensuring it’s positioned symmetrically. Pin in place before sewing for best results.
- Step 3 Secure the nose: Position the top of the yellow (or beige) nose 4 rows above where the dark blue (or orange) yarn begins on the body. This placement ensures proper facial proportions.
- Step 4 Sew on the belly: Attach the belly piece two rows above the nose, creating a natural flow between facial features and body.
- Step 5 Embroider nose details: Using black yarn (or brown for the orange puppy), embroider the top of the nose to create realistic definition.
- Step 6 Add finger details: With black finer line (or brown), create finger details on the paws—two lines on the arms and three lines on the feet.
- Step 7 Attach ears and spots: Sew the ears to the top of the head, positioning them slightly to the sides for that classic puppy look. Attach the spots to the back of the body as desired.
- Step 8 Create the eyes: Either sew on your crocheted eye pieces, or trace an eye template from online resources and cut felt to the appropriate size. Position eyes above the nose for the most expressive look.
Small notes
- The velvet yarn hides stitch definition, so count rounds instead of reading them by eye.
- Stuff the Nose lightly; overstuffing pulls the shaping tight and rounds it too much.
- Work ears in two color pairs, then join them, so the layers sit flat against the head.
- When working with chains and turning, always begin from the second chain from the hook.
- Finished size: the assembled puppy stands approximately 16.14 inches tall.
Little questions
Can I make the ears in one color instead of two?
Yes, the two-tone joining is for contrast, not structure. One color will still build the same six-stitch shape.
Why does the Nose round count stay small?
The Nose only needs six rounds to reach its final 28 stitches. It stays small on purpose, so it sits neatly on the face.
Do I need felt eyes, or can I embroider them?
Felt is listed as optional. Embroidered eyes work fine with the same black finer line used for the fingers.
What happens if my velvet yarn splits while working increases?
Velvet yarn can split on tight increases, especially in the Nose and Head Spot rounds. Go slowly through those increase stitches, and the loops stay even.
Original pattern: https://amigurumicorner.com/blue-puppy-amigurumi-pattern/

About the Author
Tamsin Okoro Who writes the patterns at Yarn Gallery, how a pattern gets from the hook to the page, and what this site will never do.


