About This Pattern
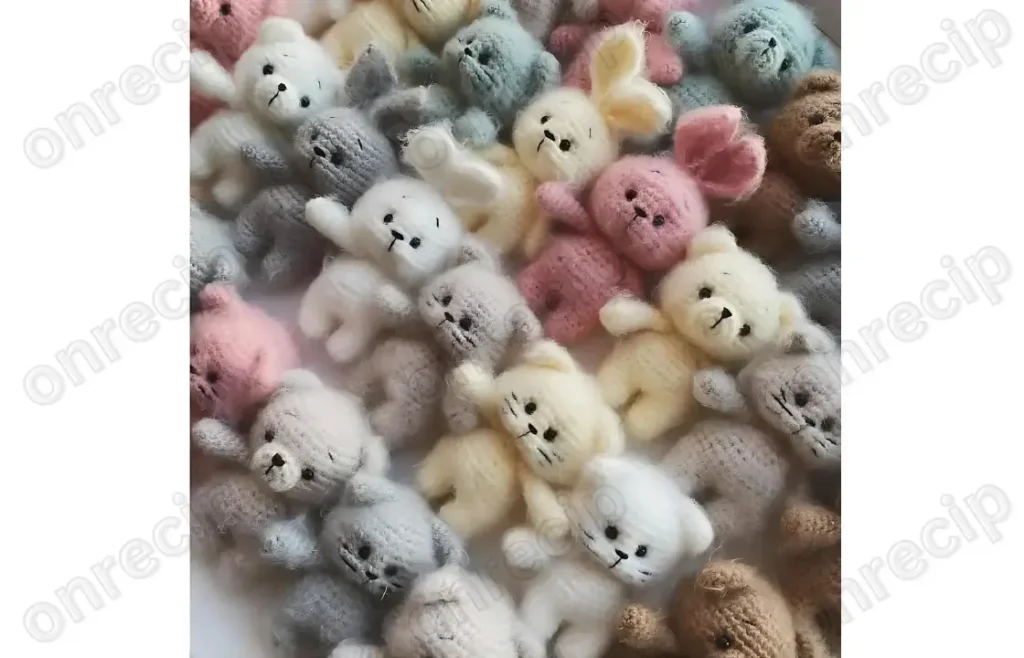
This clever little pattern gives you not one but three amigurumi animals from a single shared base — a bunny, a cat, and a bear, each built from the same head and body but finished with completely different ears and, for the bear, a sweet muzzle detail. It's a wonderful project for anyone who loves the idea of a whole shelf of cuddly friends without having to learn three separate patterns from scratch. Crocheters who enjoy variety, gift-makers, and parents wanting a matched set of toys will especially love this one.
You'll work in the round using a magic ring start, single crochet increases and decreases for shaping, and simple standalone pieces for the ears and face details that get attached afterward. The head is worked over five rounds, the body over three, and each set of arms is a quick three-round piece worked twice — nothing overly technical, but the multiple small components make this a satisfying intermediate-friendly project rather than a total beginner one. Expect roughly 4-6 hours total, depending on which two (or three!) animal variations you decide to make.
The finished result is a compact, huggable amigurumi head-and-body figure with short round arms, sized just right for little hands or a cozy shelf display. Because the ears and face pieces swap in and out, you get three distinct looks — floppy bunny ears, tiny rounded bear ears with a muzzle, or perky triangular cat ears — all from the same soft, plush body. These make fantastic baby shower gifts, nursery decor, or a themed trio for a child who can't decide on a favorite animal.
- Start with the shared head, working it in the round through five shaping rounds until it forms a rounded shape.
- Crochet the body separately over three rounds, keeping it proportioned to sit nicely below the finished head.
- Make two matching arm pieces, each worked over three rounds, so both sides of the toy match.
- Choose your animal and crochet the matching ear set — four rounds for bunny ears, one round for bear ears, or two rounds for cat ears.
- If making the bear, crochet the extra two-round face piece to form the rounded muzzle detail.
- Stuff the head and body firmly before closing up the final rounds so the shapes hold well.
- Sew the arms onto the sides of the body, then attach the head so the toy stands or sits securely.
- Position and sew on the ears (and face piece for the bear), checking placement before stitching for a balanced, expressive look.
Materials
Crochet Abbreviations
- ch
- chain
- sc
- single crochet
- inc
- increase
- dec
- decrease
Amigurumi Bunny, Cat & Bear: One Body, Three Adorable Crochet Animals
EARS FOR A BUNNY
- Round 14 ch, starting from the 2nd ch from the hook, 3 SC, ch, turn. 2nd row: 3 SC, ch, turn.
- Round 32 SC, inc, ch, turn. 4th row: 3 SC, inc, ch, turn. 5th row: 4 SC, inc, ch, turn.
- Round 66 SC. 7th row: 4 SC, dec, ch, turn. 8th row: 3 SC, dec, ch, turn. 9th row: 2 SC, dec, ch, turn.
- Round 101 SC, dec, ch, turn. 11th row: ch. Crochet SC around the entire ear.
EARS FOR A BEAR
- Round 16 SC into a magic ring. 2nd row: 6 inc. 3rd-4th row: 12 SC.
EARS FOR A CAT
- Round 14 SC into a magic ring. 2nd row: 4 inc (8 SC). 3rd row: (3 SC, inc) 2 times (10 SC).(10)
- Round 4(4 SC, inc) 2 times (12 SC). 5th row: (5 SC, inc) 2 times (14 SC). For the bunny and the cat, make adjustments for the eyes and face.
FACE FOR A BEAR
- Round 16 SC into a magic ring. 2nd row: 6 inc (12 SC). 3rd row: (3 SC, inc) 3 times (15 SC).(15)
- Round 415 SC.
HEAD
- Round 16 SC into a magic ring. 2nd row: 6 inc (12 SC). 3rd row: (1 SC, inc) 6 times (18 SC).(18)
- Round 4(2 SC, inc) 6 times (24 SC). 5th row: (3 SC, inc) 6 times (30 SC). 6th row: (4 SC, inc) 6 times (36 SC).(36)
- Round 7(5 SC, inc) 6 times (42 SC). 8th-13th row: 42 SC (6 rows). 14th row: (5 SC, dec) 6 times (36 SC).(36)
- Round 15(4 SC, dec) 6 times (30 SC). 16th row: (3 SC, dec) 6 times (24 SC). 17th row: (2 SC, dec) 6 times (18 SC).(18)
- Round 18(1 SC, dec) 6 times (12 SC).(12)
ARMS (2 pieces)
Make 2- Round 15 SC into a magic ring. 2nd row: 5 inc (10 SC). 3rd-5th row: 10 SC (3 rows). 6th row: (dec, 8 SC) (9 SC).(9)
- Round 7(dec, 7 SC) (8 SC). 8th-10th row: 8 SC (3 rows). LEGS + BODY: First, crochet the legs (2 pieces).(2)
- Round 16 SC into a magic ring. 2nd row: 6 inc (12 SC). 3rd-6th row: 12 SC. For the first leg: finish with a slip stitch, fasten off, and cut the yarn.
For the second leg: do not cut the yarn, continue crocheting the body.
BODY
- Round 7From the second leg, ch 1 and join to the first leg (in the stitch after the slip stitch). Then, crochet 12 SC on the first leg, 1 SC into the ch, 12 SC on the second leg, 1 SC into the ch (26 SC).(26)
- Round 812 SC, inc, 12 SC, inc (28 SC). 9th-13th row: 28 SC. 14th row: (2 SC, dec) 7 times (21 SC).(21)
- Round 1521 SC. 16th row: (1 SC, dec) 7 times (14 SC). 17th row: (6 SC, dec) 2 times (12 SC).(12)
Important Notes
💡 Use a hook one size smaller than the yarn label recommends (usually a 3.5-4.0mm hook for worsted weight) so your stitches stay tight and stuffing doesn't peek through.
💡 Since you're making the head, body, and arms only once each but the ears change per animal, crochet and set aside all three ear-and-face variations before assembling so you can compare proportions.
💡 Stuff the head firmly before closing the final round of decreases — it's much harder to add stuffing once the opening gets small.
💡 Use locking stitch markers (not scrap yarn) on your first stitch of each round in the five-round head, since it's easy to lose your place during the increase rounds.
💡 When working the two identical arm pieces, crochet them back to back or keep a written tally so both arms end up truly matching in length and stitch count.
💡 If swapping yarn colors between the body and the ears or face, leave a 6-inch tail on each color change for weaving in later rather than knotting, which keeps your amigurumi looking clean on close inspection.
Common Mistakes and Fixes
Starting the head or body with a loose magic ring that leaves a visible hole at the center.
Pull the tail yarn firmly after your first round of single crochets to cinch the ring closed completely, and weave the tail through a couple more stitches before trimming for extra security.
Losing track of which round you're on across the head's five rounds of increases, resulting in a lopsided or cone-shaped head instead of a round one.
Place a stitch marker in the first stitch of every round and move it up as you go — this also helps you spot exactly where increases should be evenly spaced.
Attaching the tiny ear pieces (especially the single-round bear ears) before checking that both ears match in size and shape.
Lay both ears flat side by side before sewing them on; if one looks smaller, add one extra stitch or a slightly tighter cinch on the magic ring to even them out.
Overstuffing the arms and body so firmly that the three-round arm pieces become stiff and hard to bend or pose.
Stuff firmly enough to hold shape but leave a little give — use small pinches of stuffing added gradually rather than one large handful, checking softness with a gentle squeeze as you go.
Sewing the bear's two-round face piece too high or too low on the head, throwing off the whole facial proportion.
Pin the face piece in place with a stitch marker first and step back to check placement before committing with sewing pins and thread — aim for roughly the lower-middle third of the head.
Skipping a gauge check between the different ear types, resulting in a bunny's ears looking too small or a cat's ears looking oversized compared to the head.
Since all three animals share the same head size, hold each finished ear piece up against the head before sewing to confirm the proportions look right for that particular animal's character.
What Makes It Good
- The beauty of this pattern is how easy it is to remix. For color combos, try a soft oatmeal or cream worsted weight (like Vanna's Choice or Soft) for the bear, a classic white-and-pink combo for the bunny, and a two-tone gray-and-white for the cat using contrasting yarn for the ear tips. If you want a chunkier, faster finish, size up to a bulky weight yarn with a 5.0mm hook — your head and body rounds will grow larger with fewer stitches per round needed relative to gauge, giving you a bigger, huggable 8-10 inch toy in half the time. Going the other direction, a fingering weight yarn with a 2.5mm hook creates an adorable mini version perfect for a keychain or bag charm, though stuffing small pieces gets fiddly, so use a chopstick or stuffing tool. For themed variations, swap the bunny's ears for a lop-eared look by folding the ear tips down and tacking them to the sides of the head instead of the top. Add a small embroidered star or heart to the bear's belly for a keepsake gift, or give the cat a tiny yarn bowtie made from a folded chain and wrapped center for extra charm. You could also make all three in the same yarn color family — like blush, cream, and dusty gray — so they look like a cohesive matched set on a shelf rather than three unrelated toys. Safety eyes can be swapped for embroidered French knot eyes if you're gifting to a baby under three, since safety eyes are a choking hazard for the youngest recipients.
Frequently Asked Questions
Can I make all three animals from one skein of yarn?
Yes, especially if you keep the body the same color across all three and only change the ear and face yarn — a single worsted weight skein typically covers one full body plus multiple sets of ears.
What size hook should I use for this pattern?
A 3.5-4.0mm hook works well with standard worsted weight yarn to keep stitches tight enough that stuffing won't show through; always crochet a small test round to check your gauge feels dense and even.
Do I need safety eyes, or can I embroider the faces instead?
Either works beautifully — safety eyes give a classic amigurumi look, while embroidered French knot eyes are safer for gifts to babies and young toddlers since there's no small hardware to loosen.
How do I keep the bunny, cat, and bear ears from looking too similar?
Pay attention to the round counts — the four-round bunny ears should be worked longer and slightly floppy, the single-round bear ears stay small and rounded, and the two-round cat ears can be pinched slightly at the base for that triangular perked-up look.
Is this pattern good for a beginner's first amigurumi project?
It's better suited to someone who has completed at least one simple amigurumi before, since managing multiple small pieces (head, body, two arms, ears, and the bear's face) requires comfort with magic rings, increases, and sewing pieces together neatly.
Original pattern: https://onrecip.com/free-amigurumi-bunny-cat-and-bear-crochet-pattern/

About the Author
Tamsin Okoro Who writes the patterns at Yarn Gallery, how a pattern gets from the hook to the page, and what this site will never do.