About This Pattern
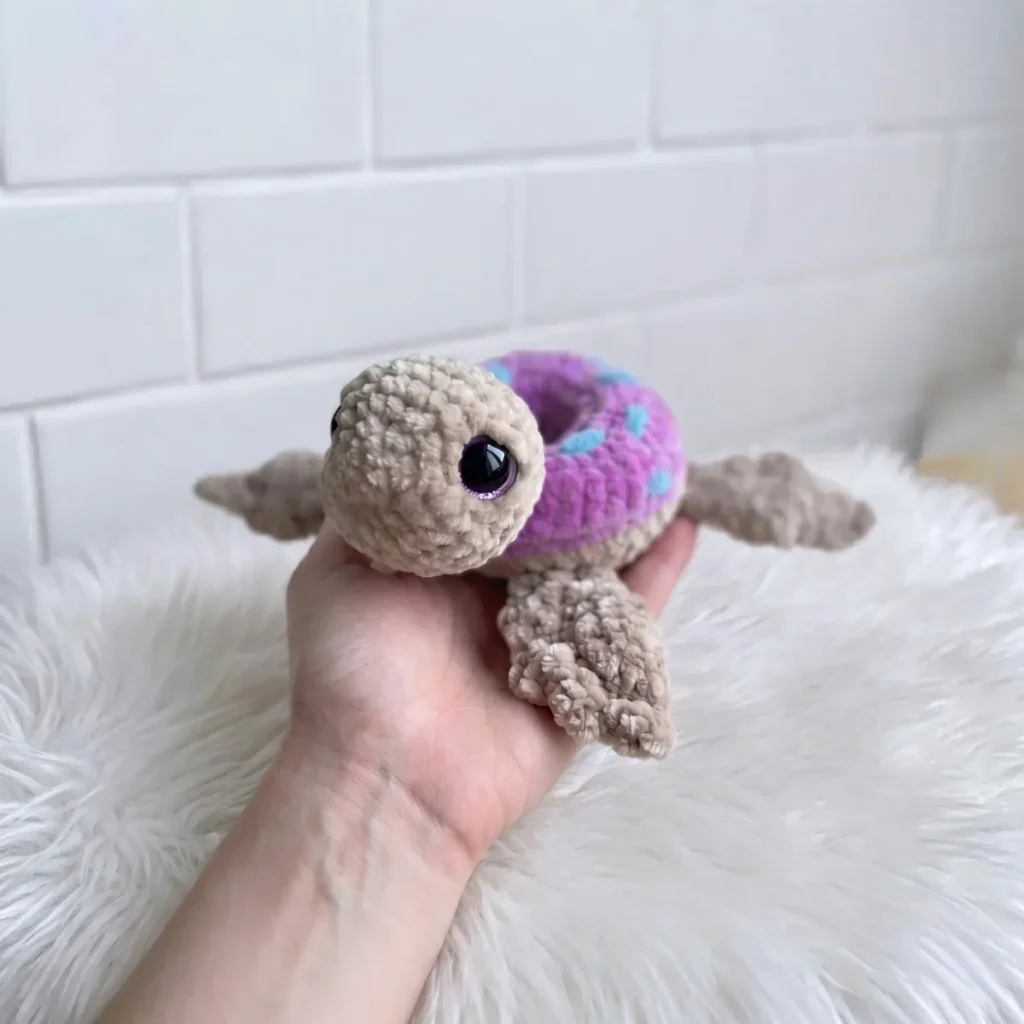
This is a turtle wearing a donut for a shell. The body starts as a ring of 36 chains, then grows in joined rounds. The head sits worked separately, in a tidy spiral. It needs a quiet evening, or two shorter ones. Four fins get sewn on last, two up, two down. It suits a desk shelf or a small gift bag.
In the basket
Yarn
Hook
Stuffing
Cotton thread
Tapestry needle
Specialty needle
Tools
Abbreviations
- ch
- Chain
- sl st
- Slip Stitch
- sc
- Single Crochet
- hdc
- Half Double Crochet
- inc
- Increase (2 sc in same stitch)
- dec
- Decrease (work 2 stitches together as one)
- mr
- Magic Ring (or starting chain as noted)
Crochet donut turtle amigurumi pattern
Donut Body
Work with main color yarn.
Begin by chaining 36, then join with a sl st to the first chain to form a ring. Chain 1 to begin working in rounds.
- Rounds 1–236 sc around. (36)
- Round 3(4 sc, dec) × 6. (30)
- Round 42 sc, dec, (3 sc, dec) × 5, 1 sc. (24)
- Round 51 sc, dec, (2 sc, dec) × 5, 1 sc. (18)
- Round 618 sc. (18)Fasten off with a sl st and cut yarn. Join contrast color yarn.
- Round 718 sc. (18)
- Round 8(2 sc, inc) × 6. (24)
- Round 9(3 sc, inc) × 6. (30)
- Round 102 sc, inc, (4 sc, inc) × 5, 2 sc. (36)
- Rounds 11–1436 sc. (36)Sl st to close, then cut yarn leaving a long tail for sewing.Assembly note: Turn the piece so that when the two open edges are joined, the right side faces outward. Thread the long tail onto your needle and seam both edges of the donut together along the outer side, catching only the back loops of the contrast color stitches. As you seam, gradually stuff the donut with polyfill. Once assembled, embroider sprinkle details in any color onto the glaze section of the donut.
Head
Work with main color yarn.
Chain 2.
- Round 16 sc into the second chain from hook. (6)
- Round 2inc × 6. (12)
- Round 3(sc, inc) × 6. (18)
- Round 41 sc, inc, (2 sc, inc) × 5, 1 sc. (24)
- Round 5(3 sc, inc) × 6. (30)
- Rounds 6–930 sc. (30)Insert 15mm safety eyes between Rnds 5 and 6, spacing them approximately 10 stitches apart.
- Round 10(3 sc, dec) × 6. (24)
- Round 11(2 sc, dec) × 6. (18)
- Round 12(1 sc, dec) × 6. (12)Stuff the head firmly with polyfill before continuing.
- Round 13dec × 6. (6)Pull yarn through remaining stitches to close. Fasten off and leave a tail for assembly.
Face Detailing
Use cotton thread for all indentation work.
Thread a needle with cotton thread. Insert the needle into the closing hole at the back of the head, leaving a 10cm tail. Bring the needle out just below the right safety eye, then reinsert it at the lower left of the same eye. Pull the needle back out through the original entry hole. Pull gently to create a dimple beneath the eye, then tie the two thread ends together with 2 knots. Do not cut the thread yet. Repeat this process for the left eye.
Using the same thread, create an indentation for the mouth using the same technique, positioning it centrally below the eyes.
Finally, use the main color yarn to embroider upper eyelid details above each eye.
Fins (Make 4)
Make 4Work with main color yarn. Do not stuff.
Chain 2.
- Round 16 sc into the second chain from hook. (6)
- Round 2inc × 6. (12)
- Round 3(1 sc, inc) × 6. (18)
- Round 41 sc, inc, (2 sc, inc) × 5, 1 sc. (24)
- Round 5Fold the fin in half and sc 11 stitches through both layers to close. (11)Now work the decorative wavy edge: Chain 2, work 3 hdc into the first stitch at the base of the chain. Then sl st × 2. Chain 2 again and work 3 hdc into the same stitch where the last sl st was worked. Continue in this manner to create wavy bumps. Work a total of 6 bumps across the fin edge. At the base of the last bump, sl st to finish. Fasten off and hide the tail inside the fin.
More pictures
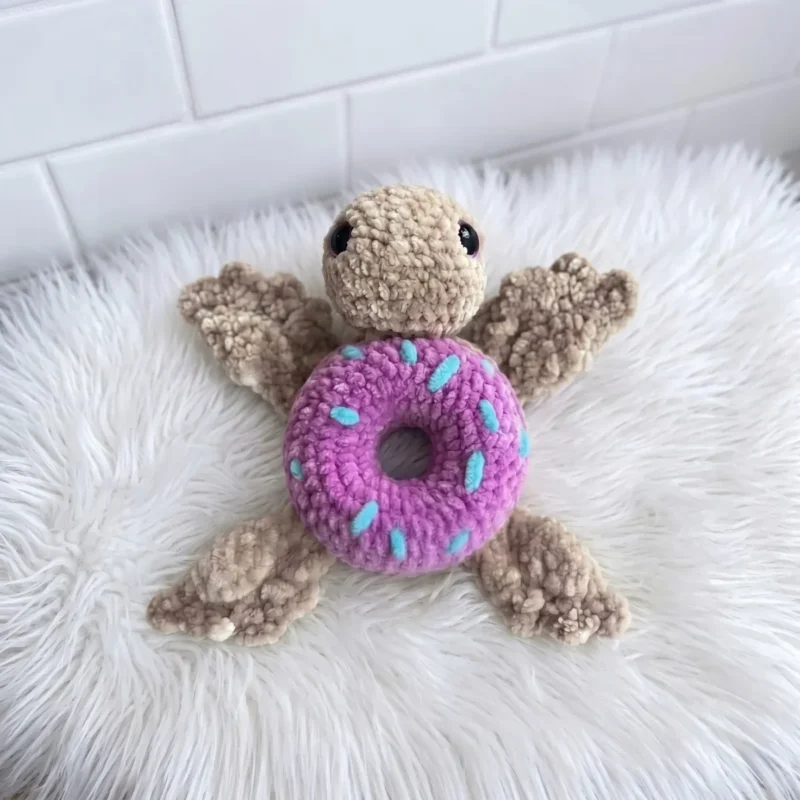
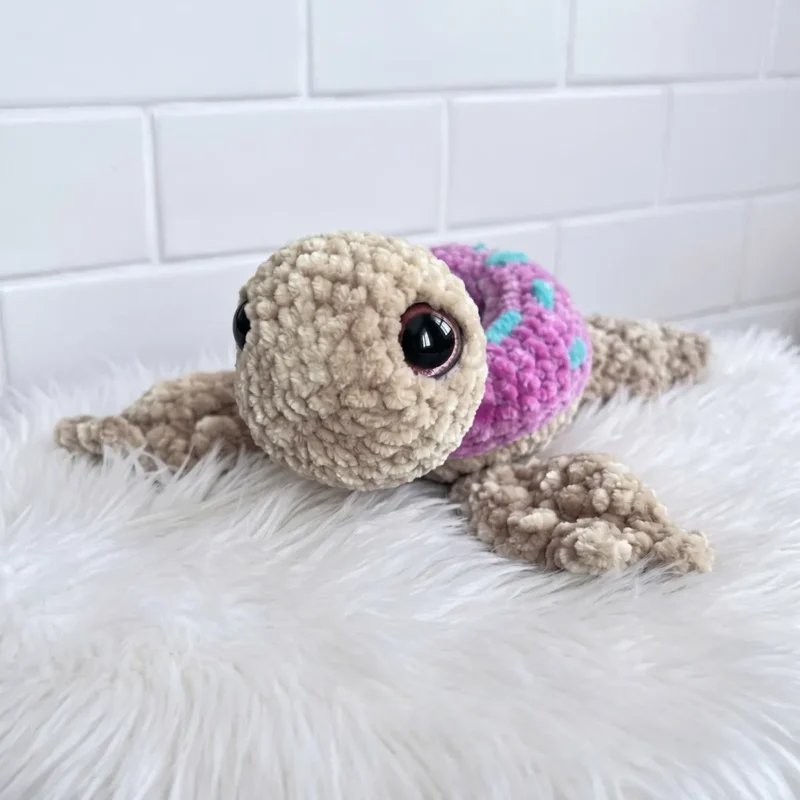
Before the first stitch
- Check you have enough main color and contrast color yarn for both the donut glaze and the body.
- Read through the Donut Body section first. It is worked in joined rounds, not a spiral.
- Have your 15mm safety eyes ready before you finish the head. They go in before stuffing.
Minutes per piece
- Donut Body about 2 hours, because it runs 10 rounds worked flat and joined, not spiraled
- Head and fins about 2-3 hours, because the head has 10 rounds of shaping plus four small fins to make and attach
Other yarns that work
- Chunky plush or velvet yarn If Himalaya Dolphin Baby is not available in your region, any chunky plush or velvet yarn in a similar weight will work. Look for something with a similar soft texture and slight sheen. Avoid very slippery yarns, as they can make seaming difficult.
Where it ends up
- A shelf piece next to other small amigurumi animals.
- A soft toy for a toddler's basket, paired with other stuffed shapes.
- A desk companion beside a mug and a stack of notebooks.
Joining up
- Step 1 Lay the completed donut body on a flat surface with the contrast-color glaze section facing up.
- Step 2 Position the head at the front of the donut and sew it securely in place using the yarn tail and tapestry needle, attaching it to the outer ring of the donut body.
- Step 3 Attach two fins to the upper sides of the donut body (these serve as the front flippers).
- Step 4 Attach the remaining two fins to the lower sides of the donut body (these serve as the back flippers).
- Step 5 Make sure all parts are evenly spaced and lie flat before fastening off each seam. Weave in all ends securely.
Small notes
- Use a 4mm hook throughout for both the donut body and the head, to keep the pieces the same scale.
- The donut body is joined at the end of each round. Do not treat it like a spiral or your rounds will twist.
- Face detailing uses cotton thread, not yarn, so the dimples under the eyes stay crisp after stuffing.
- This pattern uses US crochet terminology.
- Gauge: Approximately 4 sc = 1 inch with 4mm hook and Himalaya Dolphin Baby yarn. Gauge is not critical for amigurumi, but consistent tension will affect finished size.
- The head and fins are worked in a continuous spiral, unless otherwise noted.
- Do not stuff the fins — leave them flat for best results.
Little questions
Is this donut turtle pattern suitable for beginners?
This pattern is best suited for beginners who are already comfortable with single crochet, increasing, and decreasing. If you've completed one or two basic amigurumi projects before, you'll find this turtle very manageable. The most challenging step is seaming the donut body, which becomes easy with a little patience.
Can I use a different yarn for this pattern?
Yes! While Himalaya Dolphin Baby gives the turtle its signature plush look, you can substitute any chunky-weight fluffy or velvet yarn. Just make sure your gauge is similar and that the yarn has enough body to hold the donut shape once stuffed. Avoid very thin yarns, as they won't produce the same effect.
How large will the finished donut turtle be?
Using a 4mm hook and Himalaya Dolphin Baby yarn, the finished donut turtle measures approximately 15–18 cm (6–7 inches) in diameter. The head adds a little extra length to the front. Sizing may vary slightly depending on your personal tension.
How long does it take to complete this project?
Most crocheters with intermediate experience can complete this turtle in 3–5 hours, including assembly and face detailing. The donut body works up quickly, while the fins and face finishing take a bit more time and care. It makes a great one-evening or weekend project.
Original pattern: https://amigurumicorner.com/crochet-donut-turtle-amigurumi-full-pattern/

About the Author
Tamsin Okoro Who writes the patterns at Yarn Gallery, how a pattern gets from the hook to the page, and what this site will never do.