About This Pattern
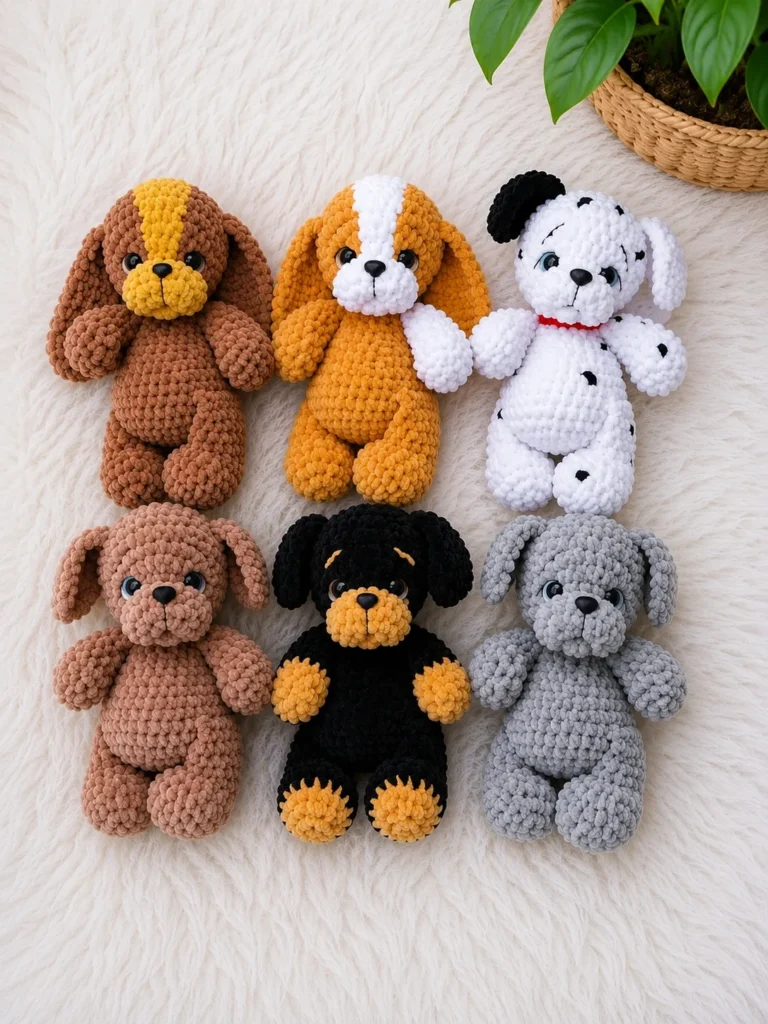
This is a plush puppy, built from a head, muzzle, body, and four legs. It sits well on a shelf or in small arms. Toby needs a quiet evening, not a rushed one. The head alone runs twenty-one rounds, so I work it in one sitting when I can. Safety eyes go in before stuffing, so I plan that step ahead. Fiberfill does the rest, packed tight so no white shows through the stitches.
In the basket
Yarn
Hook
Safety eyes
Stuffing
Stitch markers
Abbreviations
- BLO
- Back Loop Only
- ch
- Chain
- dec
- Decrease (invisible decrease)
- dc
- Double Crochet
- FLO
- Front Loop Only
- inc
- Increase (2 sc in the same stitch)
- MR
- Magic Ring
- sc
- Single Crochet
- sk
- Skip
- sl st
- Slip Stitch
- SM
- Stitch Marker
- st / sts
- Stitch / Stitches
Crochet a plush puppy: an amigurumi dog pattern
Head
- Round 16 sc in MR. (6)
- Round 2inc in each st around. (12)
- Round 3sc, inc repeat 6 times around. (18)
- Round 42 sc, inc repeat 6 times around. (24)
- Round 53 sc, inc repeat 6 times around. (30)
- Round 64 sc, inc repeat 6 times around. (36)
- Round 75 sc, inc repeat 6 times around. (42)
- Round 86 sc, inc repeat 6 times around. (48)
- Rounds 9–14sc in each st around. (48)At the end of Rnd 14, insert safety eyes between Rnds 10 and 11, approximately 10–12 stitches apart. Secure backings firmly.
- Round 156 sc, dec repeat 6 times around. (42)
- Round 165 sc, dec repeat 6 times around. (36)
- Round 174 sc, dec repeat 6 times around. (30)
- Round 183 sc, dec repeat 6 times around. (24)Begin stuffing the head firmly now. Continue adding stuffing as you close.
- Round 192 sc, dec repeat 6 times around. (18)
- Round 20sc, dec repeat 6 times around. (12)
- Round 21dec 6 times around. (6)Fasten off, leaving a long yarn tail. Close the opening and weave in the end.
Muzzle
- Round 16 sc in MR. (6)
- Round 2inc in each st around. (12)
- Round 3sc, inc repeat 6 times around. (18)
- Round 42 sc, inc repeat 6 times around. (24)
- Round 5sc in each st around. (24)Fasten off, leaving a long yarn tail for sewing. Do not stuff. Sew flat onto the lower front of the Head between Rnds 12 and 17, centered below the safety eyes.
Nose
Using black or dark brown yarn, embroider a small oval nose at the top center of the Muzzle using a yarn needle and satin stitch. Alternatively, you may use a 15 mm oval craft nose secured from the inside before the Muzzle is sewn on.
Body
- Round 16 sc in MR. (6)
- Round 2inc in each st around. (12)
- Round 3sc, inc repeat 6 times around. (18)
- Round 42 sc, inc repeat 6 times around. (24)
- Round 53 sc, inc repeat 6 times around. (30)
- Round 64 sc, inc repeat 6 times around. (36)
- Round 75 sc, inc repeat 6 times around. (42)
- Rounds 8–18sc in each st around. (42)
- Round 195 sc, dec repeat 6 times around. (36)
- Round 204 sc, dec repeat 6 times around. (30)Begin stuffing the body firmly now.
- Round 213 sc, dec repeat 6 times around. (24)
- Round 222 sc, dec repeat 6 times around. (18)
- Round 23sc, dec repeat 6 times around. (12)
- Round 24dec 6 times around. (6)Fasten off, leaving a long yarn tail. Close the opening and weave in the end.
Front Leg (make 2)
- Round 16 sc in MR. (6)
- Round 2inc in each st around. (12)
- Round 3sc, inc repeat 6 times around. (18)
- Rounds 4–5sc in each st around. (18)
- Round 6sc, dec repeat 6 times around. (12)
- Rounds 7–14sc in each st around. (12)Stuff lightly. Fasten off, leaving a long yarn tail for sewing.
Back Leg (make 2)
- Round 16 sc in MR. (6)
- Round 2inc in each st around. (12)
- Round 3sc, inc repeat 6 times around. (18)
- Round 42 sc, inc repeat 6 times around. (24)
- Rounds 5–6sc in each st around. (24)
- Round 72 sc, dec repeat 6 times around. (18)
- Rounds 8–14sc in each st around. (18)Stuff lightly. Fasten off, leaving a long yarn tail for sewing.
Ear (make 2)
- Round 16 sc in MR. (6)
- Round 2inc in each st around. (12)
- Round 3sc, inc repeat 6 times around. (18)
- Round 42 sc, inc repeat 6 times around. (24)
- Rounds 5–10sc in each st around. (24)
- Round 112 sc, dec repeat 6 times around. (18)
- Round 12sc in each st around. (18)Fasten off, leaving a long yarn tail. Do not stuff. Flatten the ear before sewing.
Tail
- Round 16 sc in MR. (6)
- Round 2inc in each st around. (12)
- Rounds 3–4sc in each st around. (12)
- Round 5sc, dec repeat 4 times around. (8)
- Rounds 6–9sc in each st around. (8)Fasten off, leaving a long yarn tail. Stuff lightly.
More pictures
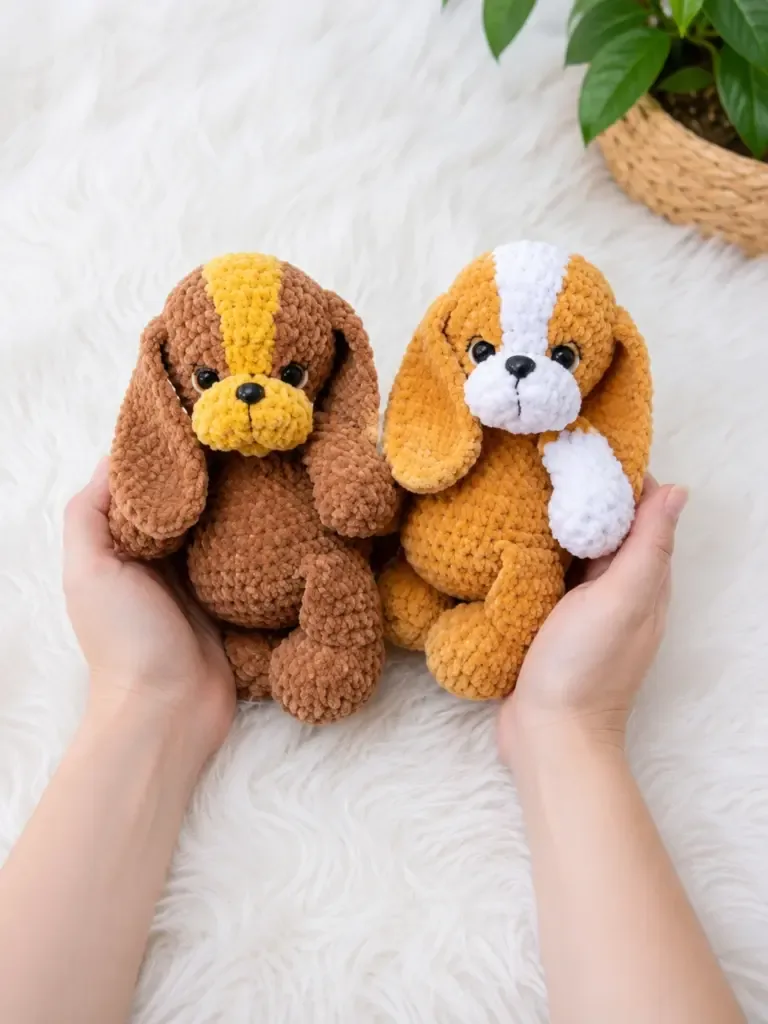
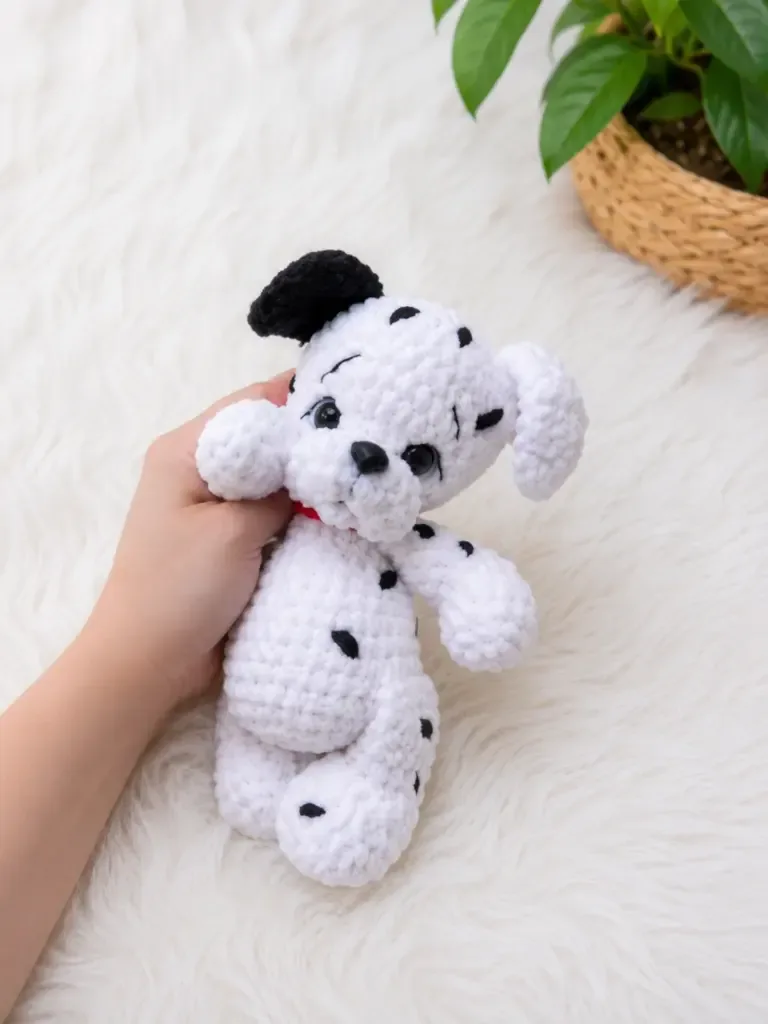
Before the first stitch
- Check yarn amounts first — about 100 to 120 grams main color, 20 to 30 grams accent.
- Set a stitch marker ready. Every part works in a continuous spiral, no joins.
- Read through the Head rounds once. Twenty-one rounds of shaping go by fast if you know the count.
Minutes per piece
- Head about 45 minutes because it runs twenty-one rounds with steady increases and decreases
- Body, legs, and assembly about 3 to 4 hours because four legs and whipstitch joins take patience
Other yarns that work
- Acrylic worsted weight Same size and hook, but slightly less drape. Stuffs firm and holds shape well.
- Cotton-blend worsted weight Sturdier fabric with less give. May need a touch more fiberfill for the same firmness.
Where it ends up
- A shelf companion, paired with a small knit blanket.
- A gift for a child, alongside a favorite storybook.
- A quiet toy for a nursery, paired with soft cotton bedding.
Joining up
- Step 1 Attach the Head to the Body. Position the Head on top of the Body with the opening of the Head aligned over the narrowed top of the Body. Using the yarn tail from the Head, sew around the entire perimeter using a whipstitch. Keep tension even so the join is smooth on all sides.
- Step 2 Attach the Muzzle. Center the Muzzle on the lower front of the Head, between Rnds 12 and 17, directly beneath the safety eyes. Sew all the way around using the yarn tail and a whipstitch, leaving no gaps.
- Step 3 Attach the Ears. Flatten each Ear and position on either side of the Head, with the top of each Ear sitting at approximately Rnd 4–5. The ears should drape downward. Sew across the flat top edge of each Ear using a whipstitch.
- Step 4 Attach the Front Legs. Pin each Front Leg to the lower sides of the Body at approximately Rnds 18–20, centered on either side. Sew securely around the top opening using the yarn tail and a whipstitch.
- Step 5 Attach the Back Legs. Pin each Back Leg to the lower Body at approximately Rnds 6–8, angled slightly outward. Sew securely around the top opening using a whipstitch.
- Step 6 Attach the Tail. Position the Tail at the center back of the Body at approximately Rnd 8. Sew the open end firmly to the Body using the yarn tail.
- Step 7 Embroider the nose (if not already completed) and any additional facial details such as eyebrow arches using dark yarn and a yarn needle.
- Step 8 Weave in all remaining ends securely.
Small notes
- Use an E-4 / 3.5 mm hook and keep stitches snug — gauge is not critical, but your fabric should be tight enough that no fiberfill is visible through the stitches. If you can see gaps, go down one hook size. This pattern is written in US crochet terminology, and stitch counts are given at the end of each round in parentheses.
- Move your stitch marker every round. A spiral pattern drifts fast without one.
- Place safety eyes before you close the Head. Once stuffed, adjusting them is much harder.
- To work an invisible decrease, insert your hook under the front loop of the first stitch and the front loop of the second stitch at the same time, draw up a loop, and complete the stitch as a single crochet. This avoids the small hole a standard decrease leaves and keeps the shape smooth.
- Stuff the head and body firmly for a well-defined shape — solid but not rock hard; a properly stuffed piece holds its round shape when set on a flat surface without support. Stuff the limbs only lightly so they stay soft and poseable.
Little questions
Can I use a smaller hook for a tighter stitch?
You can, but the pattern is written for E-4 / 3.5 mm. A smaller hook makes the Head tighter to stuff and may shrink the finished size slightly.
How much yarn do I really need?
Plan for 100 to 120 grams in your main color and 20 to 30 grams in your accent. Keep a small amount of black or dark brown ready for the nose.
Why does the pattern say continuous spiral?
Every part, including the Head, works without joining or chaining at the round's start. A stitch marker keeps track of where each new round begins.
Where exactly does the Muzzle attach?
Center it on the lower front of the Head, between rounds 12 and 17. It sits directly beneath the safety eyes, whipstitched all the way around.
Original pattern: https://amistitch.com/toby-the-dog-crochet-your-own-adorable-plush-puppy/

About the Author
Tamsin Okoro Who writes the patterns at Yarn Gallery, how a pattern gets from the hook to the page, and what this site will never do.