About This Pattern
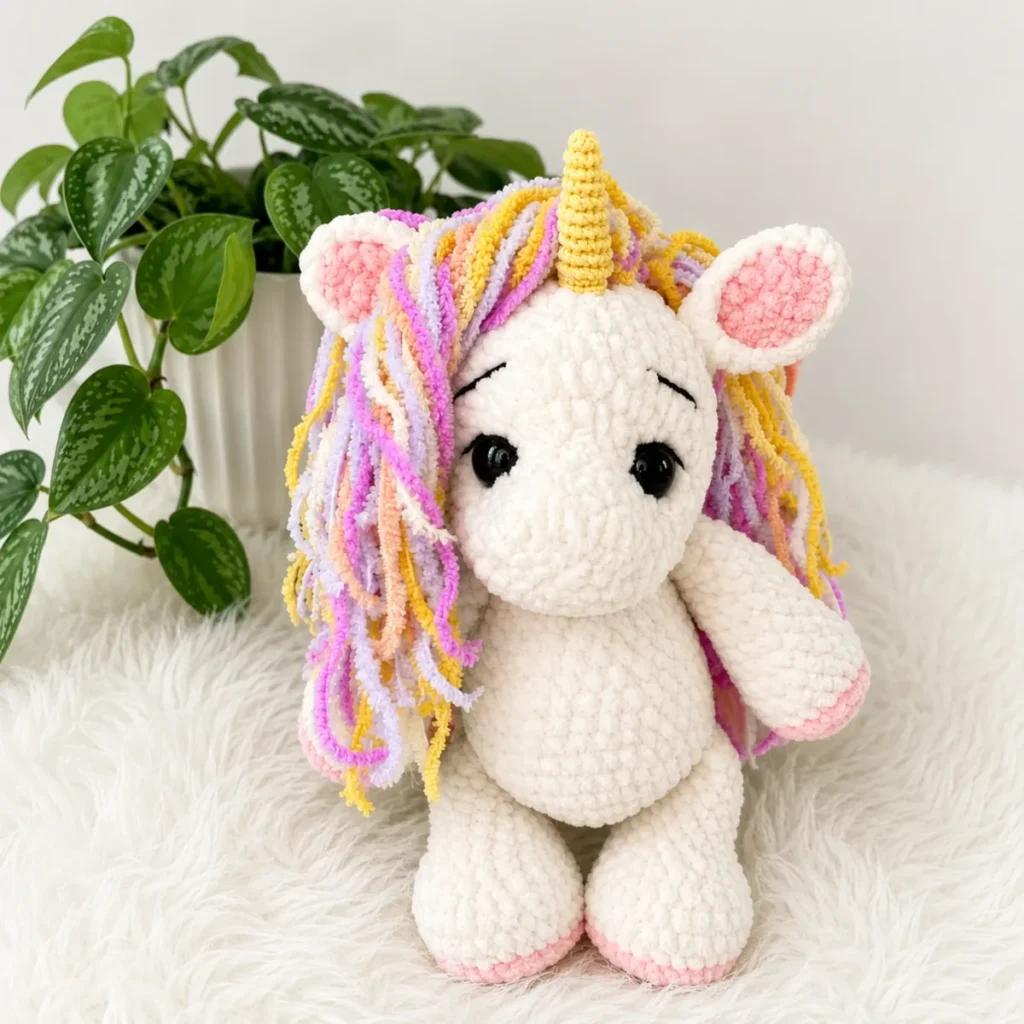
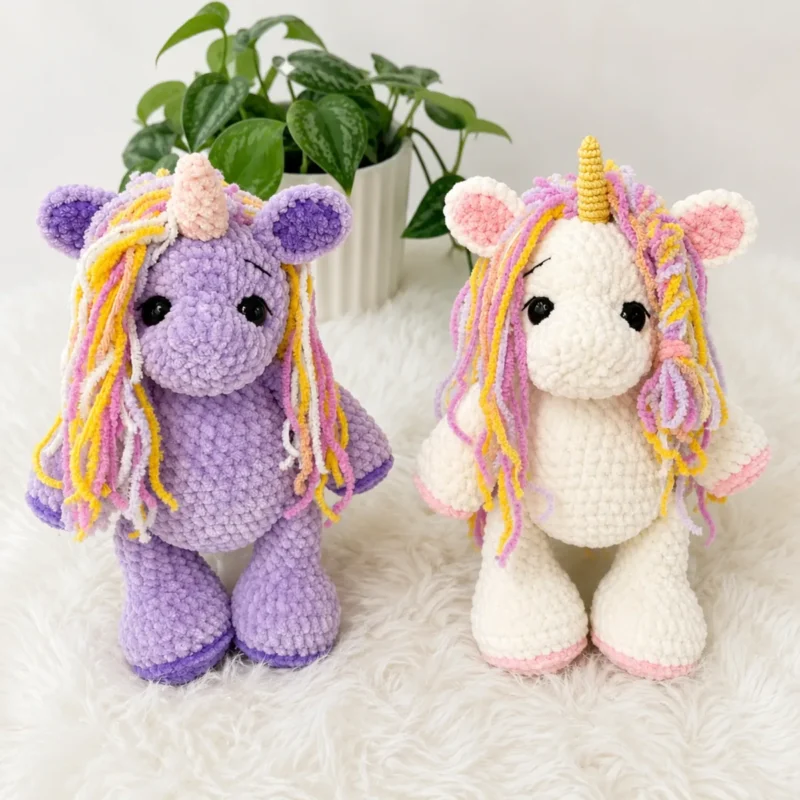
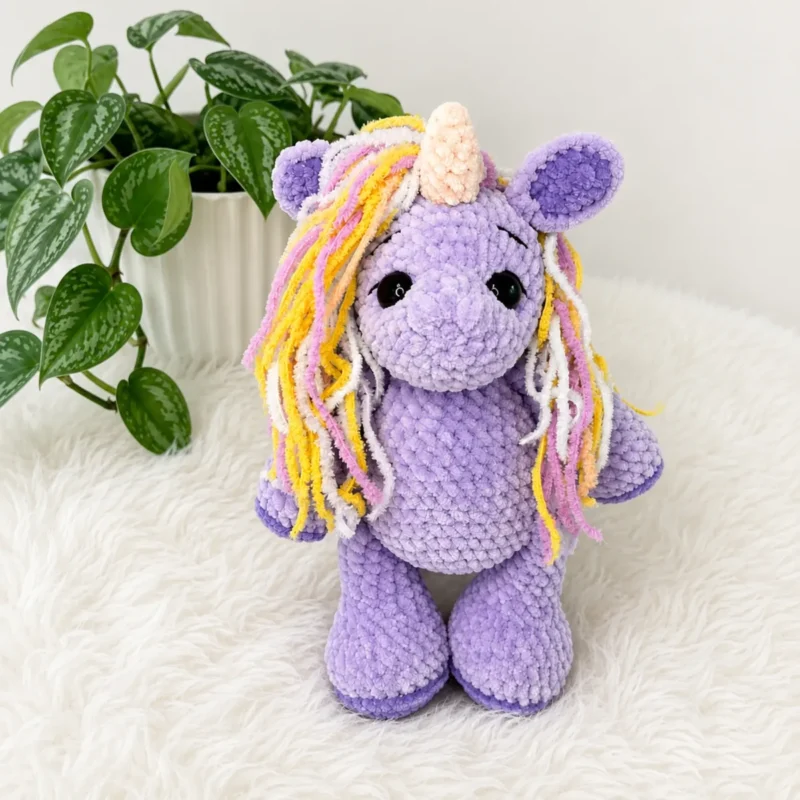
This unicorn stands thirteen inches tall. It takes an evening, maybe two, with the chenille body and separate horn. The legs and arms build first, small and quick. Then the body grows around them, joined right into the round. It needs a steady hand for BLO edging and patience for the mane. Safety eyes and a firm stuffed neck make it stand proud on a shelf.
In the basket
Hook
Safety eyes
Fiberfill
Abbreviations
- BLO
- Back Loop Only
- ch
- Chain
- dec
- Invisible Decrease (insert hook in front loop of next 2 sts, pull up a loop, yarn over, pull through all 3 loops)
- FLO
- Front Loop Only
- inc
- Increase (2 sc in the same stitch)
- MR
- Magic Ring
- Rnd
- Round
- Row
- Flat Row
- sc
- Single Crochet
- sl st
- Slip Stitch
- SM
- Stitch Marker
- st / sts
- Stitch / Stitches
Crochet a tall unicorn amigurumi, thirteen inches of soft magic
Legs
Make 2Start with accent/hoof color.
Change to main color. Rnd 5 is worked BLO. The exposed front loops of Rnd 5 will be edged with sl sts later to create the hoof ridge.
Work 1 additional sc to reach the center of the leg opening. Fasten off and weave in end inside the piece. Alternatively, fold the leg flat and work 7 sc across both layers to close; if using this method, work only 16 rounds total.
Hoof ridge: Return to the exposed front loops of Rnd 5. Join accent color and work 1 sl st in each front loop around. Fasten off.
Stuffing: Stuff the foot section firmly. Stuff the mid-section lightly. Leave the upper section unstuffed.
Insert safety eyes at Rnd 7 now, before continuing. Place the first eye just before the first increase of Rnd 7 and the second eye just after the last increase. Begin stuffing the head gradually from this point, distributing filling evenly and packing the muzzle area firmly.
Draw yarn through remaining 6 stitches and pull tight to close. Fasten off and weave in end.
Face embroidery: Embroider eyebrows 2 rounds above the eyes, each spanning 4 stitches. Embroider eyelashes starting 2 stitches out from the outer edge of each eye. Embroider nostrils with small satin stitches using black yarn.
- Round 1Ch 2, sc 8 in 2nd ch from hook. (8)
- Round 2[inc] x8. (16)Step by step: sc 16. (16).
- Round 3[sc 1, inc] x8. (24)
- Round 4[sc 2, inc] x8. (32)
- Round 5(BLO): [sc 6, dec] x4. (28)
- Rounds 6–7sc 28. (28)
- Round 8dec, sc 6, dec, sc 1, dec, sc 2, dec, sc 1, dec, sc 6, dec. (22)
- Round 9sc 5, dec, sc 1, dec, sc 2, dec, sc 1, dec, sc 5. (18)
- Round 10sc 5, dec x4, sc 5. (14)
- Rounds 11–17sc 14. (14) — 7 roundsStep by step: sc 9, inc x6, sc 9. (30); sc 9, [sc 1, inc] x6, sc 9. (36); sc 36. (36) — 6 rounds.
Arms
Make 2Start with accent/paw color.
Change to main color. Rnd 4 is worked BLO. Return to the front loops of Rnd 4 after finishing the arm and work a sl st edging round for the paw ridge.
Fasten off and weave in end inside the piece. Work the FLO sl st edging on Rnd 4 as for the legs.
Stuffing: Stuff the paw section firmly. Stuff the mid-section lightly. Leave the upper section unstuffed.
- Round 1Ch 2, sc 6 in 2nd ch from hook. (6)
- Round 2[inc] x6. (12)
- Round 3[sc 1, inc] x6. (18)
- Round 4(BLO): sc 18. (18)
- Rounds 5–6sc 18. (18)
- Round 7[sc 4, dec] x3. (15)
- Rounds 8–10sc 15. (15)
- Round 11[sc 3, dec] x3. (12)
- Rounds 12–14sc 12. (12)
- Round 15[sc 4, dec] x2. (10)
- Round 16sc 10. (10)
Body
Rnd 8: Hold each leg opening parallel to the body. Insert hook through the body stitch and the corresponding open stitch of the leg simultaneously, and work sc through both layers. Join each leg over 7 stitches.
Rnd 19: Align arms at the same height as the legs. Join each arm over 5 stitches using the same method as for the legs.
Leave a long yarn tail for sewing the head. Stuff the body firmly, paying special attention to the neck — pack it well so the head sits upright and doesn't tilt.
- Round 1Ch 2, sc 6 in 2nd ch from hook. (6)
- Round 2[inc] x6. (12)
- Round 3[sc 1, inc] x6. (18)
- Round 4[sc 2, inc] x6. (24)
- Round 5[sc 3, inc] x6. (30)
- Round 6[sc 4, inc] x6. (36)
- Round 7[sc 5, inc] x6. (42)
- Round 8(join legs): [sc 7 joining leg, sc 14] x2. (42)
- Round 9sc 42. (42)
- Round 10[sc 5, dec] x6. (36)
- Rounds 11–12sc 36. (36)
- Round 13[sc 4, dec] x6. (30)
- Rounds 14–15sc 30. (30)
- Round 16[sc 3, dec] x6. (24)
- Rounds 17–18sc 24. (24)
- Round 19(join arms): [sc 5 joining arm, sc 7] x2. (24)
- Round 20[sc 2, dec] x6. (18)Step by step: [sc 1, dec] x6. (12); dec x6. (6).
Horn — Option 1 (Textured Spiral Horn)
Use sport-weight yarn and US B-1 / 2.0 mm hook.
From Rnd 3 through the end, work all stitches BLO.
Spiral ridge: After completing Rnd 12, return to the exposed front loops of Rnds 3–12. Without cutting yarn, work 1 sl st in each exposed front loop continuously from bottom to top. This creates the spiral ridge effect.
Fasten off, leaving a sewing tail.
- Round 1Ch 2, sc 6 in 2nd ch from hook. (6)
- Round 2[sc 1, inc] x3. (9)
- Round 3(BLO): sc 9. (9)
- Round 4(BLO): [sc 2, inc] x3. (12)
- Rounds 5–6(BLO): sc 12. (12)
- Round 7(BLO): [sc 3, inc] x3. (15)
- Rounds 8–9(BLO): sc 15. (15)
- Round 10(BLO): [sc 4, inc] x3. (18)
- Rounds 11–12(BLO): sc 18. (18)
Horn — Option 2 (Soft Velvet Horn)
Use main color or contrast color chenille yarn with US G-6 / 4.0 mm hook.
Fasten off, leaving a long sewing tail.
- Round 1Ch 2, sc 4 in 2nd ch from hook. (4)
- Round 2[sc 1, inc] x2. (6)
- Round 3[sc 1, inc] x3. (9)
- Rounds 4–7sc 9. (9) — 4 rounds
Ears
Make 2Each ear is made of two pieces: one inner piece in accent color, one outer piece in main color.
Inner Piece (accent color) uses Row 1 and Row 2 above.
Outer Piece (main color) uses the second Row 1 and Row 2 above.
Hold both pieces together with wrong sides facing. Using the main color yarn, join both pieces by working sc or sl st evenly around the outer edge, enclosing all yarn ends inside as you go. Leave a sewing tail. With tapestry needle, sew the bottom edge of the ear closed.
- Round 1Ch 7, sc 5 beginning in 2nd ch from hook, sc 6 in last ch (corner), turn, sc 5 along opposite side of foundation ch. (16)
- Round 2sc 1, inc, sc 6. Do not complete the row. Fasten off.
- Round 1Ch 7, sc 5 beginning in 2nd ch from hook, sc 6 in last ch (corner), turn, sc 5 along opposite side of foundation ch. (16)
- Round 2sc 1, inc, sc 5, inc, sc 2, inc, sc 5, sl st. (19) Fasten off.
More pictures
Before the first stitch
- Check you have enough chenille yarn for one full body skein.
- Place a stitch marker at round one and move it every round, since these pieces spiral.
Minutes per piece
- Legs and arms about 2 hours, because four pieces and color changes add up
- Body, head, horn, ears about 6-8 hours, because the body alone runs seventeen rounds plus joining
Other yarns that work
- Acrylic super bulky (chenille-style), #6 weight Similar size and softness; watch for extra fuzz shedding, so brush gently after stuffing.
- Cotton-blend worsted, #4 weight Smaller finished unicorn, crisper stitch definition; go down one hook size and stuff a touch firmer.
Where it ends up
- A shelf companion for a child's room, paired with a matching soft blanket.
- A gift for a new baby, alongside a small knit hat.
- A quiet-time toy for travel, small enough to tuck into a bag.
Joining up
- Step 1 Sew the head to the top of the body using the long yarn tail left on the body. Use a whipstitch or mattress stitch around the 18 open stitches of the body's last round, aligning the head so the muzzle faces forward.
- Step 2 Sew the horn to the center of the head between Rnds 10–11, using the sewing tail. Pull the tail through to the inside of the head and knot securely.
- Step 3 Sew the ears to the head across Rnds 12–14, spacing them 9 stitches apart from each other (approximately one ear on each side of the horn placement). Use the sewing tail and whipstitch through the bottom edge of each ear.
- Step 4 Attach the mane and tail by cutting lengths of mane yarn in your chosen colors and attaching them to the top and back of the head using a lark's head knot — fold each strand in half, insert the loop through a stitch, and pull the ends through the loop. Distribute colors as desired.
- Step 5 Weave in all remaining ends.
Small notes
- Stuff the neck firmly before sewing the head on, or it will tilt.
- Keep the stitch marker moving every round on all five main pieces, since none of them join.
- This pattern is written in US crochet terminology.
- All 3D pieces (head, body, arms, legs, horn) are worked in continuous spirals — do not join rounds unless instructed. Use a stitch marker to track the start of each round and move it up as you go.
- Stitch count for each round is given in parentheses at the end of the line: (##).
- The legs and arms are worked separately and then joined directly into the body — leave the tops of all four limbs unstuffed so they join cleanly.
- Safety eyes are inserted into the head at Round 7, before the head is fully closed. Set them in place before you begin decreasing.
- The horn has two versions: a textured spiral horn worked in sport-weight yarn (Option 1) and a soft velvet horn (Option 2). Both are sewn to the finished head.
Little questions
Can I skip the hoof and paw ridge?
Yes, just skip the BLO edging round on legs and arms. The piece still holds its shape fine. You lose the raised ridge detail, but the fit is unaffected.
Which horn option should I pick?
Option 1 gives a textured spiral look over nine rounds. Option 2 is a soft, quick velvet horn in four rounds. Pick Option 2 if you are short on time.
Do I need to close the leg opening a certain way?
You can work one extra sc to center it, then fasten off. Or fold it flat and sc across both layers for a flatter seam. If you fold flat, stop at sixteen rounds total.
How do I keep the head from tilting?
Stuff the neck of the body firmly before sewing. Pack it tighter than the rest of the body. Then whipstitch around all eighteen open stitches evenly.
Original pattern: https://amigurumicorner.com/crochet-unicorn-amigurumi/

About the Author
Tamsin Okoro Who writes the patterns at Yarn Gallery, how a pattern gets from the hook to the page, and what this site will never do.