About This Pattern
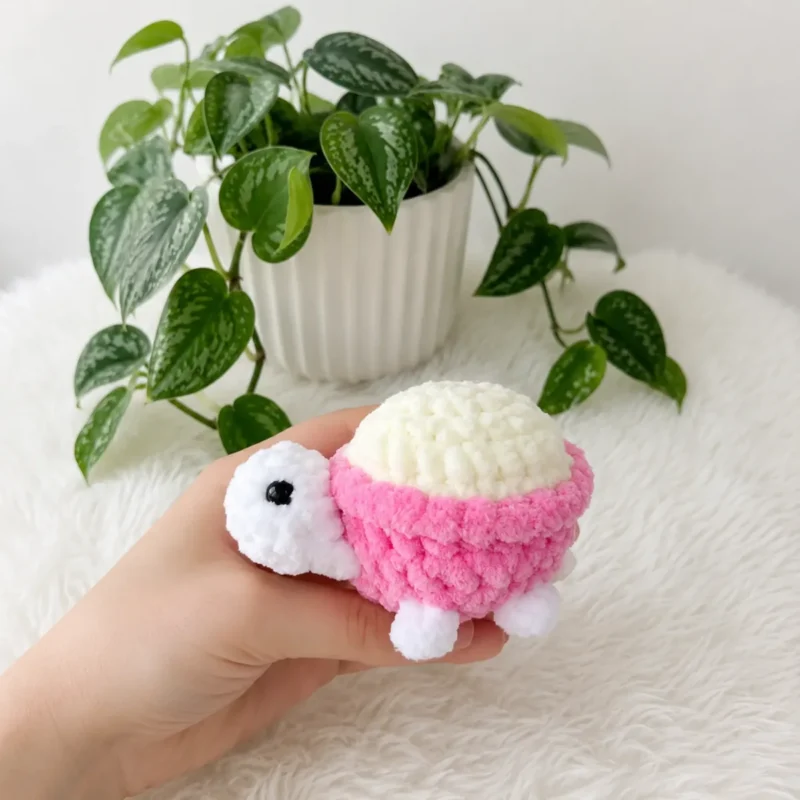
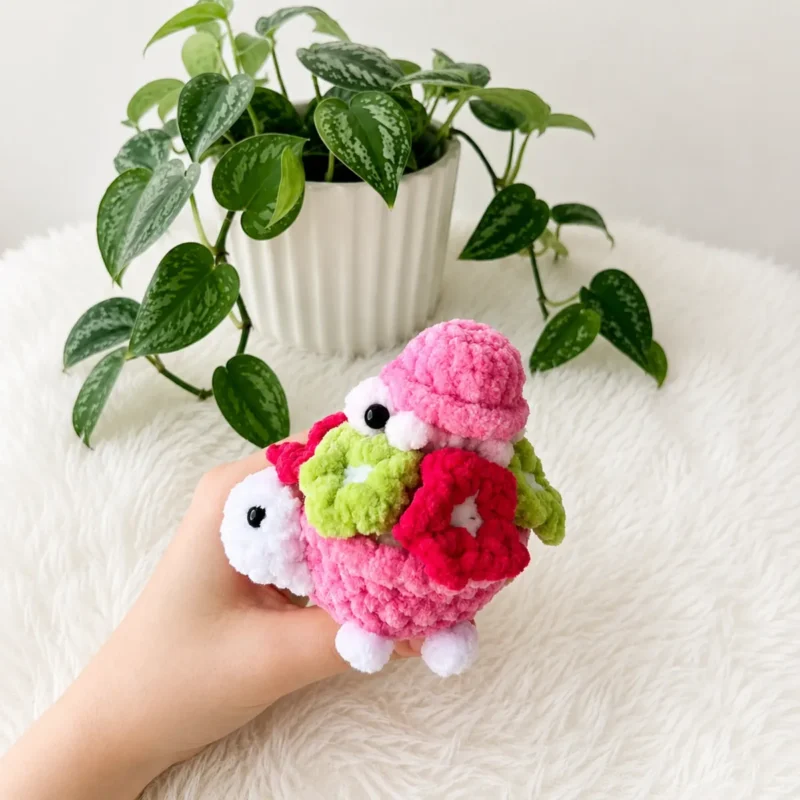
This pattern brings a whole little turtle family to life — a mama turtle with her own baby tucked right onto her back, both finished off with a sprinkle of tiny crocheted flowers. What makes this design so charming is the way the baby turtle isn't a separate toy but an attached companion, giving the whole piece a storybook, 'always together' feeling. It's perfect for anyone who loves amigurumi with a narrative — new parents, turtle lovers, or crocheters looking for a nursery-shelf centerpiece that feels personal and handmade.
You'll work through magic rings, standard amigurumi increases and decreases, and a continuous spiral technique throughout — no joining or chaining up between rounds, just a stitch marker keeping you honest on round one. The trickiest section is Rnd 9 of the mama turtle, where you join the head to the shell-body and immediately work the limbs, so some comfort with multi-step joining rounds will serve you well. Expect roughly 4-6 hours total between the head, shell-body, baby turtle, and flower pieces, plus stuffing and finishing time.
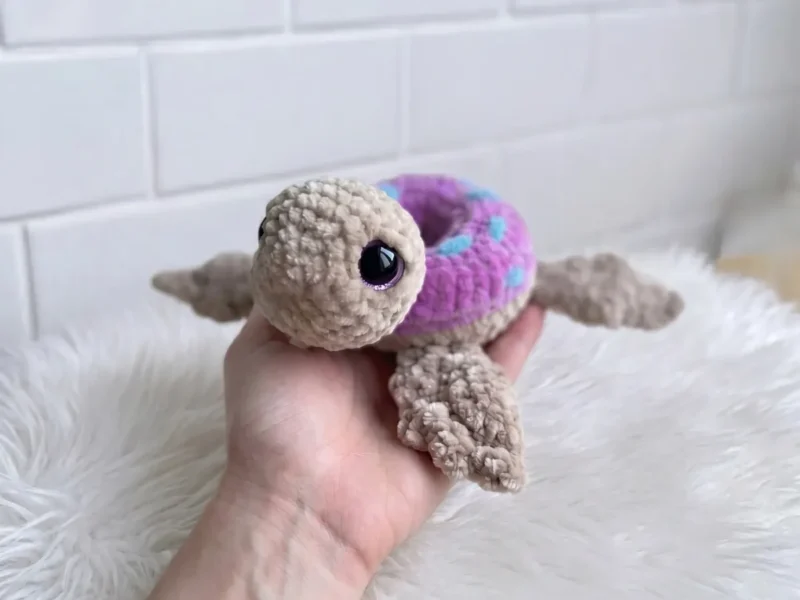
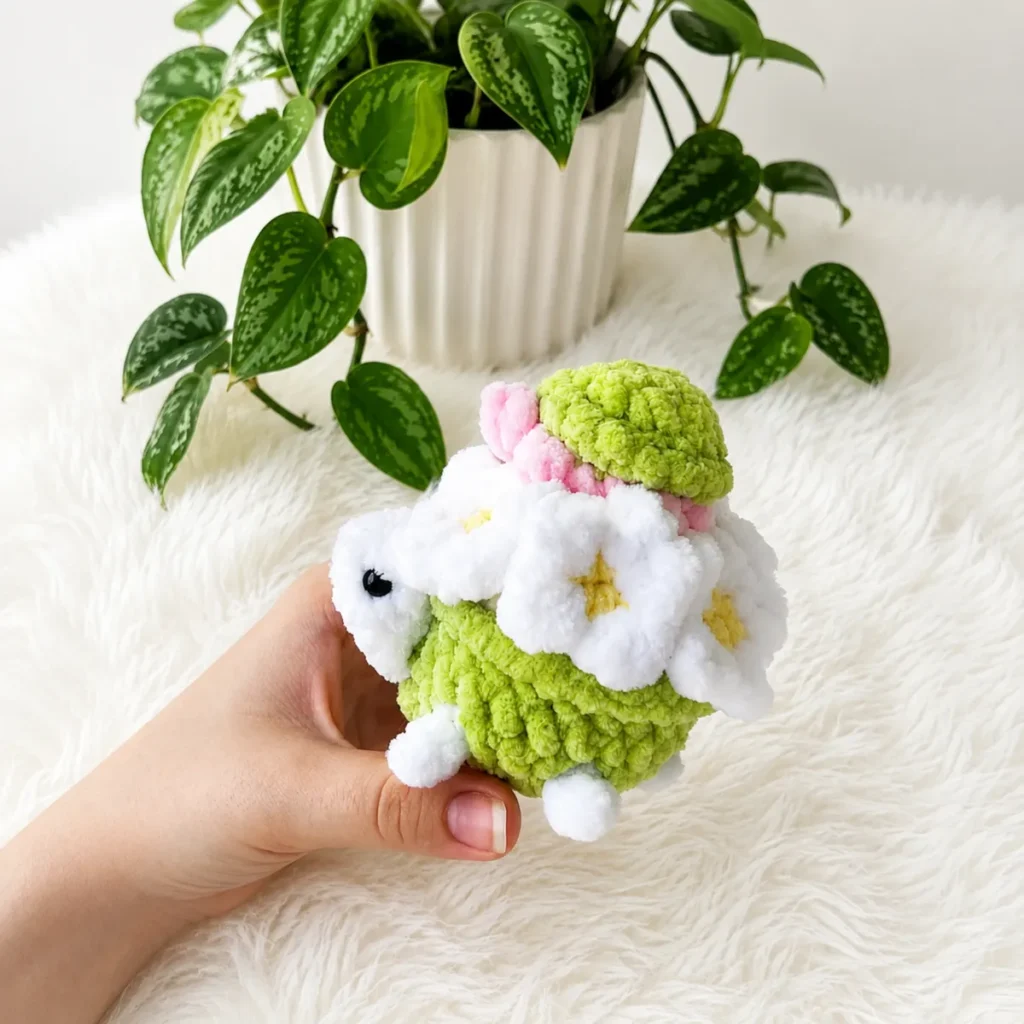
When it's all stitched together, you get a plush mama turtle with a rounded shell-body, sculpted head and limbs, and a tiny soft-pink baby turtle riding along on her back — all softened further by cheerful crocheted flowers in green and raspberry with white centers. Worked up in bulky yarn with a bit of DK yarn for contrast details, the finished set has a dense, huggable feel with no stuffing peeking through. It's the kind of piece that makes a wonderful heirloom-style baby gift or a sweet addition to a woodland-themed nursery display.
- Crochet the mama turtle's head first, shaping it round by round with magic ring increases in a continuous spiral.
- Work the mama turtle's shell-body separately, building up the rounded shape with increases through eight rounds.
- Join the finished head onto the shell-body in a combined round while shaping the limbs at the same time.
- Stuff the head and shell-body firmly as you go so the curves stay smooth without lumps or gaps.
- Crochet the baby turtle as a single piece that covers both its shell and body in one continuous spiral.
- Make the flower pieces in either the DK-weight or bulky-weight variant, using contrasting petal and center colors.
- Sew the baby turtle securely onto the mama's shell-body, positioning it centered and level before stitching.
- Attach the crocheted flowers to the shell and weave in all remaining yarn tails to finish the piece.
Materials
Hook
Safety eyes
Crochet Abbreviations
- BLO
- Back Loop Only
- ch
- Chain
- dc
- Double Crochet
- dec
- Invisible Decrease (insert hook through front loop of next 2 stitches, yarn over, pull through both loops, yarn over, pull through remaining 2 loops)
- FLO
- Front Loop Only
- hdc
- Half Double Crochet
- inc
- Increase (2 sc in the same stitch)
- MR
- Magic Ring
- sc
- Single Crochet
- sl st
- Slip Stitch
- SM
- Stitch Marker
- st / sts
- Stitch / Stitches
Mama Turtle & Baby Amigurumi Crochet Pattern
Mama Turtle — Head
Work in cream or white yarn. Continuous spiral.
- Round 16 sc in MR. (6)
- Round 2Inc in each st around. (12)
- Round 3Sc in each st around. (12)Attach safety eyes (6–8 mm) between Rnds 2 and 3, spacing them 3–4 sts apart. Secure the backs firmly.
- Round 4(2 sc, dec) × 3. (9)
- Round 5Sc in each st around. (9)
- Round 6Sc in each st around. (9)
Lightly stuff the head — just enough to give it shape. It needs to remain flat enough to fold in half.
- Round 7Fold the piece in half, aligning the edges. Working through both layers at once, sc across all paired sts: 4 sc. (4)Fasten off and leave a short yarn tail. Set aside.
Mama Turtle — Shell-Body
Begin with cream yarn. Continuous spiral.
- Round 16 sc in MR. (6)
- Round 2Inc in each st around. (12)
- Round 3(1 sc, inc) × 6. (18)
- Round 4(2 sc, inc) × 6. (24)
- Round 5Sc in each st around. (24)Place a SM in the back loop of the last st of Rnd 5 to mark the start of Rnd 6. Change to bright pink yarn.
- Round 6(FLO): Working in front loops only: sc in each st around. (24)For a cleaner color ridge: fasten off the pink yarn, then re-join it into the back loops of Rnd 5 and continue with Rnd 7. Alternatively, carry the yarn up and continue without cutting.
- Round 7(BLO): Working in back loops only: sc in each st around. (24)
- Round 8Sc in each st around. (24)
Baby Turtle — Shell and Body (One Piece)
Begin with bright pink yarn for the shell. Continuous spiral.
- Round 18 sc in MR. (8)
- Round 2Inc in each st around. (16)
- Round 3Sc in each st around. (16)
- Round 4(FLO): Working in front loops only: sc in each st around. (16)Fasten off bright pink yarn. Join soft pink yarn into the back loops of Rnd 4 to begin the body.
- Round 5(BLO): Working in back loops only — Head: work a 5-dc bobble into the first st (yarn over, insert hook, pull up loop, yarn over, pull through 2 loops — repeat 4 more times in the same st until 6 loops remain on hook, yarn over, pull through all 6 loops) ; 1 sc in next st; Leg (sl st into same st, ch 3, sl st into base st) ; 3 sc; Leg (repeat) ; 1 sc; Tail (sl st into same st, ch 2, sl st into base st) ; 1 sc; Leg (repeat) ; 3 sc; Leg (repeat) ; 1 sc. (16)
- Round 6Dec 8 times. (8)Fasten off, leaving a long yarn tail for attachment.
Flowers — Variant 1 (DK / Fine Yarn, 170–175 m/100 g)
Make 5–6 total. Use two colors: one for center, one for petals.
- Round 1(center color): 5 sc in MR. (5)Switch to petal color. Work all stitches of each bracket into the same stitch.Petals: (sc, hdc, ch 1, hdc, sc) × 5, sl st. (5 petals formed)Fasten off, leaving a tail for sewing.
Flowers — Variant 2 (Bulky Yarn, 120 m/100 g)
Make 5–6 total. Use two colors: one for center, one for petals.
- Round 1(center color): 5 sc in MR. (5)Switch to petal color. Work all stitches of each bracket into the same stitch.Petals: (sl st, sc, ch 1, sc, sl st) × 5, sl st. (5 petals formed)Fasten off, leaving a tail for sewing.
Mama Turtle — Rnd 9: Join Head and Work Limbs
All legs and tail are worked in white yarn (matching the head). Switch colors as needed within the round.
- Round 9Work 4 sc joining the Head and Shell together (insert hook through the corresponding edge sts of both pieces simultaneously for each of these 4 sts), 1 sc in next st, Leg (sl st into same st, ch 3, starting from 2nd ch from hook: 2 hdc, sl st into base st on body) , 3 sc, Leg (repeat as above) , 3 sc, Tail (sl st into same st, ch 2, starting from 2nd ch from hook: 1 dc, sl st into next st on body) , 3 sc, Leg (repeat as above) , 3 sc, Leg (repeat as above) , 1 sc. (24)
- Round 10(2 sc, dec) × 6. (18)
- Round 11(1 sc, dec) × 6. (12)Stuff the body firmly now, before the opening closes.
- Round 12Dec 6 times, sl st into next st. (6)Fasten off. Close the opening by weaving the yarn tail through the front loops of the remaining 6 sts and pulling tight. Weave in all ends.
More photos
Putting It Together
- Step 1 Attach the Baby Turtle: Thread the long yarn tail of the Baby Turtle onto your tapestry needle. Position the baby on top of the mama’s shell, centering it slightly toward the back half of the shell. Sew it down with several secure stitches, passing through the baby’s body and the mama’s shell. Pull firmly so the baby sits flat and does not wobble. Weave in the end on the inside.
- Step 2 Attach the Flowers: Arrange 5–6 flowers across the mama’s shell, tucking them around the baby turtle (or filling the shell entirely if you chose the flower-only version). Thread each flower’s yarn tail and sew it firmly to the shell surface using a whipstitch through the center of the flower. Weave in all ends inside the shell.
- Step 3 Final check: Tug gently on all limbs, the tail, and the baby turtle to confirm everything is secure. Weave in any remaining ends, burying them inside the stuffed body where possible.
Important Notes
💡 Keep two hooks handy at all times — the E-4 (3.5 mm) for DK-weight sections and the 6 mm/8 mm pair for bulky-weight pieces — so you're not constantly digging through your hook case mid-round.
💡 Stuff the shell-body in stages as you complete each round rather than waiting until it's closed, especially before Rnd 9 when you'll be joining the head and can no longer easily reach inside.
💡 Since every piece works in a continuous spiral with no chain-up, drop a stitch marker into the very first stitch of round one for the head, shell-body, and baby turtle pieces before you forget.
💡 Aim for a tighter tension than you might use for garments — this pattern calls for dense fabric with no stuffing visible through the stitches, so don't be afraid to size down your hook slightly if your stitches look loose.
💡 Sew the baby turtle onto the mama's shell before weaving in all your ends, so you can use those existing tails to help anchor the attachment stitches invisibly.
Common Mistakes and Fixes
Losing track of the first stitch in
Place a stitch marker in the first stitch of every single round the moment you make it, and move it up as you go — this pattern relies entirely on spiral rounds with no joining, so a dropped marker means a miscounted round.
Rushing through Rnd 9 where the head
Read through this round fully before starting, since it combines joining and limb-building in one sequence — work slowly, count stitches after each limb, and use extra markers to separate the joining stitches from the limb stitches.
Under-stuffing the shell-body, causing
Stuff firmly and in small pieces as you go rather than all at once at the end, pushing fiberfill evenly toward the shell's curved edges so the rounded shape holds without visible dents.
Attaching the baby turtle to the mama's
Dry-fit the baby turtle piece against the shell-body before sewing, adjusting placement so it sits centered and level, then use a tapestry needle to whipstitch it securely at multiple points around its base.
Mixing up which yarn amount belongs
Pre-portion your yarn — cream for shell top base, green and raspberry for petals, white for centers — into small labeled bundles before starting so color changes in the small flower rounds don't get muddled.
Frequently Asked Questions
What yarn weights do I need for this pattern?
You'll need bulky-weight yarn (approximately 120 m/100 g) for the shell, baby body, cream shell top base, and flower petals, plus DK-weight yarn (170-175 m/100 g) for the white head, legs, tail, and flower centers. Having both weights on hand before starting keeps you from pausing mid-project.
Do I need to join rounds or chain up anywhere in this pattern?
No — every piece is worked in continuous spirals throughout, so you never join or chain up between rounds. Just place a stitch marker in the first stitch of each round to keep your place.
How is the baby turtle attached to the mama turtle?
The baby turtle is crocheted separately as one piece covering both shell and body, then sewn onto the mama's shell-body during assembly. It's part of the three assembly steps that bring the whole set together.
Why does the pattern use two different hook sizes?
The E-4 (3.5 mm) hook is sized for the DK-weight yarn sections like the head, legs, and tail, while the 6 mm and 8 mm hooks match the bulky-weight yarn used for the shell and body. Using the correct hook for each yarn weight keeps your stitch density consistent and dense enough to hide stuffing.
Are there different options for the crocheted flowers?
Yes, the pattern includes two flower variants — one worked in DK/fine yarn (170-175 m/100 g) and another in bulky yarn (120 m/100 g) — so you can choose the scale that best suits your finished turtles. Both use green and raspberry or red for petals with white centers.
Original pattern: https://amigurumicorner.com/mama-turtle-amigurumi-crochet-pattern/

About the Author
Tamsin Okoro Who writes the patterns at Yarn Gallery, how a pattern gets from the hook to the page, and what this site will never do.