About This Pattern
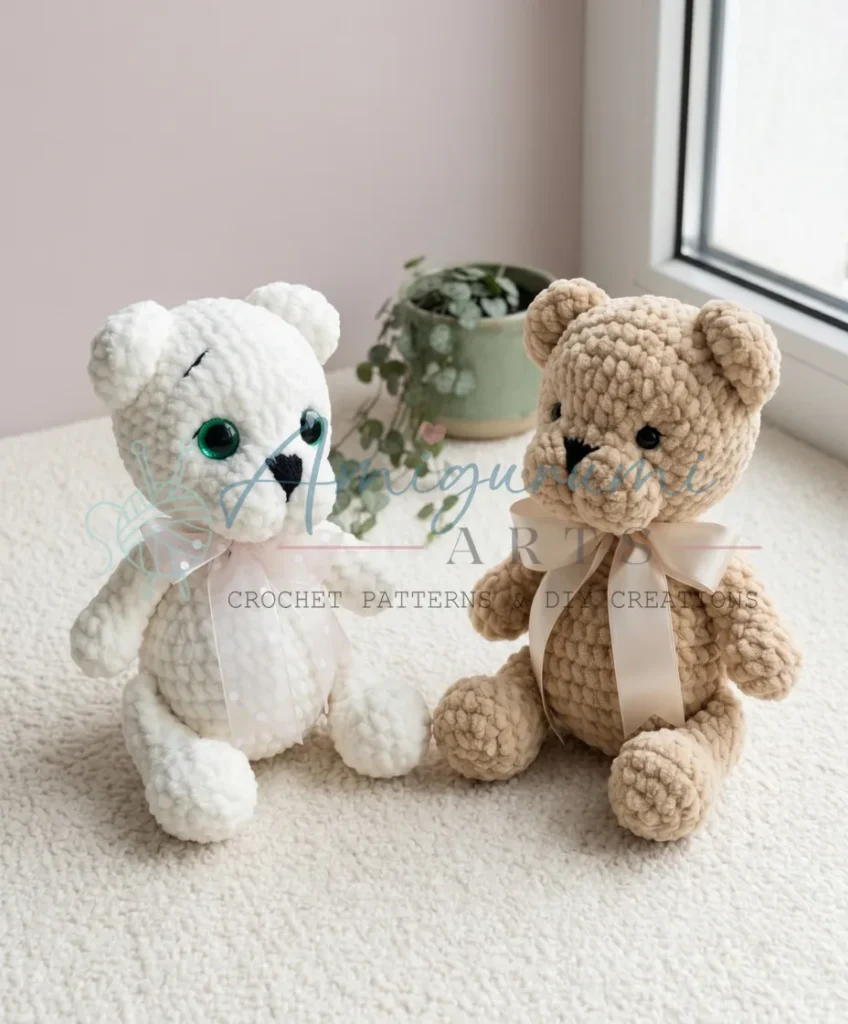
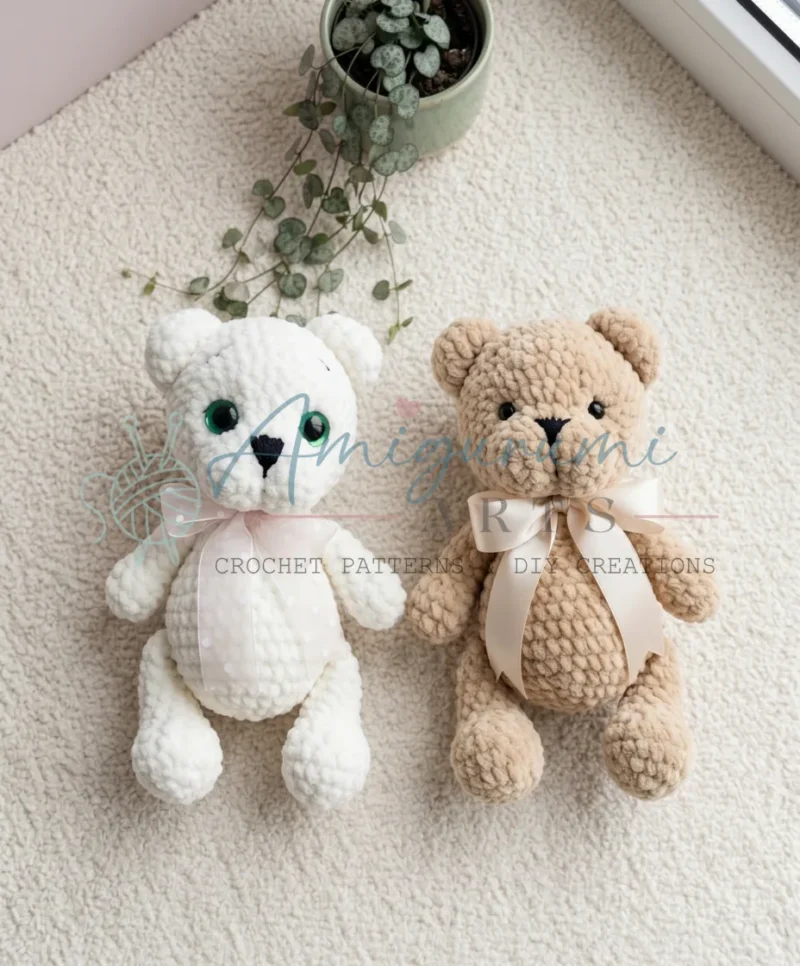
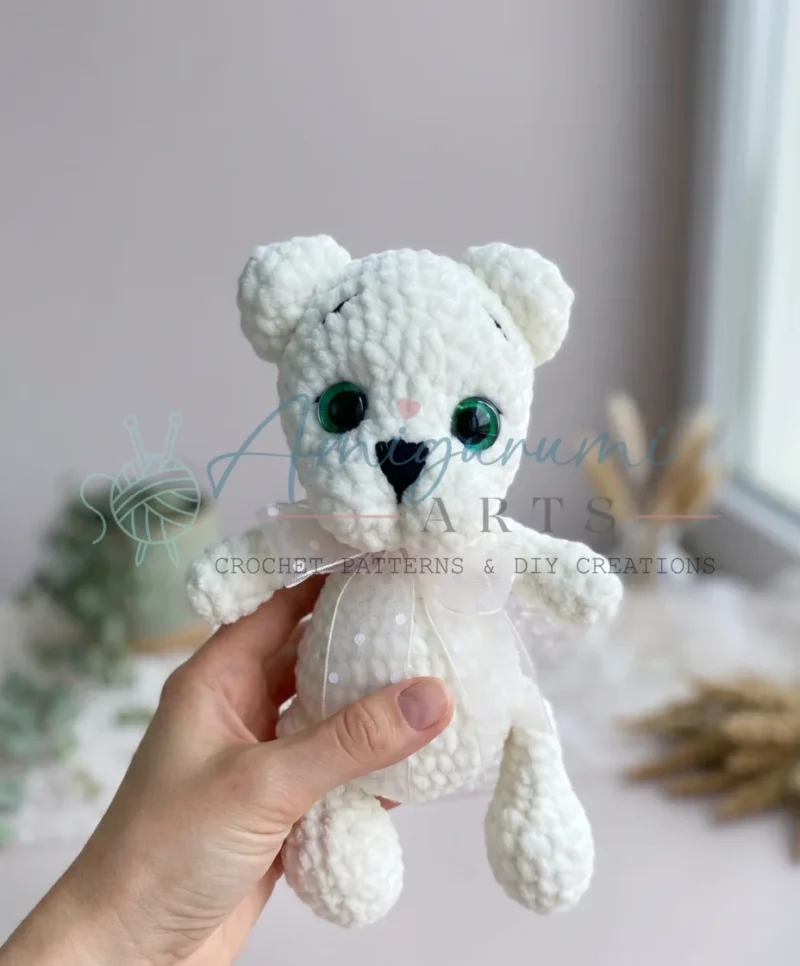
This is a plush teddy bear, soft as a cloud on the shelf. It works up in bulky chenille, so rounds go fast. I like this one for a Sunday afternoon, radio on, coffee cooling nearby. It needs a steady hand for the head shaping and a little patience for stuffing. By evening, you have a bear with a face.
In the basket
Main yarn
Face detail yarn
Hook
Safety eyes
Stuffing
Abbreviations
- ch
- Chain
- dc
- Double Crochet
- dec
- Invisible Decrease (sc2tog through front loops only)
- hdc
- Half Double Crochet
- inc
- Increase (2 sc in same stitch)
- MR
- Magic Ring
- sc
- Single Crochet
- sl st
- Slip Stitch
- st / sts
- Stitch / Stitches
- 4-dc bobble
- 4 dc worked into 1 stitch sharing a single joined top
Soft chenille teddy bear amigurumi pattern
Ears (make 2)
- Round 16 sc in MR. (6)
- Round 2inc in each st around. (12)
- Round 3sc, inc repeat 6 times. (18)
- Round 4sc in each st around. (18)
- Round 5sc, dec repeat 6 times. (12)Do not stuff the ears. Fold flat in half and sc across the 6 sts, then sl st to close. Leave a yarn tail — ears will be crocheted directly into the head at Round 14.
Front Arms (make 2)
- Round 16 sc in MR. (6)
- Round 2sc, inc repeat 3 times. (9)
- Round 3sc in each st around. (9)
- Round 4sc, dec repeat 3 times. (6)
- Rounds 5–9sc in each st around. (6) (5 rounds) Stuff the lower paw portion only. Fold flat in half and sc across the 3 sts to close. Leave a yarn tail — arms will be crocheted into the body.
Body
- Round 16 sc in MR. (6)
- Round 2inc in each st around. (12)
- Round 3sc, inc repeat 6 times. (18)
- Round 42 sc, inc repeat 6 times. (24)
- Round 53 sc, inc repeat 6 times. (30)
- Round 64 sc, inc repeat 6 times. (36)
- Rounds 7–8sc in each st around. (36) (2 rounds)(36)
- Round 96 sc, 5 sc crocheted together with back leg, 14 sc, 5 sc crocheted together with back leg, 6 sc. (36)
- Round 104-dc bobble (4 dc into 1 st with a single joined top), 4 sc, inc, 5 sc, inc repeat 5 times. (42)Begin adding stuffing to the body gradually from this point.
- Round 115 sc, dec repeat 6 times. (36)
- Round 124 sc, dec repeat 3 times, 3 dec, 4 sc, dec repeat 2 times. (28)
- Round 133 sc, dec repeat 5 times, 3 sc. (23)
- Rounds 14–15sc in each st around. (23) (2 rounds)(23)
- Round 162 sc, dec repeat 3 times, 3 sc. (18)
- Round 17sc, dec repeat 3 times, sc, (dec, sc crocheted together with front arm), dec. (12)
- Round 183 sc, 3 sc crocheted together with front arm, 6 sc. (12)
- Round 1912 sc, sl st.
Head
Row 1: ch 5.
- Round 2Starting from the 2nd ch from hook: inc, 2 sc, 4 sc in the last ch; working back along the opposite side: 2 sc, inc in the first ch. (12)
- Round 32 inc, 2 sc, 4 inc, 2 sc, 2 inc. (20)
- Rounds 4–510 sc. (2 rounds) Insert safety eyes in Round 5 with 9 hdc sts between the post of each eye. Begin stuffing the head gradually from this point.
- Round 612 sc, 6 hdc inc, 2 sc. (28)
- Round 712 sc, hdc, hdc inc repeat 6 times, 2 sc. (32)
- Round 832 sc. (32)
- Round 92 sc, 4 sc, inc repeat 6 times. (38)
- Round 105 sc, inc repeat 6 times, 2 sc. (44)
- Rounds 11–12sc in each st around. (44) (2 rounds)(44)
- Round 132 sc, 5 sc, dec repeat 6 times. (38)
- Round 142 sc, 4 sc, dec repeat 2 times, 4 sc, (dec, 4 sc crocheted together with ear), dec, 4 sc, (dec, 4 sc crocheted together with ear), dec. (32)
- Round 15dec, 3 sc, dec repeat 6 times. (25)
- Round 162 sc, dec repeat 6 times, sc. (19)
- Round 17sc, dec repeat 6 times, sc. (13)
- Round 186 dec, sc. Pull the opening closed, fasten off, and weave in ends.
Back Legs (make 2)
Row 1: ch 4.
- Round 2Starting from the 2nd ch from hook: inc, sc, 3 sc in the last ch; working back along the opposite side: sc, sc in the first ch. (8)Continue working in the round:
- Round 3inc, 2 sc, 2 inc, 2 sc, inc. (12)
- Round 4sc, inc, 3 sc, inc, sc, inc, 3 sc, inc. (16)
- Round 5sc, inc, 4 sc, inc, 2 sc, inc, 4 sc, inc, sc. (20)
- Round 6sc in each st around. (20)
- Round 76 sc, 4 dec, 6 sc. (16)
- Round 84 sc, 4 dec, 4 sc. (12)
- Rounds 9–10sc in each st around. (12) (2 rounds)(12)
- Round 115 sc, dec, 5 sc. (11)
- Rounds 12–14sc in each st around. (11) (3 rounds) Stuff the lower paw portion only. Fold flat in half and sc across the 5 sts to close. Leave a yarn tail — legs will be crocheted into the body.
More pictures
Before the first stitch
- Check you have one full skein of bulky chenille before starting the body.
- Set a stitch marker at the start of every round — spirals are easy to lose.
- Read through the Head section once. It shifts from a chain into rounds, and that surprises people.
Minutes per piece
- Head and Body about 2 hours, because the body alone runs 17 rounds
- Ears, Arms, Legs, and Assembly about 2-4 hours, because four small pieces plus eye placement take care
Other yarns that work
- acrylic chenille, bulky weight Similar plush finish, slightly lighter drape, same hook size works fine.
- cotton-blend, worsted weight Firmer stitches, less fuzz, size shrinks a bit, and you may want a smaller hook for tension.
Where it ends up
- A nursery shelf companion, paired with a soft knit blanket.
- A keepsake gift, paired with a small handwritten note.
- A reading-nook toy, paired with a basket of picture books.
Joining up
- Step 1 Sew the head to the body. Pin it in position using sewing pins or stitch markers to confirm it’s centered and level before stitching. Use the yarn tail to whipstitch around the neck opening, pulling evenly for a clean join.
- Step 2 Sink the eyes. Thread a yarn needle from the bottom of the head and bring it up at the base of one safety eye (Point 1), re-enter at the top of the same eye (Point 2), and pull back out at the bottom shifted 1 stitch sideways. Adjust the pull to set the depth and tie off with a firm knot. Repeat on the second eye. For deeper-set eyes, make a second pass around the same circuit.
- Step 3 Shape the muzzle. Insert the needle from the bottom of the head and bring it up at the nose position. Re-enter from the bottom and emerge 1 stitch lower, then pull gently to create the muzzle’s dimensional curve. Pass through several times to set the shape, then weave the tail inside the head.
- Step 4 Embroider the face. Using the black cotton-blend yarn, embroider the nose by building up three or four overlapping stitches from the nose point downward toward the mouth position. Add short embroidered lines above and around the eyes for the eyebrows and lashes.
- Step 5 Secure the ears. Sew down any remaining ear edges that weren’t fully secured during the crocheting-in step at Round 14 of the head.
- Step 6 Weave in all remaining ends.
Small notes
- Use a US G-6 / 4.0 mm hook throughout. It keeps the chenille tight enough to hold stuffing.
- Mark the start of each round. Chenille hides stitch definition, so markers save you from guessing.
- Stuff firmly but evenly. Soft chenille shows every lump once the seams are closed.
- This pattern is written in US crochet terminology.
- All pieces are worked in a continuous spiral (no joining, no turning chain between rounds) unless a sl st is explicitly called for.
- The head begins with a foundation chain and transitions into rounds to create the protruding muzzle shape — this is intentional and normal.
- Gauge is not critical for amigurumi, but tight tension keeps fiberfill from showing through. If your stitches look open, drop to a 3.5 mm hook.
- Stitch counts are given at the end of each round in parentheses: (##).
- Safety eyes are inserted during Round 5 of the Head, with 9 hdc stitches between the post of each eye. Attach locking washers firmly before the head is closed — you cannot reach them afterward.
- Stuff the head and body gradually while you work, not all at once at the end. Stuff only the lower paw portion of each limb before folding and joining.
- Finished size: the assembled bear stands approximately 20 cm (about 8 inches) tall.
Little questions
Why does the head start with a chain instead of a magic ring?
The chain creates the muzzle shape before rounds begin. It is intentional, not a typo. Just follow the note in Pattern Notes and keep going.
Can I use a smaller hook for a mini bear?
Yes, a smaller hook with the same bulky yarn tightens stitches and shrinks the bear. Expect denser fabric and less give when stuffing.
What size safety eyes should I choose?
The pattern lists both 10 mm and 16 mm as options. Smaller eyes read as younger and cuter, larger eyes give a more classic teddy look.
How do I keep track of rounds in chenille yarn?
Chenille hides stitch definition, so a locking stitch marker at round start is essential. I move mine up every round without fail.
Original pattern: https://amigurumiarts.com/free-crochet-teddy-bear-amigurumi-pattern/

About the Author
Tamsin Okoro Who writes the patterns at Yarn Gallery, how a pattern gets from the hook to the page, and what this site will never do.