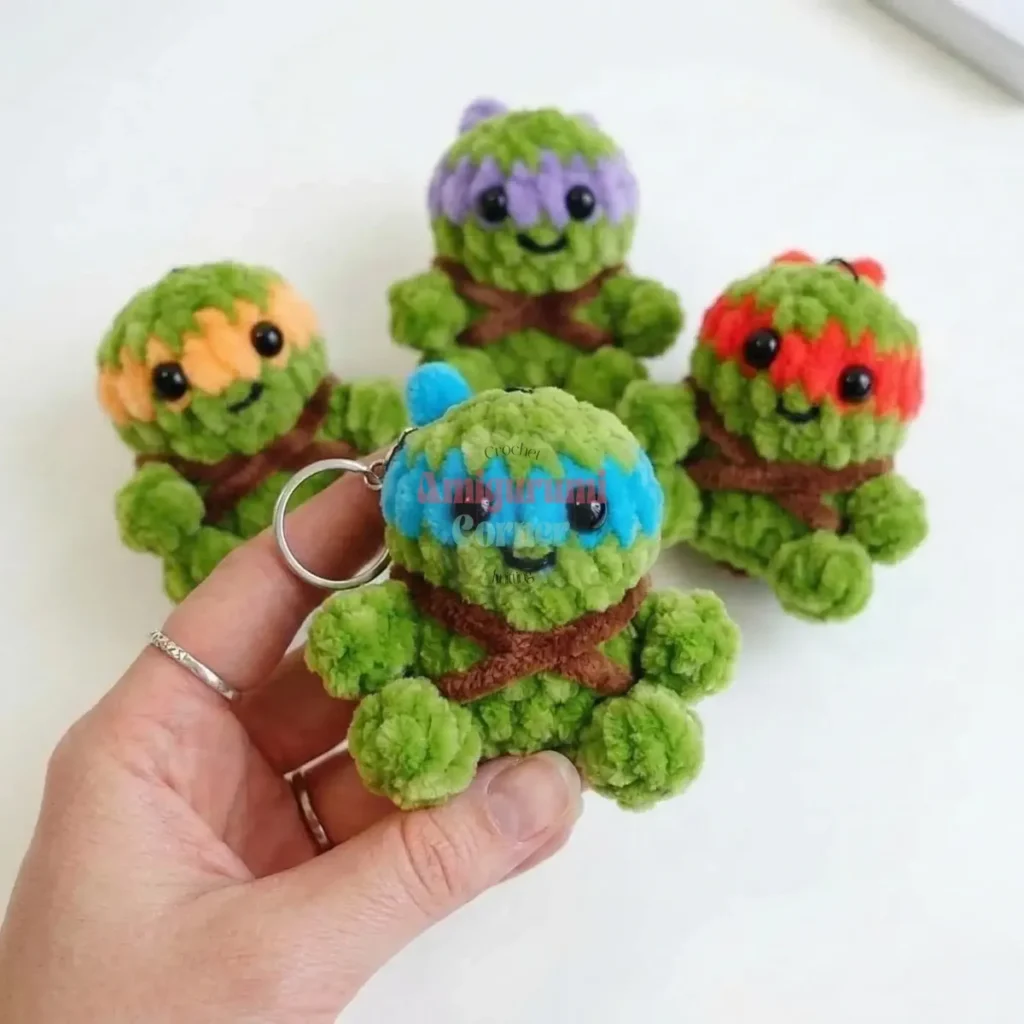
About This Pattern
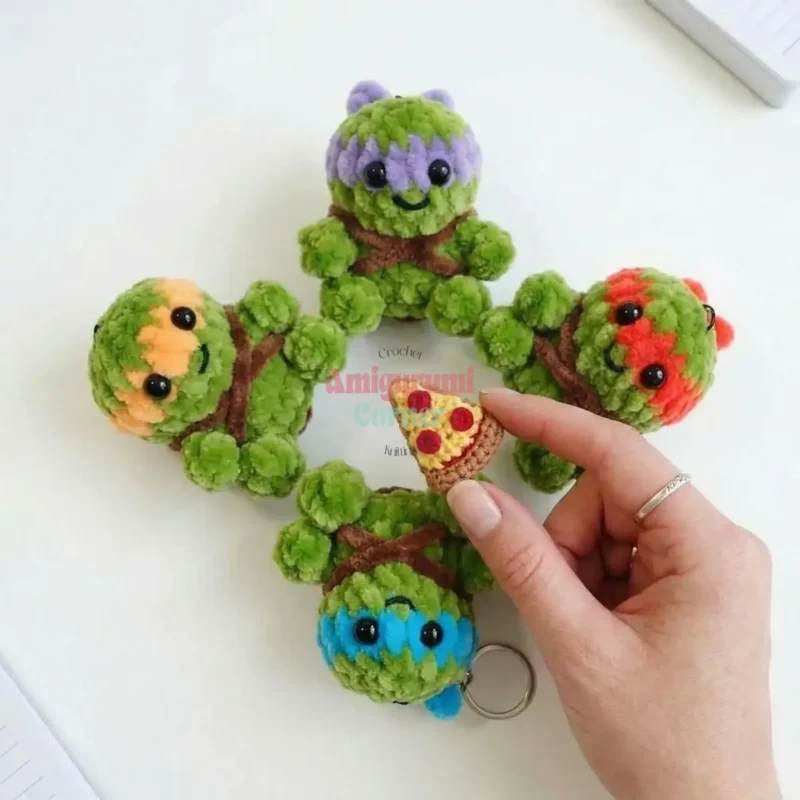
This little turtle sits in the palm of your hand. The body grows in one piece, with two legs and two arms crocheted right into the rounds. A separate brown shell closes the look, and a bandana in your choice of color finishes the face. It suits a quiet evening with a show on. You need firm stuffing, a few colors, and patience for the limb shaping in rounds 2 and 5.
In the basket
Plush yarn (100g/120m)
Crochet hook
Tools
Abbreviations
- ch
- Chain
- sl st
- Slip Stitch
- sc
- Single Crochet
- dc
- Double Crochet
- inc
- Increase (2 sc in same stitch)
- dec
- Decrease (invisible decrease for 3D/spiral work)
- mr
- Magic Ring
- LC
- Leg Cluster: [Yarn over, insert hook into stitch, yarn over, pull up a loop, yarn over, pull through 2 loops] 4 times in the same stitch. (5 loops on hook). Yarn over, pull through all 5 loops on hook.
- AC
- Arm Cluster: [Yarn over, insert hook into stitch, yarn over, pull up a loop, yarn over, pull through 2 loops] 3 times in the same stitch. (4 loops on hook). Yarn over, pull through all 4 loops on hook.
Little green turtle amigurumi crochet pattern
Head and Body (Green Yarn)
- Round 1Make 8 sc in a mr (8)
- Round 2inc in next 3 stitches. Next, crochet the first leg: (ch 3, skip 1 ch, make 1 LC in next ch, sl st in the remaining 1st ch of the chain, sl st in the same stitch on the body where the ch-3 originated). inc in next 2 stitches. Next, crochet the second leg: (ch 3, skip 1 ch, make 1 LC in next ch, sl st in the remaining 1st ch of the chain, sl st in the same stitch on the body where the ch-3 originated). inc in next 3 stitches (16)
- Round 3sc in each stitch around (16)
- Round 4sc in each stitch around (16)
- Round 5sc 2, dec, sc 2. Next, crochet the first arm: (ch 4, skip 1 ch, make 1 AC in next ch, sl st in next ch, sl st in the remaining 1st ch of the chain, sl st in the same stitch on the body where the ch-4 originated). dec, sc 2, dec. Next, crochet the second arm: (ch 4, skip 1 ch, make 1 AC in next ch, sl st in next ch, sl st in the remaining 1st ch of the chain, sl st in the same stitch on the body where the ch-4 originated). sc 2, dec (12)Begin stuffing the body firmly.
- Round 6(sc, inc) x6 (18)
- Round 7sc in each stitch around (18)Change to bandana color yarn (e.g., Red) for the next round.
- Round 8sc in each stitch around (18)Insert safety eyes between Rnds 8-9, approximately 4-5 stitches apart, centered on the face. Continue stuffing firmly.
- Round 9(sc, dec) x6 (12)
- Round 10dec x6 (6)Fasten off, leave a long tail, and weave through the front loops of the remaining 6 stitches. Pull tight to close the hole. Weave in the tail.
Shell (Brown Yarn)
- Round 1Make 6 sc in a mr (6)
- Round 2inc in each stitch around (12)
- Round 3(sc, inc) x6 (18)sl st to the first sc to finish the round. Fasten off, leaving a long tail for sewing the shell to the body.
More pictures
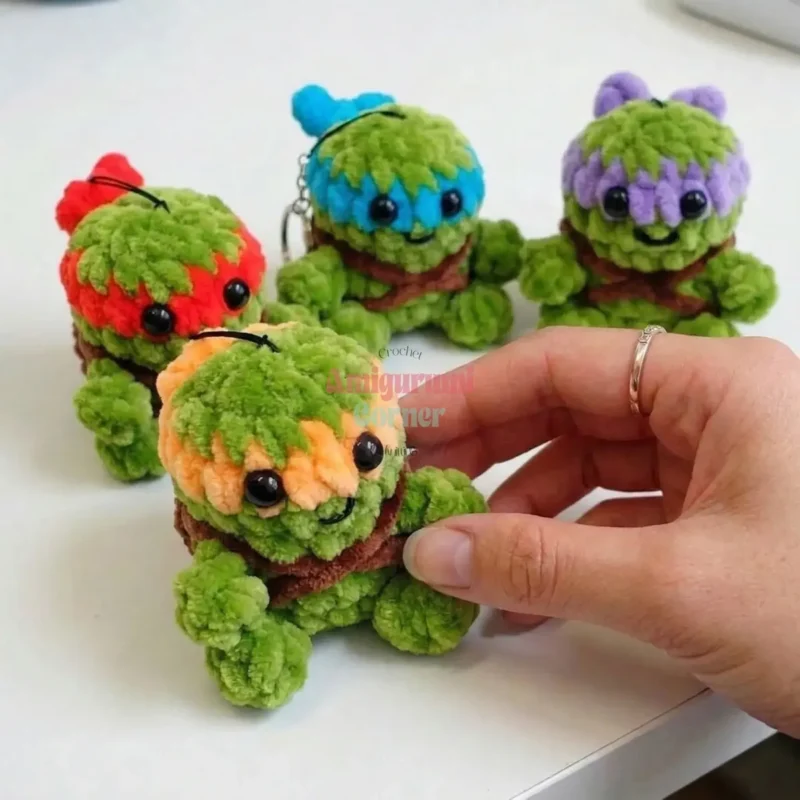
Before the first stitch
- Read round 2 fully before you start. The legs branch off mid-round, so know where you are headed.
- Set a stitch marker at the start of round 1. You will work in a continuous spiral throughout.
- Check your green yarn amount covers all 10 body rounds plus both limbs before casting on.
Minutes per piece
- Head and Body (Green Yarn) about 2-3 hours, because 10 rounds include four built-in limbs
- Shell (Brown Yarn) about 30-40 minutes, because it is only 3 rounds plus sewing
Other yarns that work
- Cotton worsted weight Gives sharper stitch definition but less stretch. Stuffing may need a touch more firmness, and a 4.0mm hook keeps stitches tight.
- Acrylic plush or velvet weight Softer drape and a plumper finish. A 5.0mm hook suits the thicker strand, and stuffing goes in a little faster.
Where it ends up
- A desk companion for a child's room shelf. Pairs well with other amigurumi animals in a small lineup.
- A soft toy for quiet play on a rug or bed. Pairs with a basket of other hand-sewn plushies.
- A handmade gift for someone who collects crochet figures. Pairs nicely with a small card or note.
Joining up
- Step 1 Stuff the Body: Ensure the head and body are firmly stuffed, shaping the head nicely. The limbs should be prominent.
- Step 2 Attach Safety Eyes: Insert the 8mm safety eyes between Rnds 8 and 9 of the head, in the bandana-colored section. Position them evenly, about 4-5 stitches apart, to give your turtle a friendly expression. Secure the washers firmly from the inside.
- Step 3 Embroider Mouth: Using a small piece of black embroidery floss or thin yarn and your yarn needle, embroider a small "V" or "U" shape for the mouth between the eyes and the start of the body, typically below Rnd 7.
- Step 4 Sew the Shell: Position the shell on the back of the turtle's body, centered over Rnds 3-7. Using the long tail from the shell and your yarn needle, sew the shell securely to the body, going through the back loops of the body stitches and the stitches of the shell. Make sure it's firmly attached. Weave in any remaining ends.
- Step 5 Create Bandana Ties: Join your chosen bandana color yarn (e.g., Red) in Rnd 8 at the back of the turtle's head (where the bandana color starts).
- Step 6 First Tie: ch 3, sl st in 2nd ch from hook, sc in next ch, sl st in the same base stitch on the body.
- Step 7 Second Tie: ch 3, sl st in 2nd ch from hook, sc in next ch, sl st in the same base stitch on the body.
- Step 8 Fasten off, tie the two ends together in a small knot to secure, and trim any excess yarn. This creates a cute little bow detail at the back of the bandana.
Small notes
- Use a hook between 4.0mm and 5.0mm, sized to your plush yarn. Tighter stitches keep stuffing from peeking through.
- Place the 8mm safety eyes between rounds 8 and 9. Space them 4-5 stitches apart for a friendly look.
- Stuff the body firmly as you shape each limb. Small parts lose their form fast without enough fill.
- This pattern uses US crochet terminology.
- Gauge is not critical for this project. The finished size of your turtle will vary depending on your chosen yarn weight and hook size.
Little questions
Can I skip the arm and leg details in round 2 and round 5?
I would not skip them. They are built into the stitch count, so leaving them out changes the shape of the body.
What size safety eyes does this pattern use?
I use 8mm safety eyes, placed between rounds 8 and 9. That spot sits in the bandana-colored section of the head.
How firm should the stuffing be?
I stuff firmly, especially through the limbs and head. Loose stuffing lets the shape sag once the shell is sewn on.
Do I need a stitch marker for this pattern?
Yes, I keep one at the start of each round. The whole body and shell work in continuous spirals, so it is easy to lose your place.
What skill level is required for this amigurumi turtle pattern?
This pattern suits confident beginners to intermediate crocheters. It uses basic stitches like single crochet, increases, and decreases, but the cluster stitches for the limbs and the assembly need a bit more attention.
Original pattern: https://amigurumicorner.com/amigurumi-ninja-turtle-crochet-pattern/

About the Author
Tamsin Okoro Who writes the patterns at Yarn Gallery, how a pattern gets from the hook to the page, and what this site will never do.