About This Pattern
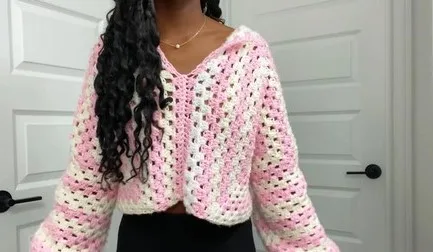
This hexagon sweater pattern builds a beautifully textured, six-sided motif using clusters of double crochet stitches that radiate outward from a simple magic ring center. What makes it special is how quickly the geometric shape takes form—each round adds structure and dimension, giving you that classic granny-hexagon look with a modern, wearable twist. It's perfect for crocheters who love motif-based projects and want to create something cozy, textural, and a little different from the usual sweater silhouette.
The core techniques here are the magic ring foundation, chain-3 as a first double crochet, and the corner increase pattern that keeps your hexagon lying perfectly flat as it grows. You'll want intermediate comfort with reading cluster repeats and tracking corner spaces, since the increases happen at six points every round. Expect to spend somewhere between 4 and 6 hours total, depending on your gauge and how many hexagon rounds your finished sweater design calls for.
The result is a soft, structured worsted weight fabric with a distinctive geometric personality—thick enough to feel warm and substantial, yet full of open chain-1 spaces that add visual interest and breathability. Because the technique is so versatile, this hexagon motif works beautifully scaled up into a full garment or gifted as a starting swatch for someone learning motif construction. Either way, it's a thoughtful, handmade piece that says warmth and craftsmanship in every stitch.
- Start with a magic ring and build six evenly spaced 3 DC clusters to form the hexagon's foundation round.
- Close the ring snugly and join the round with a slip stitch to the top of your starting chain-3.
- Begin round two with a fresh chain-3 and work your first side cluster right before that starting chain.
- Move into each corner chain-1 space and work the signature (3 DC, Chain 1, 3 DC) corner pattern.
- Continue around, adding one new 3 DC cluster into every gap along each side as you go.
- Repeat the corner pattern at all six points to keep the hexagon shape crisp and symmetrical.
- Join the round and admire how each pass adds one more cluster per side than the last.
- Weave in your ends and lightly block the finished motif so the corners sit perfectly flat.
Materials
Yarn
Hook
Notions
Crochet Abbreviations
- sc
- single crochet
- dc
- double crochet
- sc2tog
- single crochet 2 stitches together (decrease)
- blo
- back loops only
Cozy Crochet Hexagon Sweater Pattern for Everyday Warmth
Main Pattern
Start with a Magic Ring.
- Round 1(Creating the Six Sides) Chain 3 (counts as your first double crochet, DC ). Work 2 DC into the magic ring. (This is the first 3 DC cluster).Chain 1.Work 3 DC into the ring.Repeat steps 3 and 4 until you have a total of six clusters of 3 DC separated by a Chain 1 space.Close the magic ring by pulling the tail.Slip stitch to the top of the initial Chain 3 to join the round.
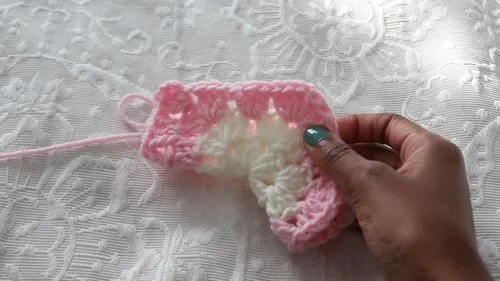
- Round 2(Establishing Corners) Chain 3. Work 2 DC into the space before the initial Chain 3 (completing the first side cluster).Corner Pattern: In the next Chain 1 space, work (3 DC, Chain 1, 3 DC) .Repeat the Corner Pattern in each of the next five Chain 1 spaces.To finish the round, work 3 DC into the last gap.Chain 1, then slip stitch to the top of the initial Chain 3 to join.Increase Pattern: Each round increases by adding one more 3 DC cluster between the corners.Chain 3, and work 2 DC into the starting gap.Work 3 DC into every gap along the side until you reach the next corner.At the corner, repeat the Corner Pattern ( 3 DC, Chain 1, 3 DC ).Repeat steps 2 and 3 all the way around the hexagon.Finish the final side with 3 DC in the last gap.Chain 1, then slip stitch to the top of the Chain 3 to join.Continue until the panel is large enough to fold in half and create the sleeve hole (typically 14 rows).Fold the hexagon panel in half to create the sleeve shape.Turn the work so the wrong side is facing out .Join the two edges by working a single crochet (SC) through the corresponding stitch on both sides all the way up the seam.Turn the work right side out .
Subsequent Rounds (Increasing the Size)
Part 2: Seaming the Sleeve & Adding Length Seaming the Sleeve (Armhole)
Creating the Sleeve Tube
Part 2
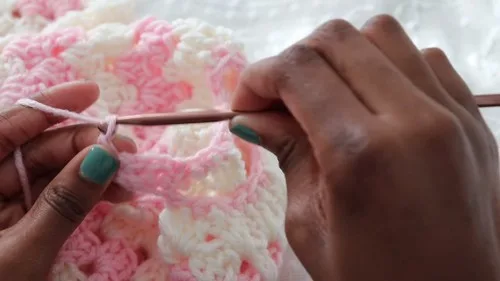
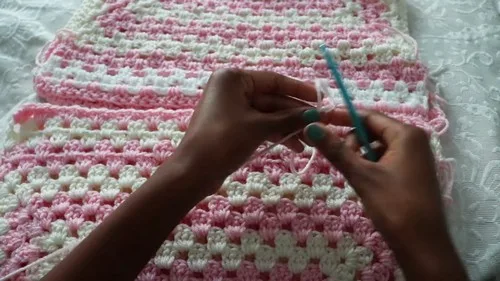
- Round 1Chain 3. Work 2 DC in the gap to the right of the chain. Work 3 DC into every remaining gap around the sleeve opening. Slip stitch to the Chain 3 to join.Subsequent Rounds: Chain 3, work 2 DC in the starting gap, and then work 3 DC in every gap around. Slip stitch to join. Repeat for the desired sleeve length (usually 13 rows).Decrease Row (Optional: Change to a smaller hook, e.g., 5.0 mm, for the ribbing).Work a single crochet decrease (SC2tog) all the way around the sleeve opening to cinch the opening.Slip stitch to the first stitch to join.Work 1 SC in the 2nd chain from the hook, and 1 SC in each of the remaining 4 chains (5 SC total).Joining: Slip stitch into the next two stitches on the sleeve opening.Row Up: Turn your work. SC in the first stitch. SC in the back loop only (BLO) for the next three stitches. SC in the last stitch (under both loops).Row Down: Chain 1, turn your work. SC in the first stitch. SC in the BLO for the next three stitches. SC in the last stitch (under both loops).Repeat these steps all the way around the sleeve opening.Closing the Cuff: Leave a long tail and use a tapestry needle to sew the short sides of the ribbing together to create the finished cuff.Part 4: Seaming the Body Place the two completed panels together with the wrong side facing out .Front Seam: Start from the bottom hem and use a single crochet seam to stitch the two panels together up the center. Stop where the neckline will begin (about 13 stitches unworked at the top).Back Seam: Repeat the single crochet seam on the back edge, but stitch the entire edge closed .Turn the sweater right side out to reveal the finished garment.
Part 3: Sleeve Cuff (Decrease and Ribbing)
Cuff Ribbing (Working in Short Rows)
Foundation: Chain 6.
More photos
Important Notes
💡 Use a 5.75mm hook with worsted weight yarn to get the drape and stitch definition this hexagon pattern is designed for.
💡 Place stitch markers in all six corner chain-1 spaces at the end of round one so future increase rounds are foolproof.
💡 Pull your magic ring tail snug before your first slip stitch join to avoid a gappy, uneven center.
💡 Block your finished hexagons lightly with steam or a spritz of water to help the corners lie perfectly flat.
💡 If changing colors between rounds, carry or weave in ends along the wrong side as you go so joins stay invisible.
💡 Count your DC clusters after each round before joining to confirm you added exactly one new cluster per side.
💡 If you want to change hooks for the ribbing, size down to a 5.0mm hook for a snugger cuff before starting the short-row ribbing.
Common Mistakes and Fixes
Not pulling the magic ring tail tight
Give the tail a firm, steady tug right after your slip stitch join, and check that the center hole is fully closed before weaving in the end.
Losing track of which chain-1 space is
Place a stitch marker in each of the six corner chain-1 spaces right after round one so they're easy to spot as the rounds grow.
Forgetting that the initial chain-3
Always treat that chain-3 as a full DC in your stitch count, and slip stitch into the very top chain of it to close each round correctly.
Working the corner pattern as just 3 DC
Double-check every corner space gets both DC clusters with a chain-1 between them—this is what creates the sharp point and keeps the hexagon flat.
Adding the wrong number of new clusters
Remember each round adds exactly one more 3 DC cluster between corners than the previous round, so count carefully before joining.
Using a hook size that's too small
Stick with the recommended 5.75mm hook, and size up slightly if your tension runs tight to keep the fabric relaxed and flat.
What Makes It Good
- This hexagon motif is endlessly customizable, so have fun making it your own! For a bold colorblock look, try working each round in a new shade—think deep forest green for the center, mustard yellow for round two, and a warm rust for the outer round, using a brand like Wool-Ease or With Love for great stitch definition. If you want a softer, monochromatic sweater, stick with a single tonal yarn like Bernat Softee Chunky in oatmeal or blush for a more elevated, minimalist finish. To resize the motif for a larger sweater panel, simply keep repeating the increase pattern for additional rounds beyond the two shown here—each new round adds one more 3 DC cluster per side, so a size-large panel might need 5-6 total rounds instead of 2. For a lighter, drapier fabric, swap to a DK weight yarn with a 4.5mm hook, though note your finished hexagon will be noticeably smaller and you may need more motifs to reach the same coverage. Want a seasonal spin? Try autumn-inspired burnt orange and cream for a cozy fall sweater, or icy blues and white for a winter-ready piece. You could also alternate two colors every other round for a striped concentric effect, or work the corner clusters in a contrasting accent color while keeping the sides neutral for a pop of visual interest. However you customize it, this hexagon technique is a wonderful base for experimenting with color theory and yarn texture.
- I adore this pattern because the hexagon shape practically builds itself once you get the rhythm of chain-1, 3 DC, repeat. There's something so satisfying about closing that first magic ring and watching six neat clusters snap into a perfect little hexagon before you even start the corner increases. Speaking of corners, I love how the (3 DC, Chain 1, 3 DC) corner pattern gives such crisp, defined points—it makes the whole piece look intentional and polished rather than fussy. The increase logic is genuinely clever too: each round, you're just adding one more 3 DC cluster between corners, so the motif grows outward in a totally predictable, satisfying way. It's the kind of project where you can settle into a groove, stitch through a few rounds while watching TV, and suddenly have a substantial piece of fabric in your hands. Plus, worsted weight yarn and a 5.75mm hook make for quick, chunky stitches that build up fast, so you feel real progress every session. This is one of those patterns that rewards paying attention just enough to feel accomplished.
Frequently Asked Questions
What yarn weight works best for this hexagon sweater pattern?
This pattern is designed for weight 4 worsted weight acrylic yarn, which gives the stitches nice structure and warmth. A smooth, consistent worsted yarn will make your corner clusters and chain-1 spaces easier to see and count.
Can I use a different hook size than 5.75mm?
You can, but keep in mind it will change your gauge and finished motif size. If you size down, your hexagon will be smaller and denser; sizing up will create a looser, larger motif with more drape.
How do I know where to place my increases each round?
The corner chain-1 spaces are where the (3 DC, Chain 1, 3 DC) corner pattern always goes, and every side gap between corners gets one more 3 DC cluster than the previous round. Marking your six corners with stitch markers makes this much easier to track.
Why does my hexagon look ruffled instead of flat?
A ruffled edge usually means too many stitches were added in the increase rounds, or the corner pattern was worked more than once per corner. Double check that each corner gets exactly one (3 DC, Chain 1, 3 DC) sequence and that side clusters match the pattern's count.
Can I join multiple hexagons together for a full sweater?
Yes, this hexagon motif is designed to be a repeatable building block for a larger wearable piece. Once you're comfortable with the increase pattern, you can crochet multiple hexagons and join them along their straight edges to form sweater panels.
Original pattern: https://crocheteverything.com/cozy-crochet-hexagon-sweater-pattern-to-stay-warm/

About the Author
Tamsin Okoro Who writes the patterns at Yarn Gallery, how a pattern gets from the hook to the page, and what this site will never do.