About This Pattern
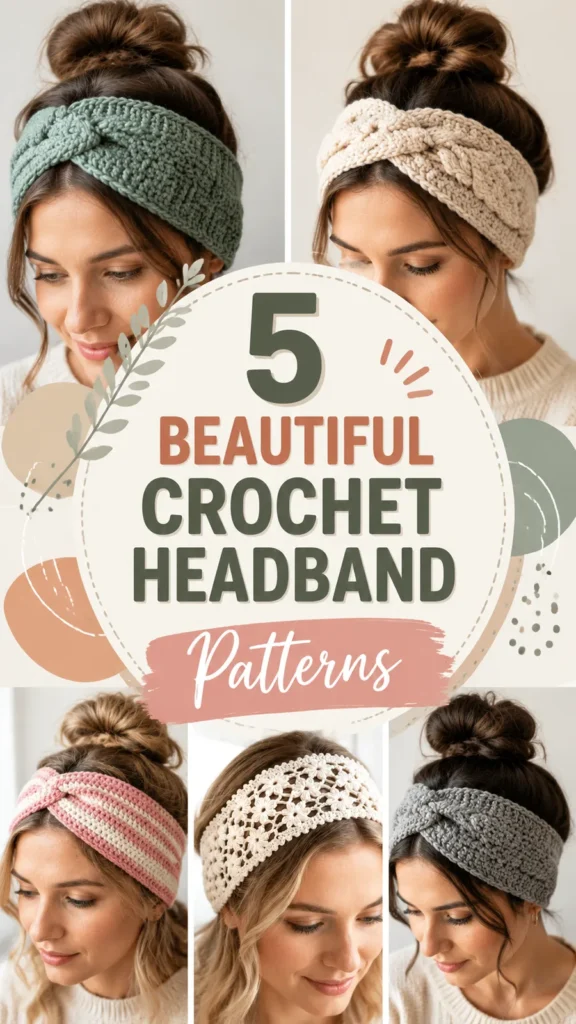
This ridge twist headband turns a single simple stitch into a beautifully textured accessory. Worked flat in half double crochet through the back loop only, every row builds a subtle ridge that gives the fabric a soft, corduroy-like texture without any fancy stitch combinations. It's the kind of pattern that looks far more complex than it actually is, making it perfect for anyone who wants a polished, boutique-style headband without a steep learning curve.
The technique here is refreshingly simple: chain a foundation, work half double crochet across, then repeat that same row using the back loop only until your rectangle reaches the right length. Because there's no shaping, color changes, or stitch pattern to track, this is an excellent project for beginners who've mastered the basic hdc stitch and want to build confidence with blo texture. Most crocheters can finish the strip in one or two relaxed sitting sessions, then take a bit more time for the twist seam.
Once assembled, you're left with a cozy, snug-fitting band roughly 20 inches around and 4 inches wide for an adult medium — plenty of stretch and warmth for cool mornings. The ridged texture gives it a knit-look finish that pairs beautifully with both casual and dressed-up outfits, and the twisted seam adds a lovely sculptural detail right at the front or side. It stitches up quickly enough to make several in an afternoon, which makes it a lovely handmade gift for friends, teachers, or family.
- Chain a foundation length and work a first row of half double crochet across to set the stitch count.
- Turn and work every following row in half double crochet through the back loop only to build the ridge texture.
- Keep repeating that same textured row, turning after each one, until the strip reaches the target length.
- Check your piece periodically against your gauge swatch to confirm the width and length are on track.
- Lay the finished rectangle flat, right side up, and bring the two short ends together.
- Fold each short edge inward so the layers overlap in a twisted arrangement at the center.
- Sew through all the overlapping layers with a yarn needle, going back and forth until the seam feels strong.
- Turn the twist seam to the inside of the band and weave in any remaining loose ends.
Materials
Crochet Abbreviations
- ch
- chain
- hdc
- half double crochet
- sl st
- slip stitch
- st
- stitch
- blo
- back loop only
- rep
- repeat
- RS
- right side
- WS
- wrong side
Ridge Twist Crochet Headband Pattern: Cozy Autumn Accessory
Main Pattern
The headband is worked flat from one short edge to the other.
The number of rows determines the width, while the starting chain determines the circumference.
The turning chain does not count as a stitch throughout the pattern.
Special Stitch - Back Loop Only Half Double Crochet (hdc blo): Work a half double crochet stitch by inserting the hook only into the back loop of the stitch from the previous row. This creates a raised ridge texture.
Foundation Row: Ch 17.
- Row 1Hdc in the second ch from hook and in each ch across. Turn. (16 sts)
- Row 2Ch 1, hdc blo in each stitch across. Turn. (16 sts)
- Rows 3-50Repeat Row 2 until the rectangle measures approximately 20 inches (51 cm) long. The final piece should contain 50 rows and measure approximately 4 inches (10 cm) wide.Fasten off, leaving a long yarn tail for seaming.
Putting It Together
- Step 1 Creating the Twist Seam:
- Step 2 Lay the rectangle flat with the right side facing upward.
- Step 3 Bring both short ends together.
- Step 4 Fold each short edge inward halfway so the four fabric layers overlap in a gentle twist arrangement.
- Step 5 Use the yarn tail and a yarn needle to sew through all layers securely.
- Step 6 Stitch back and forth several times until the center seam feels strong.
- Step 7 Turn the seam toward the inside of the headband.
- Step 8 Finishing: Weave in all loose ends with a yarn needle. Gently stretch the headband into shape and lightly steam block if needed. Avoid pressing directly on textured stitches because the raised ridges create the design feature.
Important Notes
Always swatch first — a small difference in hdc tension can shift your finished circumference enough to change how the headband fits, so it's worth the extra five minutes.
Use a stitch marker or removable clip to mark your seam placement before assembly, especially if you're working in a solid color where row counting can get tricky.
Block or steam your finished rectangle lightly before seaming if your yarn allows it — this helps the blo ridges lie flat and even before you twist and sew.
When folding the short edges for the twist seam, take your time arranging the four fabric layers so the twist looks balanced and symmetrical from the front.
Save a generous yarn tail after your final row so you have plenty of length to sew the twist seam securely without needing to add new yarn.
gift-giving, consider making a quick gauge swatch in the recipient's likely size range first, since head circumference varies more than people expect between adults, teens, and children.
Always check your gauge before making the full headband. A small difference in stitch tension can change the final circumference and affect how comfortably the accessory fits.
Gauge: Approximately 16 half double crochet stitches x 10 rows = 4 inches (10 cm).
Finished Size: Adult medium, approximately 20 inches circumference x 4 inches width (51 cm x 10 cm).
Terminology: This pattern uses US crochet terms.
Color suggestions: The design works beautifully in neutral shades such as cream, beige, gray, and soft brown, but it can also be customized with brighter colors, seasonal tones, or leftover yarn from previous projects.
Child size: Reduce the finished circumference to approximately 17 to 18 inches (43 to 46 cm).
Teen size: Aim for approximately 18 to 19 inches (46 to 48 cm).
Adult larger size: Increase the row count until the band measures approximately 21 to 22 inches (53 to 56 cm).
Wider headband: Add more starting chains in even numbers to increase height.
Crochet fabric naturally stretches. For the best fit, measure the wearer's head circumference and make the finished band slightly smaller than the measurement so it stays comfortably in place.
Headband feels too loose: Reduce the number of rows to create a smaller circumference.
Edges look uneven: Count stitches at the end of every row and make sure each row contains 16 stitches.
Texture is not visible: Check that you are working into the back loops only.
Seam feels bulky: Sew through the folded layers neatly and avoid pulling the yarn too tightly.
Fabric curls: A light blocking session can help relax the stitches.
Hand washing or gentle washing according to the yarn label will help maintain the shape and texture. Lay the headband flat to dry instead of hanging it, as gravity may stretch the fabric over time.
Common Mistakes and Fixes
Working into both loops instead of the back loop only.
Double-check each row that you're inserting your hook under just the back loop — this is what creates the signature ridge texture, and working both loops will flatten it out.
Losing track of the turning chain
Remember the turning chain does not count as a stitch in this pattern, so your first hdc goes into the actual first stitch, not into the chain space.
Not checking gauge before starting the full rectangle.
Work a small swatch first to confirm your 16 hdc x 10 rows measures 4 inches; if it doesn't match, adjust your hook size before committing to all the rows.
Stopping the rows too early or too late.
Measure your rectangle as you go rather than just counting rows, since tension varies between crocheters — aim for approximately 20 inches in length before finishing.
Rushing the twist seam and only
Take your time sewing back and forth through all four overlapping fabric layers at the center twist so the seam stays secure through regular wear.
Leaving the seam visible on the outside
After sewing, gently turn the twisted seam toward the inside of the band so the right side stays smooth and the seam is hidden against the wearer's head.
What Makes It Good
- This pattern is a fantastic canvas for personalization. For a bold statement piece, try a self-striping or gradient worsted yarn — the blo ridges will highlight every color shift beautifully as you work each row. For something more subtle, a tweed or marled yarn adds dimension without competing with the texture. If you want a plush, extra-warm version for winter, swap in a chunky yarn with a larger hook (try 6.5mm) and adjust your row count to match a swatch-tested gauge, keeping an eye on the finished width. Going the other direction, a lighter DK-weight yarn with a smaller hook creates a more delicate, lightweight band ideal for transitional weather. Sizing is easy to customize too: for the child size, aim for a shorter starting chain and fewer overall rows to bring the circumference down to 17-18 inches, while a teen size lands in between. If you're making this for a specific person, measure their head circumference and subtract about 1-2 inches for the natural stretch of the fabric, then adjust your foundation chain accordingly. For a fun seasonal twist, alternate two coordinating colors every few rows to create subtle stripes that show off the ridge texture beautifully. You could also embellish the twist seam with a small button or fabric flower for a decorative focal point, or add a coordinating pom-pom to one side for a playful, youthful look. Wool or wool-blend yarns give the best stitch definition for the ridges, while acrylics offer easy care for kids' versions.
- I adore how this headband proves that texture doesn't require complicated stitches. Working half double crochet through the back loop only creates these gorgeous little ridges that catch the light and make the fabric look intentional and rich, even though you're really just repeating one row over and over. There's something so meditative about turning your work and going again — it's the kind of mindless-but-satisfying project I reach for during a show binge. The real magic moment is the twist seam: folding those short edges into an overlapping arrangement and sewing them together transforms a plain rectangle into a sculptural, boutique-worthy accessory. Nobody has to know it started as a simple ribbed strip! I also love that the gauge and row count give you total control over sizing, so you're not locked into one fit. Whether I'm making this in a cozy neutral for myself or a bright color for a niece, it always feels like a rewarding, low-stress project that delivers a genuinely impressive result for the effort involved.
Frequently Asked Questions
How do I know when my rectangle is the right length?
Measure across the length as you work rather than relying only on row count, since everyone's tension is slightly different. Aim for approximately 20 inches long for an adult medium, adjusting up or down for other sizes.
What does working in the back loop only actually do?
Inserting your hook under just the back loop of each stitch leaves the front loop free, creating a visible horizontal ridge on the right side of the fabric. It's this simple technique that gives the headband its signature ribbed, textured look.
Can I make this headband in a smaller size for a child?
Yes, simply reduce your foundation chain and total rows to bring the finished circumference down to approximately 17 to 18 inches. Keep the same gauge and hook size so the ridge texture stays consistent.
Why is my headband coming out too loose or too tight?
This usually comes down to gauge or foundation chain length. Check your swatch against the 16 hdc x 10 rows over 4 inches gauge, and remember the starting chain determines the final circumference.
Is the twist seam hard to sew for a beginner?
Not at all — it just takes patience. Fold the short edges inward so the layers overlap, then stitch back and forth through all layers with your yarn needle until the center feels sturdy and secure.
Original pattern: https://duniarecipe.com/5-beautiful-crochet-headband-patterns-for-beginners-easy-diy-ideas/

About the Author
Tamsin Okoro Who writes the patterns at Yarn Gallery, how a pattern gets from the hook to the page, and what this site will never do.