About This Pattern
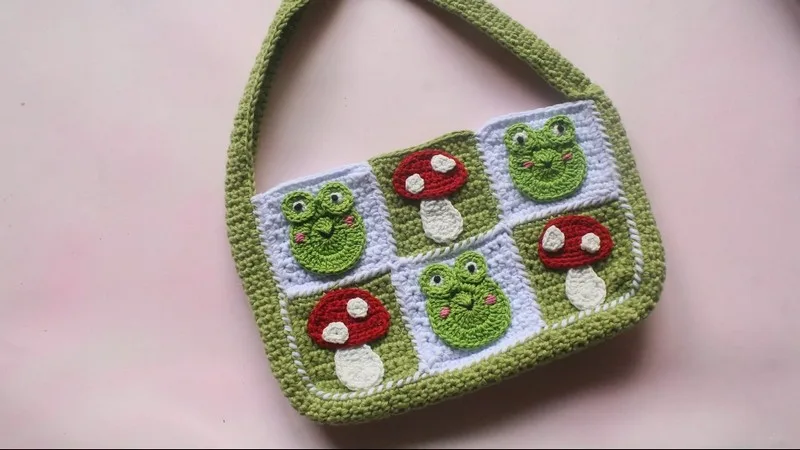
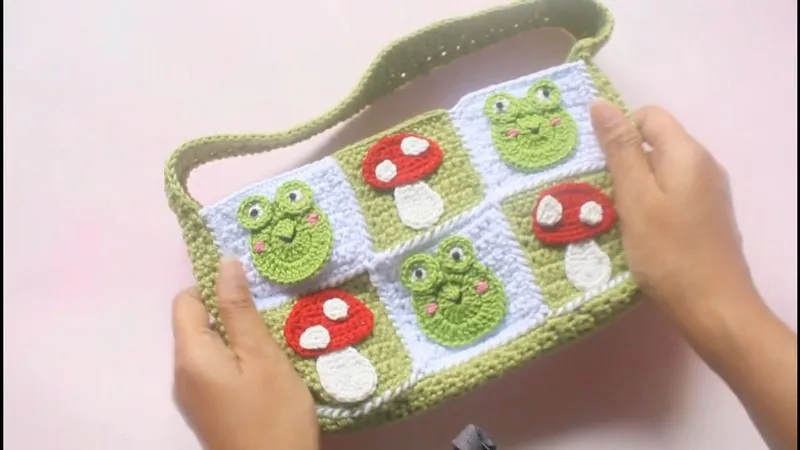
This Crochet Granny Frog and Mushroom Bag is a whimsical, sturdy tote built from single crochet granny squares, finished off with a gusset panel and a matching handle strip. What makes it special is its modular construction — you're not wrestling with one giant piece, but instead building twelve manageable squares that come together into something bigger and more impressive than the sum of its parts. It's perfect for crocheters who love cottagecore aesthetics, garden-inspired accessories, or anyone hunting for a handmade gift with real personality and playful charm.
The finished bag is a generously sized square tote with a substantial, structured feel thanks to the bulky cotton yarn and reinforced gusset panel. It has that textured, homemade-with-love look that instantly reads as a labor of care rather than a rushed project. With its playful frog and mushroom motifs, it makes a fantastic gift for garden lovers, whimsical-style friends, or anyone who wants a tote that gets compliments every time it's slung over a shoulder.
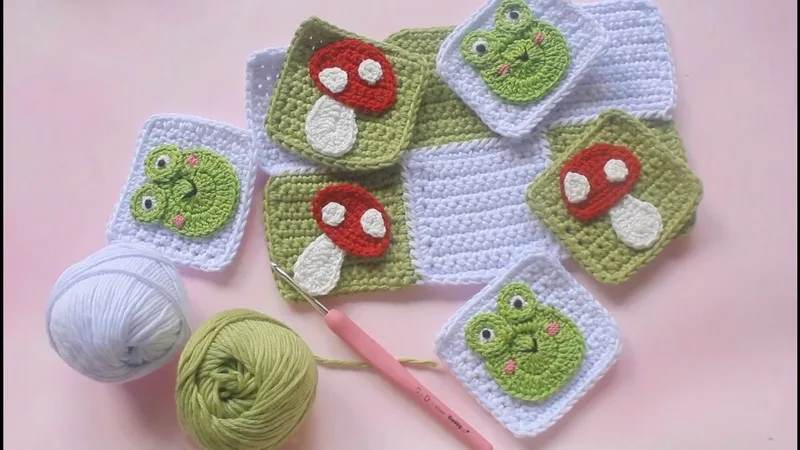
- Start by crocheting twelve single crochet granny squares, working two stitches into each corner to keep edges flat.
- Finish each square with an invisible join for a clean, seamless edge before moving to the next one.
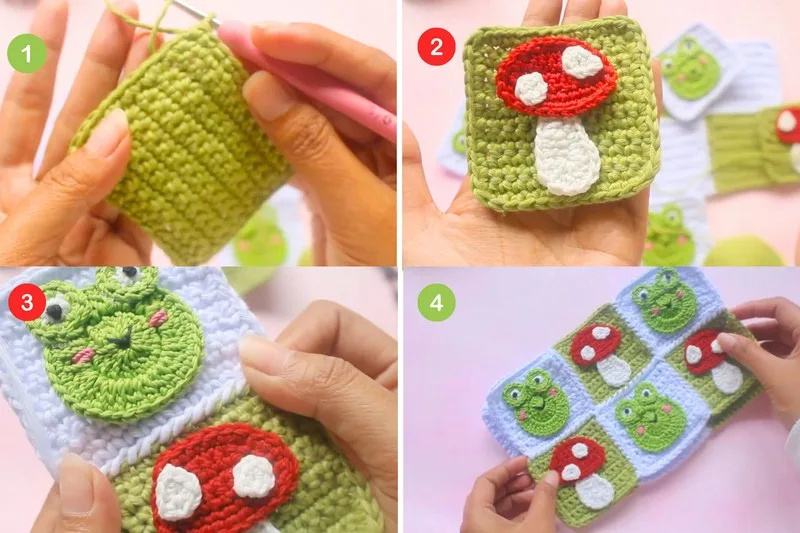
- Once all twelve squares are complete, lay them out in your desired grid to plan the bag's front and back panels.
- Whipstitch the squares together with a tapestry needle, keeping seams even and consistent for a durable finished shape.
- Crochet the side panel and handle strip as a single gusset piece that will wrap around the bag's sides and bottom.
- Sew the gusset panel between the front and back panels, joining all edges securely to form the bag's structure.
- Add any optional appliqués, like the frog or mushroom motifs, stitching them onto the squares for extra character.
- Finish with optional touches such as a fabric lining, magnetic snap, buttons, or zipper for a secure, personalized bag.
Materials
Yarn
Crochet Hook
Bag Closures
Tools
Decorative Appliqué
Crochet Abbreviations
- ch
- chain
- st
- stitch
- sl st
- slip stitch
- sc
- single crochet
- rep
- repeat
- row(s)
- row(s)
Crochet Granny Frog and Mushroom Bag Pattern
1.Main Granny Squares (Make 12)
Each square measures approximately 7 cm x 7 cm.
With chosen color and 5 mm hook: Foundation Chain: Ch 13 .
- Round 1Sc in 2nd ch from hook and in each ch across. (12 sc) Turn.
- Round 2-12Sc in each st across. (12 sc) Turn at end of each row. Continue until you have a total of 12 rows.Edging Round: After finishing Row 12, do not fasten off .Rotate work to work along next side:Sc evenly along all 4 sides of the square, placing 1 sc in each row end , 1 sc in each ch across, and [2 sc] in each corner to keep edges square and flat.Join with a sl st to the first sc of edging.Fasten off, leaving a long tail for sewing.Invisible Join: Pull yarn through; weave ends neatly.Make 12 squares total for the bag body.
2.Joining the Squares
Arrangement:
Arrange squares in a rectangle (e.g., 2 sheets of 6 squares: 3 squares wide x 2 squares high for each side).
One side may have an appliqué (mushroom/frog).
Joining:
With right sides together, sew squares to each other using a tapestry needle and the whipstitch or mattress stitch.
Continue until you have two panels (front and back).
3.Side Panel & Handles (Gusset Panel)
Make 1 long rectangular strip: Foundation Chain: Ch 6 .
- Round 1Sc in 2nd ch from hook and in each ch across. (5 sc) Turn.
- Round 2-160Sc in each st across. (5 sc) Turn. Repeat until you reach approximately the same length as the perimeter of three sides (side-bottom-side) of the bag (160 rows, or as needed for your bag). This will be sewn around the sides and bottom, and serve as the “gusset” and handles.Edging: Sc around the entire strip to neaten the edges.Fasten off, leaving a long tail.Fold ends of the side/handle strip together and join with sl st or sew with a tapestry needle for a seamless attachment.
Joining Strip Ends:
5.Optional Closures and Decorations
Top Closure:
Add a magnet snap, button, or zipper for security.
Appliqué:
Attach crocheted motifs (mushroom/frog) as decorations.
Lining:
Add fabric lining for additional durability.
More photos
Putting It Together
- Step 1 Attaching Gusset Panel:
- Step 2 Align the long strip to bag panel perimeter (side-bottom-side).
- Step 3 Sew gusset evenly around one piece (front or back), then attach the other panel in the same manner, forming a bag shape.
- Step 4 Handles:
- Step 5 Ensure that the top edges of the strip extend equally at both sides as handles.
- Step 6 Sew strip ends together for a continuous handle (or sew to bag sides for two separate handles, as preferred).
- Step 7 Weaving in Ends:
- Step 8 Hide all loose yarn ends between stitches for a neat finish.
Important Notes
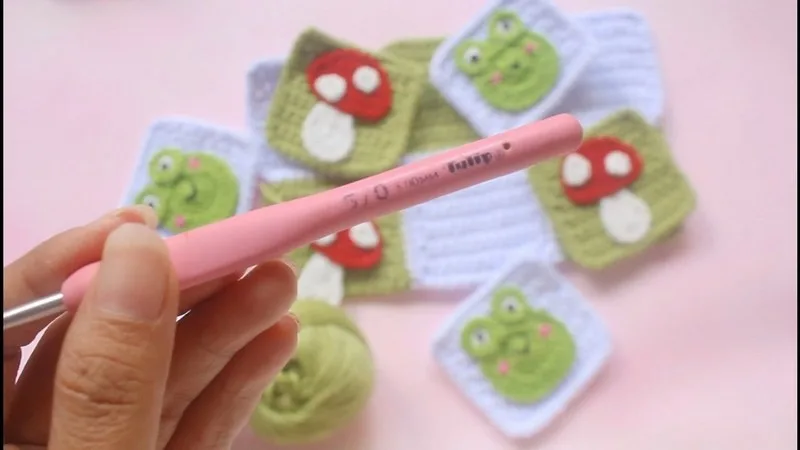
💡 Use a 5mm hook for firmer, tighter stitches, or size up to 6mm if your tension runs tight and you want a slightly looser, drapier fabric.
💡 Keep a stitch marker in the first stitch of each round on your granny squares so you never lose track of where a new round begins, especially important for keeping corners aligned.
💡 Since you're making twelve identical squares, batch-cut your yarn or wind mini cakes ahead of time so you're not stopping mid-project to rewind skeins.
💡 Block your finished squares before assembly by lightly steaming or pinning them to size — this evens out any tension differences and makes joining much easier.
💡 When sewing the gusset panel to the main squares, pin or clip pieces in place first so the seam stays straight and your bag doesn't end up twisted.
💡 If adding a fabric lining, cut your fabric slightly larger than your finished crochet panels to allow for seam allowance, then hand-sew it in just inside the top edge for a clean finish.
💡 This pattern uses US crochet terminology throughout, so sc means single crochet — double-check your terms if you're used to working from UK patterns.
💡 Tension and measurements affect the final size, so check your gauge against the 7 cm x 7 cm square measurement before starting if you want an exact finished size.
Common Mistakes and Fixes
Skipping the two single crochet
Always work 2 sc into each corner space as noted in the pattern — this small addition is what keeps your squares flat and prevents puckering or curling edges once they're joined.
Inconsistent tension between the twelve
Crochet all twelve squares in one sitting if possible, or at minimum check your gauge against a finished square before starting a new one so your tote assembles into a uniform grid.
Rushing the invisible join and leaving
Slow down on this step — pull your working yarn through the last stitch's front loops only, then weave in the tail through the back so the join disappears into the stitch pattern seamlessly.
Sewing the squares together
Use a tapestry needle with a strong, even sewing method as the pattern recommends, and go through both loops of matching stitches on adjacent squares for a durable, matching seam.
Attaching the gusset panel and handle
Lay all twelve squares out in your intended grid first, confirm the arrangement looks balanced, and only then attach the gusset panel so your bag proportions come out even on both sides.
Choosing a yarn weight that doesn't
Stick with a true bulky cotton yarn and a 5mm or 6mm hook as specified — thinner yarns won't give the tote enough structure to stand up and hold its shape when loaded.
What Makes It Good
- I adore this bag because it turns a big project into a series of small, satisfying wins. Every granny square only takes about 18 minutes, so you get that little dopamine hit of finishing something again and again instead of staring down one endless piece. Using single crochet keeps the fabric dense and structured, which means this tote actually holds its shape and can carry real stuff, not just look cute on a shelf. I love the invisible join technique too — it gives every square that clean, seamless finish so your corners stay crisp instead of puckering, especially once you remember to place two sc stitches at each corner. Assembling the twelve squares with a tapestry needle feels almost meditative, like piecing together a quilt, and watching the gusset panel and handle strip turn a flat pile of squares into an actual bag is genuinely magical. Plus, the frog and mushroom theme gives it so much personality — it's whimsical without being childish, and it's the kind of bag people stop you to ask about.
Frequently Asked Questions
How much yarn do I need for the whole bag?
Since this uses bulky/big ply cotton across twelve squares plus the gusset panel and handles, plan for several skeins total — buy an extra one in your main color just in case, since bulky cotton yarn can vary in yardage between brands.
Can I make this bag smaller or larger?
Yes, the modular design makes resizing easy — simply reduce or increase the total number of granny squares you crochet, then adjust your gusset panel length to match the new perimeter.
Do I need to know how to do an invisible join?
Yes, this technique is used throughout the pattern to keep each square looking seamless, but it's a straightforward skill to pick up even if you've never tried it — a little practice on a swatch first helps a lot.
What's the best way to attach the frog and mushroom appliqués?
Whipstitch them on securely using a tapestry needle and matching or contrasting yarn, making sure to catch both layers evenly so the appliqués stay flat and don't pucker the base square.
Is this bag sturdy enough for everyday use?
Yes, thanks to the bulky cotton yarn, dense single crochet stitches, and reinforced gusset panel, this tote is designed to be practical and durable, not just decorative, so it can handle regular outings.
Original pattern: https://redagapeblog.com/crochet-granny-frog-and-mushroom-bag/

About the Author
Tamsin Okoro Who writes the patterns at Yarn Gallery, how a pattern gets from the hook to the page, and what this site will never do.