About This Pattern
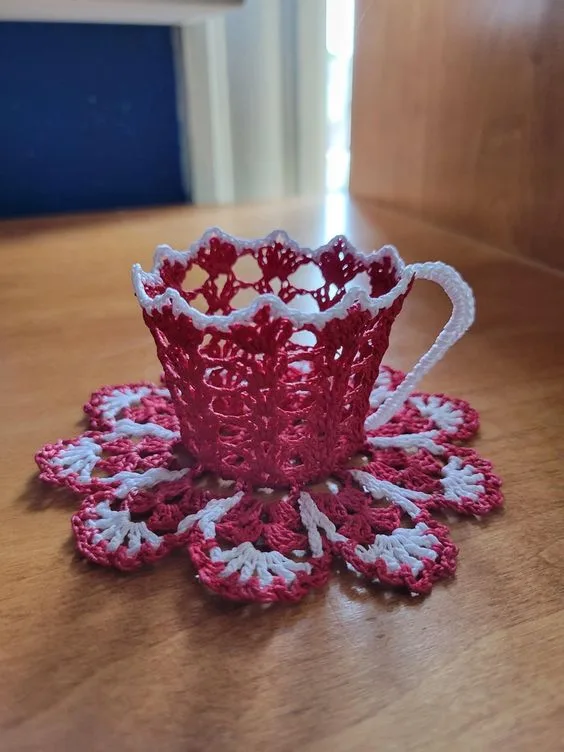
This crochet teacup pattern turns a handful of stitches into an adorable little accessory that looks right at home on a shelf, in a play kitchen, or nestled into a gift basket. What makes it special is how the three simple parts — a rounded base, a shaped body, and a curved handle — come together to mimic the silhouette of a real teacup. It's a lovely quick-make for crocheters who love amigurumi-style projects but want something a little different from the usual stuffed animal.
You'll be working in the round to build the base and body, then crocheting a small handle piece and attaching it during assembly. The pattern is well suited to intermediate crocheters who are comfortable with basic increases and following round-by-round shaping, though confident beginners who've made a few amigurumi pieces before will manage just fine. Expect to spend somewhere in the range of 4 to 6 cozy hours total, including the six assembly steps that bring everything together.
The finished teacup is a compact, tactile little object with a rounded body and a neatly curved handle that mimics the real thing in miniature. It has that satisfying, squishy amigurumi feel while still reading clearly as a teacup shape, making it a fun conversation piece or a whimsical addition to a tea-themed display. Because it's small and quick, it also makes a thoughtful handmade gift for tea enthusiasts, or a fun starter piece for a set of matching cups.
- Start by crocheting the circular base, increasing steadily over three rounds to form a flat, sturdy bottom.
- Transition smoothly from the base into the body, letting the sides curve upward into a rounded cup shape.
- Continue shaping the body until it reaches the proportions of a classic teacup silhouette.
- Lightly stuff the body so it holds its rounded form without losing its teacup-like shape.
- Set the base and body aside and crochet the small handle piece separately.
- Mark two matching points on opposite sides of the body where the handle will attach.
- Sew the handle securely between those two marked points, checking the angle for symmetry.
- Weave in all loose ends and give the finished teacup a final shape check before it's ready to display.
Materials
Crochet Abbreviations
- ch
- chain
- st
- stitch
- sl st
- slip stitch
- sc
- single crochet
- dc
- double crochet
How to Crochet a Teacup: Easy Amigurumi Pattern
Step 1: Create the Base of the Teacup
Start with a Magic Ring : Begin by making a magic ring to create the base of your teacup. This allows for a tight center.
Magic Ring Instructions: - Wrap the yarn around your fingers to form a loop. - Insert your hook into the ring, yarn over, and pull up a loop.
- Round 1Work 6 sc into the magic ring. Pull the ring tight to close it and join with a sl st to the first sc.Increase for Shape: To create the base of the cup, continue working in rounds while increasing stitches:
- Round 2Ch 1, 2 sc in each stitch around (12 sc).(12)
- Round 3Ch 1, sc in the first stitch, 2 sc in the next (repeat) (18 sc).(18)
Step 2: Shape the Body of the Teacup
Working Upwards :
After reaching the desired diameter for the base, start working in rounds without increases to form the body of the teacup.
For example, continue working in sc for several rounds until the cup reaches your desired height.
Adding Texture :
Consider alternating stitches for texture. For example, switch between sc and dc in every other round for a visually interesting design.
Step 3: Create the Handle
Foundation for the Handle :
After reaching the desired height of the teacup, you will create the handle. Chain about 10-12 stitches to form the handle.
Joining the Handle : Work back along the chain using sl st or sc to give the handle a more structured look.
Once you reach the end of the chain, attach it to the side of the teacup using a sl st .
Securing the Handle :
Use your yarn needle to sew any loose ends and secure the handle in place, ensuring it can hold its shape.
More photos
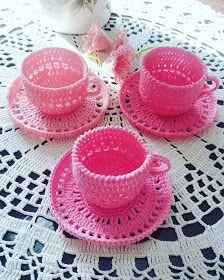
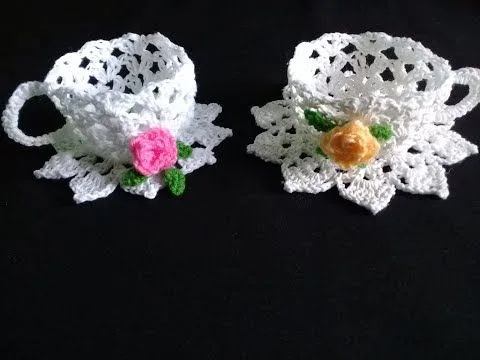
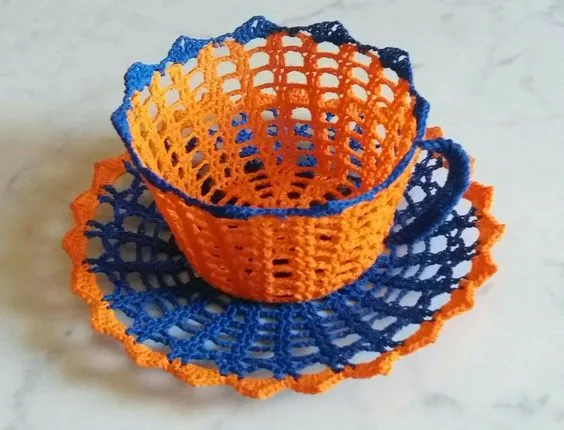
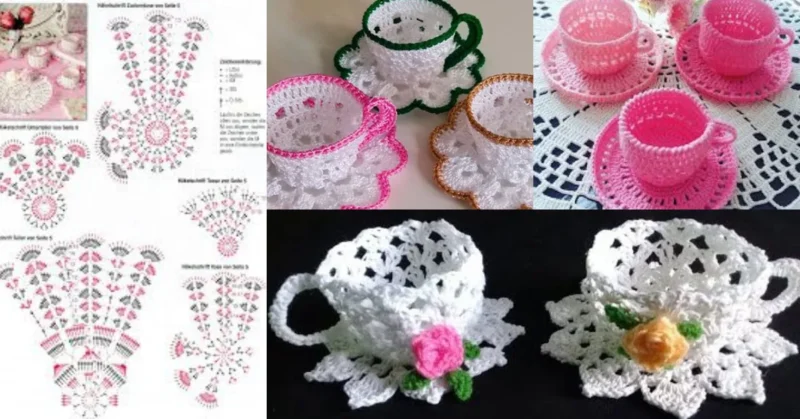
Putting It Together
- Step 1 Adding Color :
- Step 2 If desired, change yarn colors to create stripes or patterns on your teacup. Simply change colors at the beginning of a round.
- Step 3 Embellishments :
- Step 4 Consider adding decorative elements like flowers, buttons, or embroidery to personalize your teacup.
- Step 5 Weave in Ends :
- Step 6 Use a yarn needle to weave in any loose ends for a clean finish.
Important Notes
💡 Choose a hook one size smaller than the yarn label recommends for a tighter, amigurumi-style fabric that won't let stuffing peek through.
💡 Use stitch markers religiously on every round of the base — with only three shaping rounds, one miscount can throw off the whole cup shape.
💡 If you plan to try the two-tone color idea from the notes, pick your body and handle colors before you start so you're not hunting for a matching skein mid-project.
💡 Lightly stuff the body just enough to hold its rounded shape — overstuffing can distort the cup silhouette and make attaching the handle harder.
💡 When sizing up or down for a matching set, adjust in small increments (one extra or fewer increase round at a time) so the proportions stay teacup-like rather than bowl- or mug-shaped.
💡 Pin or clip the handle in place before sewing so you can check the angle and spacing from a few steps back — small handle-placement tweaks make a big visual difference.
Common Mistakes and Fixes
Starting the base too loosely
Cinch your starting loop closed firmly before working the first round, and check that no hole remains before moving on to Step 2.
Losing track of stitch counts
Place a stitch marker at the start of every round and count your stitches out loud after each round before continuing to the next.
Making the handle too short
Crochet the handle a touch longer than you think you need — it's easy to tack down a slightly longer handle, but a too-short one won't reach both attachment points.
Attaching the handle at mismatched
Mark both intended attachment points on the body with removable stitch markers before you start sewing, and step back to check symmetry before securing the yarn.
Skipping the shaping transition
Work Step 2's body shaping gradually rather than rushing straight rounds — a smooth transition from the increases of Step 1 is what gives the teacup its rounded silhouette.
What Makes It Good
- I love this pattern because it takes the humble teacup and turns it into a genuinely satisfying crochet build — you start with a simple base, watch it grow into a rounded body, and then get to add that little handle that instantly makes it read as 'teacup' instead of just 'round blob.' There's something so charming about crocheting an everyday object in miniature, and the six-step assembly process feels like putting together a tiny puzzle where every piece has a purpose. I especially love how forgiving the construction is for experimenting — the pattern notes suggest playing with two-tone color combos or multiple colors for the body and handle, and I think that's where this pattern really shines. It's quick enough to finish in a weekend but detailed enough to feel like a real accomplishment when the handle finally clicks into place. Whether you're making one as a whimsical decor piece or building a whole mismatched tea set in different sizes, this project scratches that amigurumi itch without demanding a huge time investment. It's the kind of make that gets genuine 'aww, how did you make that?' reactions.
Frequently Asked Questions
What yarn weight works best for this crochet teacup?
A worsted weight cotton or cotton-blend yarn gives the cleanest, most teacup-like stitch definition. Cotton also holds its shape well, which helps the body stay rounded once stuffed.
Do I need to stuff the teacup body?
Yes, a light stuffing helps the body hold its rounded shape and gives the handle something firm to attach to. Just avoid overstuffing, since too much fill can distort the cup's silhouette.
Can I make a matching set of teacups in different sizes?
Absolutely — the pattern notes specifically suggest adjusting stitch and round counts to create teacups of various sizes. Add or skip an increase round or two in Step 1 to scale the cup up or down.
How do I attach the handle so it looks even?
Mark both attachment points on the body with removable stitch markers before sewing, then step back and check symmetry from a distance. Sewing slowly and checking as you go prevents a lopsided handle.
Is this pattern good for a beginner?
It's best suited to confident beginners or intermediate crocheters who've worked in the round before and are comfortable with basic increases. The handle attachment step in particular benefits from some prior amigurumi experience.
Original pattern: https://crochetblog.net/how-to-make-a-crochet-teacup/

About the Author
Tamsin Okoro Who writes the patterns at Yarn Gallery, how a pattern gets from the hook to the page, and what this site will never do.