About This Pattern
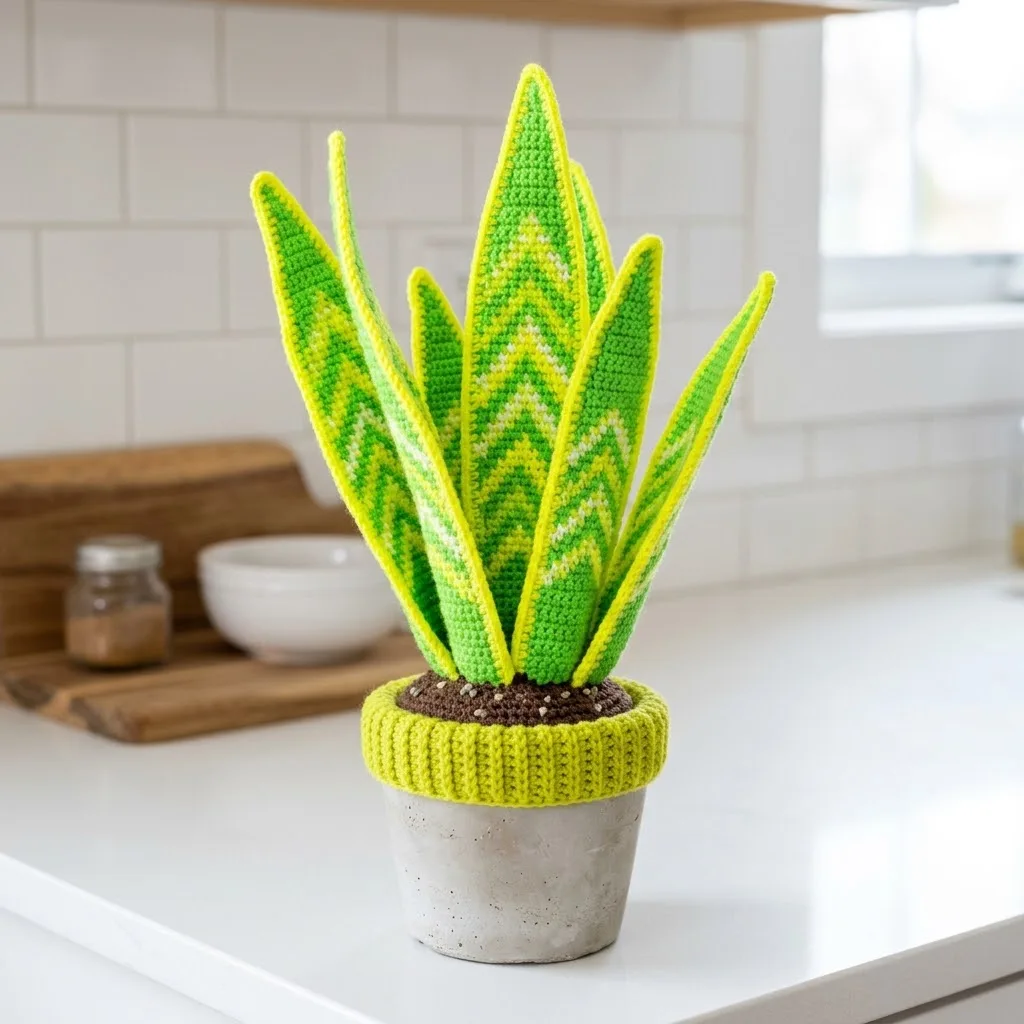
This little snake plant sits on a shelf and asks for nothing. The leaves build in chartreuse, round by round, with simple shaping at the edges. A small terracotta pot holds it steady, weighted with pebbles if you want that. It fits into one quiet evening, hook in hand, yarn in four greens and a touch of brown for the soil. Nothing about it needs a deadline.
In the basket
Worsted weight yarn (weight 4) in the following colors
Hook
Notions
Abbreviations
- ch
- chain
- st
- stitch
- sts
- stitches
- sc
- single crochet
- sl st
- slip stitch
- inc
- increase
- dec
- invisible decrease
- BLO
- back loop only
- FLO
- front loop only
- MR
- magic ring
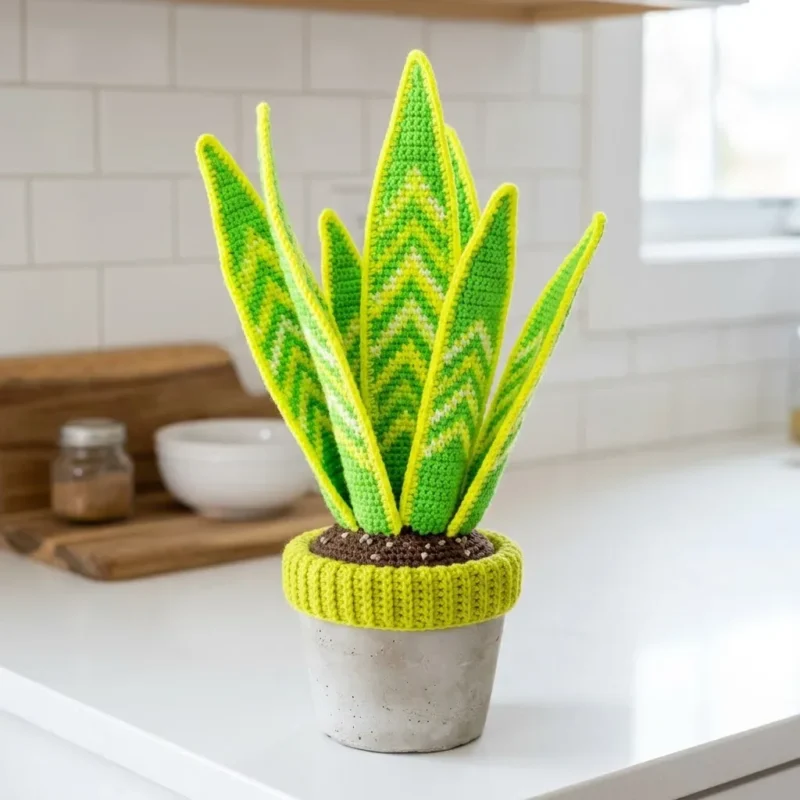
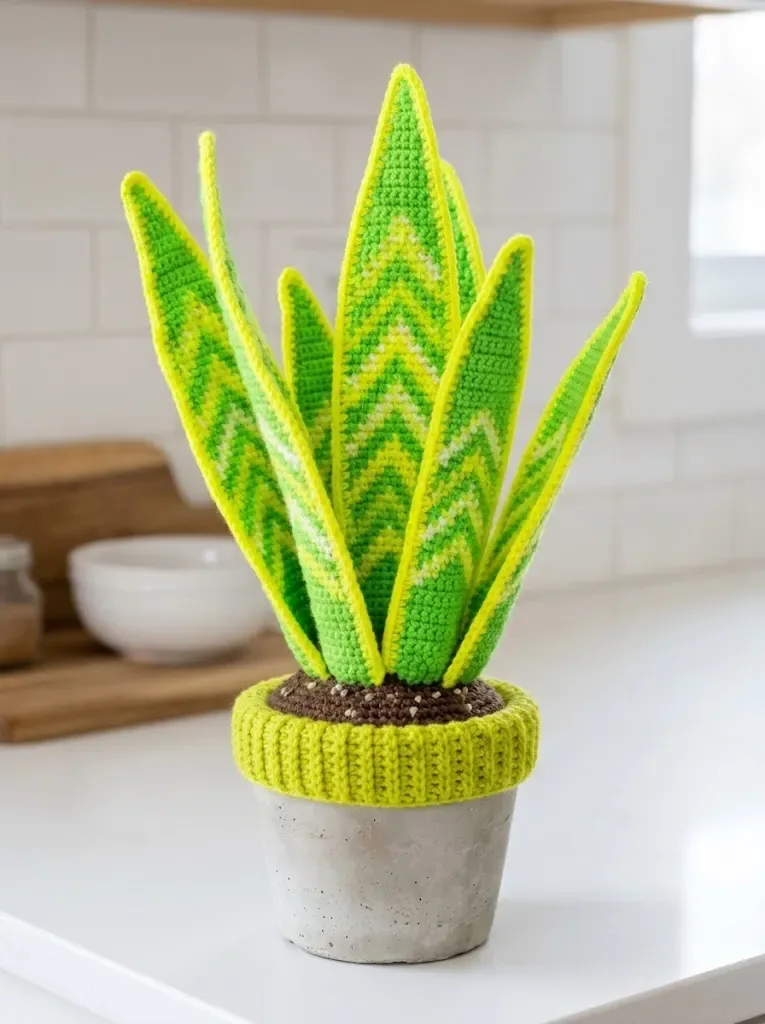
Neon lime snake plant amigurumi crochet pattern
Front Panel
Large Leaf (Make 3): You'll create each leaf as two flat panels, then join them together and stuff lightly. This creates that realistic pointed leaf shape.
Using Color D (chartreuse) and your 3.5mm hook, ch 5.
- Row 1Sc in 2nd ch from hook and in each ch across, turn. (4 sts)
- Row 2Ch 1, 2 sc in first st, sc in next 2 sts, 2 sc in last st, turn. (6 sts)
- Row 3Ch 1, sc across, turn. (6 sts)
- Row 4Ch 1, 2 sc in first st, sc to last st, 2 sc in last st, turn. (8 sts)
- Rows 5–6Ch 1, sc across, turn. (8 sts)
- Row 7Ch 1, 2 sc in first st, sc to last st, 2 sc in last st, turn. (10 sts)
Now begin the chevron color work. This is where the magic happens.
- Row 8Ch 1 with Color A (neon lime). Sc 2 in A, switch to Color B (kelly green), sc 6 in B, switch to A, sc 2 in A, turn. (10 sts)
- Row 9Ch 1, sc 3 in A, sc 4 in B, sc 3 in A, turn. (10 sts)
- Row 10Ch 1, 2 sc in first st with A, sc 2 in A, switch to C (cream), sc 1 in C, switch to B, sc 2 in B, switch to C, sc 1 in C, switch to A, sc 2 in A, 2 sc in last st with A, turn. (12 sts)Continue working the chevron pattern, increasing every 4th row until you have 16 stitches. The chevron "V" shapes should stack vertically, creating that distinctive snake plant variegation.Rows 11-30: Continue in established chevron pattern, alternating the peak positions and adding cream accent stitches at each chevron point. Maintain 16 sts for the middle section.
- Row 31Begin decreasing. Ch 1, dec, sc to last 2 sts, dec, turn. (14 sts)Rows 32-45: Continue decreasing every other row while maintaining color pattern until 4 sts remain.
- Row 46Ch 1, dec twice. (2 sts)
- Row 47Dec. Fasten off, leaving a long tail.
Back Panel
- All RowsWork the same as the front panel but using only Color A and Color D in simple stripes. No chevron needed. This saves time and the back won't be as visible anyway.
Joining
- Join & StuffHold front and back panels together with wrong sides facing. Using Color D, single crochet around the entire outer edge, working through both layers. When you reach the base, stop and stuff the leaf lightly with fiberfill. If using floral wire for stability, insert it now before closing. Continue sc around to join completely. Fasten off and weave in ends.
Medium Leaf (Make 3)
- Rows 1–35Work the same as the large leaf, but start with ch 4 and work only 35 rows total. Final leaf should measure approximately 8 inches.
Small Leaf (Make 2)
- Rows 1–25Work the same construction with ch 3, working 25 rows total. Final leaf should measure approximately 5 inches.
Soil Topper
Using Color E (dark brown) and your 3.5mm hook, create the soil that sits atop your pot.
- Round 1MR, 6 sc in ring. (6 sts)
- Round 2Inc in each st around. (12 sts)
- Round 3*Sc 1, inc* repeat around. (18 sts)
- Round 4*Sc 2, inc* repeat around. (24 sts)
- Round 5*Sc 3, inc* repeat around. (30 sts)
- Round 6*Sc 4, inc* repeat around. (36 sts)
- Round 7*Sc 5, inc* repeat around. (42 sts)
- Round 8*Sc 6, inc* repeat around. (48 sts)Continue increasing until the circle fits snugly inside your pot opening. For a 4-inch pot, you'll likely need 60-66 stitches total.
- Final RoundSc in BLO around. Sl st to join. Fasten off.
Pot Rim Cover
This ribbed piece wraps around the top edge of your pot for that finished look.
Using Color D and your 4.0mm hook, ch 9.
- Row 1Sc in 2nd ch from hook and across, turn. (8 sts)
- Row 2Ch 1, sc in BLO across, turn. (8 sts)Repeat Row 2 until the piece stretches comfortably around your pot rim. Approximately 40-50 rows depending on your tension and pot size.
- FinishingSl st the short ends together to form a tube. Fasten off.
Assembly Instructions
Now comes the fun part. Putting it all together.
Step 1 If desired, place small pebbles or dried beans in the bottom of your pot for stability.
Step 2 Stuff a ball of fiberfill or plastic bags into the pot to create a base for your soil topper.
Step 3 Position your soil topper inside the pot opening, pressing the edges down around the filling.
Step 4 Slide the pot rim cover over the top edge of your pot. Adjust so it sits evenly.
Step 5 Arrange your leaves. Start with the three large leaves in the center, positioning them to fan outward naturally. The tallest should point straight up. Stitch the base of each leaf to the soil topper using your tapestry needle.
More pictures
Before the first stitch
- Check your yarn amounts against the five colors before you start a leaf.
- Swatch a few rows at 3.5mm to see if your fabric feels tight enough for stuffing.
- Read through the Front Panel's row counts once, so the increases don't surprise you.
Minutes per piece
- Front Panel leaves about 2 hours, because the shaping rows need attention
- Pot, base, and joining about 1-2 hours, because assembly takes patience, not speed
Other yarns that work
- Acrylic worsted weight Holds its shape well and keeps stuffing hidden. Hook size stays the same.
- Cotton worsted weight Gives a crisper, less fuzzy leaf. You may need a slightly smaller hook for the same tight fabric.
Where it ends up
- A small desk companion that needs no water and no light.
- A shelf piece next to real plants, for contrast in texture.
- A gift for someone who kills every actual plant they own.
Small notes
- Use the 3.5mm hook for the leaves. A tighter gauge keeps the fiberfill from peeking through.
- Keep a stitch marker on your working round. Amigurumi shaping is easy to lose track of.
- Intermediate. This pattern requires comfort with basic amigurumi construction and willingness to learn tapestry crochet for the color work.
- This snake plant consists of multiple leaves in varying sizes, a soil topper, and a decorative pot rim. All pieces except the pot rim are worked in continuous spiral rounds. Do not join rounds unless instructed. Use a stitch marker to track the beginning of each round.
- I recommend making the smaller leaves first to practice the tapestry technique before tackling the larger center leaves.
- This pattern creates a decorative piece that stands approximately 12 to 14 inches tall when displayed in a standard 4-inch pot.
- Gauge is not critical for amigurumi, but you want a tight fabric so stuffing doesn't show through. With a 3.5mm hook and worsted weight yarn, you should get approximately 5 single crochet stitches per inch.
Little questions
Do I need floral wire for the leaves?
No, it's optional. It just helps the leaves hold a gentle curve or stand upright.
Why does the pattern use five colors?
Color A and B shape the main leaf body, Color D the lighter variegation, Color C the accents, and Color E the soil. Each one is used in small amounts, so leftover yarn works well here.
Can I skip the pebbles in the pot?
Yes, they're only for weight. Without them, the pot may feel light, but it will still stand.
What if my gauge doesn't match 5 stitches per inch?
That's fine for amigurumi. Just aim for a fabric tight enough that stuffing doesn't show through, and adjust hook size if needed.
Original pattern: https://crochr.com/neon-lime-snake-plant-amigurumi-free-crochet-pattern/

About the Author
Tamsin Okoro Who writes the patterns at Yarn Gallery, how a pattern gets from the hook to the page, and what this site will never do.