About This Pattern
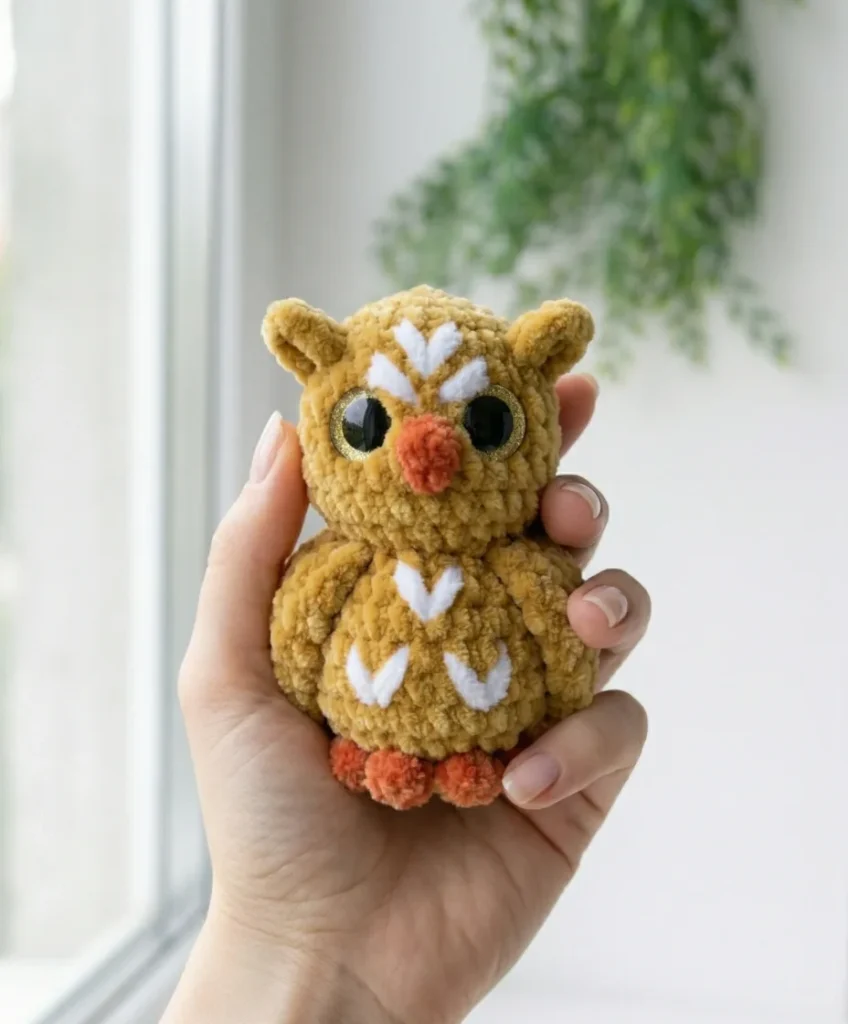
This owl keychain is a small thing that fits in one sitting. The body and head grow as one piece, worked in a spiral. Wings and feet are quick add-ons, worked separately and sewn in place. It needs bulky chenille yarn, a G-6 hook, and a bit of stuffing. Nothing about it demands a full afternoon. It sits well on a bag clip or a set of keys, a soft detail that took less than an hour of active stitching. Rated beginner-friendly — you'll use single crochet, increases, decreases, and a little embroidery at the end. The finished owl is just 8-9 cm (about 3-3.5 inches), so results come fast.
In the basket
Main yarn
Contrast yarn
Embroidery yarn
Hook
Safety eyes
Abbreviations
- ch
- Chain
- dec
- Invisible Decrease (insert hook in front loop of next 2 sts, pull up loop, yarn over, pull through all 3 loops)
- inc
- Increase (2 sc in same stitch)
- sc
- Single Crochet
- sl st
- Slip Stitch
- SM
- Stitch Marker
- st(s)
- Stitch(es)
Small crochet owl keychain pattern for quiet evenings
Body & Head(worked as one piece)
Start with a foundation chain rather than a magic ring — this creates the oval base of the body.
Begin by chaining 6. Starting in the 2nd ch from hook:
- Round 1inc, 3 sc, 4 sc in last st; working along the opposite side of the foundation chain: 3 sc, inc. (14)
- Round 22 inc, 3 sc, 4 inc, 3 sc, 2 inc. (22)
- Round 3-4sc in each st around. (22)Keep your stitch marker at the side of the body. Adjust with offset stitches as needed to maintain side placement.
- Round 514 sc, 2 dec, 4 sc. (20) The two decreases fall at the center front (belly).
- Round 6sc in each st around. (20)
- Round 7(2 sc, dec) × 5. (15)
- Round 8(3 sc, dec) × 3. (12) Adjust with offset stitches if needed — your stitch marker must remain at the side.Stuff the lower body firmly now. Shape the sides as you go.
- Round 9(inc, 1 sc) × 6. (18)
- Round 10inc, 7 sc, 2 inc, 7 sc, inc. (22) Increases fall at both sides — watch your stitch marker.
- Round 11-12sc in each st around. (22)
- Round 13dec, 5 sc, 3 dec, 5 sc, 2 dec. (16)The next round creates the brow tufts — work carefully and follow the instructions step by step.
- Round 141 sc, ch 3; starting in the 2nd ch from hook, work 3 sc along the chain (working the 3rd sc into the base of the chain); 6 sc along the body; ch 3; starting in the 2nd ch from hook, work 3 sc along the chain (working the 3rd sc into the base of the chain); 9 sc. (16 body sts)Insert safety eyes now: place them between Rounds 12 and 13, with 5 stitches between the two eye posts.(16)
- Round 15dec, 4 sc, dec, 8 sc. (14) Work the decreases at the first and last stitches of each ear tuft.Stuff the head firmly. Shape the cheeks gently as you close.
- Round 16Work 8 dec until the opening is fully closed. Pull tight, secure the yarn, and weave in the end.
Wings(make 2)
Worked in flat rows. Chain 4 to begin. Start in the 2nd ch from hook.
All decreases in this piece are worked through both loops.
- Round 13 inc, ch 1, turn. (6)
- Round 2-3sc in each st across, ch 1, turn. (6)
- Round 4inc, 4 sc, inc, ch 1, turn. (8)
- Round 54 dec, ch 1, turn. (4)
- Round 62 dec. (2)
- Round 7dec, ch 1. Pull the chain tight — do NOT cut yarn yet. To finish the wing neatly: lay the working yarn along the nearest edge of the wing toward the starting tail. Measure approximately 10 cm, thread that working yarn onto a needle, and sew a running stitch along the same edge back toward the starting loop. Smooth the wing flat — it should not be gathered or puckered. Trim yarn, leaving a small tail. Remove any loose fibers from the chenille, tie several small knots, and trim the excess.
Feet(make 2)
Chain 4. Starting in the 2nd ch from hook, work back along the chain: 2 sc, sl st in the last st. (This completes the first toe.)
Immediately chain 3 more. Starting in the 2nd ch from hook: 2 sc, sl st into the very beginning of your work. (This completes the second toe.)
Remove any loose chenille fibers from both yarn tails. Tie several knots to secure, and trim the excess.
More pictures
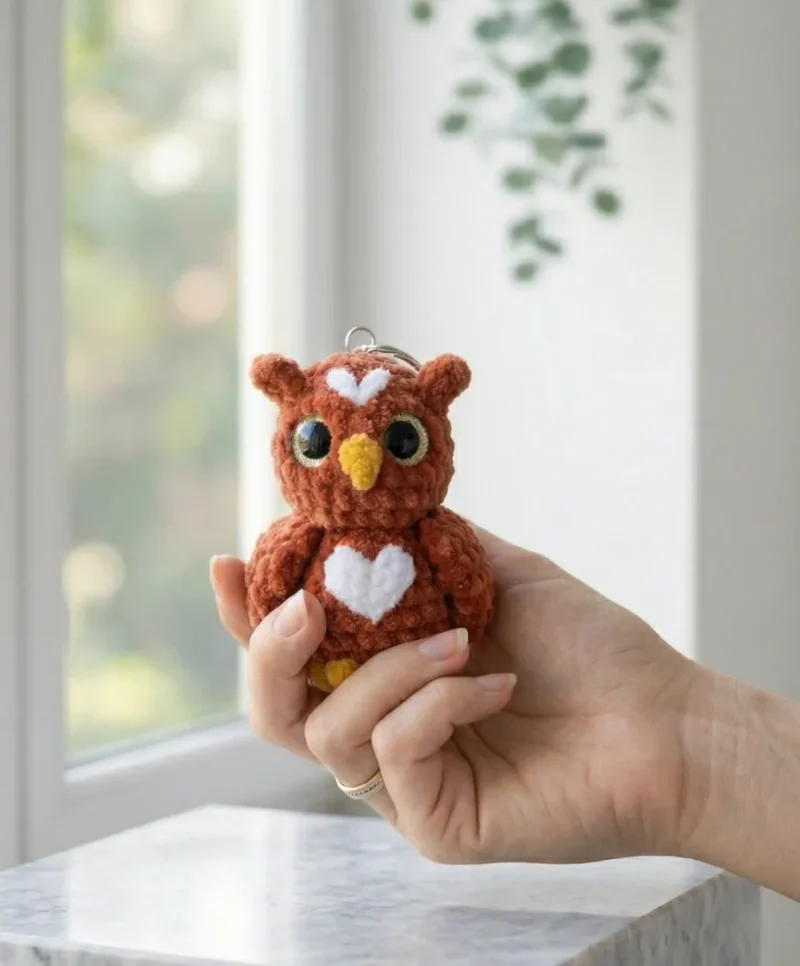
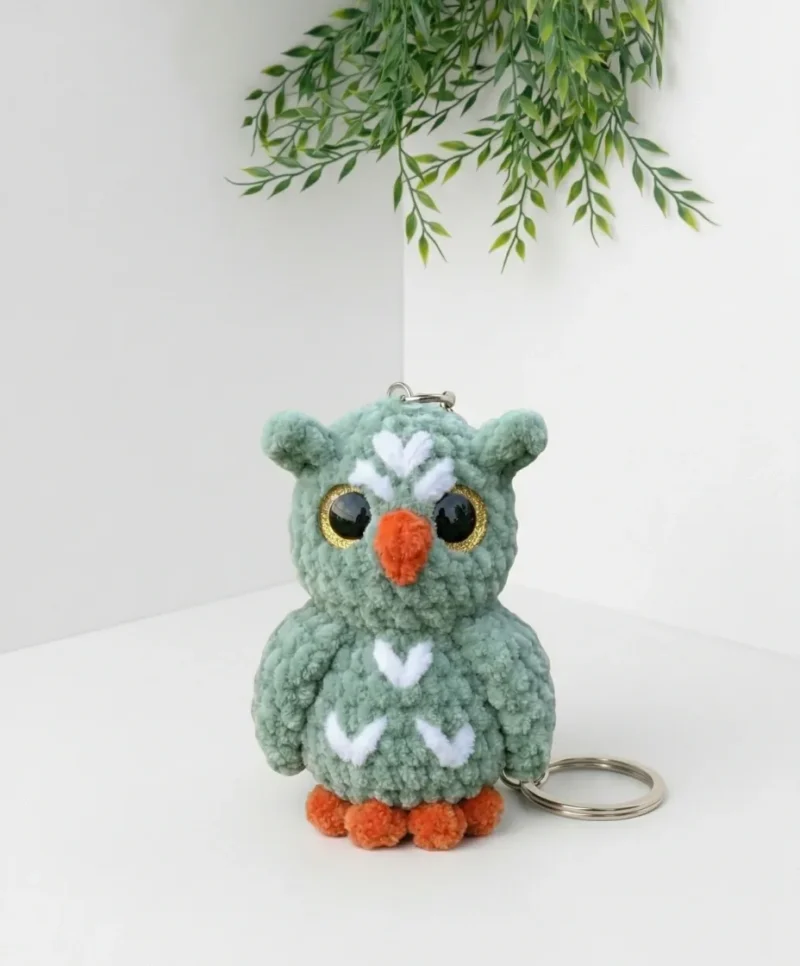
Before the first stitch
- Check you have about 12 g of main color chenille and under 2 g of contrast color for feet and beak.
- Place a stitch marker at the start of Round 1 before you begin the spiral body.
- Read through the Body & Head section once before starting, since it runs 14 rounds without a join.
Minutes per piece
- Body & Head about 40-50 minutes because it runs 14 rounds worked as one continuous piece
- Wings and Feet plus assembly about 30-40 minutes because the wings need careful shaping and the feet are hand-tied, not stuffed
Other yarns that work
- Cotton, worsted weight Gives a firmer, less fuzzy finish; go down to a 3.5 mm hook and stuff a little less.
- Acrylic, bulky weight Keeps the same hook size and stitch count, but drapes stiffer and shows stitch definition more than chenille.
Where it ends up
- Clip it to a backpack zipper for a soft everyday detail.
- Hang it on a set of house keys as a small marker.
- Give it as a paired gift with a matching stitch marker or notebook.
Joining up
- Step 1 Attach the feet: Using your stitch marker notes, identify the first and last stitches of Round 1 along the base of the body. Pin the feet symmetrically at both ends of that row. Sew them on securely with a yarn needle. Weave in ends.
- Step 2 Attach the wings: Pin both wings symmetrically on either side of the body, with exactly 3 stitches of spacing between them at both the front and the back. Sew each wing along the seam between the head and body sections, stitching through the top edge of the wing only. Secure yarn, cut, and weave in ends.
- Step 3 Embroider the beak: Locate the center stitch in Round 12–13 (where the safety eyes were placed) — this marks the top point of the beak. Count 2 rows directly below that center point and mark the bottom tip with a pin. Using your embroidery yarn and large-eye needle, stitch a small triangle in 5–7 stitches to form the beak.
- Step 4 Add decorative markings: Using embroidery yarn, add small V-shaped chevron stitches across the body and head as desired to suggest feather texture. Placement is entirely up to you — follow your instinct.
- Step 5 Attach keychain: Thread the cord through the top of the head or through a stitch at the crown, and secure the lobster clasp.
Small notes
- Use a G-6 (4.0 mm) hook throughout; chenille yarn is soft and a smaller hook can split the fibers.
- Keep a stitch marker in the working round at all times, since the body is worked in a spiral with no join.
- Stuff the body and head gently as you close the top rounds; chenille compresses easily, so slight overstuffing keeps its shape.
- This pattern is written in US crochet terminology.
- Finished size is approximately 8-9 cm (about 3-3.5 inches).
- Keep your tension snug. Chenille yarn is forgiving in texture, but loose tension in amigurumi means stuffing shows through the gaps. Aim for a dense, firm fabric — if your stuffing is visible between stitches, try going down one hook size.
- The offset stitch (position adjustment) is called out several times in this pattern for good reason. With oval-based amigurumi, the start-of-round drifts during shaping. A quick slip stitch or extra single crochet at the right moment keeps your decreases and increases landing where they should — don't skip this step.
- This pattern asks you to stuff after Round 8, before the head shaping begins. This is intentional — stuffing in two stages (body first, head before closing) lets you shape each section independently and get a rounder, more defined silhouette.
- Because chenille yarn has a thick, fuzzy pile, the invisible decrease can be tricky to find. Slow down, look for the front loop of each stitch, and feel for it with your hook tip if you can't see it clearly. The effort is worth it — clean decreases keep the surface smooth under all that fluff.
- Attach wings at the body-head join seam rather than stitching through the middle of a row. That seam acts as a natural anchor, and the wing will sit flat and even without puckering. Use the same yarn as the main body so the stitching disappears into the texture.
Little questions
Why start with a chain instead of a magic ring?
The chain foundation makes an oval base, not a circle. This gives the body a slightly elongated owl shape from Round 1.
Do I join at the end of each round?
No, the body and head are worked in a continuous spiral. A stitch marker keeps track of where each round begins.
How much yarn do I actually need?
About 12 g of your main color covers the body and wings. Less than 2 g of a second color is enough for the feet and beak.
Are the feet stuffed like the body?
No, the feet are small chained toes, tied off and trimmed rather than stuffed. They finish with knots to secure the chenille tails.
Original pattern: https://amigurumiarts.com/fluffy-owl-keychain-crochet-pattern-amigurumi/

About the Author
Tamsin Okoro Who writes the patterns at Yarn Gallery, how a pattern gets from the hook to the page, and what this site will never do.