About This Pattern
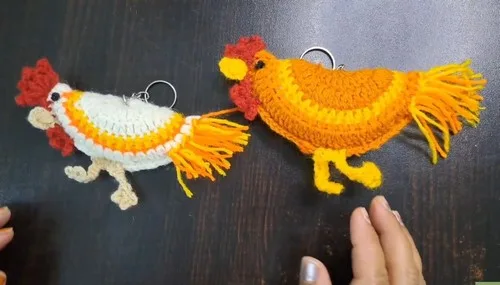
This crochet rooster keychain pattern turns a handful of acrylic yarn scraps into the cutest little barnyard companion you can clip onto a bag, backpack, or keyring. With its plump stuffed body, bright red comb, and cheerful personality, it's the kind of small-scale project that packs a huge amount of charm into a compact package. It's perfect for crocheters who love quick amigurumi makes, anyone hunting for a handmade gift with personality, or crafters who simply adore rooster and farm-animal themes.
This pattern relies on classic amigurumi shaping worked in rounds, paired with a fun puff stitch detail that gives the comb its signature bumpy texture. You'll fold and single crochet the body closed around a sponge for structure, then add a beak and legs to finish the look. Expect an intermediate-friendly experience—comfortable for confident beginners who've tried increases and puff stitches before—with a total project time of about 4 to 6 hours including drying time for glued pieces if needed.
The finished rooster keychain is small enough to fit in your palm, yet full of personality thanks to its multi-colored details and sturdy sponge-stuffed body. It has a soft, huggable feel but holds its shape well thanks to the tight single crochet stitches and supportive stuffing. Clipped to a keyring, it makes a delightful, one-of-a-kind gift for teachers, farm-animal enthusiasts, or anyone who could use a little whimsy on their keys.
- Crochet the rooster's body in rounds, building it up over six rounds to form a rounded shape.
- Fold the finished body circle in half so the edges align neatly on both sides.
- Single crochet along about three-quarters of the edge to join the two folded sides together.
- Tuck a small sponge inside the body through the remaining open edge for gentle structure.
- Continue single crocheting the last portion of the edge closed, then slip stitch and cut the yarn.
- Attach red yarn to the top-left side of the body to begin shaping the comb detail.
- Chain three and work a puff stitch using two loops to create the comb's bumpy texture.
- Chain four and single crochet into the top of the first puff stitch to finish the comb, then attach the beak, legs, and keychain ring.
Materials
Crochet Abbreviations
- sc
- single crochet
- hdc
- half double crochet
- dc
- double crochet
- puff
- puff stitch
Adorable Crochet Rooster Keychain Pattern (Gift-Worthy!)
Body
Magic Ring: Start with a magic ring.
- Round 1Chain 3 (counts as 1 DC). Make 11 double crochets into the ring (12 DC total). Slip stitch to the top of the chain-3.
- Round 2Chain 3. Make 2 double crochets in each stitch around (24 DC total). Slip stitch to the top of the chain-3.
- Round 3Chain 3. Make 2 DC in the same stitch. Alternate: 2 DC in one stitch, 1 DC in the next around. Change color at the end.
- Round 4Chain 2 (counts as 1 HDC). Make 1 HDC in each stitch around. Slip stitch to join.
- Round 5Change color. Chain 2. HDC in each stitch around.
- Round 6Switch to white yarn. Chain 3. Make 2 DC in each stitch around.Shaping the Body Fold the circle in half. Single crochet along ¾ of the edge to join both sides.
Stuffing Insert a small sponge to stuff the body.
Closing
Continue single crocheting the remaining open edge.
Slip stitch and cut the yarn.
Crest (Comb)
Attach red yarn to the top-left side of the body.
Chain 3.
Make a puff stitch (two loops).
Chain 4, single crochet into the top of the first puff stitch.
Repeat puff stitch and chain sequence 4 times.
Chain 3 and slip stitch in the same space.
Skip 2 stitches, then single crochet in the next 6 stitches.
Chain 6 and slip stitch in the same space (repeat three times to create loops).
Skip a stitch, then slip stitch.
Cut and secure the yarn.
Beak
Attach yellow yarn at the center of the 6 SCs under the crest.
Chain 3, make two loops.
In the next chain, make two loops again.
Chain 4 and single crochet at the top.
Chain 3, slip stitch in the same space.
Cut and secure yarn.
Legs
Attach yarn at the center bottom of the body.
Chain 8.
SC in the 4th chain from the hook.
Chain 4, SC in the same space.
Repeat 3 times for claw effect.
SC along the remaining chain.
Chain 8 again for the second leg and repeat.
Slip stitch and cut yarn.
Feathers Wrap yarn (yellow and orange) around a small object 7 times.
Cut both ends to create loops.
Attach strands to DC stitches on the back to create tassels.
Trim tassels evenly.
Eyes
If beads aren't available, use black yarn.
Create small knots with yarn and sew them in place for eyes.
Final Touches
Attach the keychain ring to the top.
Weave in and secure all loose yarn ends.
More photos
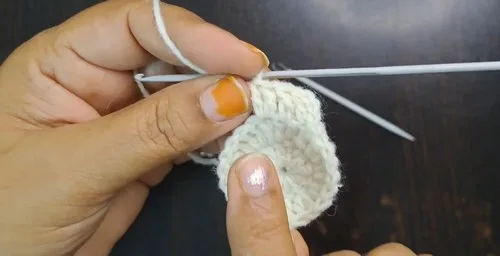
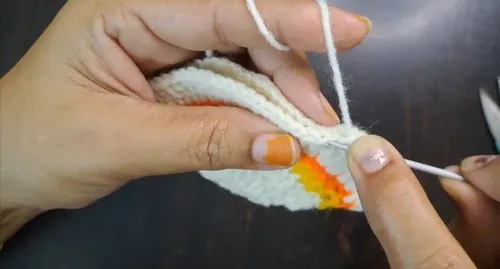
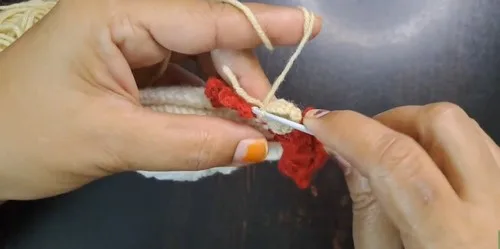
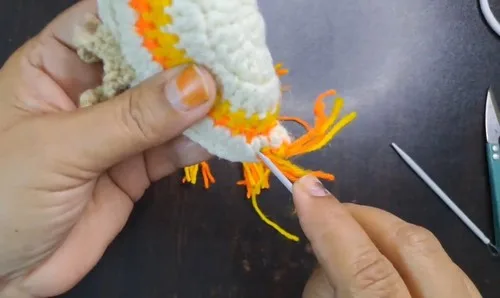
Important Notes
💡 Trim your sponge slightly smaller than the body cavity before inserting it, so it fits snugly without stretching or distorting your single crochet stitches.
💡 When working the puff stitch for the comb, count your loops carefully (two loops as specified) so the texture stays consistent and doesn't look lopsided.
💡 Use small stitch markers or safety pins to mark the top-left starting point before attaching red yarn, so your comb placement stays symmetrical and centered.
💡 Weave in yarn ends as you finish each color section (red, yellow, white, black, orange) rather than waiting until the very end—this keeps color changes tidy and prevents tangled tails.
💡 Attach the key chain ring securely with a few extra stitches or a small loop of yarn reinforced with a yarn needle, since keychains endure daily wear and tugging.
Common Mistakes and Fixes
Stuffing the sponge in before fully
Complete the ¾ single crochet seam first, insert the sponge through the remaining open edge, then finish crocheting the last portion closed—this keeps your stitches even and easy to control.
Making the puff stitch too loose
Pull up each of the two loops in the puff stitch to a consistent, medium height, and cinch the yarn over snugly before completing the stitch so the comb holds its rounded, textured shape.
Forgetting to fold the body circle
Fold the circle carefully so the edges line up exactly, and use a stitch marker or paperclip to hold both layers together before you start single crocheting the seam.
Not leaving a long enough yarn tail
Leave at least a 6-inch tail when starting the red yarn attachment so you have plenty of length to weave in securely once the comb and puff stitches are complete.
Cutting the yarn too close to the slip
Leave a small tail after the slip stitch and cut the yarn, then immediately weave the end through several stitches with a yarn needle before trimming flush.
Using a hook size that doesn't match
Stick with the recommended 2.5mm hook for the acrylic yarn used here, and check your gauge on a small swatch first to make sure your stitches are snug enough to fully contain the stuffing.
What Makes It Good
- I fell head over heels for this rooster keychain the moment I finished the comb—that little puff stitch detail with the chain-4 arch just makes the whole face pop with personality! There's something so satisfying about folding the body circle in half and single crocheting three-quarters of the edge closed, tucking in a sponge for stuffing, then finishing the last stretch by feel. It's a wonderfully tactile, meditative process. I also love how the five-color palette (red, yellow, white, black, and orange) lets every rooster come out looking a little different depending on how you place your colors. This isn't a fussy, hours-long amigurumi project—it's quick enough to finish in an evening or two, but detailed enough that it never feels boring. Attaching the finished body to a keychain ring instantly transforms it from "cute stuffed thing" into "functional, giftable accessory," which I find incredibly rewarding. Whether you're making one for yourself or a whole flock for holiday gifts, birthday presents, or teacher appreciation gifts, this pattern scratches that itch for a small, satisfying, start-to-finish project that doesn't demand a huge yarn stash or weeks of your time.
Frequently Asked Questions
What size hook and yarn weight work best for this rooster keychain?
The pattern calls for a 2.5mm crochet hook paired with acrylic yarn, which creates tight, sponge-friendly stitches. If you prefer a larger finished rooster, sizing up to a 4.0mm hook with worsted weight yarn will also work, just expect a bigger result.
Can I use fiberfill instead of a sponge for stuffing?
Yes, polyester fiberfill can replace the sponge for a softer, plusher feel. However, the sponge helps the keychain hold a firmer shape that stands up better to everyday handling and tossing in a bag.
How do I keep the puff stitch comb looking neat and even?
Make sure both loops of the puff stitch are pulled up to a consistent height before cinching them together with a yarn over. Practicing the puff stitch on a scrap swatch first can help you get comfortable with the tension before working directly on the comb.
Is this pattern good for a beginner crocheter?
This pattern is best suited for confident beginners or intermediate crocheters who have already practiced puff stitches and basic amigurumi shaping. If you're brand new to crochet, practicing puff stitches and single crochet seams on a swatch first will make the project much smoother.
How do I attach the keychain ring securely?
Once the body is fully closed and stuffed, thread a small loop of yarn through the top of the rooster and attach it to the keychain ring, reinforcing it with a few extra stitches using a yarn needle. This double reinforcement helps the ring withstand daily use on keys or a bag.
Original pattern: https://crocheteverything.com/adorable-crochet-rooster-keychain-pattern-totally-gift-worthy/

About the Author
Tamsin Okoro Who writes the patterns at Yarn Gallery, how a pattern gets from the hook to the page, and what this site will never do.