About This Pattern
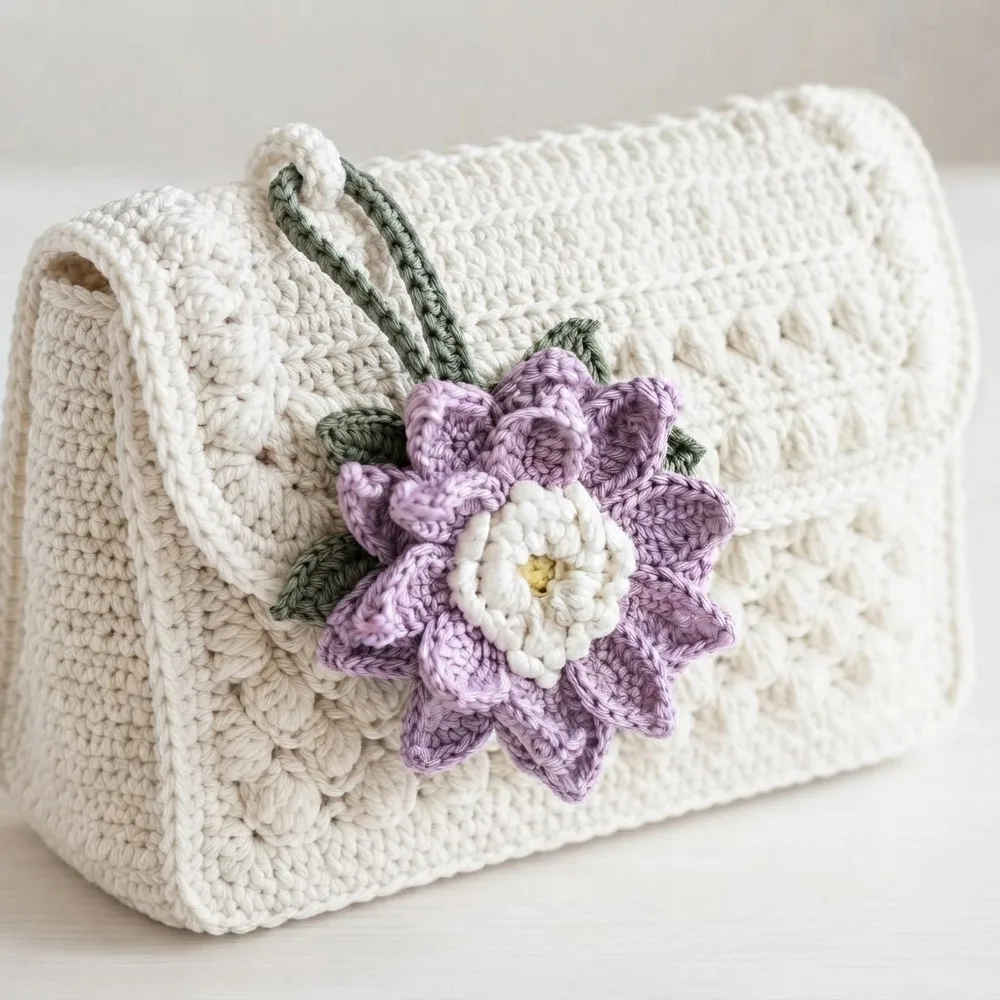
This pattern turns a handful of scrap yarn into a crochet flower keychain that hides a genuinely useful secret: the space between the green flower base and the yellow or purple center is left partly open, so the bloom doubles as a tiny storage pocket. Slip in a coin, a folded note or a spare locker key and it disappears completely behind the petals. It is perfect for anyone who loves a make that looks purely decorative until you show them what it actually does.
You will work two circular motifs in the round from an adjustable ring, growing the green base across nine rounds from 7 stitches all the way out to 63, then finishing it with a scalloped border worked in the back loop only. The center piece starts with 6 single crochets and increases to 63 as well, decorated with chain and slip stitch loops. Two rounds of petals combine sc, hdc, dc and tr with picots. Expect around three to four focused hours.
The finished keychain is a full, layered flower with a soft raised ridge where the back loop border curls forward and two tiers of petals framing the center. The cord measures roughly 22 cm, long enough to loop over a wrist or clip onto a bag strap without dangling awkwardly. It feels dense and springy in the hand, holds its shape beautifully after a light block, and makes a fast, personal handmade gift for teachers, coworkers and yarn friends.
- Start the green base with an adjustable ring and pull it tight so the center closes with no visible hole.
- Work outward in the round, adding increases each round until the circle lies flat and reaches full width.
- Finish the base by working a scalloped border into the back loops only, leaving a raised ridge behind it.
- Make the second circle in your center color the same way, matching the base so the two pieces line up.
- Decorate the center with chain and slip stitch loops for texture before moving on to the petals.
- Build two rounds of petals using chains, short and tall stitches together, capping the tips with picots.
- Crochet single crochet along side loops to form the flexible keyring cord, about 22 cm long.
- Sew the base and center together, deliberately leaving a gap open, then weave in all ends securely.
Materials
Worsted or DK weight cotton yarn in
Crochet Abbreviations
- sc
- single crochet
- inc
- increase
Easy Crochet Flower Keychain with Hidden Pocket: Free Pattern
2. Flower Base (Green Piece)
- Round 1Make a magic ring, work 7 sc into it, and join with a slip stitch.
- Round 2Increase in every stitch by working 2 sc in each stitch, totaling 14 stitches . Join with a slip stitch.
- Round 3(1 sc, 1 increase) repeat 7 times. (21 stitches total) Join with slip stitch.
- Round 4(1 sc, 1 inc, 1 sc) repeat 7 times. (28 stitches) Join with slip stitch.
- Round 5(3 sc, 1 inc) repeat 7 times. (35 stitches) Join with slip stitch.
- Round 6(2 sc, 1 inc, 2 sc) repeat 7 times. (42 stitches) Join with slip stitch.
- Round 7(5 sc, 1 inc) repeat 7 times. (49 stitches) Join with slip stitch.
- Round 8(3 sc, 1 inc, 3 sc) repeat 7 times. (56 stitches) Join with slip stitch.
- Round 9(7 sc, 1 inc) repeat 7 times. (63 stitches) Join with slip stitch.
3. Flower Center (Yellow or Purple Piece)
- Round 1Magic ring, 6 single crochets (sc) into it, join with slip stitch.Continue increasing progressively in each round, following a similar sequence as the flower base, until you reach 63 stitches on round 9.Use free loops created by chain spaces to make groups of 3 chains followed by slip stitches, forming attractive openwork patterns.
Increasing Rounds:
Note: Rounds 4 and 5 contain decorative loops made as follows:
More photos


Putting It Together
- Step 1 The fully assembled flower measures approximately 15 cm (6 inches) in diameter with petals fully extended.
- Step 2 The cord measures 22 cm (8.7 inches) , ample for keychain use or hanging from bags.
- Step 3 The opening between assembled flower pieces allows for small object storage, making this both decorative and functional.
- Step 4 A compact, attractive accessory ideal for gifting or personal use.
Important Notes
💡 A 3.5 mm (E) hook is the starting point, but tension matters more than the number here. If your green base ruffles or cups even with correct stitch counts, drop or go up a half size until the circle lies flat through all nine rounds.
💡 Place a stitch marker in the first stitch of every round on the base. With increases running from 7 up to 63 stitches, the join line disappears fast, and recounting a 54-stitch round because you lost your place is not how anyone wants to spend an evening.
💡 Leave a generous tail, at least 30 cm, when you fasten off both the flower base and the center. You will use those tails for the assembly sewing, which saves you joining fresh yarn and gives you fewer ends to weave into a small piece.
💡 The cord is worked as single crochet along side loops to about 22 cm. Check the length against your actual keyring or bag clip before fastening off, and remember it will relax slightly with use, so err on the short side rather than the long.
💡 Block the flower base and the petals before assembly, not after. Pinning the scalloped back loop border and the picot tips while damp sets the shape, and it is far easier to do while the two pieces are still separate and flat.
💡 Weave in every end through the fabric in at least two directions and split the plies as you go. This keychain lives in a pocket or a bag and gets tugged constantly, so a lazily woven tail will work itself loose within a week.
Common Mistakes and Fixes
Starting the base with a chain-2 ring instead of pulling the adjustable ring tight, leaving a visible hole in the middle of the flower.
After you place your first round of stitches into the adjustable ring, tug the tail firmly before you join or continue. The 7 stitches of round 1 should sit shoulder to shoulder with no gap. If the hole has already opened up, thread the tail onto your yarn needle, run it through the base of those first stitches and cinch it closed from the wrong side before weaving in.
Stacking all the increases directly on top of each other so the base curls into a hexagon or a cone instead of lying flat as it grows from 7 to 63 stitches.
Stagger where the increase falls in each round rather than always placing it in the same column. If the circle is already cupping upward you have too few increases for the round, and if it ruffles you have too many. Count your stitches at the end of every round and correct immediately rather than three rounds later.
Working the scalloped border through both loops instead of the back loop only, which flattens the ridge and loses the raised detail entirely.
Before starting the border round, run your finger along the top of the last round and identify the two loops. The back loop is the one furthest from you. Insert your hook under that single strand only. If you catch both, the front loops will not be left free and the scallops will lie flat instead of standing proud of the base.
Losing the picot by slip stitching into the wrong chain, so the decorative bump either vanishes or forms a loose loop instead of a tight point.
Chain 3, then go back and slip stitch into the first of those three chains, not into the stitch below it. Work the slip stitch snugly. If your picots look floppy, you are likely slip stitching into the base stitch instead of the chain, which pulls the bump sideways rather than closing it into a point.
Inconsistent tension across the sc, hdc, dc and tr in the petal rounds, giving petals that are different sizes and sit unevenly around the flower.
The taller stitches are the culprits: dc and tr stretch far more than sc if you pull the yarn over loops tight. Work a practice petal first and compare it to the next one. Keep your yarn hand relaxed and let each stitch reach its full height, and block the finished petals lightly to even out any remaining differences.
Sewing the flower base and center together all the way around, which closes the storage pocket completely.
Before you start sewing, decide where the opening will sit and mark both edges of that section with stitch markers. Sew from one marker around to the other and stop, then fasten off securely with a few backstitches at each end so the opening does not gradually widen with use. Test that a coin slides in before you weave in the tail.
What Makes It Good
- The green-and-yellow combination reads like a classic daisy, but this flower is a blank canvas. Swap the base for deep teal with a burnt orange center for an autumn palette, or go monochrome: three shades of the same blue for base, center and petals gives a modern, tonal look that photographs beautifully. A cream base with a soft blush center and picot tips in gold metallic thread turns it into something bridal. If you want the flower to pop against a dark bag, keep the base charcoal and make the petals a single high-contrast neon. For size, remember the base is a simple increasing circle. Stop the green piece after round 7 instead of 9 and work the scalloped back loop border there for a noticeably smaller bloom, or add one extra increase round before the border for a chunkier statement flower. Just keep the base and center matched at the same final stitch count so the two pieces still line up for sewing. Fewer petals in the outer round gives a tidier, less ruffled edge. Yarn substitutions change the character entirely. Cotton like Paintbox Simply DK or Scheepjes Catona keeps the stitches crisp and the pocket firm, which is what I would use for anything holding a key. A soft acrylic such as Stylecraft Special DK gives a plusher, squishier petal. Metallic or sparkle yarn held double with the main color makes the picots glint. You can also work the cord in a contrasting color so the loop becomes a design feature instead of a functional afterthought.
- I fell for this one at the exact moment the back loop only border kicked in. You have just spent nine rounds patiently increasing the green base out to 63 stitches, everything is flat and calm, and then you drop into the back loops and that scalloped edge lifts itself up into a raised ridge without you doing anything clever. It genuinely feels like the piece is building itself. The petals are the other joy: chaining, then stacking sc into hdc into dc into tr and capping the tip with a picot gives you a shape that curves naturally, and once you have made two or three you stop counting and just enjoy the rhythm. And I love that the assembly is where the magic lands. You sew the base and the center together, deliberately leave a gap, and suddenly a pretty flower becomes a pocket. Every person I have given one to has poked at it, found the opening and grinned. That reaction alone is worth the three hours.
Frequently Asked Questions
Can a confident beginner make this flower keychain?
It is rated intermediate mainly because you are combining sc, hdc, dc and tr in the petals and working a back loop only border. If you can already work a flat circle in the round from an adjustable ring and keep your stitch counts, you can absolutely manage it. Practice one petal on scrap yarn first to get the stitch heights comfortable.
How big is the finished keychain?
The cord measures roughly 22 cm, about 8.7 inches, which is long enough to loop around your wrist or clip to a bag. The flower itself depends on your yarn and hook, since the base grows from 7 to 63 stitches over nine rounds. Using a lighter yarn or smaller hook gives a noticeably daintier bloom.
What actually fits inside the hidden pocket?
The opening left between the flower base and the center is designed for very small items: a coin or two, a folded note, a spare key or a hair tie. It is a stash spot rather than a purse, so do not expect it to hold anything bulky. Use a firmer cotton yarn if you want the pocket to keep its shape when loaded.
Why does my base look like a hexagon instead of a circle?
That is the classic sign of stacking every increase in the same column round after round. Shift the position of the increase within each round so the added stitches spiral outward instead of forming straight lines. Your stitch counts can be perfectly correct and still produce corners if the placement is not staggered.
What yarn works best for this pattern?
A smooth DK cotton gives the crispest stitch definition and the firmest pocket, which is ideal for a keychain that gets handled daily. Acrylic works fine and feels softer, but the petals will be floppier and the pocket less structured. Avoid anything fuzzy, since it will completely hide the scalloped border and picot detail you worked hard for.
Original pattern: https://redagapeblog.com/easy-crochet-flower-keychain-free-pattern/

About the Author
Tamsin Okoro Who writes the patterns at Yarn Gallery, how a pattern gets from the hook to the page, and what this site will never do.