About This Pattern
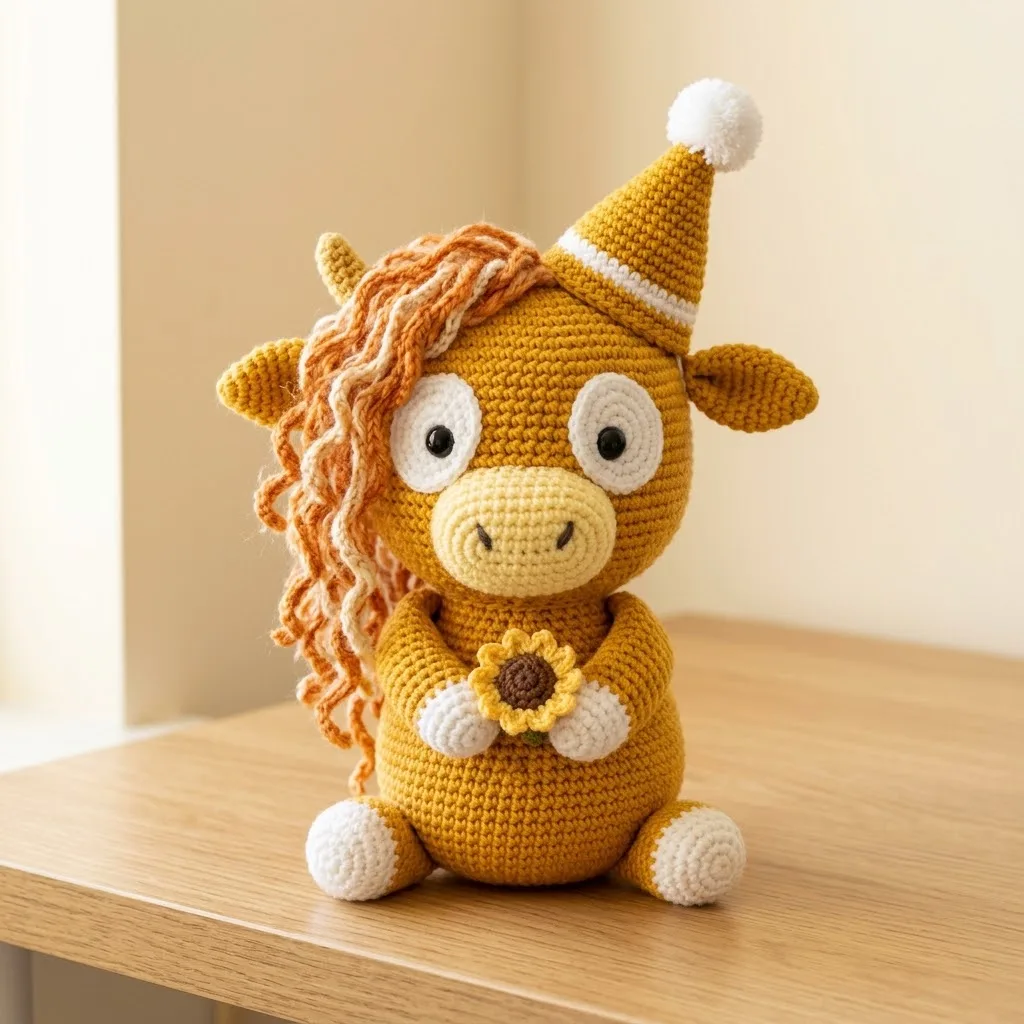
This little highland cow lives for evenings in. She has a round golden head, a soft cream muzzle, and a shaggy mane you build strand by strand. The head alone takes fourteen rounds, so she is not a one-sitting project. She needs a tidy hook, good light, and a bit of patience for the fringe work. Keep her near the sofa and pick her up in stages.
In the basket
Abbreviations
- MR
- Magic Ring. An adjustable starting loop that pulls completely closed. If you prefer, you can chain 2 and work your starting stitches into the second chain from the hook instead.
- ch
- Chain. Wrap yarn over hook, pull through the loop on your hook. Creates a foundation or adds height.
- sc
- Single Crochet. Insert hook into stitch, yarn over, pull up a loop (2 loops on hook), yarn over, pull through both loops. This is your main stitch throughout.
- inc
- Increase. Work 2 single crochets into the same stitch. This adds one stitch to your count.
- dec
- Invisible Decrease. Insert hook through the front loops only of the next 2 stitches, yarn over, pull through both front loops, yarn over, pull through both loops on hook. Creates a neater decrease than the standard method.
- sl st
- Slip Stitch. Insert hook, yarn over, pull through stitch and loop on hook in one motion. Used for joining and surface details.
- FO
- Fasten Off. Cut yarn, pull tail through final loop, tighten.
- BLO
- Back Loop Only. Work into just the back loop of the stitch instead of both loops.
Golden honey highland cow amigurumi crochet pattern
Head
Start with golden honey yarn and your 3.5mm hook.
Step by step: Continue with golden honey yarn.
Step by step: Switch to pale yellow yarn.
Step by step: Using cream yarn:.
Step by step: Using golden honey yarn:.
Step by step: Start with cream yarn:.
Step by step: Center (brown yarn):.
- Round 16 sc in MR (6 sts)inc in each st around (12 sts) FO with tail. Petals (cream and golden honey): Using cream, ch 4, sl st in 2nd ch from hook, sc in next, hdc in next. Repeat to create 6 to 8 petals, joining each to the edge of the brown center as you go. Alternatively, make individual petals and sew them around the center.
- Round 2inc in each st around (12 sts)Step by step: through 4: sc in each st around (12 sts) Switch to golden honey yarn:.through 10: sc in each st around (12 sts) FO with long tail. Stuff the bottom half firmly, leave the top softer so legs can be positioned flat against the body.through 5: sc in each st around (12 sts) FO with long tail. Do not stuff. Flatten and pinch the base slightly before sewing to create that folded ear shape.
- Round 3(sc 1, inc) repeat around (18 sts)sc in each st around (18 sts) FO with long tail. These white circles frame the safety eyes and give that characteristic wide-eyed highland cow look. You will sew these onto the head first, then insert the safety eyes through both layers.
- Round 4(sc 2, inc) repeat around (24 sts)through 7: sc in each st around (24 sts) FO with long tail for sewing. Stuff lightly before attaching.
Using black yarn, embroider a small curved line for the mouth and two small nostrils. Keep it simple. A smile and two dots work perfectly.
- Round 5(sc 3, inc) repeat around (30 sts)
- Round 6(sc 4, inc) repeat around (36 sts)
- Round 7(sc 5, inc) repeat around (42 sts)Step by step: through 18: sc in each st around (42 sts) — 11 rounds total.
- Round 8through 14: sc in each st around (42 sts) — 7 rounds total
- Round 15(sc 5, dec) repeat around (36 sts)Step by step: (sc 4, dec) repeat around (30 sts); (sc 3, dec) repeat around (24 sts) Stuff body firmly. You want it nice and plump; (sc 2, dec) repeat around (18 sts) Leave open for sewing to head. FO with long tail.
- Round 16(sc 4, dec) repeat around (30 sts) Insert safety eyes between rounds 10 and 11, approximately 8 to 9 stitches apart. I will explain eye placement more in the assembly section.
- Round 17(sc 3, dec) repeat around (24 sts) Begin stuffing firmly.
- Round 18(sc 2, dec) repeat around (18 sts)
- Round 19(sc 1, dec) repeat around (12 sts) Finish stuffing.
- Round 20dec around (6 sts) FO, sew hole closed, weave in end.
Party Hat
Using golden honey yarn:
- Round 14 sc in MR (4 sts)
- Round 2(sc 1, inc) repeat around (6 sts)
- Round 3sc in each st around (6 sts)
- Round 4(sc 2, inc) repeat around (8 sts)
- Round 5sc in each st around (8 sts) Switch to cream yarn:
- Round 6sc in each st around (8 sts)Switch to golden honey:
- Round 7(sc 3, inc) repeat around (10 sts)
- Round 8sc in each st around (10 sts)
- Round 9(sc 4, inc) repeat around (12 sts)
- Round 10sc in each st around (12 sts)
- Round 11(sc 5, inc) repeat around (14 sts)
- Round 12sc in each st around (14 sts) FO with long tail. Stuff lightly. Add a small white pom pom to the tip using cream yarn scraps. You can make a tiny pom pom or crochet a small ball.
Curly Mane
This is the fun part! Cut approximately 30 to 40 strands of yarn in your peach, coral, and orange shades. Each strand should be about 8 inches long.
To create the curl: Wet each strand lightly, wrap tightly around a pencil or thin dowel, and allow to dry completely. Alternatively, you can simply finger-twist and the yarn will hold some wave.
Attach each strand individually to the top and side of the head using a lark’s head knot. Insert your hook under a stitch, fold the strand in half, pull the loop through, then pull the ends through the loop and tighten.
Work from the top of the head down one side, creating that signature highland cow swoop. Layer different shades for dimension. Trim to desired length once all strands are attached.
More pictures
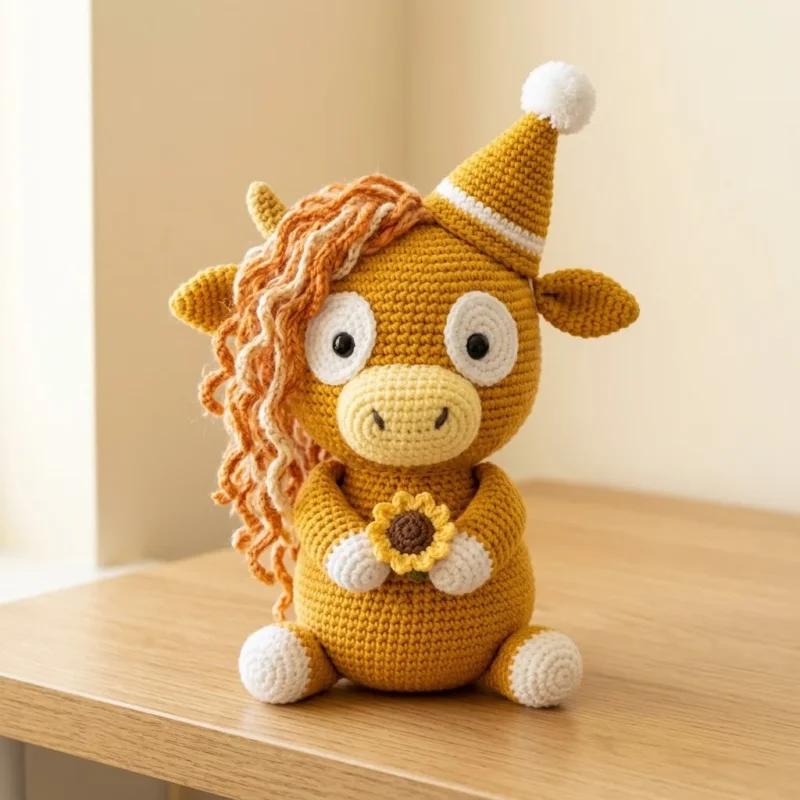
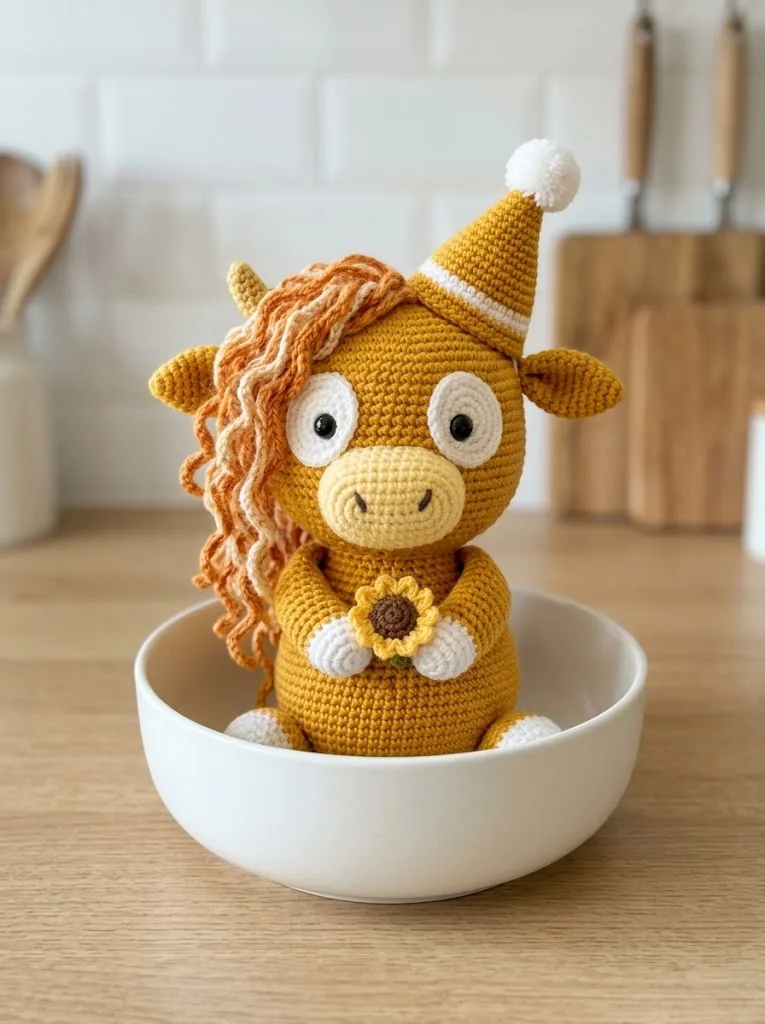
Before the first stitch
- Check your golden honey yarn amount before you begin the head, since it carries most of the piece.
- Set out two stitch markers now. You will count every round on the head and the hat.
- Read through the Party Hat rounds once. The increase pattern repeats, and it helps to see the shape first.
Minutes per piece
- Head about 2 to 3 hours, because 14 rounds of careful shaping and color changes take patience
- Party Hat and Curly Mane about 1.5 to 2 hours, because the hat is quick but attaching 30 to 40 mane strands is slow, fiddly work
Other yarns that work
- cotton blend, worsted weight Gives crisper stitch definition and a firmer mane. Stuffing may need slightly more fill since cotton has less give. Hook size stays the same.
- acrylic, DK weight Makes a smaller, lighter cow overall. Drape softens and the mane fringe sits flatter. Drop to a 3mm hook to keep the fabric snug.
Where it ends up
- A shelf companion for a reading nook, paired with a small stack of paperbacks.
- A gift for a new baby's room, set beside a soft blanket in matching cream.
- A desk mascot for a craft table, next to your yarn basket and project notes.
Joining up
- Step 1 Take your time here. Good assembly makes all the difference.
- Step 2 1. Position the eye circles on the head first. Pin them in place, checking from multiple angles. They should sit fairly close together in the center of the face.
- Step 3 2. Insert the safety eyes through the center of each white eye circle and through the head. Secure with washers on the inside.
- Step 4 3. Attach the muzzle below and slightly between the eyes. It should overlap the bottom edges of the eye circles just slightly.
- Step 5 4. Sew the ears to the sides of the head, positioned just above the eye circles.
- Step 6 5. Attach the head to the body using a whip stitch. Make sure the head is centered and facing forward.
- Step 7 6. Sew the legs to the body. Two in front, two in back. Position them so the cow sits upright and stable.
- Step 8 7. Attach the party hat to the top of the head, tilted slightly to one side.
- Step 9 8. Add the curly mane as described above.
- Step 10 9. Sew the sunflower to the front of the body, positioned as if being held.
Small notes
- Keep your tension tight on the golden honey sections. Any looseness shows as pale stuffing through the stitches.
- Mark the start of every round on the head. Fourteen rounds of shaping go wrong fast without a marker.
- Stuff the head in stages as you go. Waiting until the end makes it hard to fill evenly before the decreases close up.
Little questions
Why does the golden yarn need a tighter hook than usual?
Golden honey yarn shows gaps more than darker colors. A 3.5mm hook, or smaller if your tension runs loose, keeps the fabric dense enough to hide the stuffing.
Can I skip the pencil-curling step for the mane?
Yes, finger-twisting the strands works fine. You get a looser wave instead of a tight curl, but the swoop still reads as highland cow.
How do I keep the eye circles symmetrical before gluing in the safety eyes?
Pin both circles in place first and check from the front, the side, and above. Adjust before you push the safety eyes through, since that step is permanent.
What happens if I miscount a round on the head?
The shaping will pull crooked, especially near the muzzle. Use a stitch marker every round and count stitches before moving on, so you catch errors early.
Original pattern: https://crochr.com/golden-honey-highland-cow-amigurumi-free-crochet-pattern/

About the Author
Tamsin Okoro Who writes the patterns at Yarn Gallery, how a pattern gets from the hook to the page, and what this site will never do.