About This Pattern
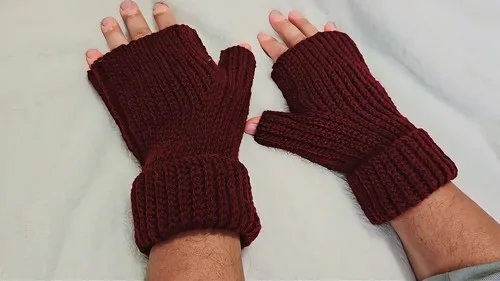
These gloves start as a plain cuff. Fifty chains, then sixteen rows of ribbing. The short rows that follow shape a thumb gap without any counting tricks. One slip stitch at a time, the hand takes form. This is an evening project, not a weekend one. It needs a steady hook, a working lamp, and no interruptions during the short-row rounds.
In the basket
Abbreviations
- ch
- chain
Men’s slip stitch gloves with a simple thumb hole
Initial Cuff Wrist Ribbing
Start with a foundation chain of 50 chain stitches
- Round 1Ch 1, work slip stitch into back loop of second ch from hook and in each ch across
- Round 2to 16: Ch 1, turn, work slip stitch in back loop only across Continue until 16 rows are complete
Connecting and Creating the Thumb Hole
Round 27: Ch 1, turn, work 10 slip stitches, continue slip stitching down side of short rows and into unworked foundation stitches to connect
- Round 28Ch 1, turn, work slip stitch until the 10th stitch, ch 7, skip 7 stitches, continue slip stitching acrossTotal stitches for this round should be 46
Main Hand Body
- Round 29to 56: Ch 1, turn, work slip stitch in back loop of each stitch including 7 chain stitches of thumb openingContinue until about 27 rounds are worked after thumb hole
More pictures
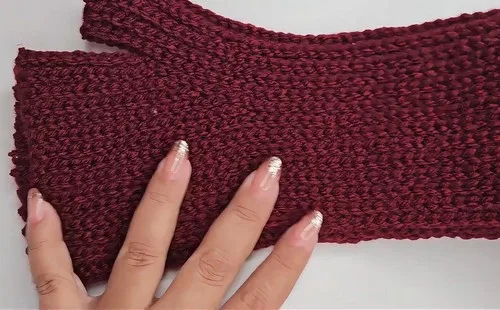
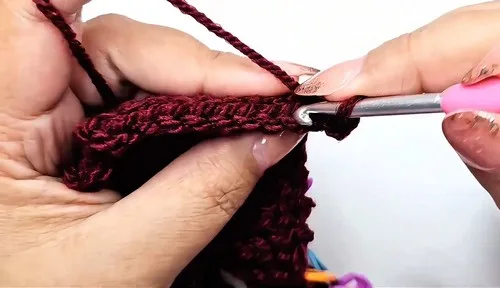
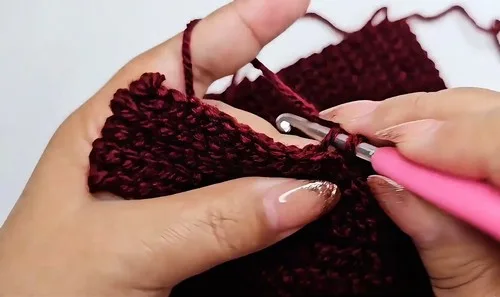
Before the first stitch
- Chain 50 loosely. A tight foundation chain fights the ribbing rows.
- Read Round 17 through 26 once before starting. The short rows build the thumb shape.
- Count your 46 stitches after Round 28. That number carries through the whole hand.
Minutes per piece
- Cuff ribbing and thumb shaping about 1.5 hours, because the short rows need close counting
- Main hand body about 3 hours, because 27 rounds take steady repetition
Other yarns that work
- Wool, worsted weight Warmer gloves, slightly denser fabric, same 4.5 mm hook.
- Acrylic-cotton blend, worsted weight Lighter drape, easier care, hook may need to drop to 4 mm for the same gauge.
Where it ends up
- Everyday outdoor wear, paired with a wool coat.
- Driving gloves, paired with a simple scarf.
- Gift for a partner or father, paired with a matching hat.
Joining up
- Step 1 Align working edge with foundation row
- Step 2 Join both sides using slip stitch seam across entire length
- Step 3 Fasten off and cut yarn, leaving a tail
- Step 4 Weave in ends securely with a needle
- Step 5 The glove can be worn with seam inside or outside depending on preference
Small notes
- Work every slip stitch into the back loop only. This keeps the fabric stretchy, like real ribbing.
- Use a stitch marker at stitch 10 before Round 28. It marks exactly where the thumb chain begins.
- Keep tension even through the short rows. Loose stitches there will show as a gap at the thumb seam.
Little questions
Can I make these gloves smaller?
Yes, reduce the foundation chain and adjust the short-row counts evenly. Keep the thumb hole at 7 chains for fit.
Why do some rounds leave stitches unworked?
Those unworked stitches shape the short rows for the thumb gusset. They get picked up later in Round 27.
Does the seam show on the outside?
You can wear it either way. The pattern notes the seam can face in or out, by preference.
What if my stitch count doesn't match 46 after Round 28?
Recount from Round 27's connection point. A missed slip stitch there throws off the whole hand body.
Original pattern: https://crocheteverything.com/crochet-mens-gloves-pattern-free-with-thumb-hole-design/

About the Author
Tamsin Okoro Who writes the patterns at Yarn Gallery, how a pattern gets from the hook to the page, and what this site will never do.