About This Pattern
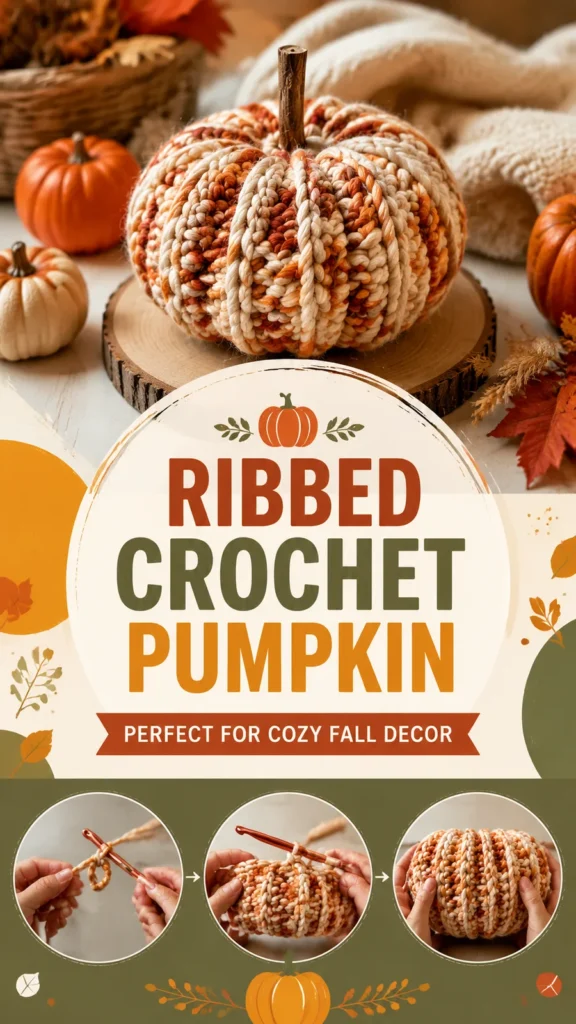
This pumpkin starts as one flat panel, not a spiral of rounds. I work it in rows, back loop only, until the ridges stand up like real pumpkin lines. Then I join the short edges, gather both openings, and stuff it round. It fits into one evening, maybe two sittings if I pause between rows. It needs a bulky yarn, a steady hand, and a quiet half hour to gather the ends neatly.
In the basket
Abbreviations
- ch
- chain
- hdc
- half double crochet
- hdc blo
- half double crochet in back loop only
- sl st
- slip stitch
- sc
- single crochet
- st
- stitch
- FO
- fasten off
- UK note
- US half double crochet is called half treble crochet in UK terminology.
Ribbed crochet pumpkin made from one simple panel
Special Stitch
Ribbed Half Double Crochet: Work a half double crochet only into the back loop of the stitch from the previous row. This creates a raised ridge texture and flexible fabric.
Panel
Ch 26.
- Row 1Hdc in the second chain from hook and across. Turn. (25 sts)
- Row 2Ch 1, hdc blo across. Turn. (25 sts)Rows 3-45: Repeat Row 2. Each row should have 25 stitches. The completed rectangle should measure approximately 13 inches wide x 5 inches tall (33 cm x 13 cm). Add or remove rows if needed to adjust height.
Joining the Pumpkin Body
Fold the rectangle in half so the first and last rows meet.
Join the side edges using slip stitches through both layers.
Do not fasten off. Continue with gathering instructions.
Gathering the Bottom
Thread yarn through a yarn needle.
Work a running stitch around the bottom opening of the tube.
Pull the yarn tightly to close the opening.
Secure the yarn with several knots and weave in the end.
Stuffing and Shaping
Fill the pumpkin firmly with stuffing until it becomes rounded.
Avoid overfilling because excessive stuffing can flatten the ribbed texture.
Use your fingers to shape the pumpkin into a round form.
Closing the Top
Thread yarn around the top opening using a running stitch.
Pull gently until the opening closes around the stem area.
Secure the yarn but leave a small center space for the stem.
Crochet Stem
With brown yarn, make a magic ring.
- Round 1Work 6 sc into the ring. Join with a sl st. (6 sts)
- Round 2Ch 1, sc around. Join. (6 sts)Rounds 3-6: Repeat Round 2. (6 sts) FO and leave a long tail for sewing. Sew the stem securely into the center top opening of the pumpkin. Add gentle shaping by pressing the sides inward to create natural pumpkin curves.
Before the first stitch
- Check your yarn amount covers 45 rows of a 25-stitch panel.
- Swatch a few rows first to see your ridge height.
- Read the Special Stitch note before Row 1, so the back loop only habit sets early.
Minutes per piece
- Panel about 2 hours, because 45 rows add up stitch by stitch
- Stem, gathering, and stuffing about 1 to 2 hours, because shaping takes patience, not speed
Other yarns that work
- Wool blend, bulky weight Gives firmer ridges and holds shape well for frequent handling, but may need a half size down on the hook for tighter stitches
- Acrylic blend, bulky weight Stays soft and lightweight for indoor display, drapes a touch looser, and needs slightly more stuffing to hold its round shape
Where it ends up
- A centerpiece for a kitchen table runner, paired with dried leaves.
- A shelf accent next to woven baskets and candles.
- A handmade gift, wrapped simply, for someone who likes texture.
Joining up
- Step 1 Light shaping is usually enough for this decorative pumpkin. Gently smooth the fabric and arrange the ridges evenly before displaying it.
- Step 2 Spot clean with a damp cloth when needed.
- Step 3 Allow the pumpkin to air dry completely.
- Step 4 Store in a cool, dry place after the fall season.
- Step 5 Avoid crushing the shape during storage.
Small notes
- Use the 5.5 mm I-9 hook throughout, including the stem, for consistent ridges.
- Mark Row 1 with a scrap yarn marker so you always know your right side.
- Stuff gradually and check the panel width against 13 inches before closing the top.
- Finished size: approximately 7 inches wide x 5 inches tall (18 cm x 13 cm).
- Gauge: approximately 14 stitches and 10 rows in 4 inches (10 cm) in half double crochet back loop only.
Little questions
Why does my panel come out narrower than 13 inches?
Tension varies with every crocheter. Compare your row width against the pattern after a few rows, not at the end. Adjust your hook size slightly if the ridges pull in too tight.
Can I change the row count to make a taller pumpkin?
Yes, the pattern allows adding or removing rows from the 45 given. Just keep each row at 25 stitches so the gathering still works evenly.
Do I need stitch markers for this pattern?
A scrap yarn marker helps track your right side across 45 rows of back loop only stitching. It also makes seaming the short edges faster at the end.
What stuffing works best for a firm pumpkin shape?
Polyester stuffing or fiber filling both hold a round shape well. Add it gradually while shaping, checking the curves as you press the sides inward.
Original pattern: https://duniarecipe.com/easy-crochet-videos-cozy-pumpkin-patterns-tips-beginner-tutorials/

About the Author
Tamsin Okoro Who writes the patterns at Yarn Gallery, how a pattern gets from the hook to the page, and what this site will never do.